ابزار Xhorse VVDI
Xhose VVDI نرم افزار برنامه نویس اصلی و سخت افزارابزار Xhorse VVDI
Xhose VVDI نرم افزار برنامه نویس اصلی و سخت افزارProgram W209 Kline Key with VVDI MB no removing
The great Update software version 5.8.0 from VVDI MB for Benz key programming released. Now 99% of cars mo need to remove anything. Disconnect ELV and just treat it as it were on bench. Just use VVDI MB power adapter as normal like W204 /W208/W210.
Here’s the new feedback on Mercedes W209:
Trying out a w209. It’s on bench but simulating in vehicle. So far so good. password first read with vvdi mb tool, about 18 minutes.
When in car you just connect the blue alligator clip wire coming off the obd into the esl plug to grab the k line . Should be pin 5.
When in car you just connect the blue alligator clip wire coming off the obd into the esl plug to grab the k line . Should be pin 5.
999 times payed calculation due to the yearly token unlimited plan


Thanks the feedback from Ms. EricRoss.
http://blog.vvdishop.com/vvdi-mb-read-w209-password-and-program-key-without-removing/
How to change Battery of Condor XC-mini
This is the Power Supply Adapter with Battery for Xhorse Condor XC-Mini key cutting machine. No need to connect Car inverter, battery as power supply, easy to carry out. Support household electricity and cigarette lighter to recharge or use as power supply.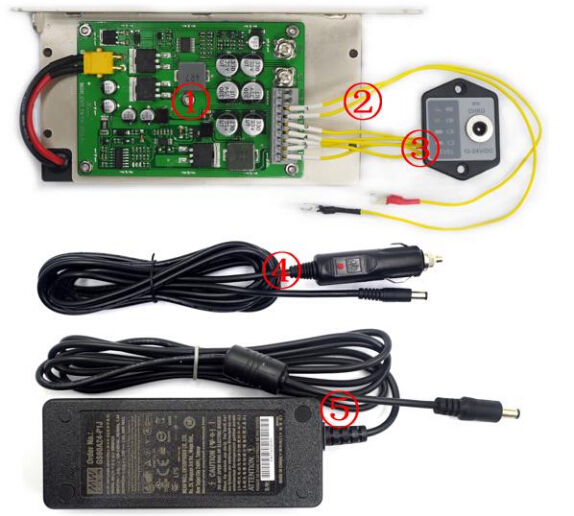
List of rechargeable battery of XC-Mini
① Mainboard
② Cable of 6 & 7
③ Battery charger & display module
④ Vehicle charging line
⑤ Adaptor 220V
Specification of rechargeable battery of XC-Mini:
Specification of rechargeable battery of XC-Mini:
Standard voltage 25.9V
Limited charge voltage 29.4V
Rated Capacity 2500mAh
Power Ra 73.5Wh
Note: The update version Condor XC-Mini Plus with built-in battery is coming soon. Don't need to change chargeable battery any more.
Instruction of how to change the built-in battery of Condor MINI:

Remark: please follow the procedure to operation in case of damage the Mainboard ,do not connect the power during operation
Attention : For your security, do not connect the power in next steps

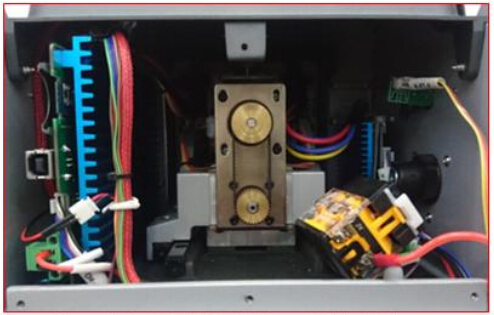
2 , Push the motor inside and hold the white buckle then take out the emergency-stop module like the picture show
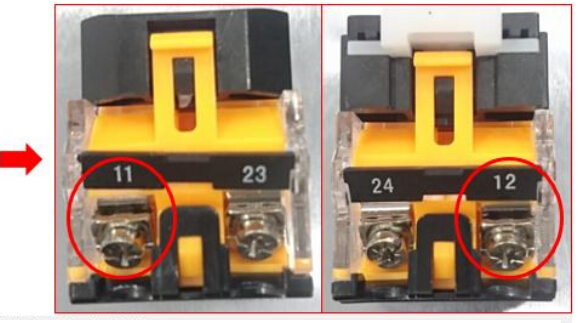
3 , Loose the connection of position 11 &12 like picture show
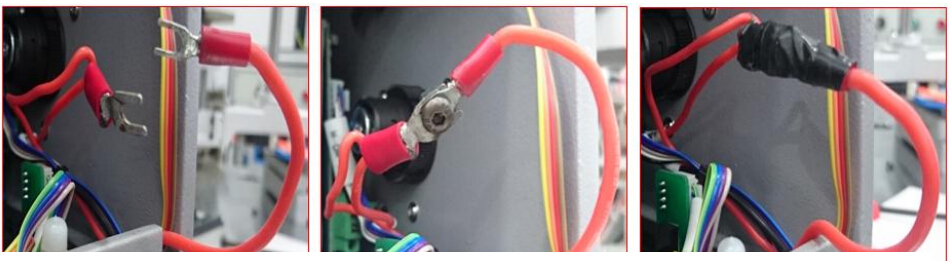
4 , Use a screw to make the connection those two cables what are from position 11 & 12 like the picture show ,and use the acetate tape fix the connection well

5, Fix the cable 6 to the position 12 , cable 7 for position 11 , then put the emergency – stop module back and fix it well
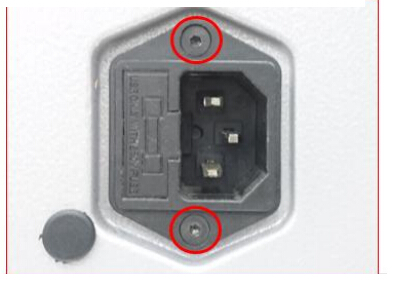
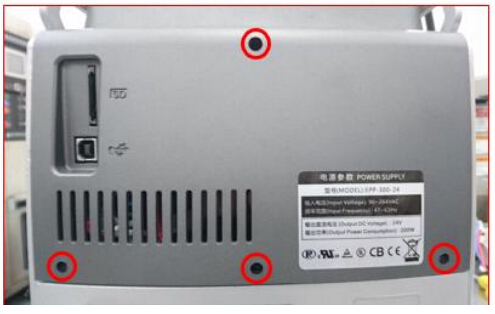
6, Take off those 2 screws like picture show
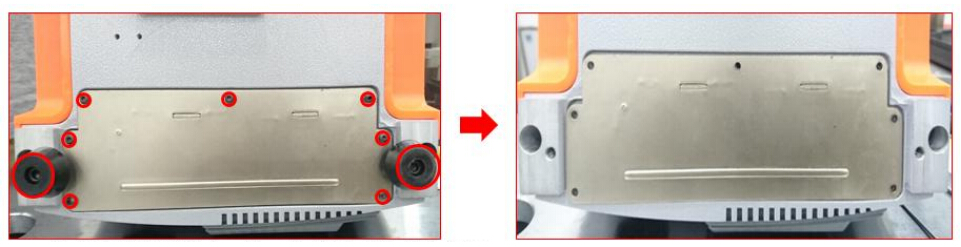
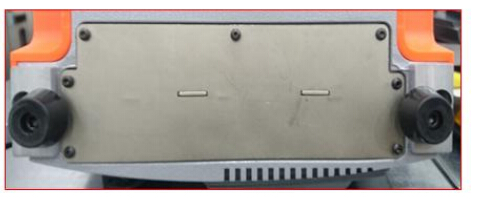
7, Turn over the Mini Condor and take off the foot rubber and
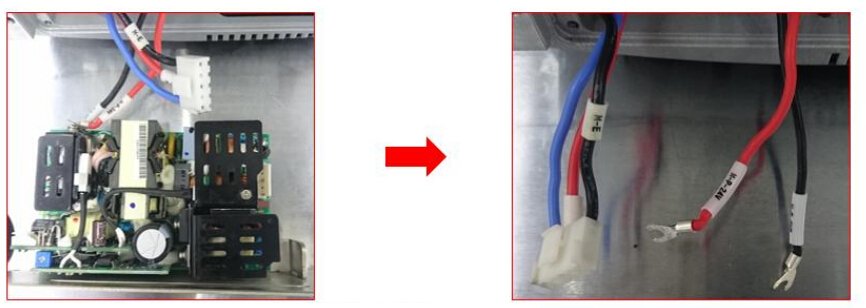
8, Take out the Power-board and disconnect all cables like picture show
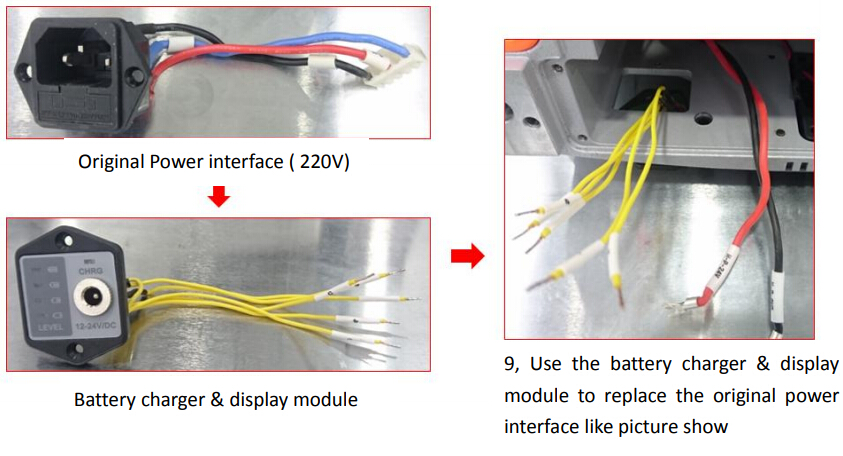
9, Use the battery charger & display module to replace the original power interface like picture show
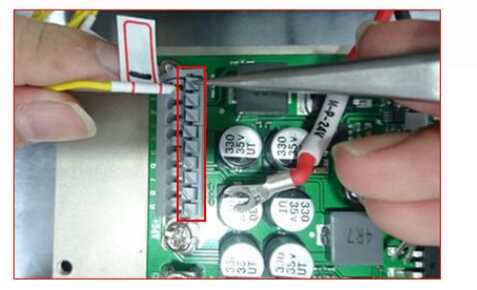
10 , Fix the cable into the socket according the number between the cable and socket ,make sure very cable will be fix well

11, Fix the cable of 24V and cable of GND in the right position like picture show

12, Connection the power like picture show then put back the Mainboard and fix it well
13, Fix the all cables after put back the mainboard , the mainboard should be in fixed very solid ,manage the cables again if not , then fix the foot rubber and screws

14, Fix those screws like picture show
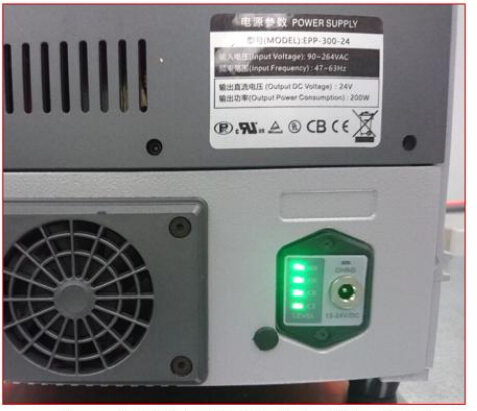
15 , The screen , LED , display of battery charger should be on after you press the emergency – stop button , if not ,check the connection again
Remark : electricity volume will be show by the green light , the LED that is mark ‘’ CHRG ‘’ should be green if it is charged , it will be red during charging.
How to Calculate PIN Code for Opel Astra H from CIM
How to get 4-digit PIN code for Opel/Vauxhall Astra H from CIM EEPROM 95160 dump using Xhorse VVDI Prog programmer.
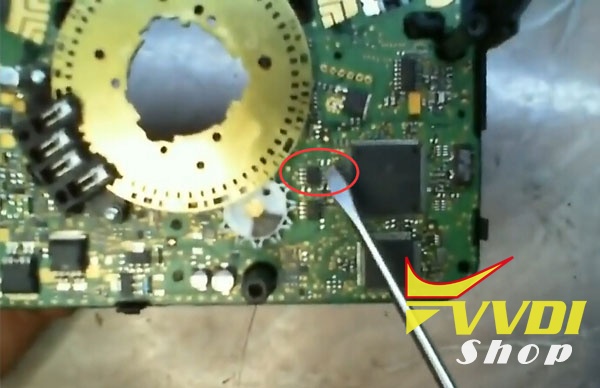
Remove and disassemble CIM module


Desolder chip 95160 with a hot gun
Solder it into vvdi prog SOP16 adapter
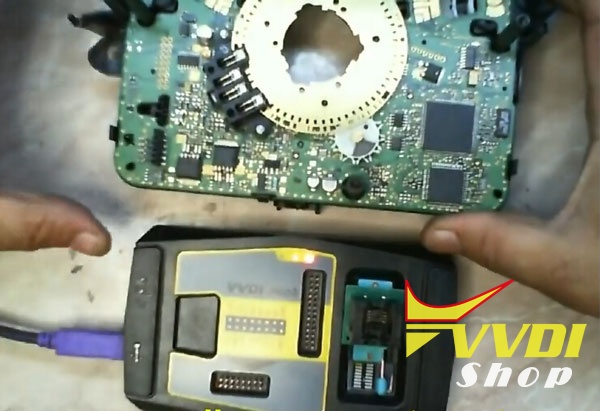


Connect VVDI-Prog with computer

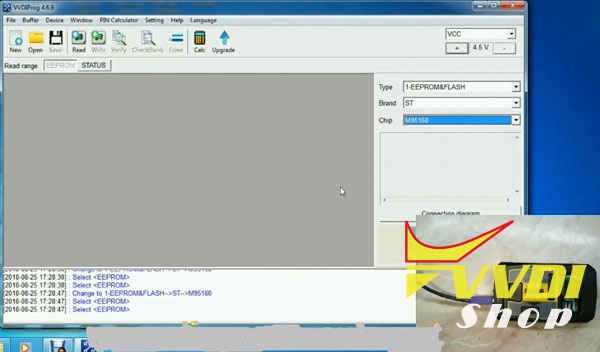
Open VVDIProg software, select EEPROM->ST->M95160
Read eeprom and save it. Same file: original.bin

Download WinHEX editor and open it
Upload CIM dump read by vvdi-prog
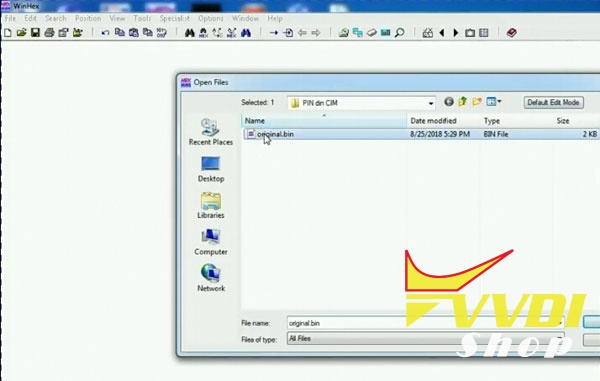
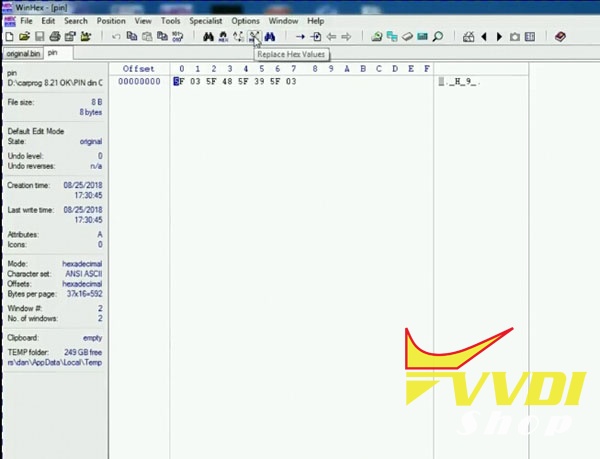
Copy Line 65, Row 8 to Row F letters : 5F 03 5F 48 5F 39 5F 03

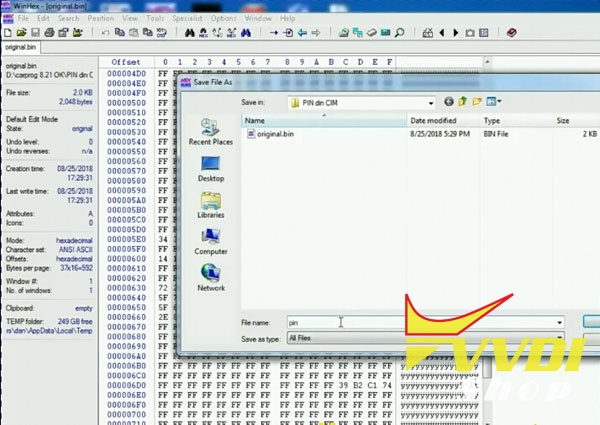
Right click selected numbers, choose Edit->Copy Block->Into New File

Save new file, named: “pin”
Select Replace Hex Values from tab
Change these values:
Search for: 5f
Replace with: aa
press OK
Replace with: aa
press OK

Changed value display: AA 03 AA 48 AA 39 AA 03

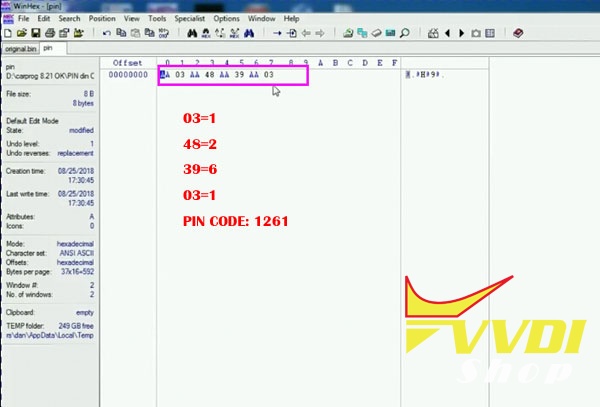
So the correct Pin for Astra H is 1261.
Read pin code from CIM eeprom 95160 success.
Read 2014 Kia Sportage pin code with VVDI Key Tool
As titled, here’s the step-by-step guide on 2014 Kia Sportage keyless entry remote fob programming using Xhorse VVDI Key Tool remote generator.
Device used:
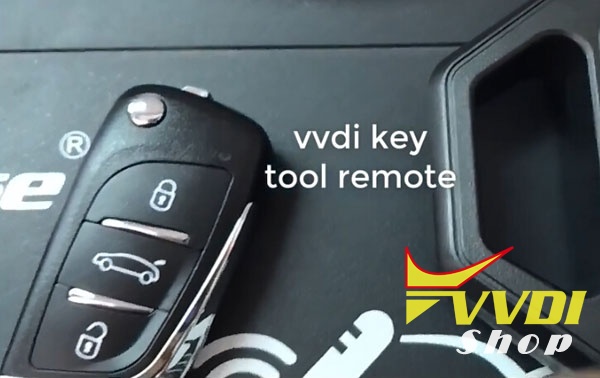
VVDI universal remote for VVDI Key Tool
Step 1: Read PIN Code

Insert original remote into left coil of Keytool
Select Automatic Detection Clone
Select Automatic Detection Clone

Detect remote type: ID46 HITAGS PCF7936

Connect vvdi remote pcb with VVDI Keytool
Select Remote Program->Asia->Kia->Sportage->NYODD4TX1306-TFL 14-16
Select Remote Program->Asia->Kia->Sportage->NYODD4TX1306-TFL 14-16


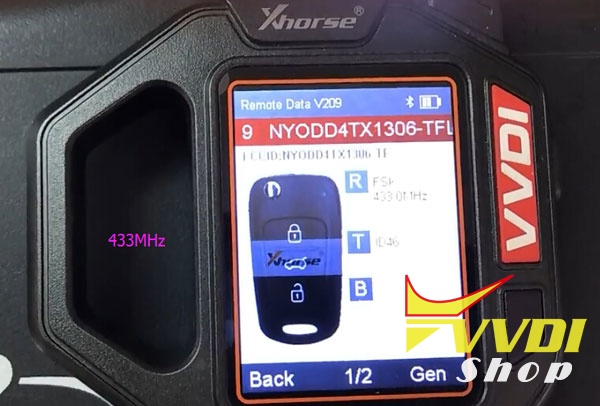
Remote frequency 433MHZ
Writing data

Write data success.

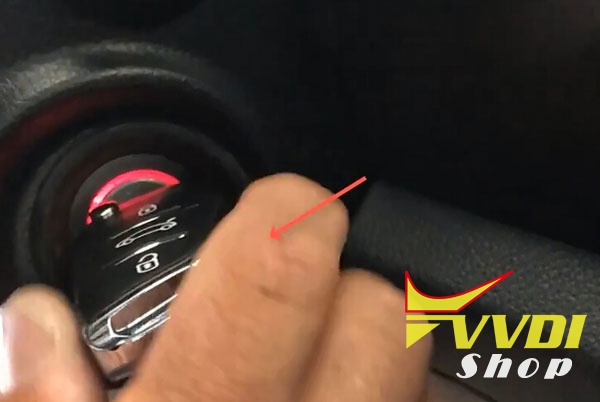
Now start to read the pin code via the key


Select Mode1 data acquisition mode
Put the KEYTOOL head antenna near the ignition coil, press OK to sniff data

Insert the original key into the left coil and press OK to start the calculation.
In calculate progress, don’t move the key.

Calculate success.
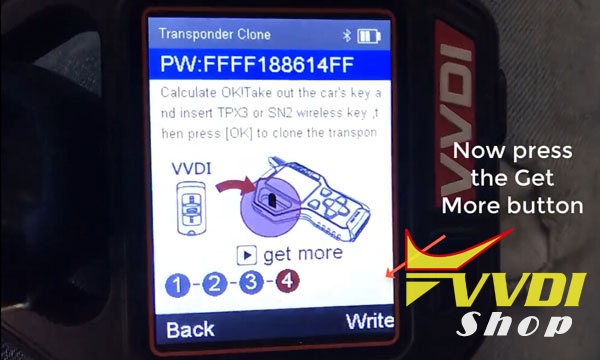
Move to get More Function
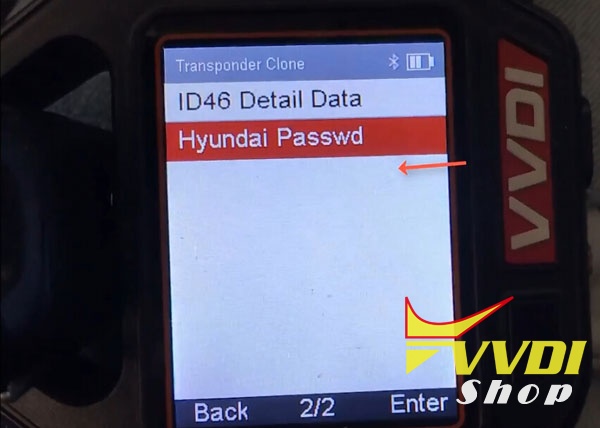
Select Hyundai Password

VVDI Key tool read password success.
Step 2: Program remote
Now we will do remote programming with Xtool X100 PAD2

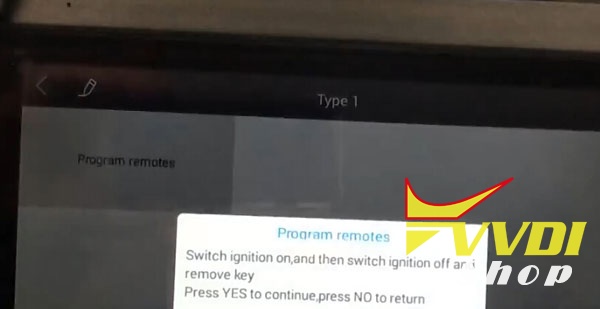
Select Immobilizer->Kia->Program Immobilizer/Remote->Select from type->Program remote->16 PIN->Type 1->Program remotes


Switch on ignition and turn off, then remove key

Program remote: press LOCK or UNLOCK for more than 1 sec.

Remote programming complete, click YES to program next remote.

Press LOCK or UNLOCK button of vvdi remote key for more than 1 sec

Program complete
Step 3: Make key programming
Now we make key programming process

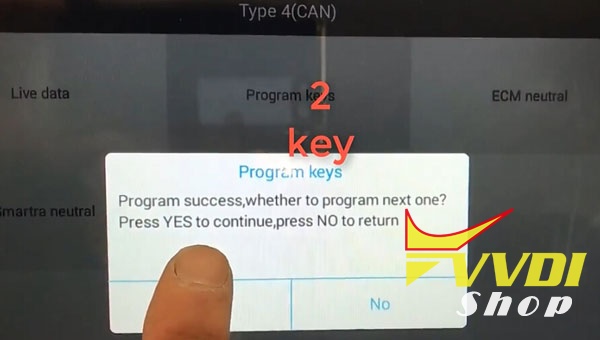
Select Type4 (CAN)->Program keys
Insert a key to be programmed, turn ignition on.
Xtool X100 PAD2 will ask pin code to access.


Press YES to program next key.
Insert next key to be programmed. Turn ignition on.
2nd key program success
Turn ignition off, wait for 10 seconds, then turn ignition on
Programming is completed.
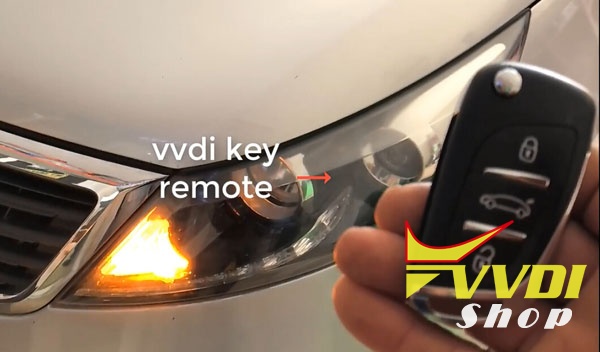
Test the new vvdi remote, works no issue.
VVDI Prog Read BMW Land Rover EWS3D module
BMW EWS3D module is different from regular EWS3 module. Ews3D can be found in bmw Z3 and some older Land Rovers.

BMW EWS III D
EWS Ill D is installed on E36/7 beginning of production 99 Model Year. The system does not have a K-Bus input.
EWS Ill D is installed on E36/7 beginning of production 99 Model Year. The system does not have a K-Bus input.
Purpose of the System
The purpose of the EWS 3 D system is to provide the highest level of drive away protection available to vehicles without a K-Bus. The input side of the control module functions the same as an EWS II (no bus inputs) system with the exception of an integrated EWS module and transmitter/receiver module. The output side functions similar to an EWS Ill (3.3) system with “Rolling codes”. The EWS Ill D control module is on the D-Bus for diagnostics.
Individual component inputs and system operation is the same as the mentioned previous systems.
Land rover EWS3D:
LAND ROVER FREELANDER 2001 2004 EWS 3.D MODULE YWC106631
BMW EWS3D wiring connection with Xhorse VVDI Prog programmer
EWS3D pinout

EWS3D back side

EWS3D 0D46J wiring connection to VVDI Prog and Xhorse EWS3 adapter
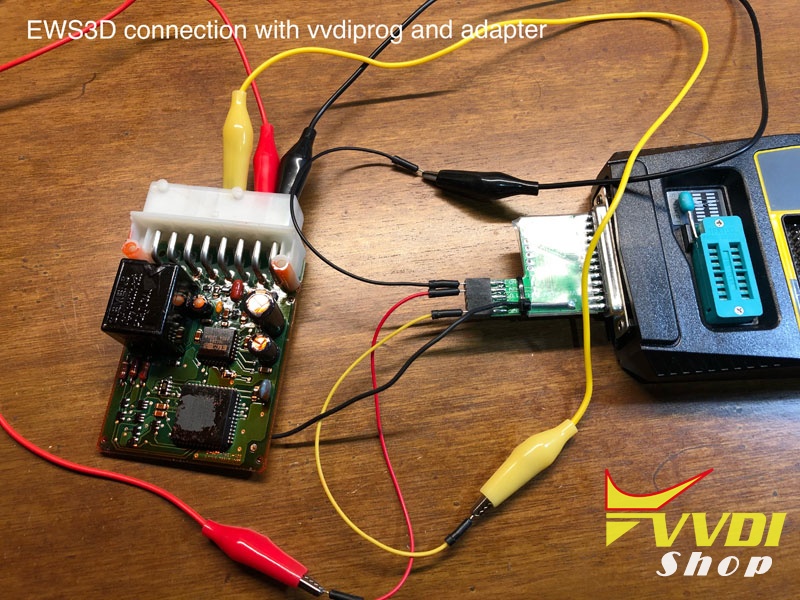
Credit to DK Veteran nickolasd.
Xhorse EWS3 Adapter instruction:

