ابزار Xhorse VVDI
Xhose VVDI نرم افزار برنامه نویس اصلی و سخت افزارابزار Xhorse VVDI
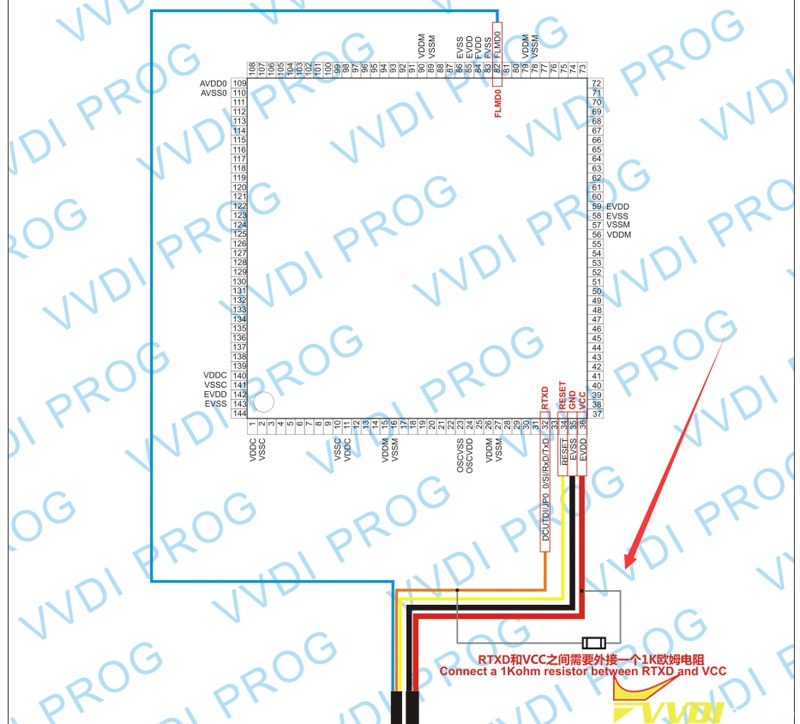
Xhose VVDI نرم افزار برنامه نویس اصلی و سخت افزارXhorse VVDI Prog Wiring Diagram to Range Rover velar 2018 D70F33506
Problem:
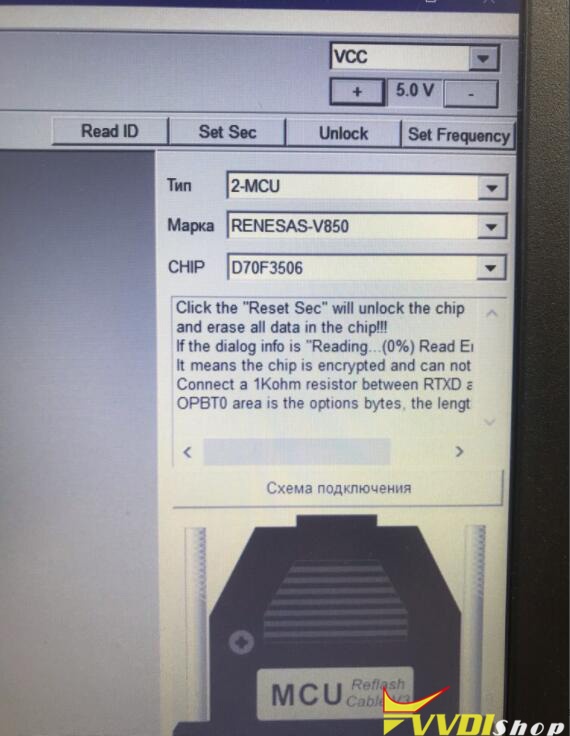
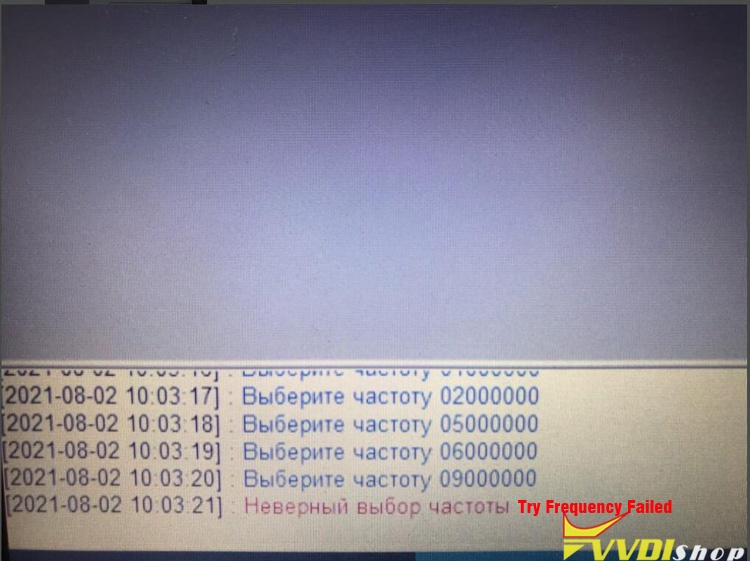
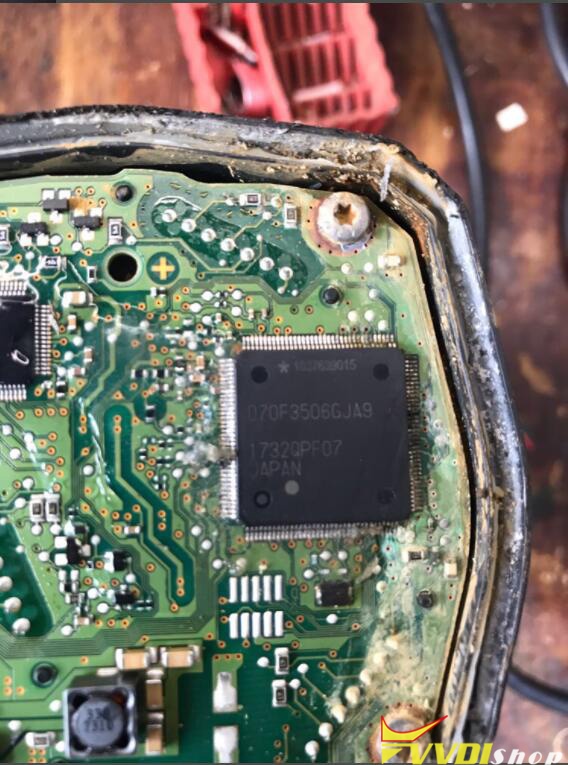
I had a problem with the xhorse vvdi prog. It failed to read Range Rover velar 2018 Renesas V850 D70F33506 mcu and gave error try frequency failed.
Solution:
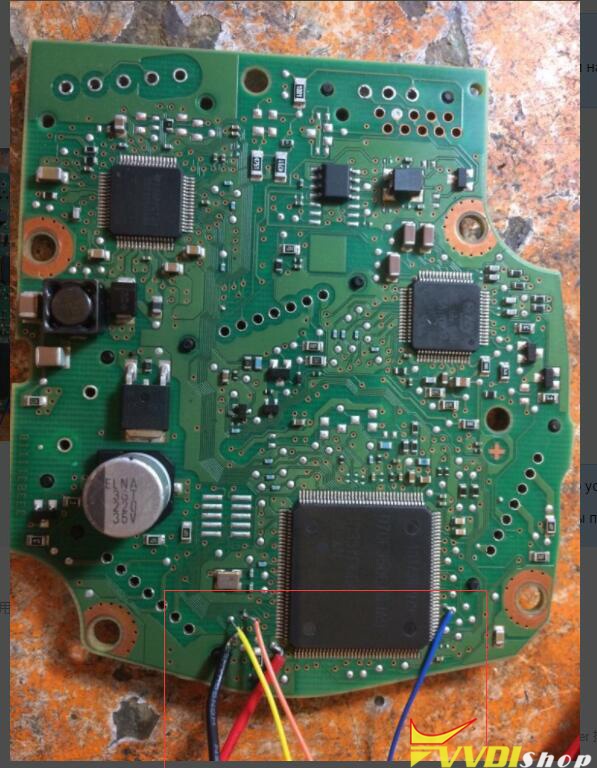
1.Follow the wiring diagram here to make a connection. Connect a 1Kohm resistor between RTXD and VCC
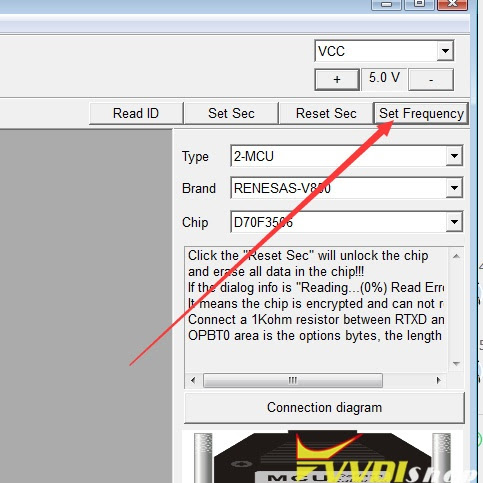
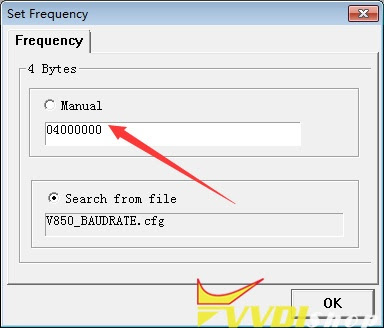
2.If fails again, change frequency and try again.
Searching on Frequency for this MCU And click Reset Sec (Security) for reading.
http://blog.vvdishop.com/vvdi-prog-range-rover-velar-2018-d70f33506-try-frequency-failed-solution/
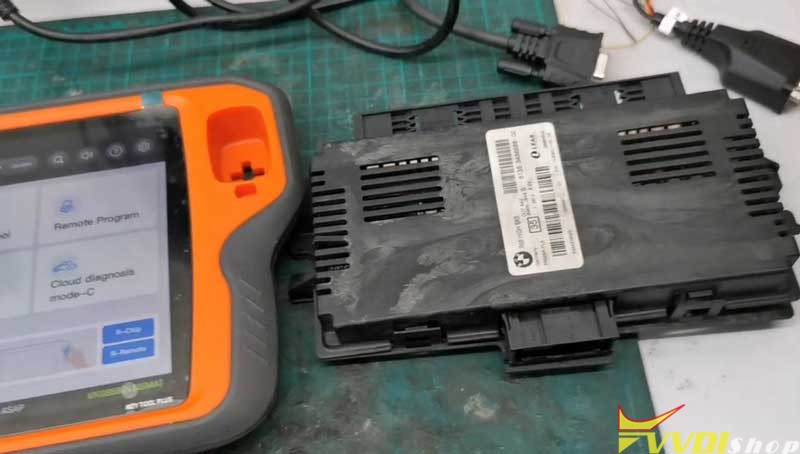
How to Repair BMW FRM XEQ384 data with Xhorse Key Tool Plus?
How to repair BMW MINI FRM E series XEQ384 data via Xhorse VVDI Key Tool Plus? Following I’m gonna make a quick demo to show the procedure.
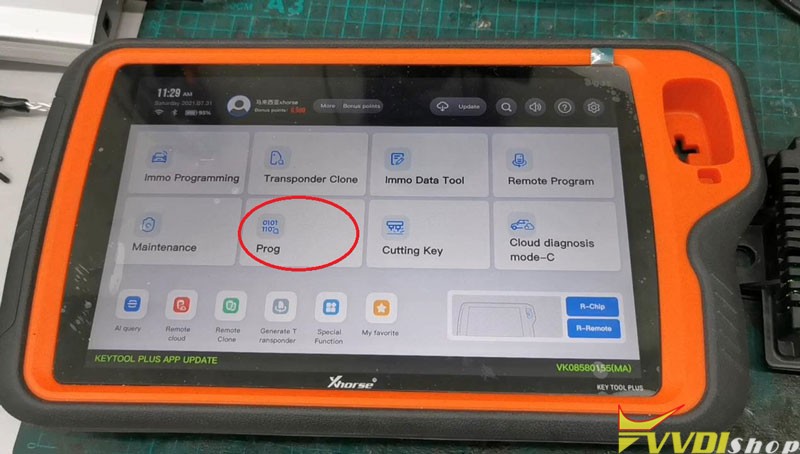
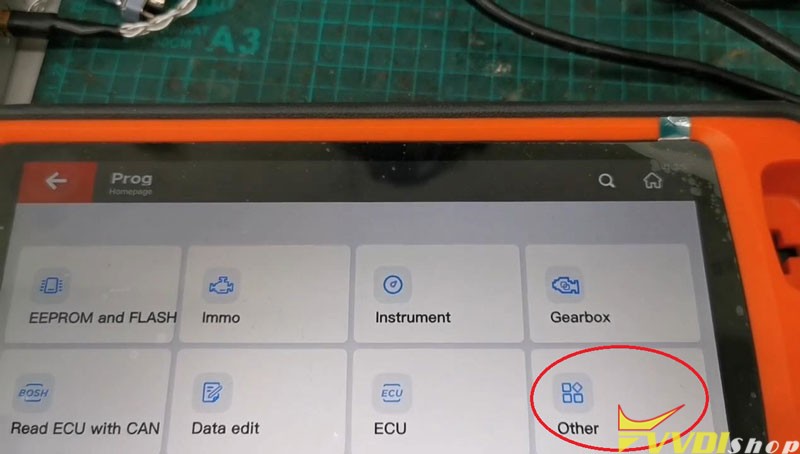
Prog >> Other >> BMW >> Select “FRM – E – SERIES(MC9S12XEQ384)(WELD)” or “FRM – E – SERIES(MC9S12XEQ384)(ADAPTER)”
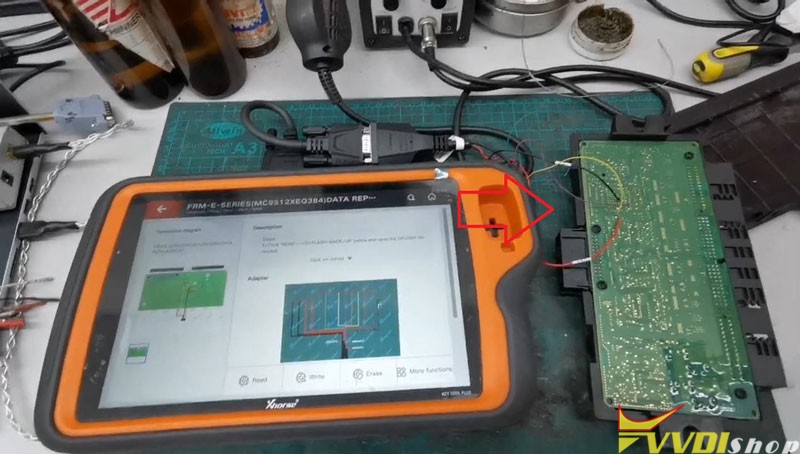
Wire FRM module according to the connection diagram.
Fortunately, we can also use a Solder Free Adapter instead to save time.

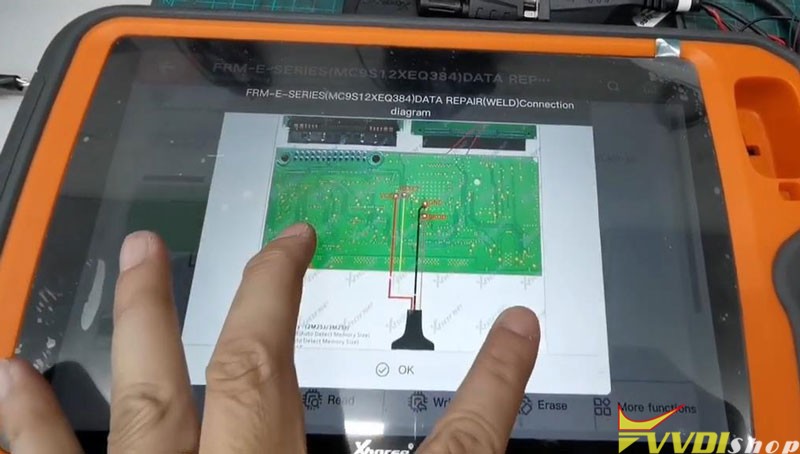
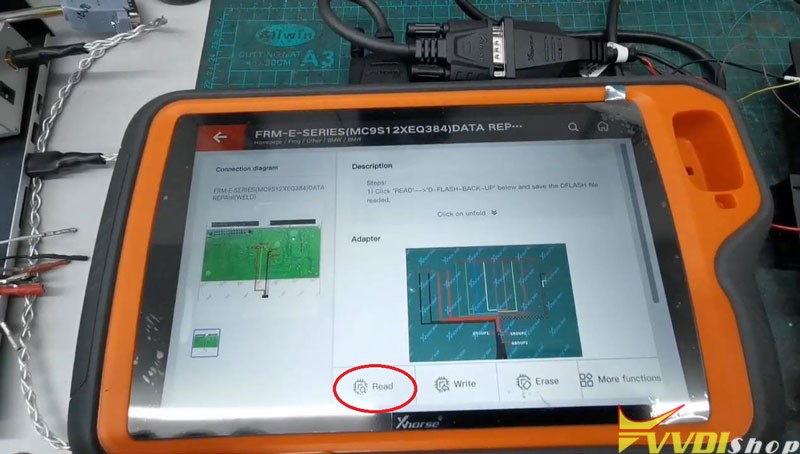
After connect FRM successfully, press
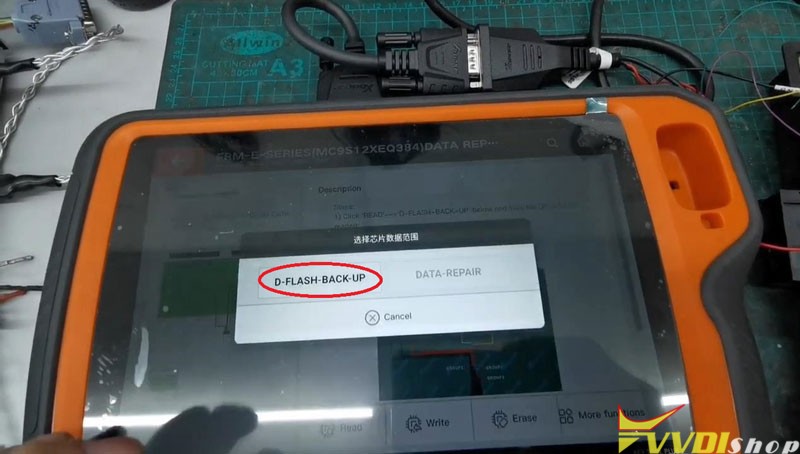
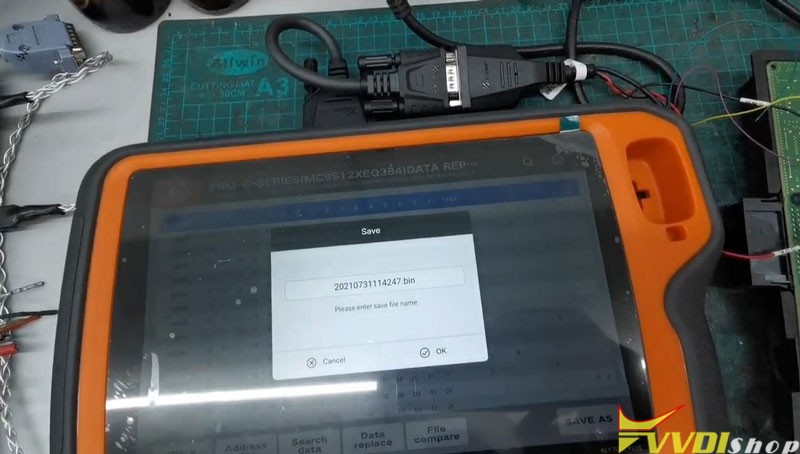
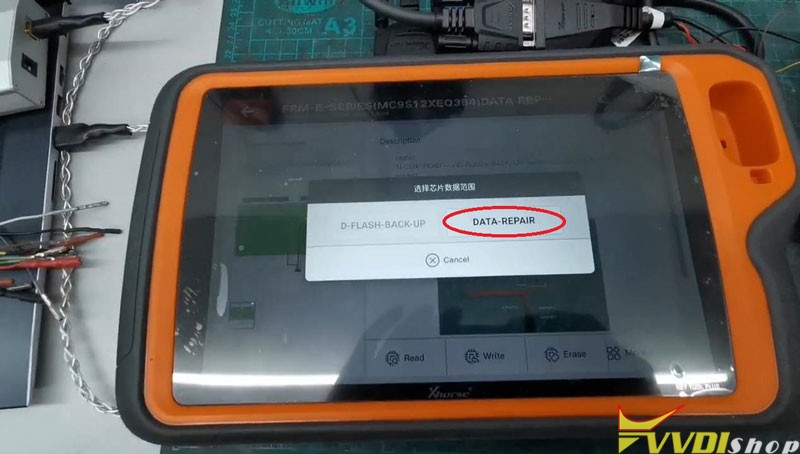
Read >> D-FLASH-BACK-UP >> Begin >> Continue >> OK >> Save as, OK
Save success.
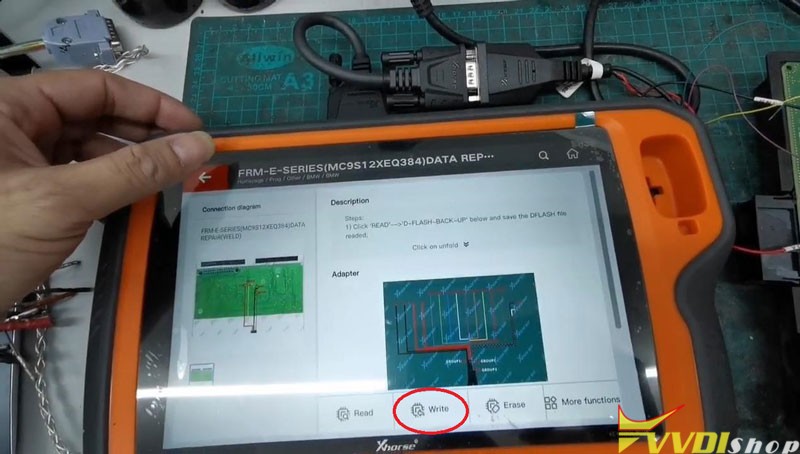
Go back to
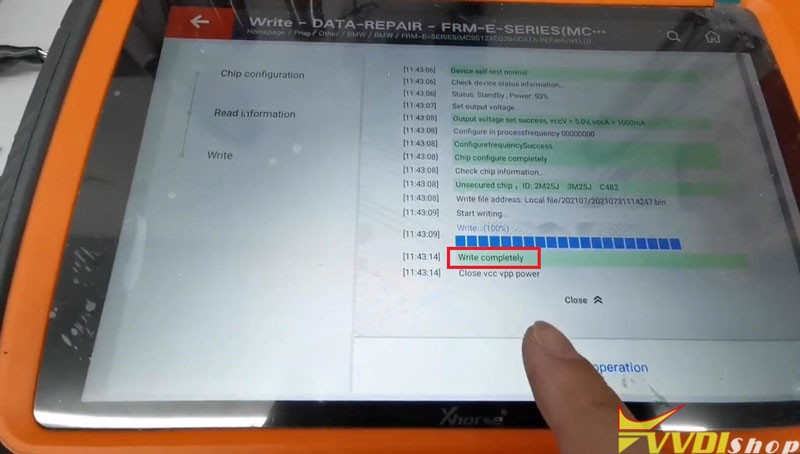
Write >> DATA-REPAIR >> Begin >> OK >> Select the saved data file, OK >> Begin >> Continue
Waiting for processing…
Write completely.
Repair FRM data successfully!
Use VVDI Key Tool Plus working with BMW FRM Adapter can easily repair XEQ384 data in 2 minutes.
http://blog.vvdishop.com/xhorse-vvdi-key-tool-plus-repair-bmw-frm-xeq384-data/
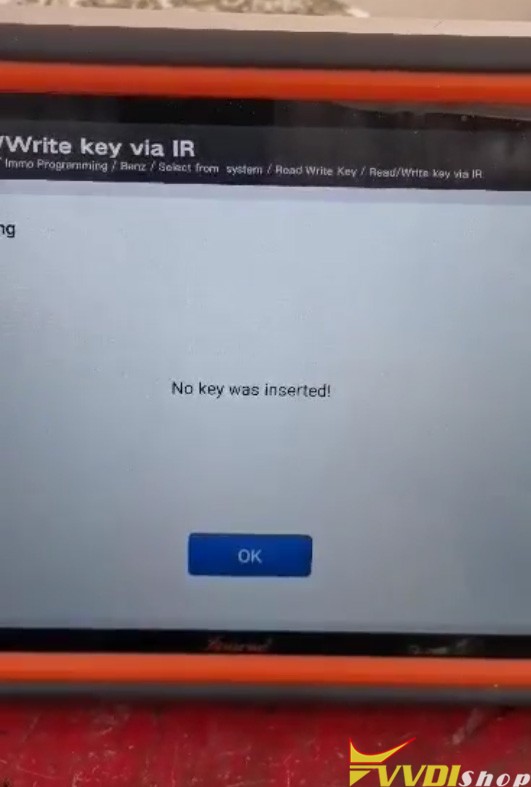
Xhorse VVDI Key Tool Plus No BE Key Detected Solution
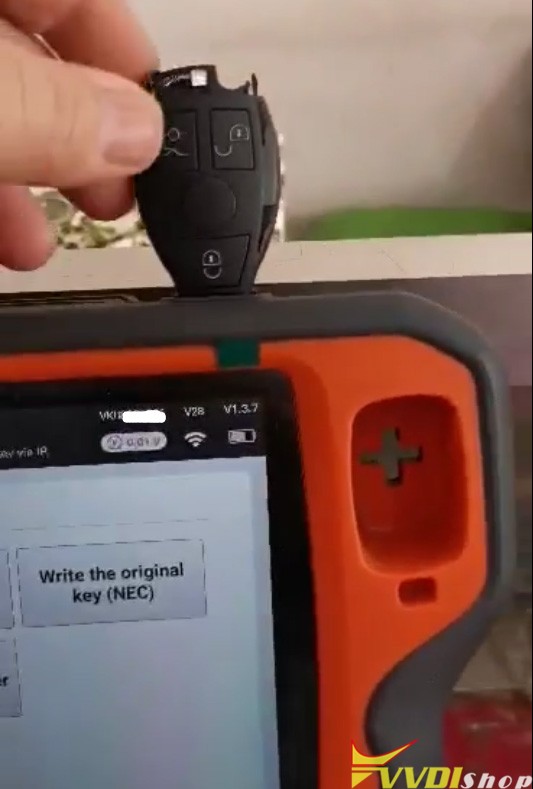
Here comes the problem with xhorse vvdi key tool plus: When I put the xhorse BE key with shell to check it doesn’t work and when I take the lid off him. It works normally.
Vvdishop solution:
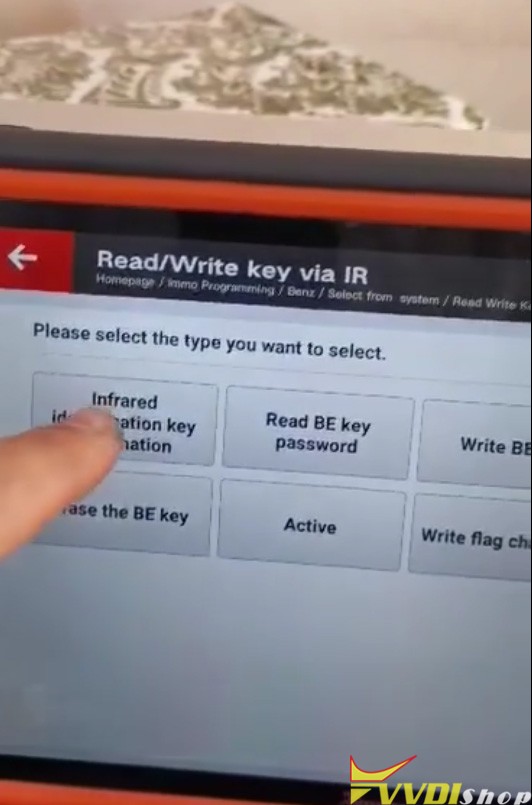
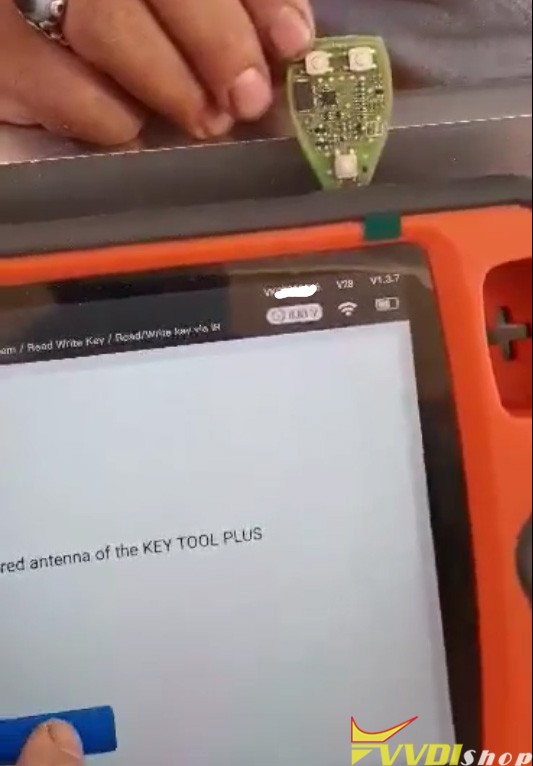
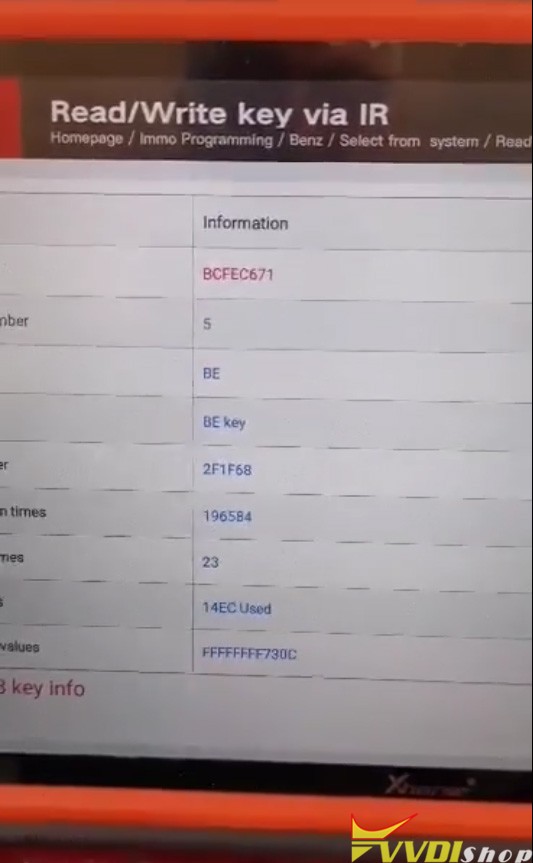
BE key information is identified via infrared. It is normal, sometimes you need to change a key position or insert it correctly.
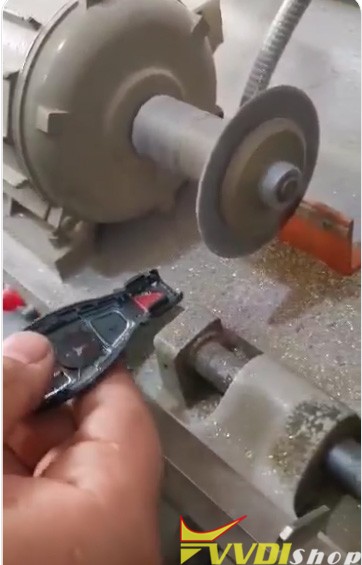
One of our customers found that this red piece was the obstacle in not reading the key. He said it’s a key manufacturing defect by the manufacturer, and they’ve been able to fix the bug by grinding/polishing the red piece.
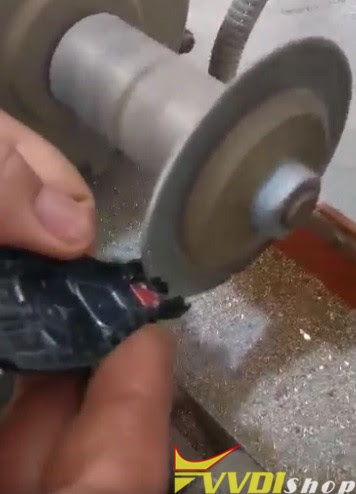
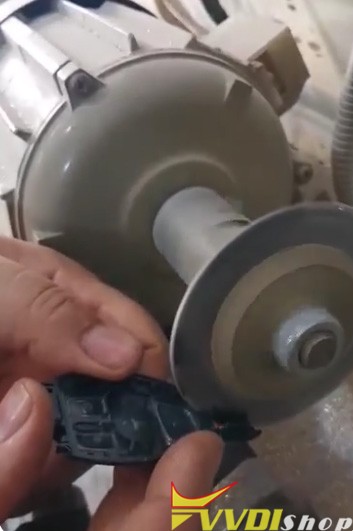

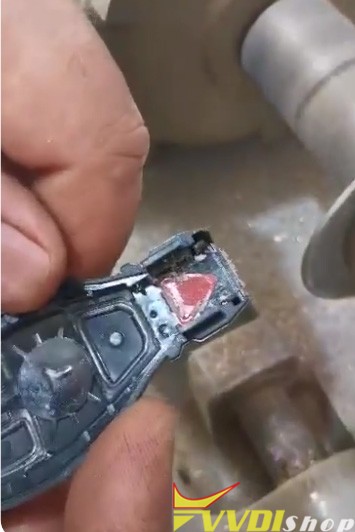
If you are afraid to damage the key shell, better take the lid off the key and read. Hope it helps.
http://blog.vvdishop.com/xhorse-key-tool-plus-cannot-read-be-key-no-key-insert-solution/
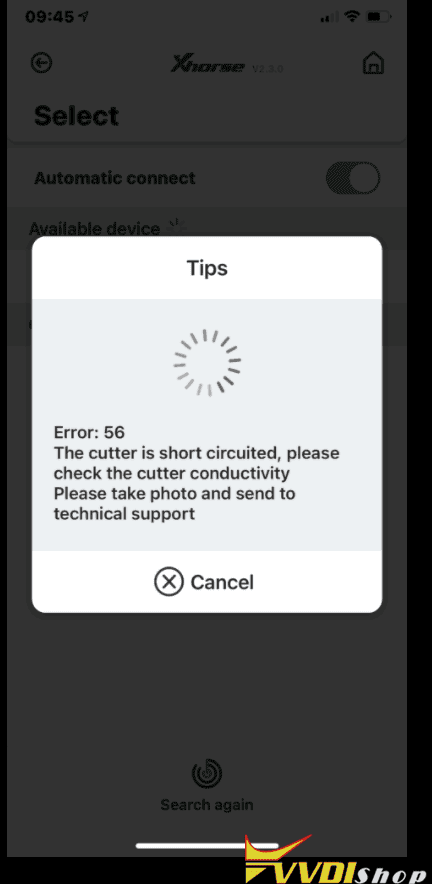
How to Fix Xhorse Dolphin XP005 Error 56?
Problem
I have successfully cut 3 keys via Xhorse Dolphin XP005 + VVDI Key Tool Max until the 4th key, it prompted “Error:56. The cutter is short-circuited, please check the cutter conductivity. Please take photo and send to technical support.”
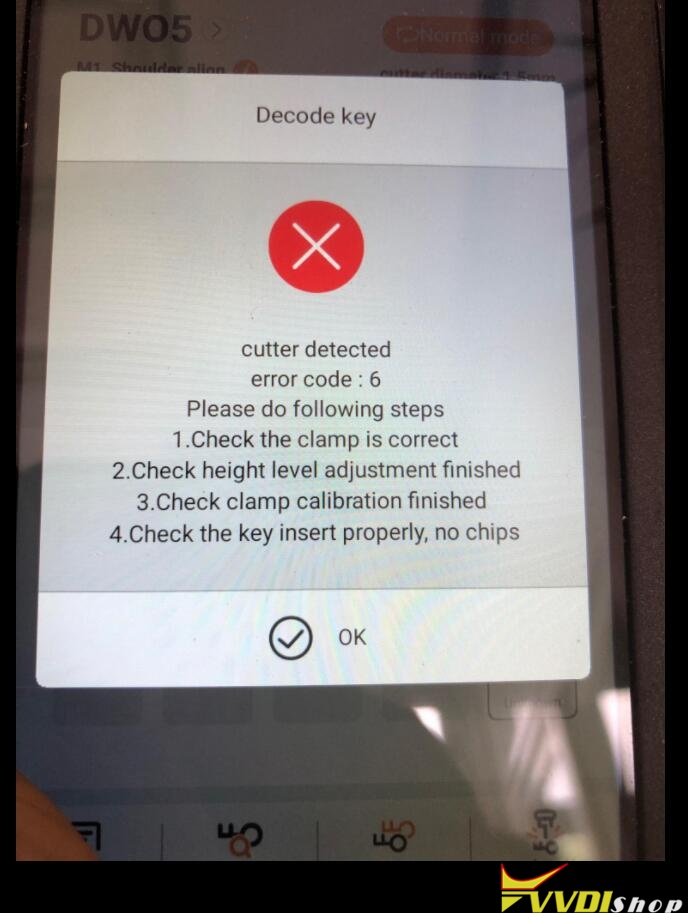
The error still exits even if I use other devices to control Dolphin XP005, it occasionally occurs cutter detected error code: 6 as below
“Please do following steps
- check the clamp is correct;
- Check height level adjustment finished;
- Check clamp calibration finished;
- Check the key insert properly, no chips.”
I can’t use Dolphin XP005 machine anymore, I can’ do calibration or anything else. Please help me.
Solution
- Just take apart the LED lamp cover to brush the scrap iron;
- Do a electrical conductivity measurement after cleaning, take a video to VVDIshop engineer for help.
How to do electrical conductivity measurement for Dolphin XP005?
http://blog.vvdishop.com/xhorse-dolphin-xp005-electrical-conductivity-measurement/
Hope it helps.
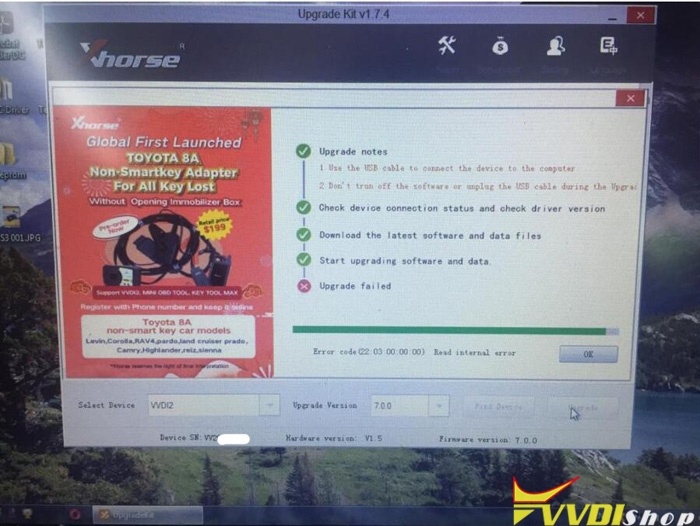
Xhorse VVDI2 All Update Errors in Upgrade Kit
Here is the working solution to Xhorse VVDI2 key programmer various update error codes via Upgrade Kit.
Error Code 1:
Error code (22:03:00:00:00) Read Internal Error
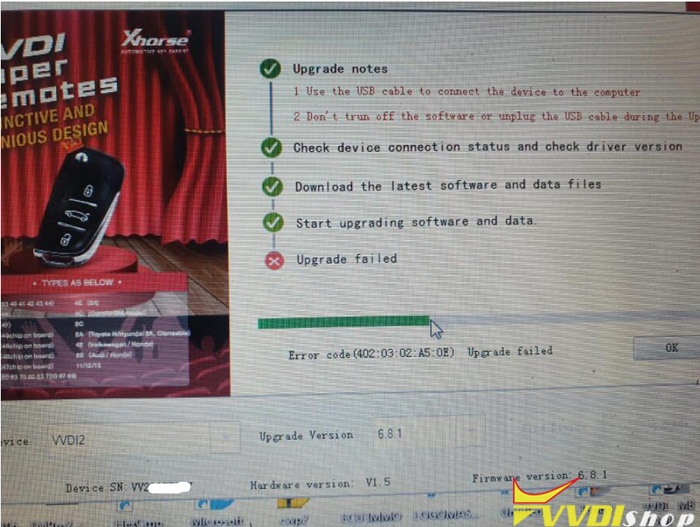
Error Code 2
Error code (402:03:02:A5:0E) Upgrade Failed
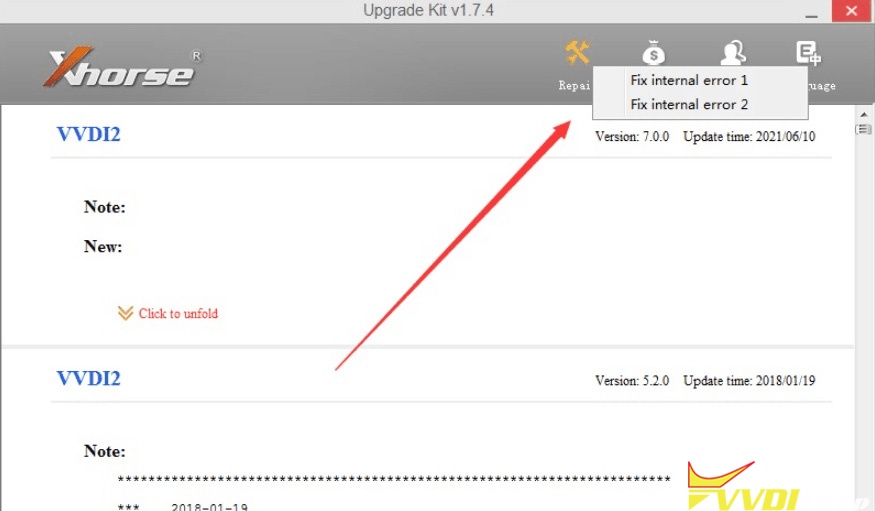
as well as other update failed error codes, follow solution below:
1. Change another USB cable, other COM ports or laptop
2. Try to Fix internal error 1 or 2 in Xhorse upgrade kit,
Then update vvdi2 again.
3. If still fails after doing all the above, vvdi2 is damaged, need to send back for repair.