ابزار Xhorse VVDI
Xhose VVDI نرم افزار برنامه نویس اصلی و سخت افزارابزار Xhorse VVDI
Xhose VVDI نرم افزار برنامه نویس اصلی و سخت افزارHow to Install Honda HDS with Xhorse MVCI Pro on Win7
Here’s a guide on setting up Honda HDS (Honda Diagnostic System) software and xhorse mvci pro j2534 cable on windows 7 64bit.
The VCI cable used here is an Xhorse MVCI Pro J2534 that was bought on vvdishop.com. It comes with a regular USB A plug and a built-in USB to serial adapter. Some tried running it on a VirtualBox VM with no luck. Installing it on the laptop itself fixed the cable software and authorization issues I had.
Hardware needed:
-Xhorse mvci pro j2534 cable
-A pair of USB sticks. 16GB or more preferred.
-A laptop with at least 4GB RAM and 40GB of free disk space for the win7 partition. If you have a spare laptop laying around that you can wipe without worry, that’s even better.
Software needed:
-Win7 x64 SP1 ISO with as many updates rolled in as possible.
-Win7 drivers for your laptop. Hopefully your laptop manufacturer has one big setup file you can download.
-Xhorse MVCI Pro
-Honda HDS suite with HDS and iHDS.
-Rufus (for windows) or woeUSB with 7z for Linux users to create a bootable win7 USB.
-Bootable gparted USB stick for resizing your current disk partitions and creating the partition for win7.
Most halfway modern laptops won’t have a DVD drive so you’ll install win7 by creating a bootable USB drive. A dd type operation where the .iso is copied onto the stick byte by byte doesn’t work with win7 like it does with Linux isos. So you’ll have to use Rufus if you’re on windows, or woeUSB if you’re running anything Linux based. Make sure you have “7z” command installed, since woeUSB uses it to build the EFI boot guts required to install win7 on gpt partitions that have been the standard for many years now. If you will not dual boot, then it gets a lot simpler.
Make sure you disable Secure Boot and enable legacy boot ROMs (that’s what it’s called in my dell BIOS). Another gotcha you might run into is having to temporarily change your SATA controller mode from AHCI to ATA. To change it back after the install, do the regedit hack to update the setting in win7, shut down, change the settings in BIOS and boot win7 to verify it still boots normally (you’ll know it worked when it boots and prompts to restart again).
The long and hard part is over. Go ahead and install the MVCI Pro software and reboot. Plug in the xhorse cable and wait for the drivers to finish load. Open the MVCI Pro and click on the connect button. Once it’s connected and you see the serial number, go ahead and click “read authorization”. It will show nothing but you should not get any error messages like ff03 like I did on a VM. Click “update authorization”. After a few seconds you’ll see the authorization list update with 999 count and all the makes in the green.
Go to the service tab and install the Honda HDS driver. The software is a bit clunky and you might have to click a couple times to get the installer to come up.
Now time to install HDS and iHDS. Click the setup in the root of the downloaded HDS suite and it will install HDS. Once that’s done, go to the iHDS subfolder on the install folder and run the installer for iHDS since it appears HDS needs to be launched from within iHDS. Don’t ask me why lol!
Finally, you can launch the iHDS and select XH-HONDA in the interface selection.
It should all be point and click from there, folks!
Xhorse VVDI Mini Key Tool Failed to Erase ST Solution
Problem:
Failed to update Xhorse vvdi mini key tool firmware. Device shows the error ‘failed to erase ST’ and mini screen displays USB to PC icon.
How i can reslove this issue?
Solution:
Solution 1: Try to update firmware via Xhorse Upgrade Kit on PC
Solution 2: If update firmware via mobile phone, change a stable WiFi or change WiFi hotspot. Try several times.
If all failed, need to send back to repair.
Xhorse Multi-Prog Read Rolls Royce MSD87 ECU
Xhorse Multi-prog programmer new tested report from one of vvdishop.com‘s customers.
Read Rolls Royce MSD87 ECU successfully.
Procedure:
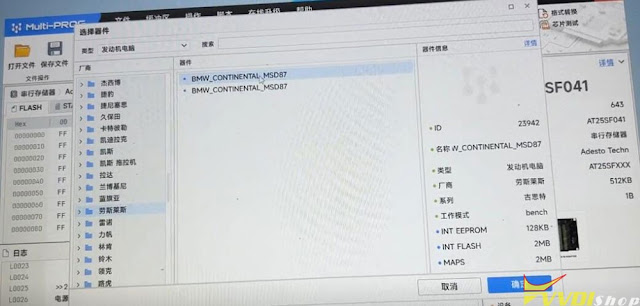
Select Device->Engine->Rolls Royce->Ghost->BMW Continental MSD87
Multi prog will show engine and chip information, way to read, data it can read and data size
Here we can see it can be read on bench.
Check wiring diagram
Connect Xhorse multi prog with MSD87 DME via ECU adapter V1.0 following the pinout
Read INT eeprom
Read internal eeprom in 1min 16s
Save data
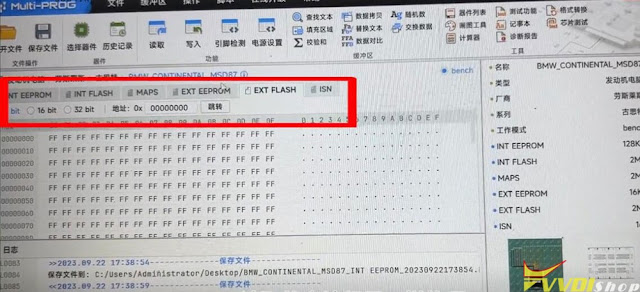
Read INT Flash, MAPS, EXT EEPROM, EXT Flash one by one and save all data.
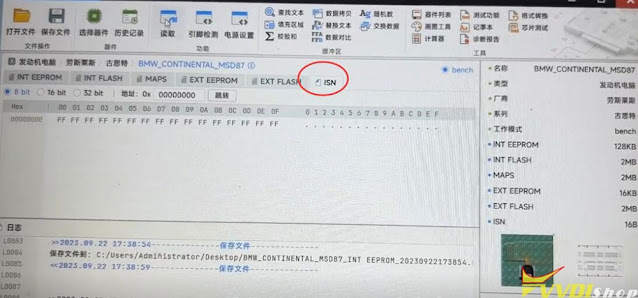
Multi-prog also reads the ISN code.
Press ISN and start to read
Read 32-bit long ISN code successfully.
Write eeprom and flash also works.
Program Toyota Land Cruiser Prado 4D Remote Key by Xhorse FT OBD Tool
How-to: program Toyota Land cruiser Prado 4D 67/68 remote key using XDMOT0GL FT-OBD Mini OBD Tool and key tool max.
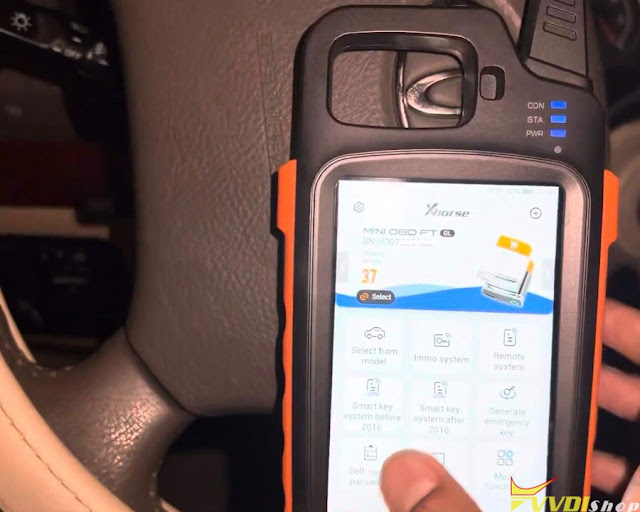
First connect the FT obd tool with vehicle.
Pair FT obd tool with key tool max via Bluetooth
Go to FT OBD Tool App.
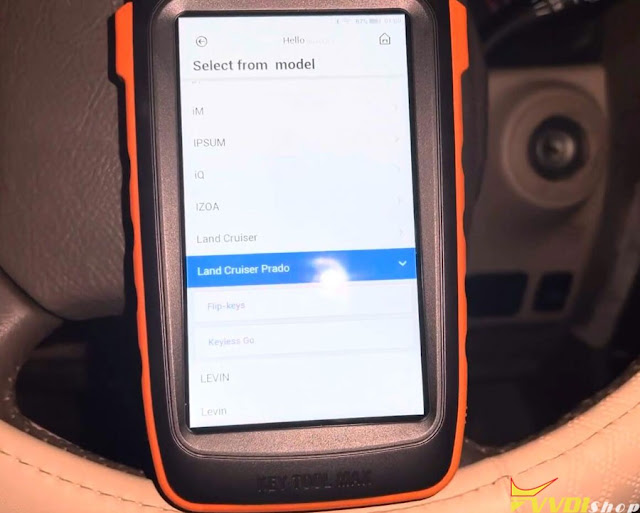
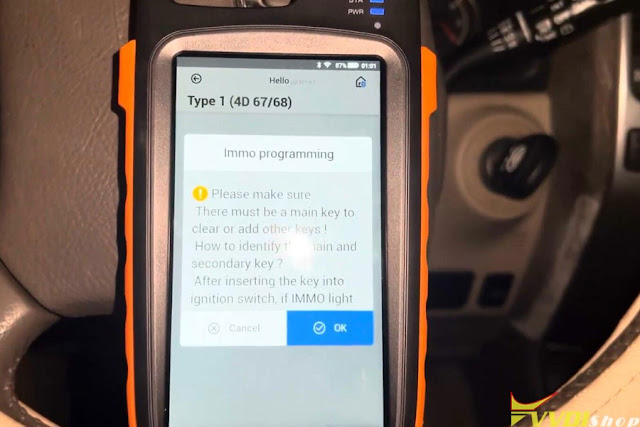
Select from model->Land Cruiser Prado->Flip Keys->2004-2013-> Type 1 (4D 67/68)->Key Programming
To add key you must have a master key.
Turn on the ignition with master key.
Insert new key to be programmed and stay at OFF, don’t turn to ON
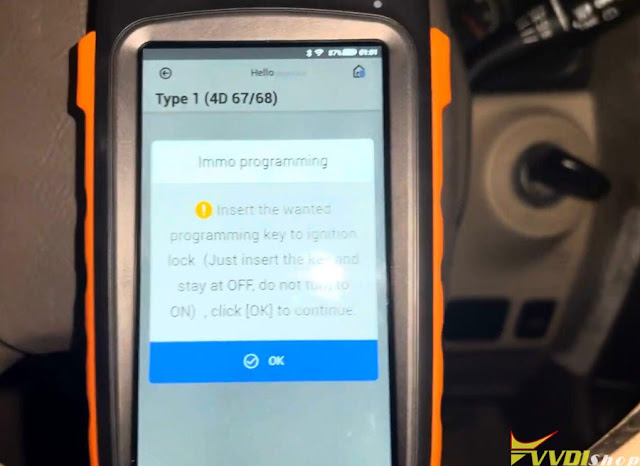
Program remote in process. Xhorse FT Mini OBD tool machine is showing like 120 seconds so we going to wait for it.
Key programming succeded.

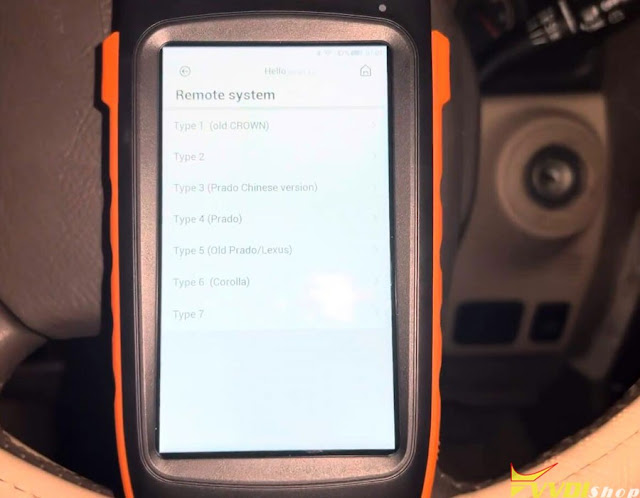
Then go to Remote System function
Select Type 2->Remote Adding
(If don’t know which type to select, try one by one)
Switch ignition on and open driver door at the same time.
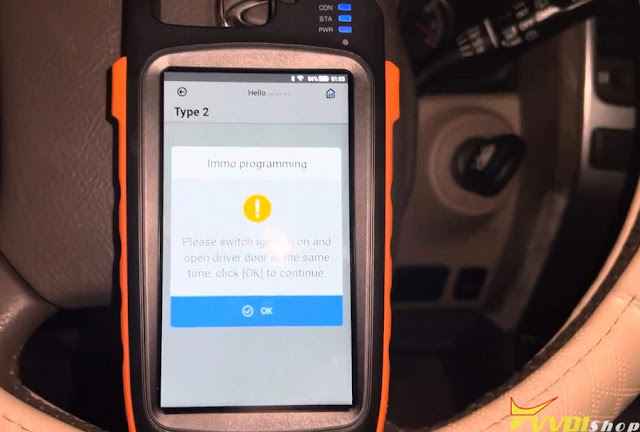
It’s mentioned here if Emer is flashing please try ignition off, switch ignition and wait for 1 minute.
but it’s already off so no need anything.
We can try to start the car by new key.
Xhorse MQB RH850 Adapter Read MQB R7F701401 IMMO Data
Xhorse MQB RH850/V850 Adapter has been released now. With it, there’s no need to cut wire or lift pin to read MQB48/MQB49/5C dashboards. It can support to read VW 4th Gen Johnson Control 34xx series, MQB-RH850(R7F) series and MQB 34xx series dashboards.
But it’s worth noting that the adapter can only work with Xhorse VVDI Key Tool Plus and need MQB NEC35XX License activated. Following, we’ll demonstrate how to use RH850/V850 adapter to read the 1401 dashboard as an example.
Step1. Connect To Read
IMMO programming >> VW >> Select by type >> MQB instrument immo system >> Instrument-MQB48(VDO/JCI-NEC35xx lock) >> Start programming >> Read disclaimer, OK
Make sure the network is connected, press “OK”.
Programmer reads files >> Read NEC35xx/RH850 chip >> Wire bond >> R7F701401
Here we can check the connection diagram.
- Follow diagram to remove the components and solder the cables.
- Connect a thin conductor or enameled wire at the designated points, then solder the remaining parts.
- Fix with tape. Connect RH850/V850 Adapter to Key Tool Plus.
After successful connection, press “Read >> Continue”.
Reading success.
Save the data file.
Step2. Obtain Immo Data
Obtaining immo data >> OK >> Load the chip file
Calculating will take about 5-10 minutes, please wait…
Save MQB IMMO file.
The file can be used to generate dealer key and learn key.


.jpg)










.jpg)
.jpg)
.jpg)
.jpg)
.jpg)
.jpg)
.jpg)
.jpg)
.jpg)
.jpg)
.jpg)
.jpg)
.jpg)
.jpg)