ابزار Xhorse VVDI
Xhose VVDI نرم افزار برنامه نویس اصلی و سخت افزارابزار Xhorse VVDI
Xhose VVDI نرم افزار برنامه نویس اصلی و سخت افزارVVDI Key Tool Plus Pad Adds Audi Q7 2010 Kessy Key
Xhorse VVDI Key Tool Plus Pad new test report: successfully added a new key on an Audi Q7 4th generation immobilizer.
Main Steps:
1. Read EEPROM
2. Make dealer key
3. Learn key
Procedure:
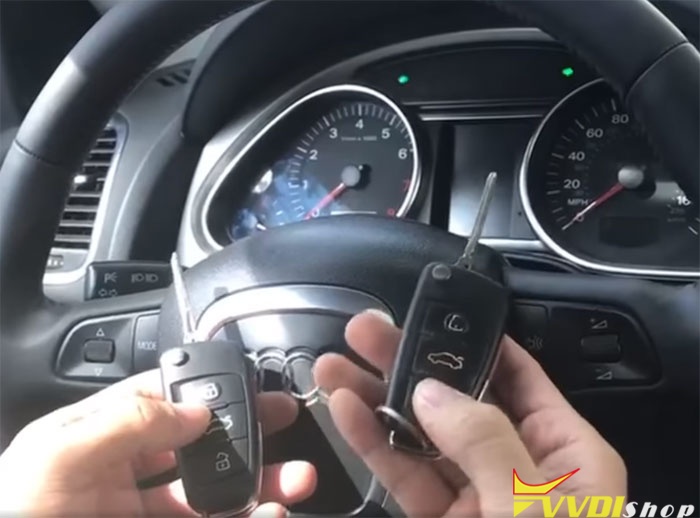
Connect key tool plus pad with vehicle
Insert original key into ignition
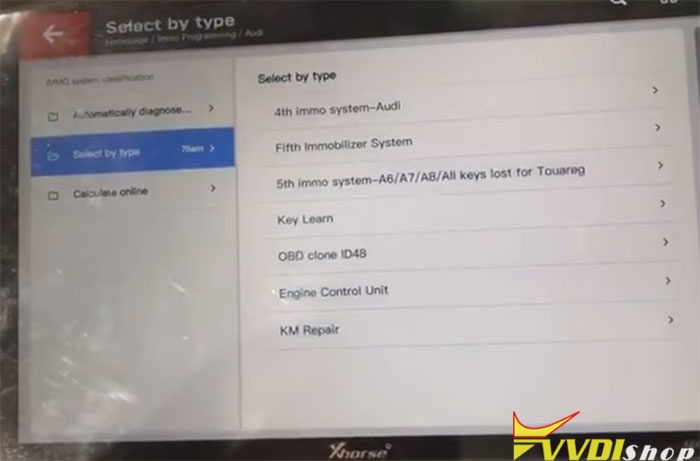
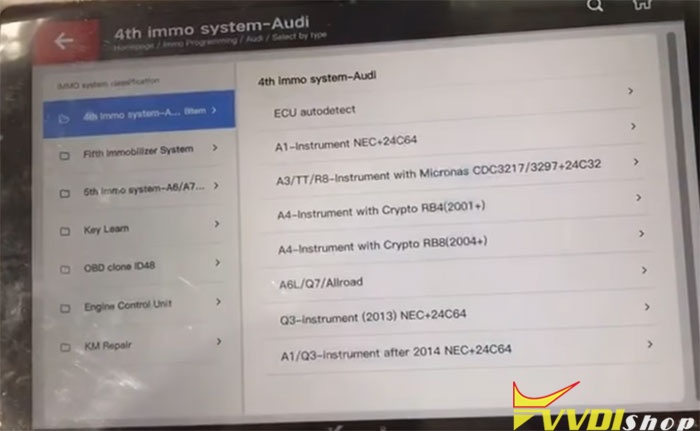
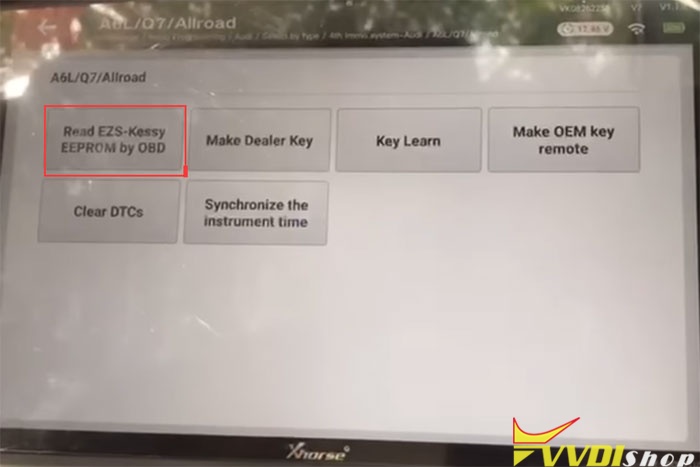
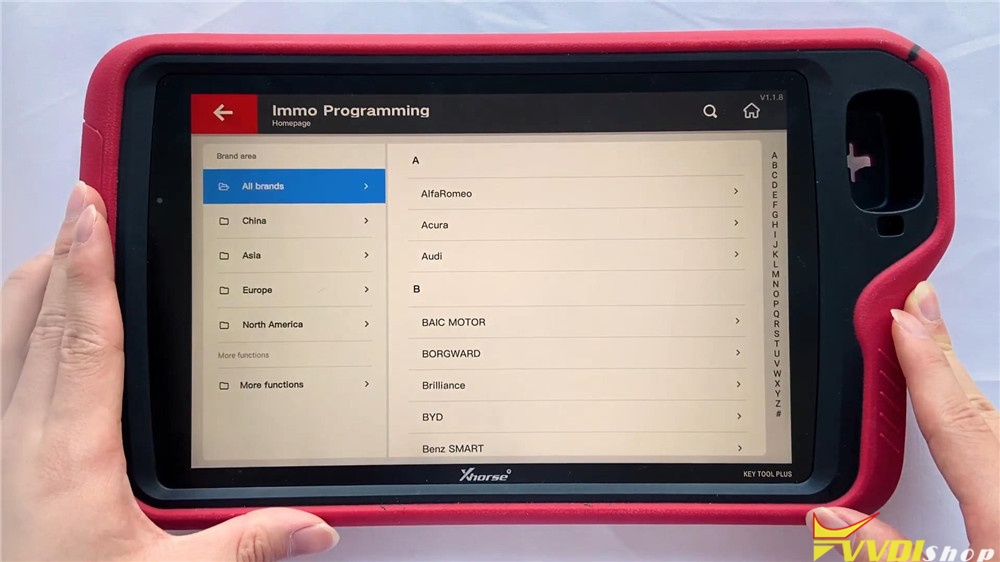
Turn on vvdi key tool plus pad, select IMMO Programming->Audi->Select by Type->4th IMMO System-Audi->A6L/Q7/Allroad

Begin to program key
Select Read EZS Kessy EEPROM by OBD->Read J518 EEPROM (9S12DT128)
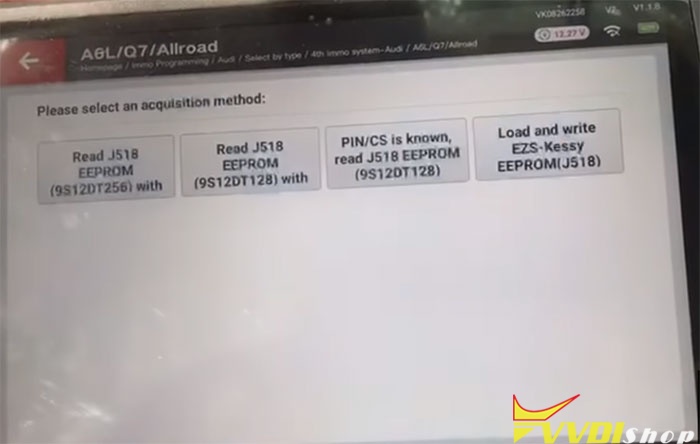
Most car before 2009 use chip 9S12DT128, most car after 2009 use chip 9S12DT(G)256
but there’s some car in 2009, you need try yourself
Start transfer/receive data
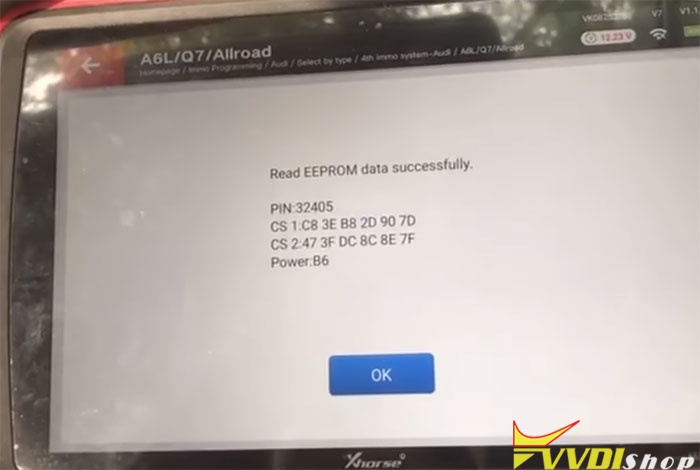
Read EEPROM data successfully
Switch OFF ignition, then switch ON
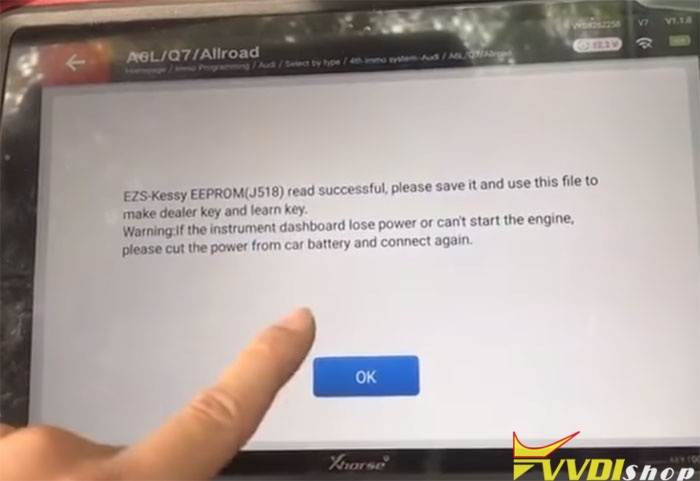
EZS Kessy EEPOM J518 read successful, save it and use this file to make dealer key and learn key
If instrument dashboard lose power or can’t start the engine, cut the power for car battery and connect again
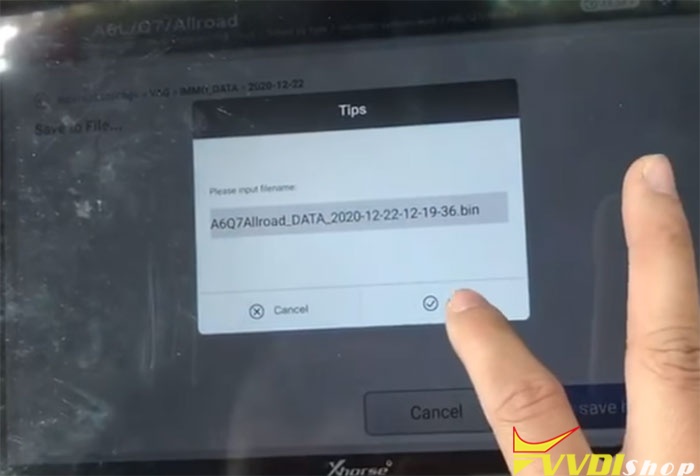
Save file success
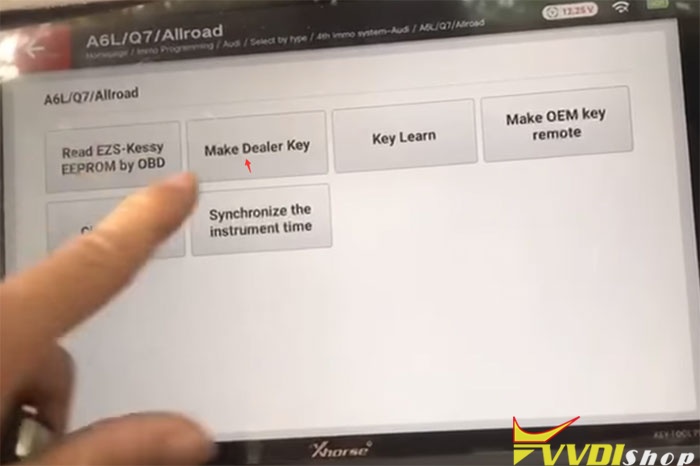
Select Make Dealer Key
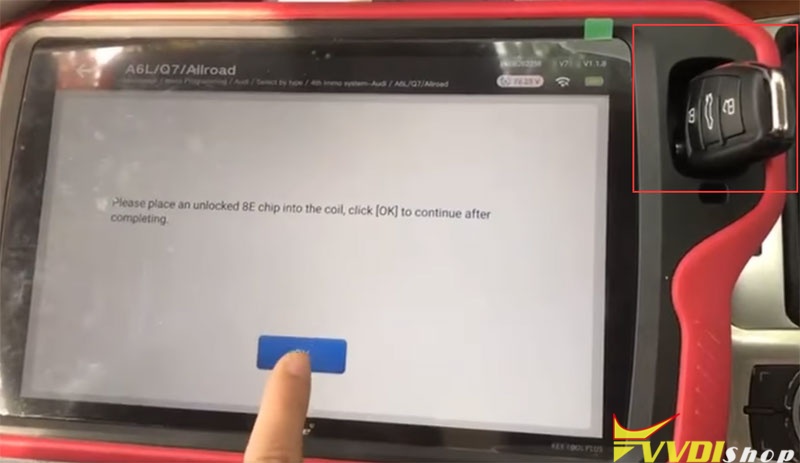
Place an unlocked 8E chip into the coil, click OK to continue
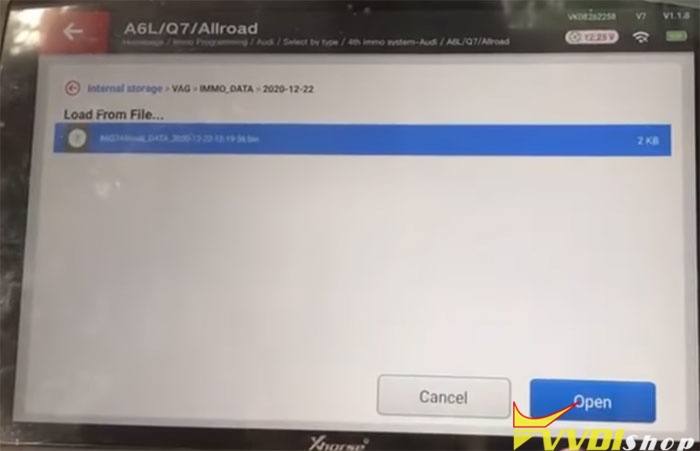
Select eeprom file just saved
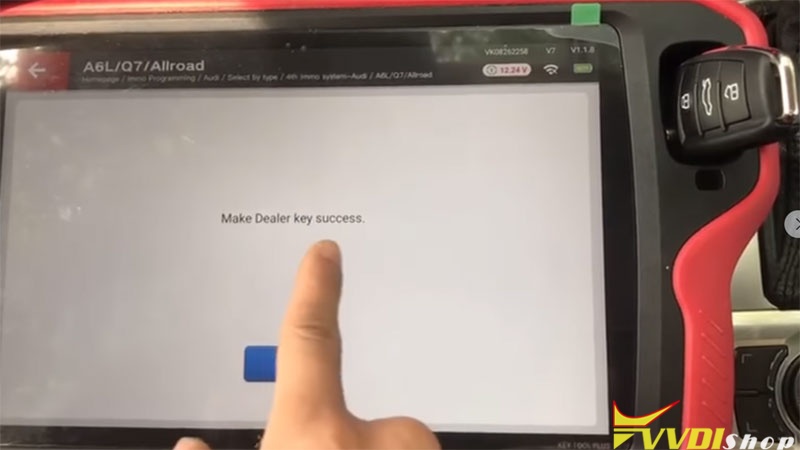
VVDI Key Tool Plus makes dealer key success
Select Key Learn function
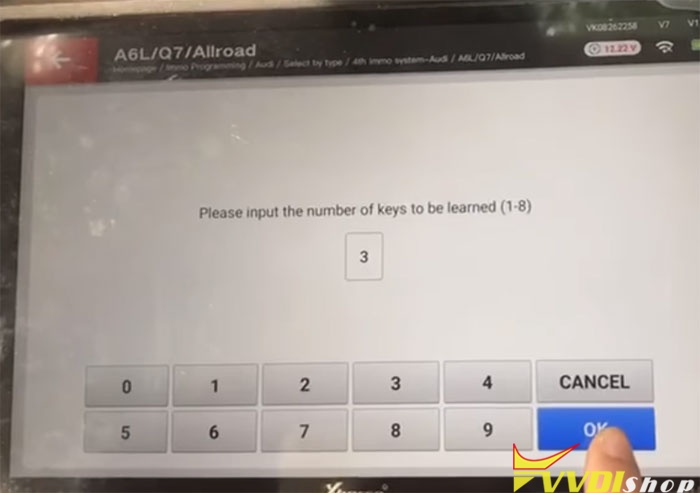
Enter number of keys you desired to learn
Start learning key
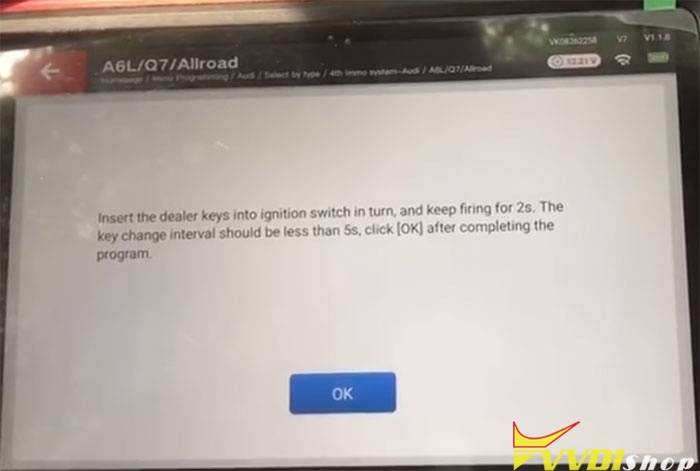
Insert the dealer keys into ignition switch in turn, and keep firing for 2s. the key change interval should be less than 5s, click ok after complete the programming
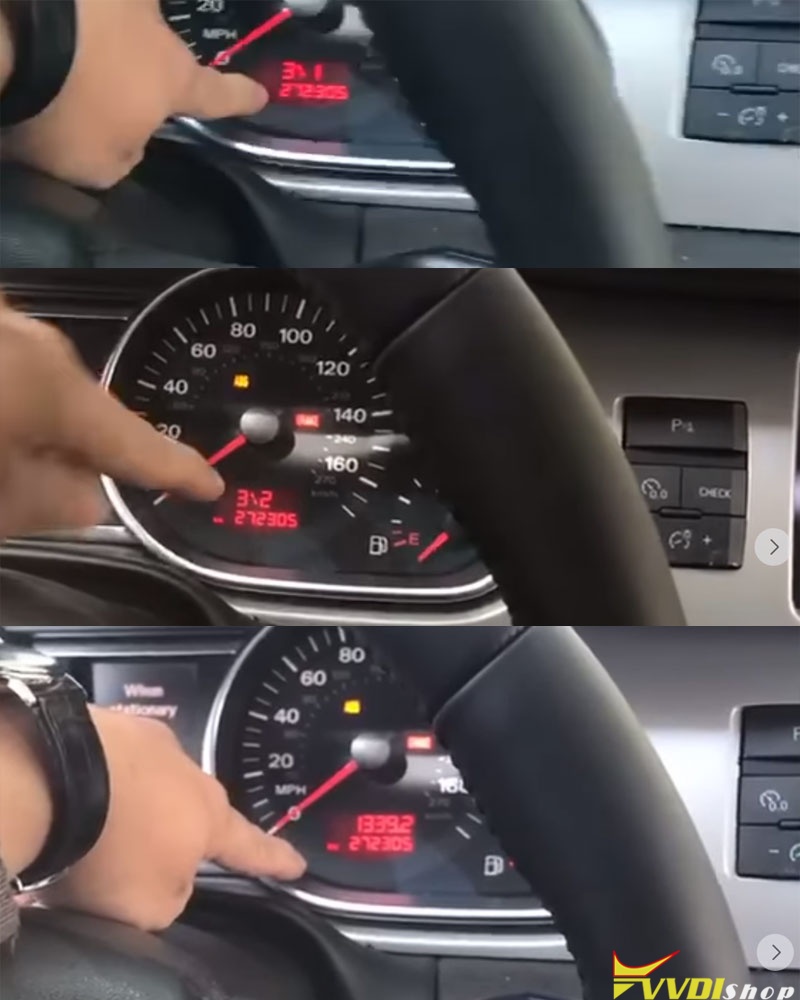
All keys successfully learned
Test all keys, remote control and start vehicle
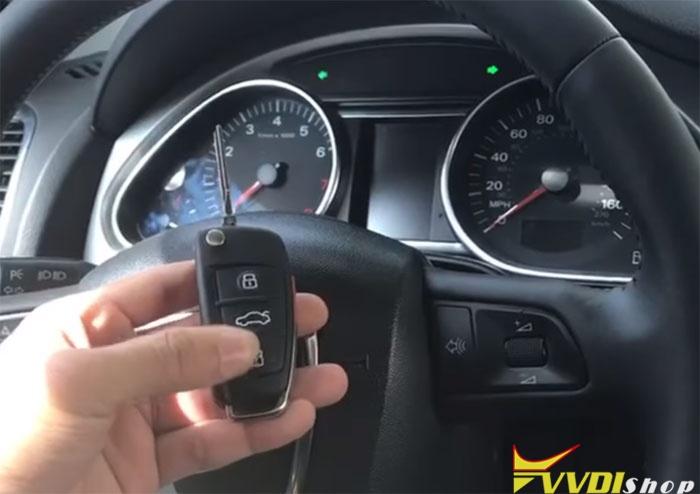
Done.
http://blog.vvdishop.com/vvdi-key-tool-plus-adds-audi-q7-2010-key/
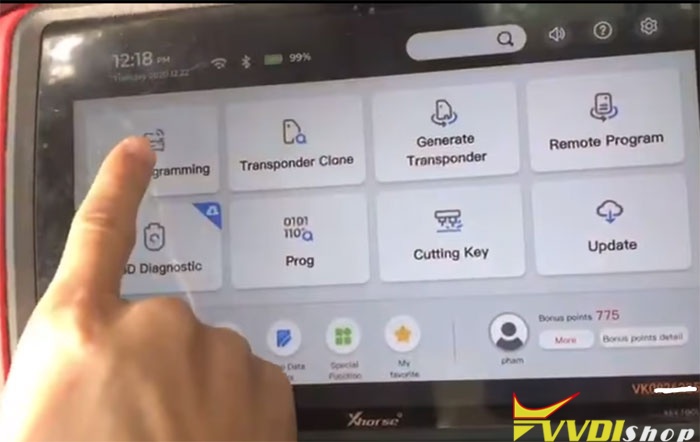
VVDI Key Tool Plus Pad Function Menu
Hello locksmith friends, this is the first look of Xhorse VVDI Key Tool Plus Pad, today I’m gonna make an introduction for its overall functions.
As we can see, there are 8 functions on VVDI Key Tool Plus Pad homepage: immo programming, transponder clone, generate transponder, remote program, OBD diagnostic, prog, cutting key and update.

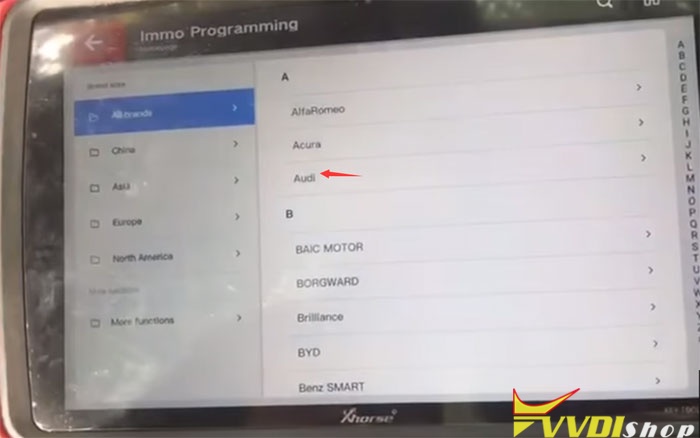
- Immo Programming
Go into immobilizer programming, we will find it supports many manufacturers, which classified by areas and brands. We can program keys for most cars such as Volkswagen, BMW, Audi, Mercedes Benz, Ford, Dodge, Chrysler, Porsche, Bentley, etc.
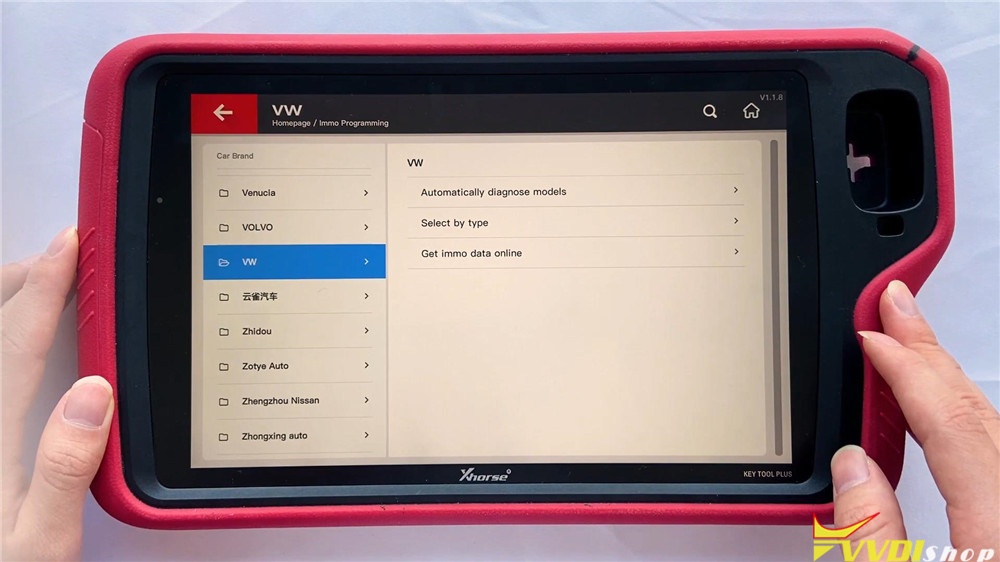
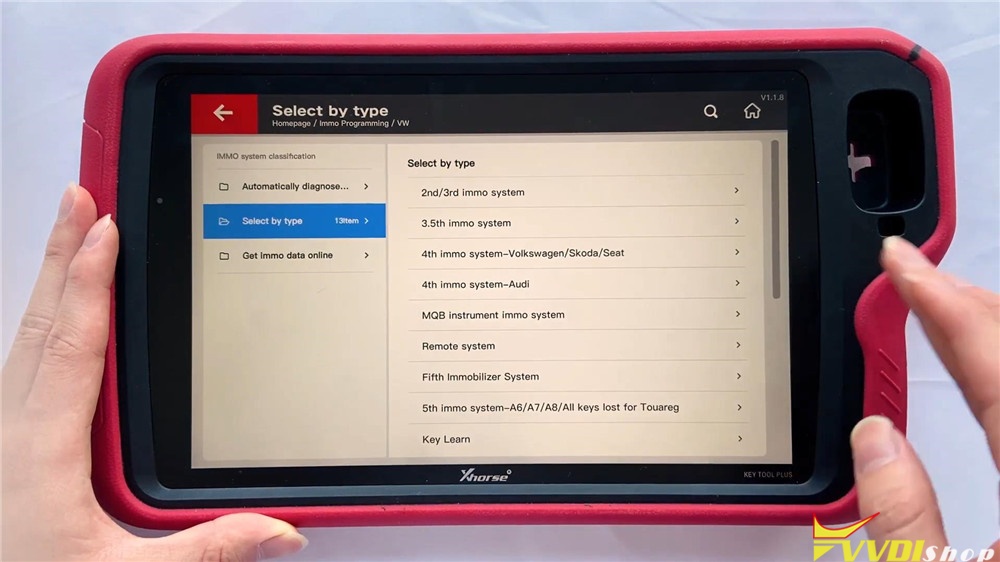
Let’s access VW, we can still select other cars on the left menu.
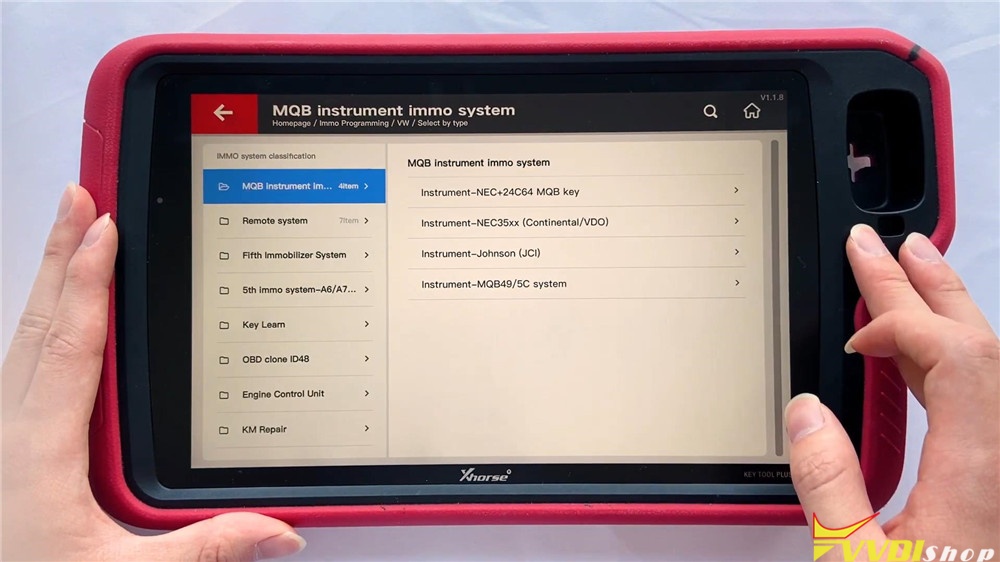
Select by type >> MQB instrument immo system
There are different car systems and operations available, we can select it by requirements. Or we can also use automatically diagnose models at first instead.
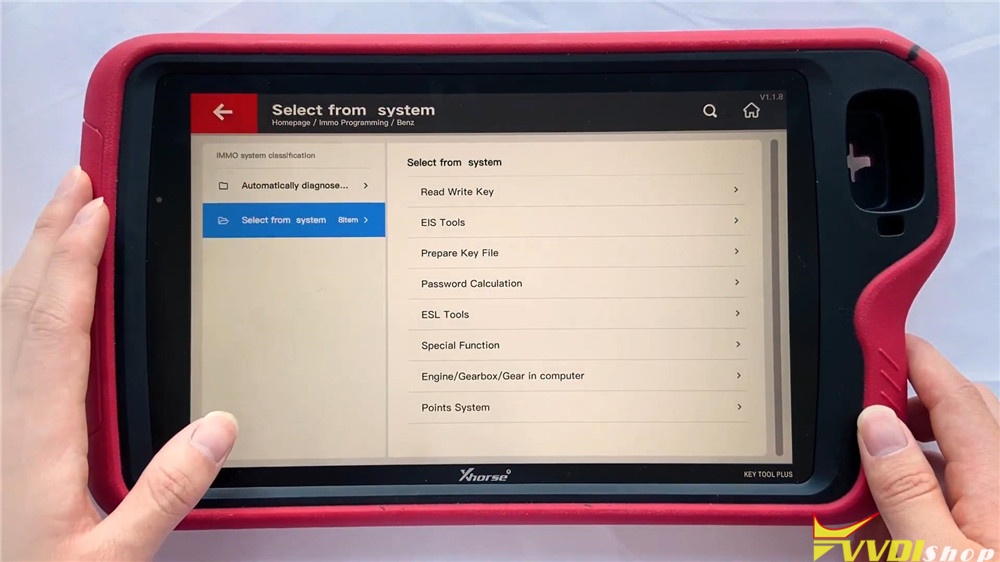
Let’s check Benz to have a look.
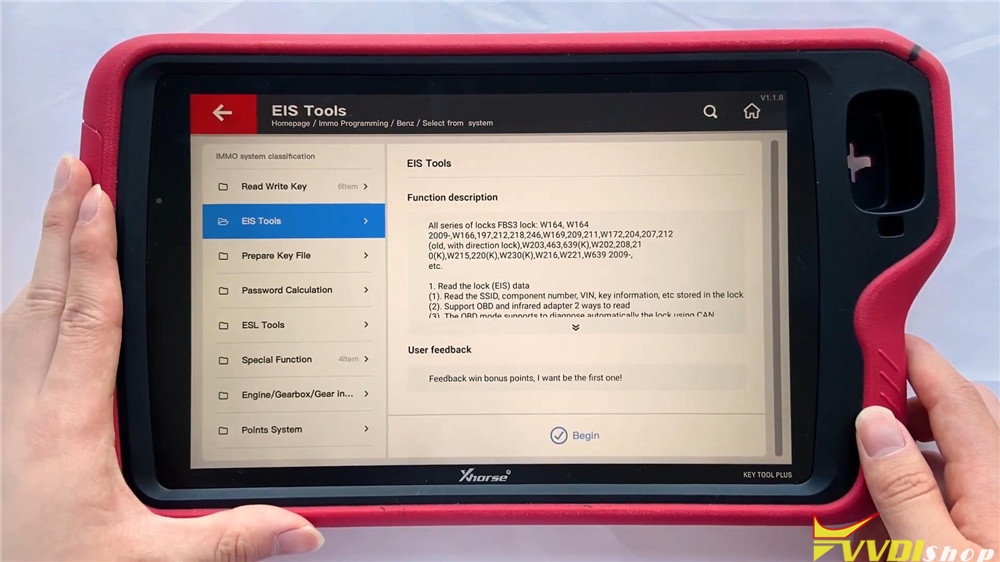
Select from system >> EIS tools >> Begin
It enables Benz to read write key, use EIS tools, prepare key file, calculate password and do other functions. EIS tools maybe the most often to use, go into the function, we can select the type to perform or use auto detect(CAN) directly.


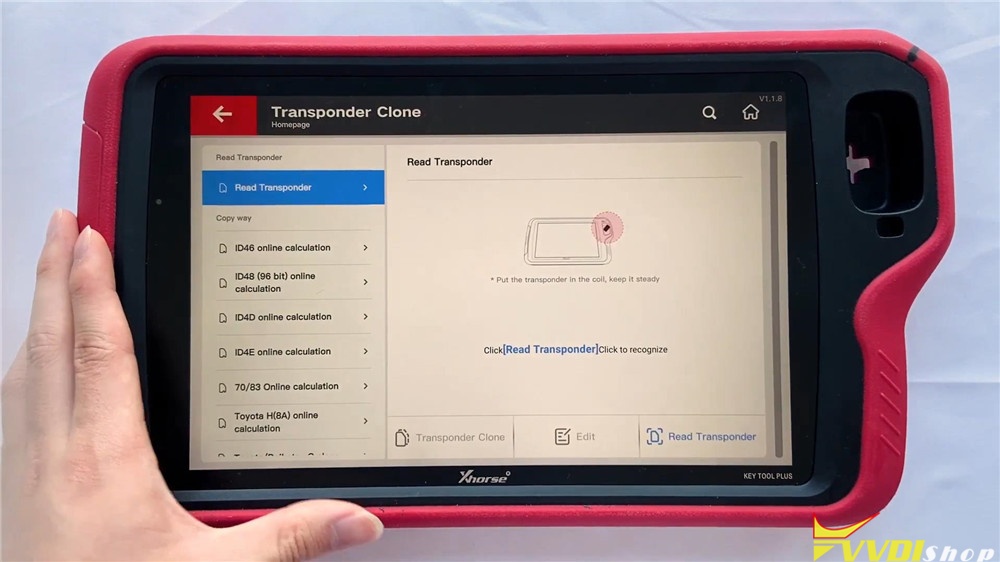
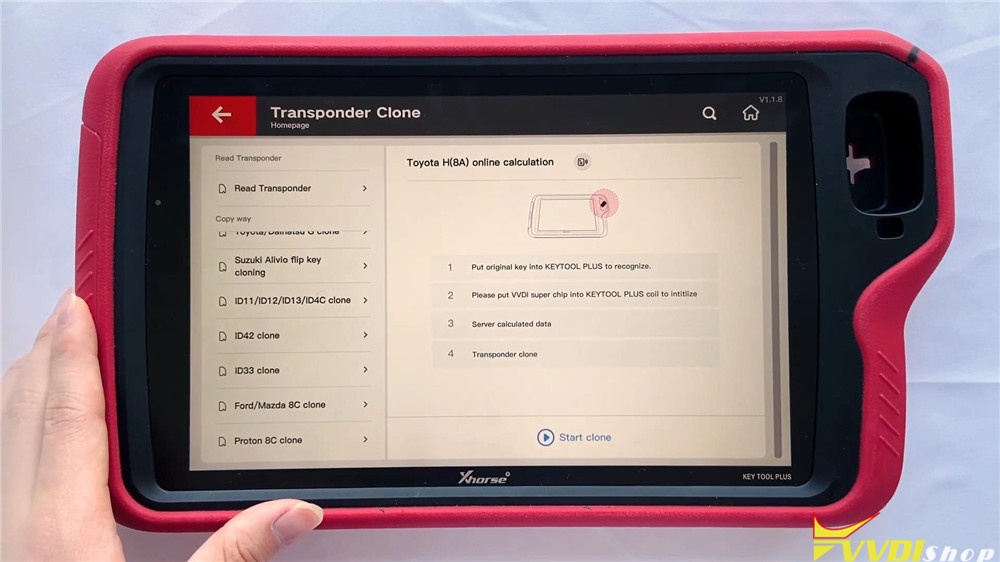
- Transponder Clone
The right side big hole is a detection coil used for transponder clone. It is used to place remotes, generate and detect the transponder. Here you can find several copy ways for calculation including ID46, ID48(96 bit), ID4D, ID4E, 70/83, Toyota H(8A), etc.
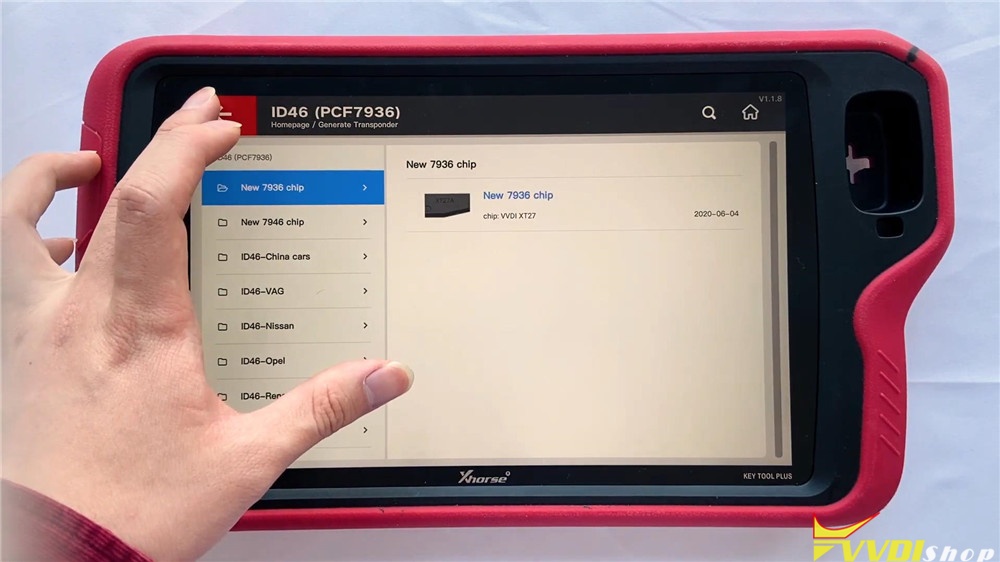
- Generate Transponder
Here you can search by transponder or car model, the chip list shows the types you can generate. Now go into ID46(PCF7936) chip, we can see here are several specific chips for selection.

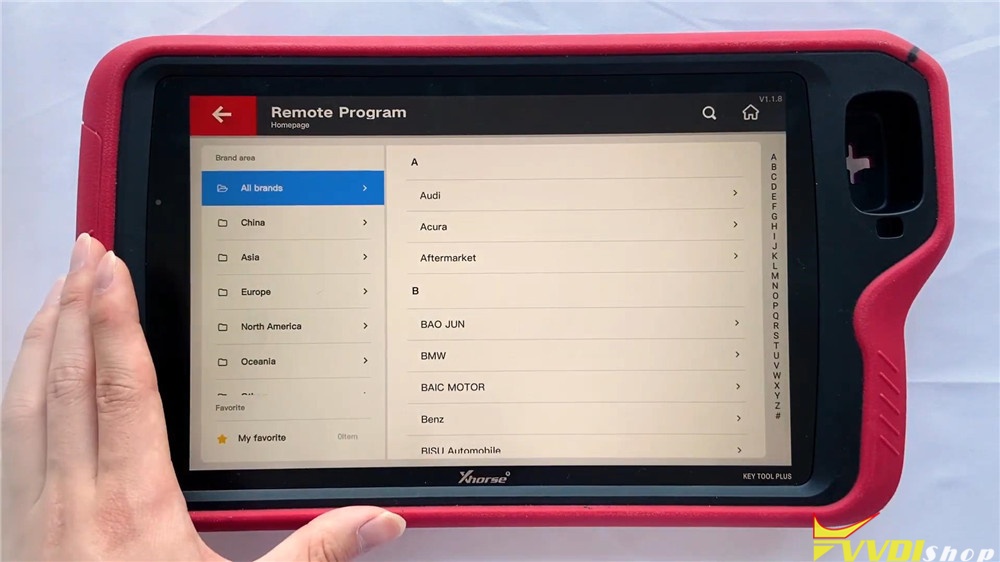
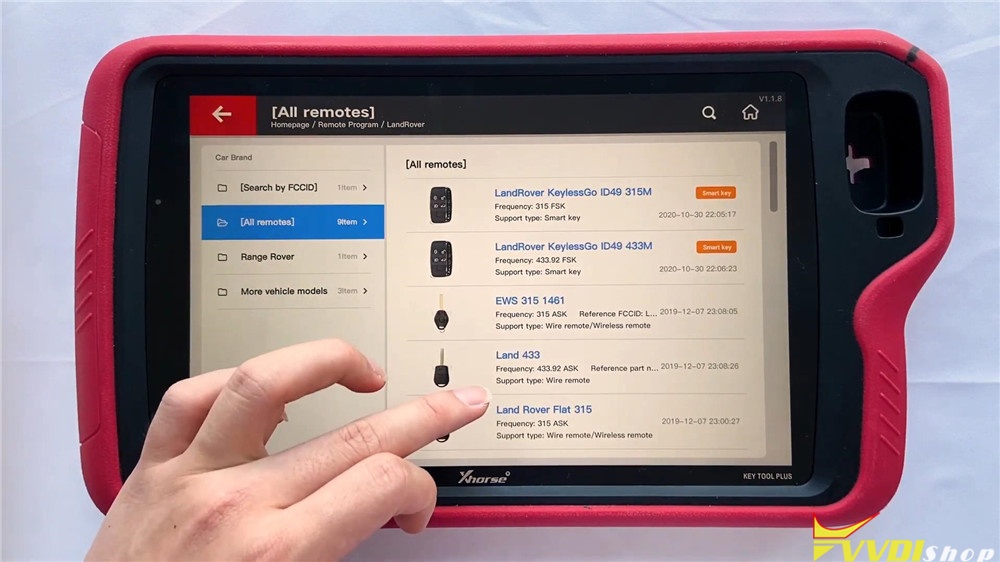
- Remote Program
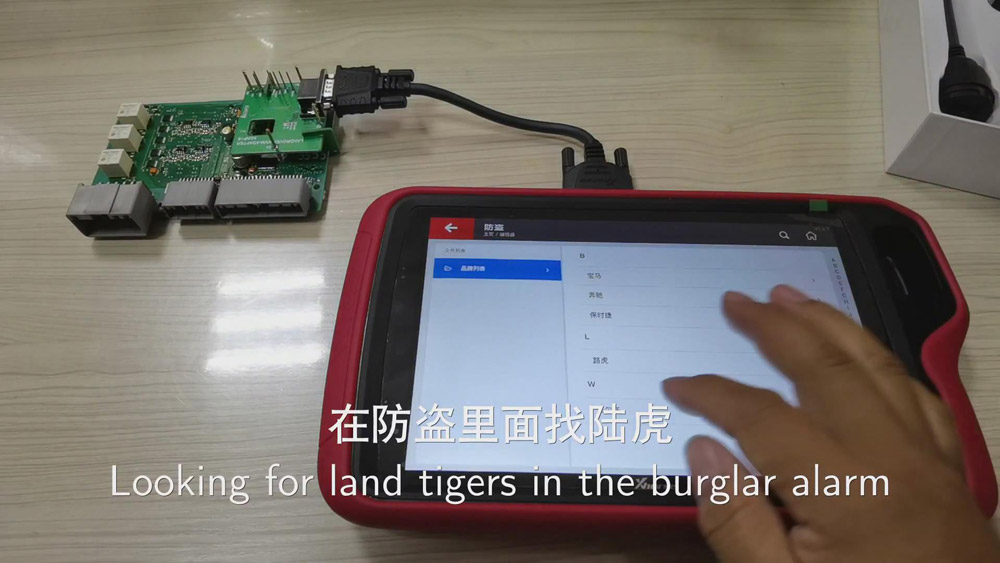
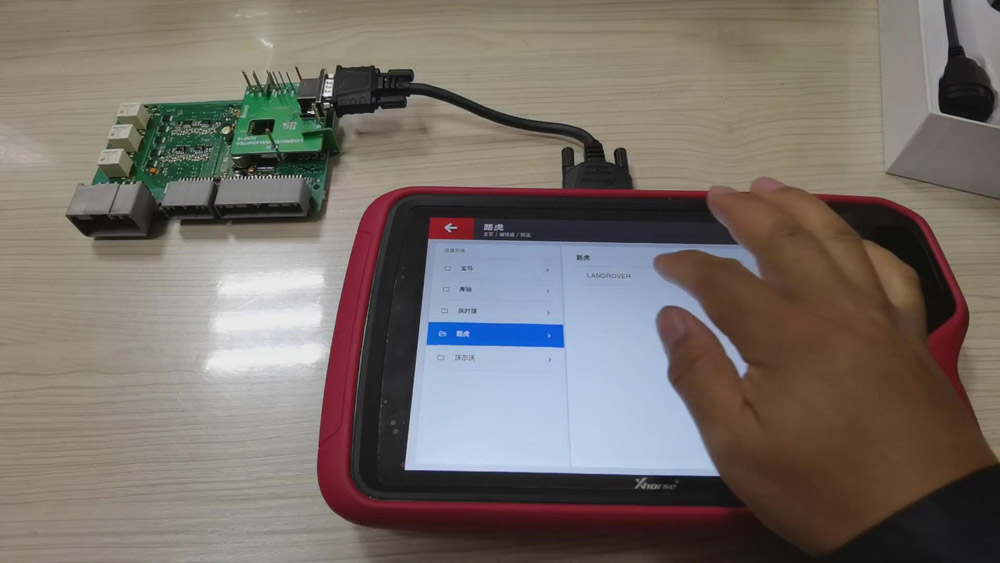
This function supports general remote for lots of car models we can check here. They are classified by areas and brands. let’s go into Land Rover:
Land Rover >> All remotes
It will display different Land Rover remotes to program.
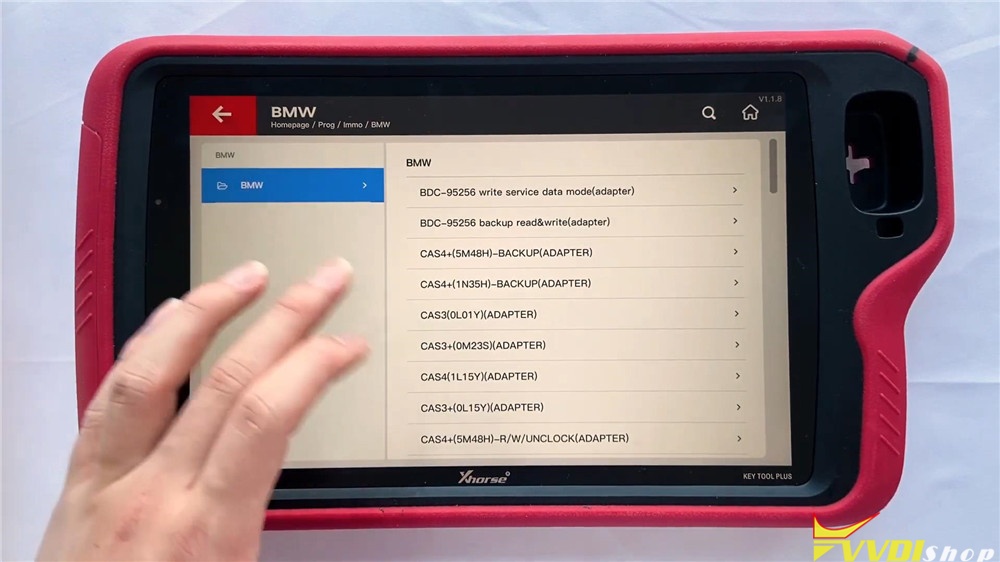
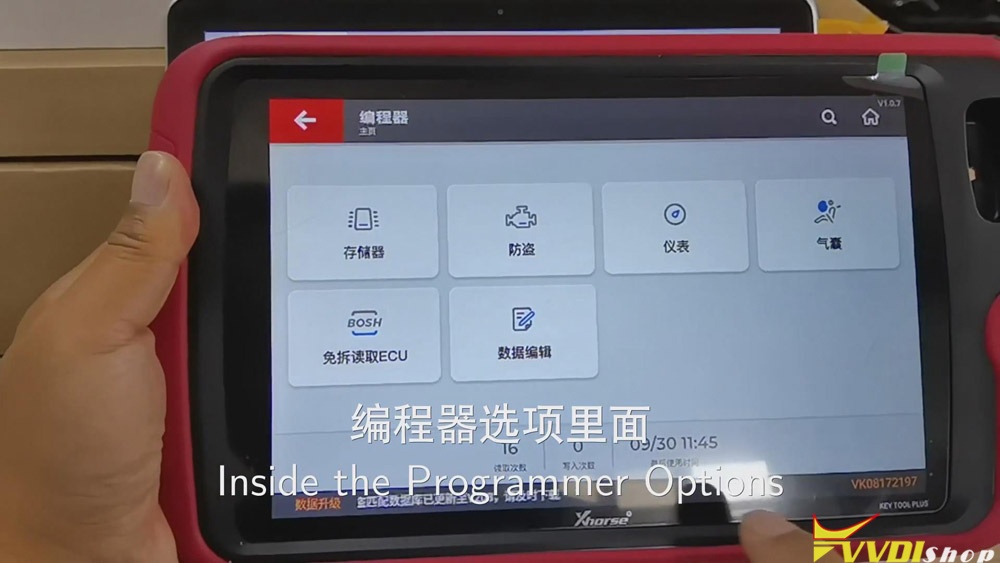
- Prog
There are 8 modules in the function: EEPROM and FLASH, Immo, instrument, airbag, read ECU with CAN, data edit, ECU and other. It can read different types of EEPROM and flash data via adapter.
Let’s get into immobilizer BMW module, it supports different systems such as CAS3/CAS3+ and CAS4/CAS4+, we can read module data here via adapters directly.
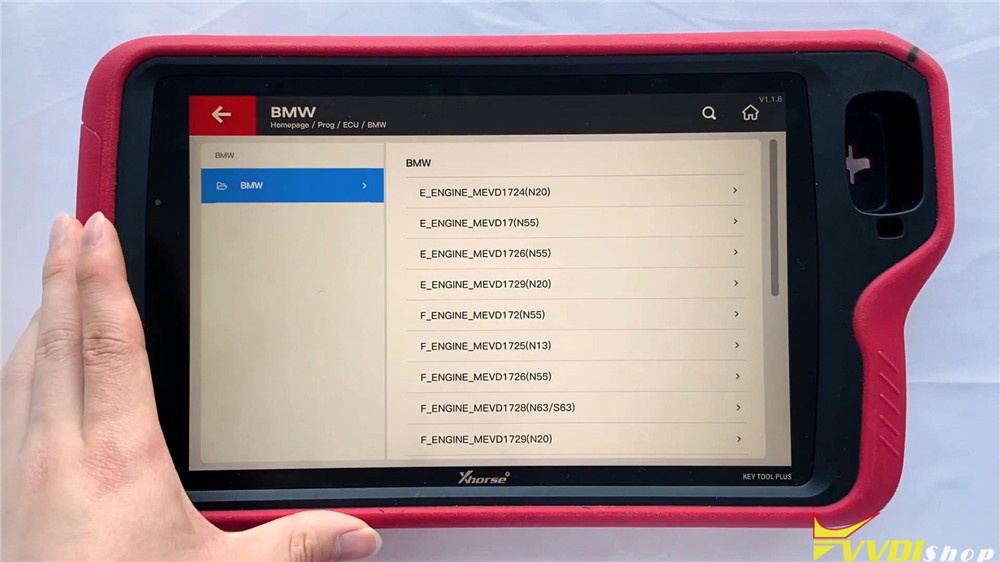
In read ECU module, we can read different BMW engines here.
In other module, we can find FRM of BMW.


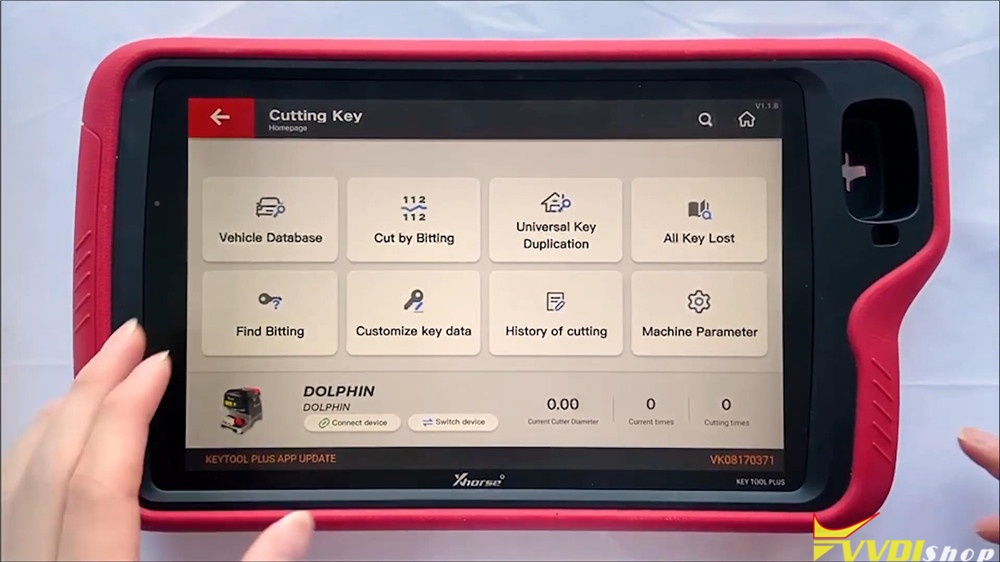
- Cutting Key
This function can connect with Dolphin XP005 Key Cutting Machine to control it. In the function including vehicle database, cut by bitting, universal key duplication, all key lost, find bitting , customize key data, history of cutting and machine parameter.
- OBD Diagnostic
This function has just been released several days ago and will be improved gradually.
- Update
We can update software here in time.
On the bottom of homepage screen, we can click the buttons to quick use AI query, remote clone, immo data tool, special functions or my favorite.
Full video of function overview:
This a brief function overview of new coming VVDI Key Tool Plus Pad diagnostic scanner. Any questions please contact us.
http://blog.vvdishop.com/vvdi-key-tool-plus-pad-function-overview/
Program VW MQB Key with VVDI Key Tool Plus
Please be informed: to match a key successfully with Xhorse VVDI Key Tool Plus Pad, you are required to do 4 things: generate MQB key, read immo data, generate the dealer key as well as learning the key. Here are the detailed steps:
Ⅰ. Generate MQB key
Now, we’ll use Xhorse VVDI smart remote to generate MQB key.
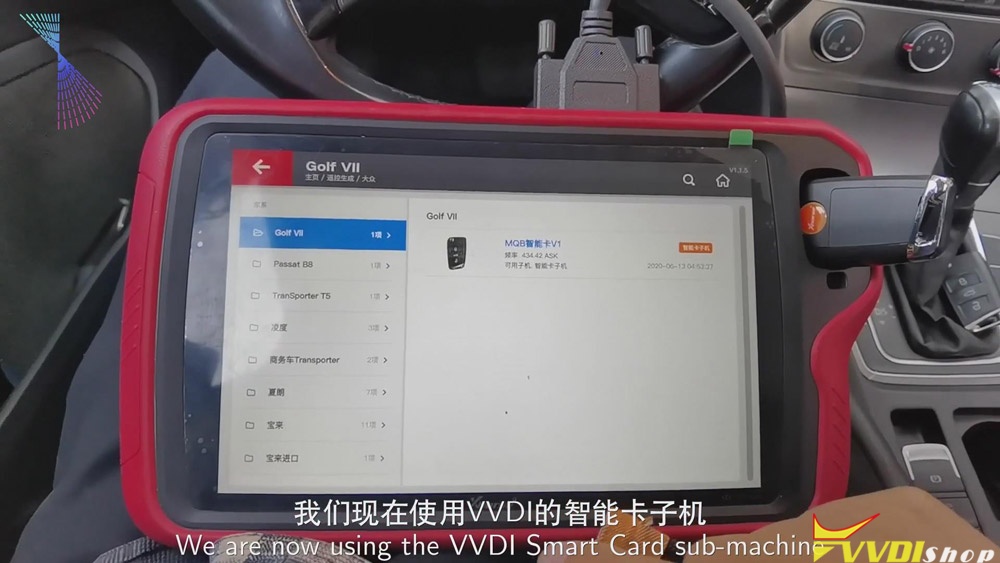
Click “Golf VII”>>“MQB smart card”>>“Generate”.
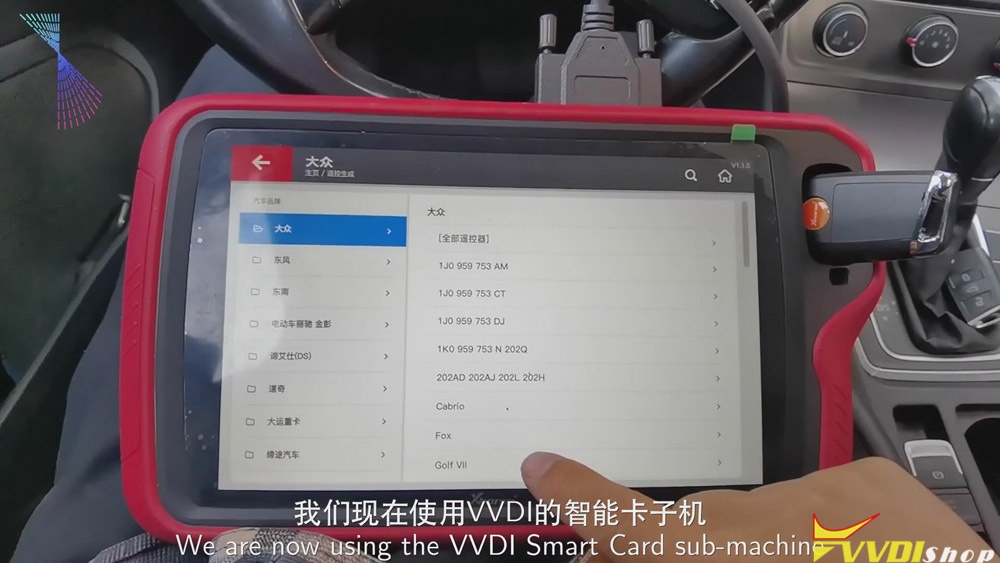
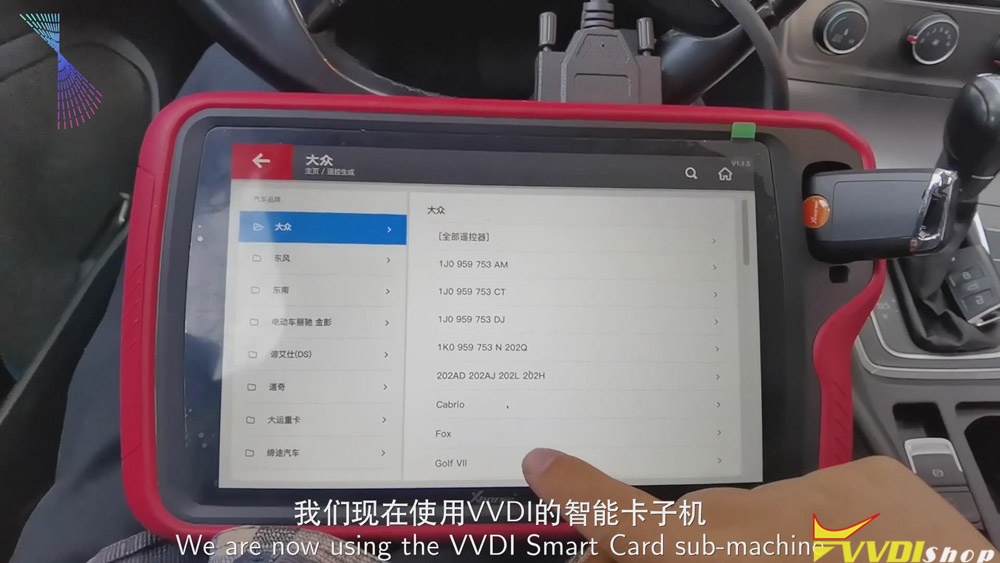
Ⅱ. Read the data
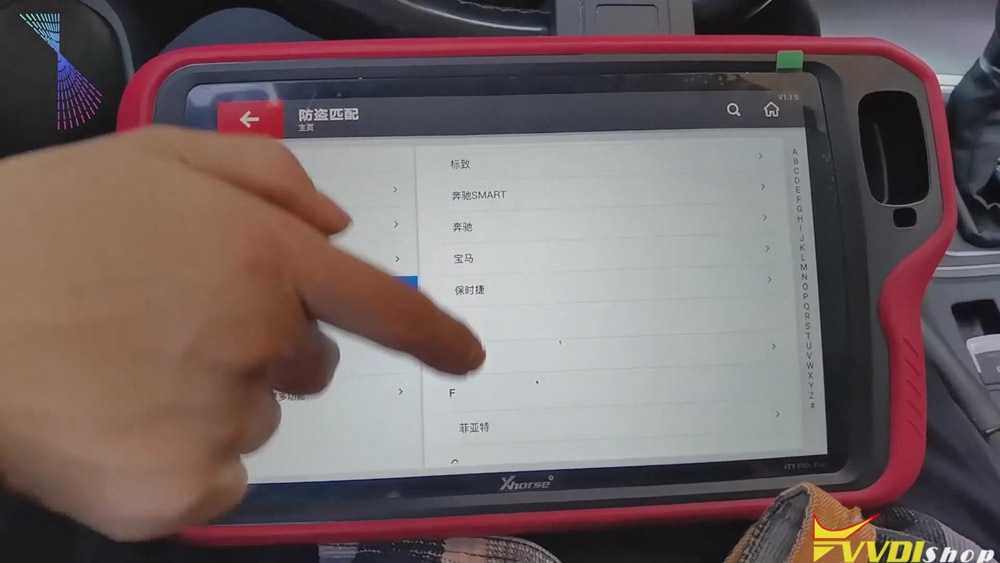
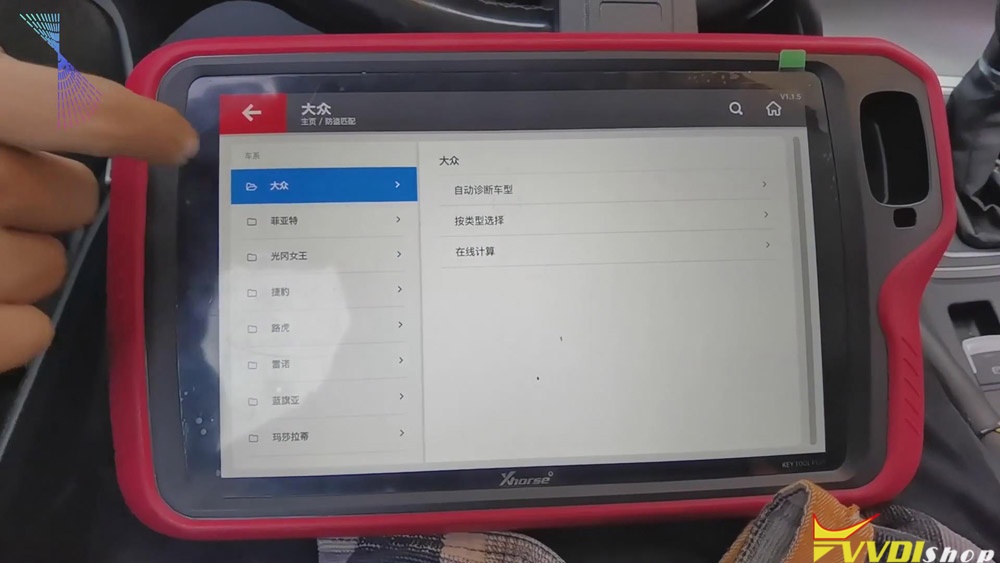
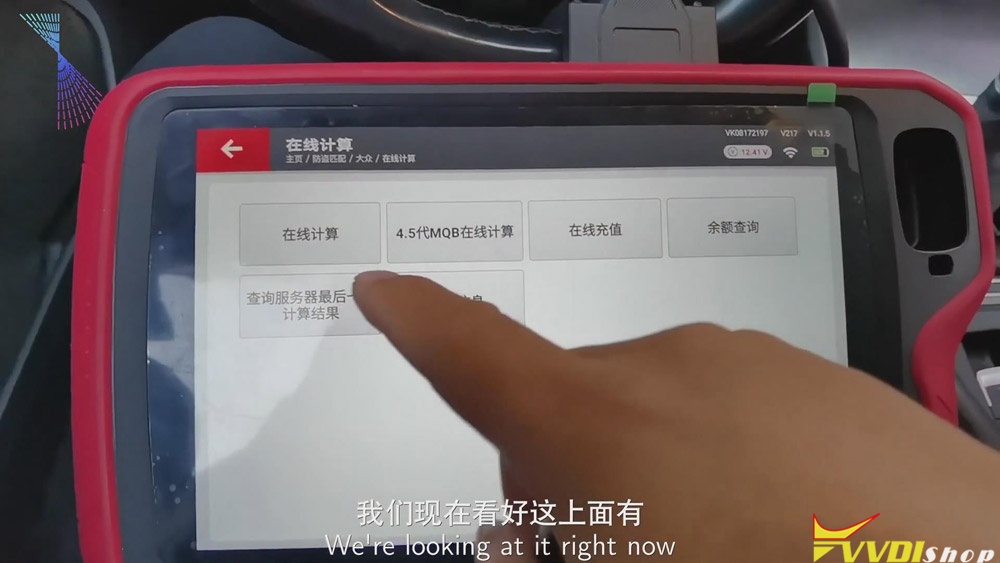
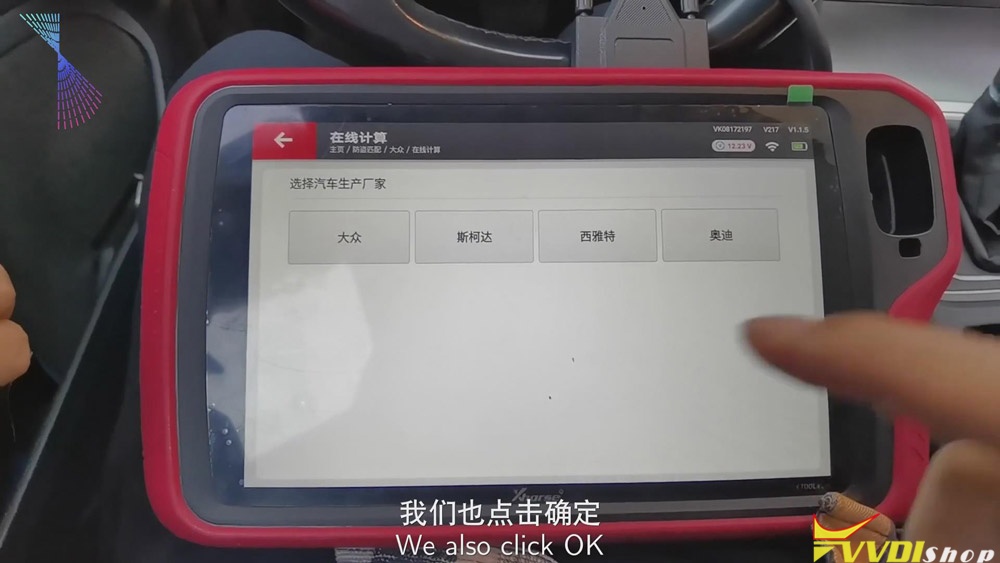
- Click “Immo matching”>>“Europe”>>“Volkswagen”>>“Online calculation”>>“Start”.
- Turn on the ignition and click “Online calculation”>>“Yes”, then the info. of the vehicle will be read.
Ⅲ.Generate the dealer key
- After finishing reading the info. of the vehicle, please recharge and upload the data.
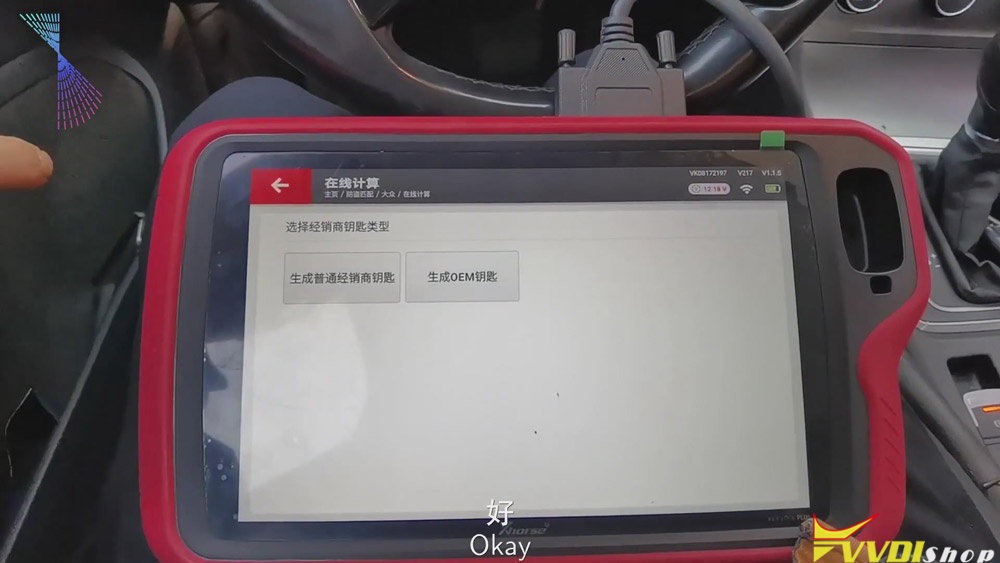
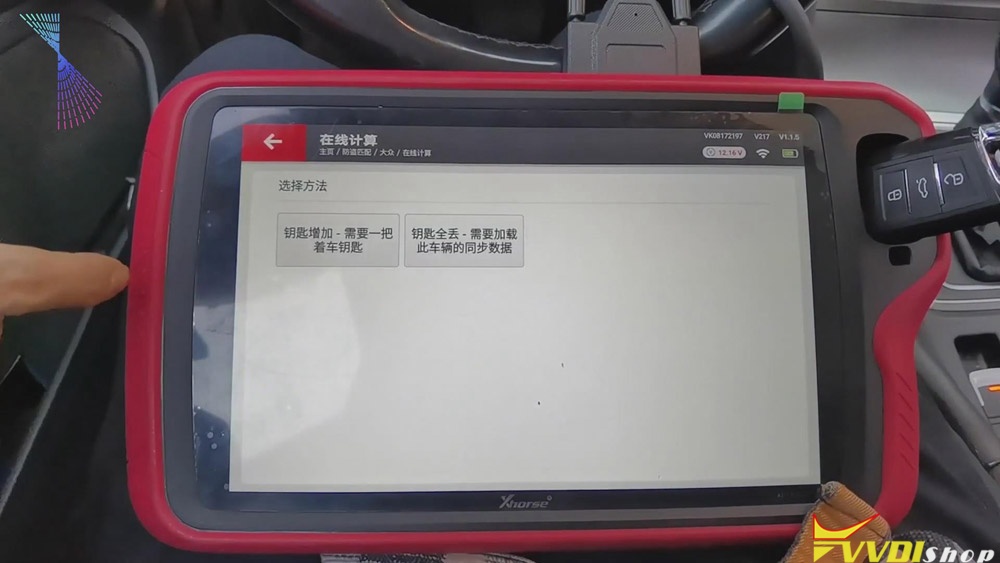
- Then we can begin to generate the dealer key. Click “Volkswagen” >> put the key that we’ve just generated to the detection coil of the tablet >> “Generate common dealer key”>> “Confirm”>> “Yes”>>“Add key-need a key of the vehicle”>>remove the key and put the original key to the detection coil of Xhorse Key Tool Plus and save the synchronous data of the vehicle>>remove the original key and put the new key to the detection coil of VVDI Key Tool Plus.
Ⅳ. Learning the key
- When the dealer key is generated, click “Confirm”>> “Confirm” again.
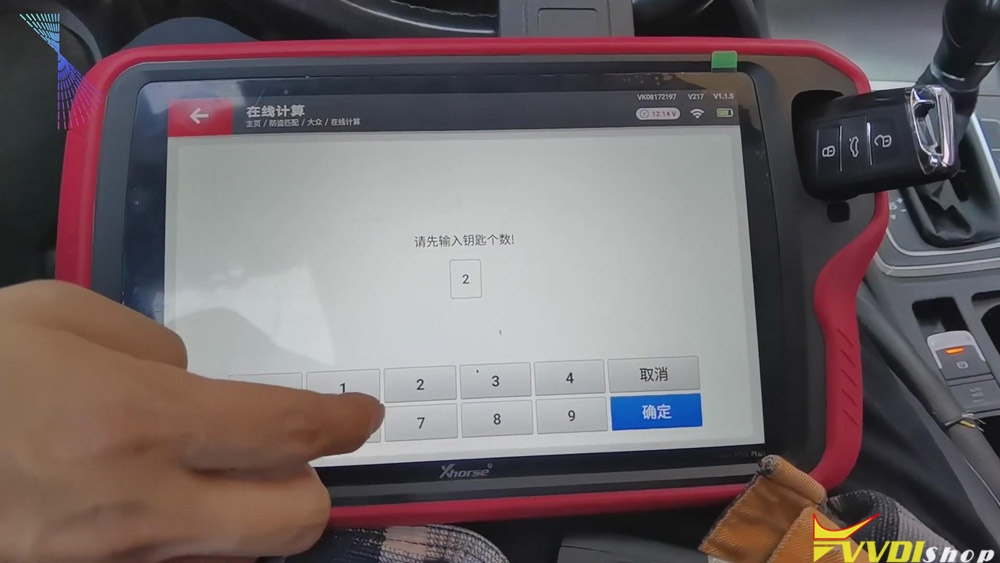
- Enter the number of the key, say, “2”, and click “Confirm”.
- Put the original key to the induction coil of the vehicle and click “Confirm” .
- Click “Confirm” again, then check the meter status, it shows 1-2.
- Remove the original key and put the new key to the induction coil of the vehicle, click “Confirm”. Check the meter status again, it shows 2-2.
- When the key learning is finished, click “Confirm”.
Job on the key matching using Key Tool Plus is done.
Good luck!
Program Golf 7 MQB Key with VVDI Key Tool Plus Pad
Please be informed: to match a key successfully with Xhorse VVDI Key Tool Plus Pad, you are required to do 4 things: generate MQB key, read immo data, generate the dealer key as well as learning the key. Here are the detailed steps:
Ⅰ. Generate MQB key
Now, we’ll use Xhorse VVDI smart remote to generate MQB key.
Click “Golf VII”>>“MQB smart card”>>“Generate”.
Ⅱ. Read the data
- Click “Immo matching”>>“Europe”>>“Volkswagen”>>“Online calculation”>>“Start”.
- Turn on the ignition and click “Online calculation”>>“Yes”, then the info. of the vehicle will be read.
Ⅲ.Generate the dealer key
- After finishing reading the info. of the vehicle, please recharge and upload the data.
- Then we can begin to generate the dealer key. Click “Volkswagen” >> put the key that we’ve just generated to the detection coil of the tablet >> “Generate common dealer key”>> “Confirm”>> “Yes”>>“Add key-need a key of the vehicle”>>remove the key and put the original key to the detection coil of Xhorse Key Tool Plus and save the synchronous data of the vehicle>>remove the original key and put the new key to the detection coil of VVDI Key Tool Plus.
Ⅳ. Learning the key
- When the dealer key is generated, click “Confirm”>> “Confirm” again.
- Enter the number of the key, say, “2”, and click “Confirm”.
- Put the original key to the induction coil of the vehicle and click “Confirm” .
- Click “Confirm” again, then check the meter status, it shows 1-2.
- Remove the original key and put the new key to the induction coil of the vehicle, click “Confirm”. Check the meter status again, it shows 2-2.
- When the key learning is finished, click “Confirm”.
Job on the key matching using Key Tool Plus is done.
Good luck!
How to use Xhorse VVDI Key Tool Plus cloud disk ?
Please be informed: Xhorse VVDI Key Tool Plus Pad cloud disk has the function of transferring data.
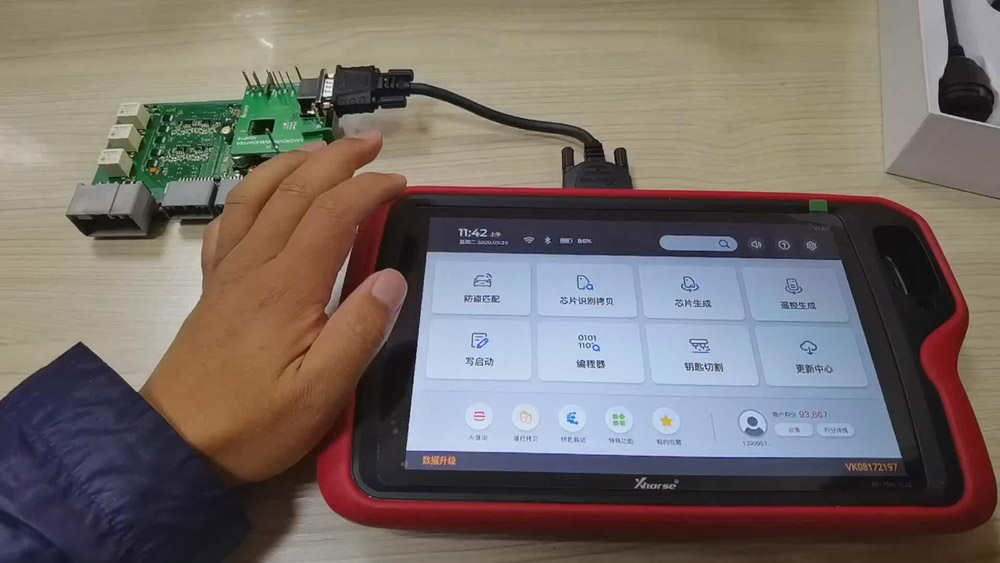
Here are the detailed steps (take JLR KVM module as an example):
What we’ve connected is Land Rover’s KVM module.
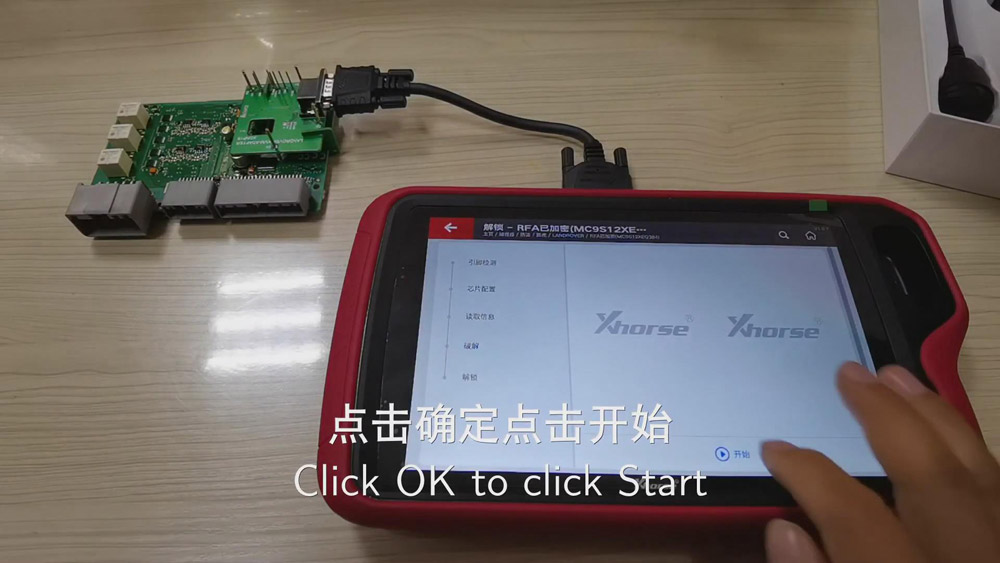
Ⅰ.Decode the chip
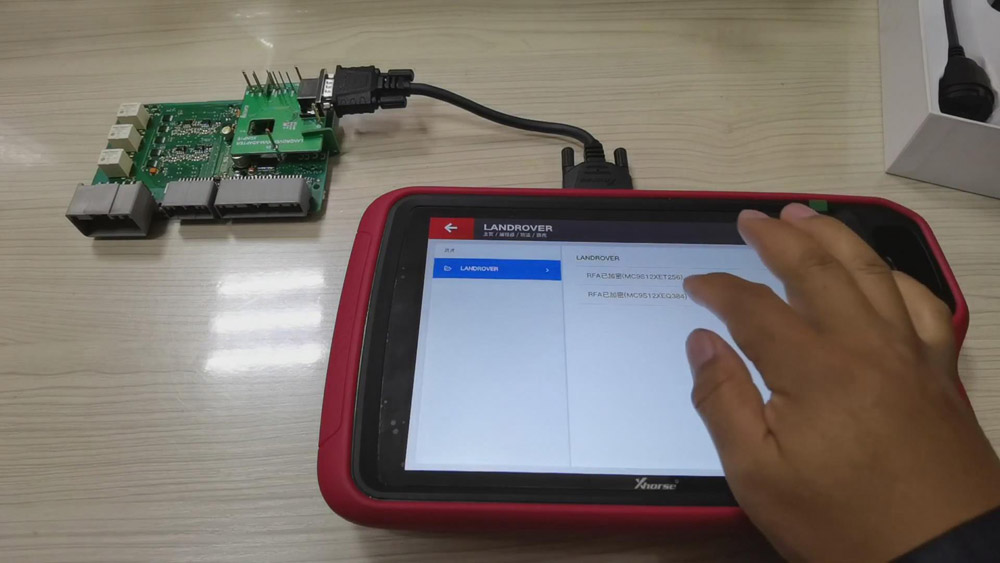
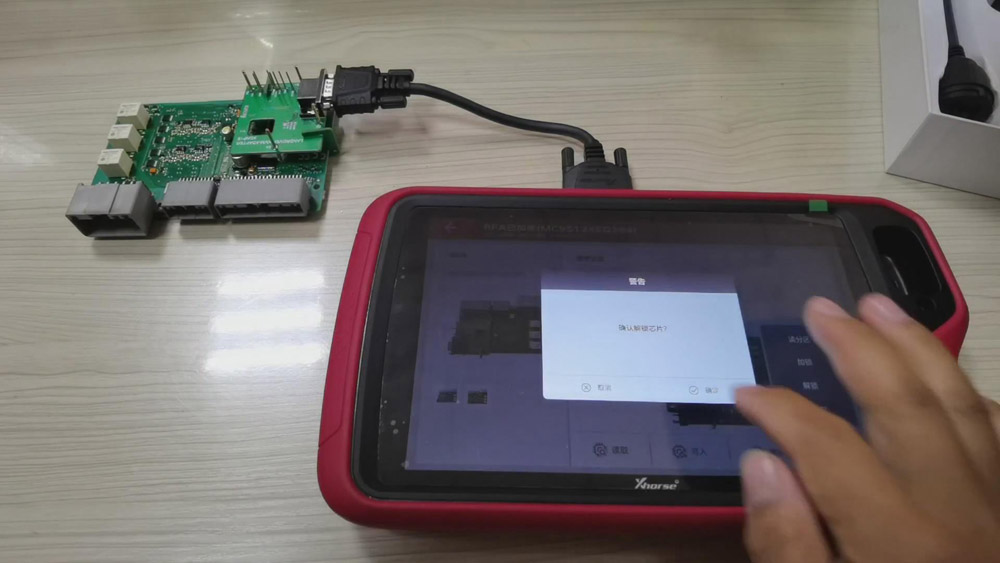
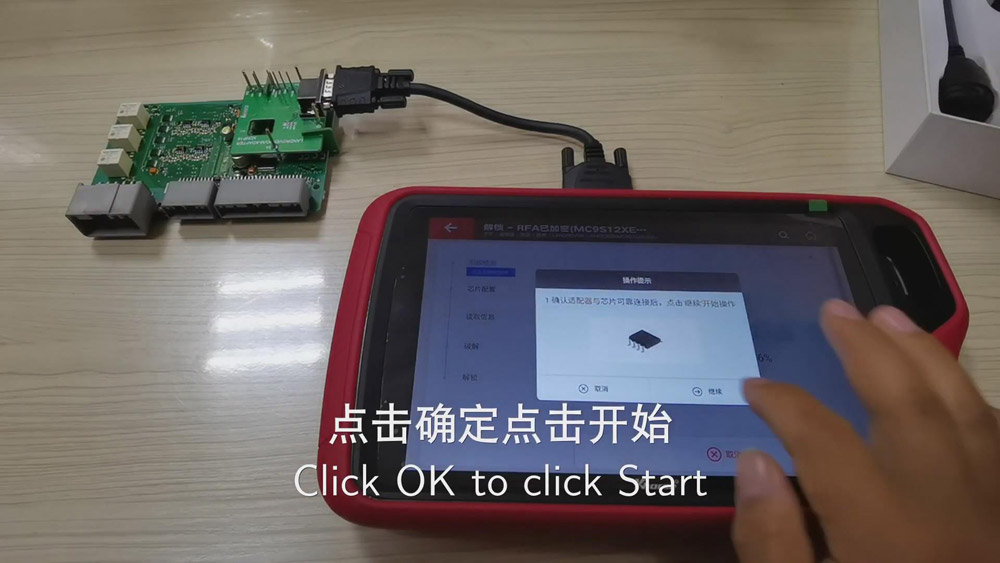
- Now, please click “Programmer”>>“Immo”>>“Land Rover”>>“LANDROVER”again>>“RFA Encrypted(MC9S12XEQ384)”>>“More functions”>>“Unlock”>>“Confirm”>>“Start”>>“Continue”.
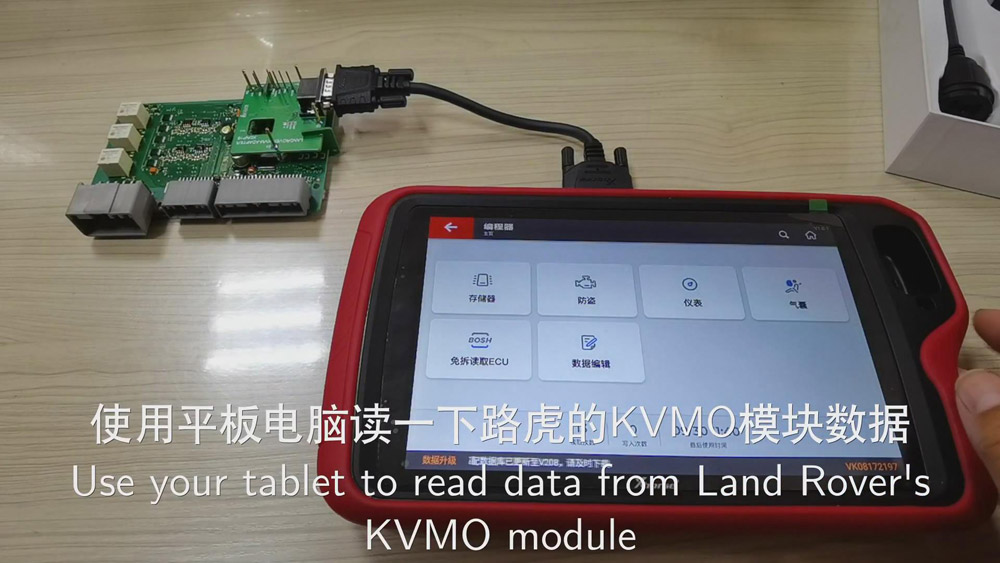

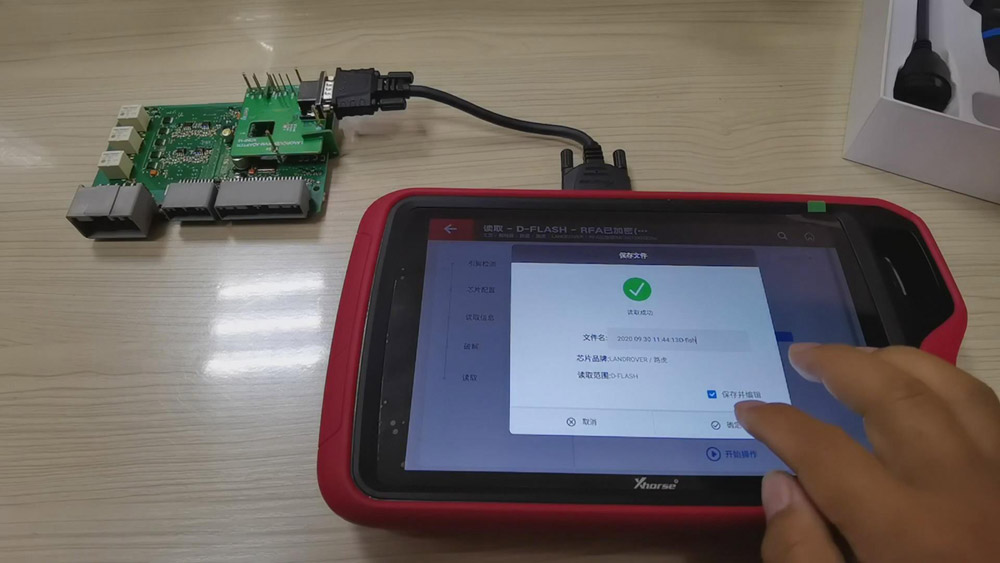
Ⅱ.Read the data
1.When the chip has been decoded, then we can start to read “D-Flash”, then rename and save the D-Flash file.

Read “EEE”, rename the EEE file and save it.
- Read “P-Flash”, rename the P-Flash file and save it.
Ⅲ. Transfer the data
After finishing reading the data, then we can transfer the data freely.
For transferring data to the computer, we need to:
- Open a web page and enter the website address “xhorse.net.cn”, then a QR code will appear.
- Click “Programmer” of the vvdi key tool plus, and choose “Data edit”>>“Scan code&login”, then scan the QR code on the computer and login.

- Enter “Local document” and upload the file we want, say, D-Flash file, the EEE file or the P-Flash file we’ve read just now, to the cloud disk.
- Refresh the web page, then we can see D-Flash file, the EEE file and the P-Flash file. If we want to download them to the computer, we can choose them and click “download”.
For transferring the data to the tablet, we need to:
- Upload the document of the computer, say, “AAAAA” file, to the cloud disk.
- Click “My data” of the tablet, then we can see “AAAAA” file.
- If we want to use the file, then we can download it to the tablet.