ابزار Xhorse VVDI
Xhose VVDI نرم افزار برنامه نویس اصلی و سخت افزارابزار Xhorse VVDI
Xhose VVDI نرم افزار برنامه نویس اصلی و سخت افزارHow to Change Xhorse Remote Frequency by Key Tool Max
Users are allowed to switch the frequency of Xhorse XKGHG1EN garage remote manually, over 20 frequencies are available.
XKGHG1EN Garage Remote is wired remote, so you need to disassemble the key shell to switch frequency.
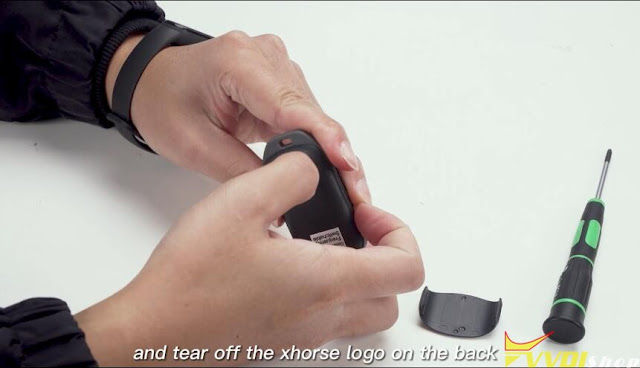
Remove cover of the garage remote
Tear off the xhorse logo on the back
Unscrew the screw with a screwdriver
Take out cover and take out the PCB of the garage remote
You can change frequency via xhorse vvdi key tool plus, key tool max, key tool max pro and mini key tool.
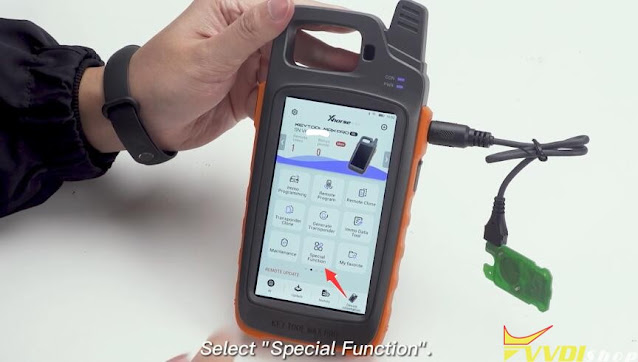
Here we use key tool max pro to change garage remote frequency.
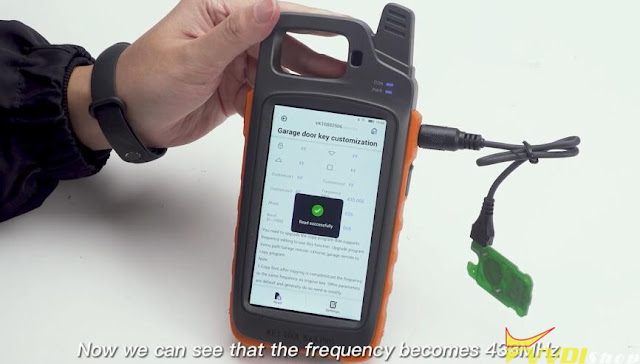
Connect key tool max with garage remote PCB via remote programming cable
Select Special Function->VVDI Remote Function->Garage door key customization
Read remote frequency, it is 315Mhz
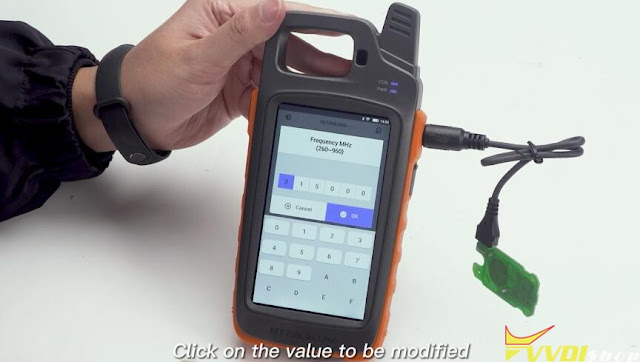
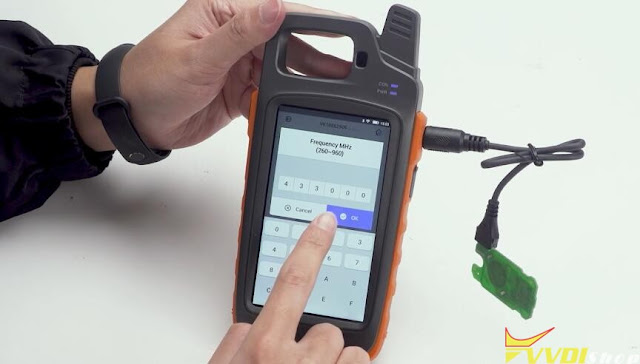
Press the value that need to be changed, i.e 433MHz
Press Frequency offset KHz
the value needs to be within the range it shows, i.e 26
Press settings to complete the modification
Read xhorse garage remote information again, the frequency now goes to 433MHz.
Clone 2010 Fiat Ducato Remote by VVDI Mini Key Tool
Had to share some very surprising news from one of our customers!!
I was working on a flip key for a 2010 Fiat Ducato, and wasn’t able to connect through to the vehicle to program diagnostically.
About to give up, so I attempted a Remote Clone with the Xhorse VVDI mini key tool and lo and behold.. it works perfectly!!
2010 FIAT DUCATO ON A B SERIES FLIP!
Some people says usually it will work perfectly for a few minutes, when you press the original remote the one you made would stop working until you start the vehicle with it.
But i tested it over and over with both keys, everything is perfect, disconnected the body power cable and reset the lot and still works 100%.
Xhorse VVDI2 V7.3.0 Adds Motorcycle Key Programming
Xhorse VVDI2 key programmer released new software V7.3.0 on Jan. 7th, 2023.
*** 2023-01-07
*** Require firmware V7.3.0
************************************************************************
!!!This version require update firmware V7.3.0!!!
===== VAG V7.3.0 =====
1. Improvement autodetect for VAG immobilizer system
2. Bugfix
===== BMW V7.3.0 =====
1.Support make dealer key for motorcycle (Contact vvdishop.com for license)
1). Support 8A smart key via OBDII (Require XM38 motor remote)
2). Support 4D+ transponder key via OBDII (Require VVDI super chip)
2. Bugfix
===== Porsche V7.3.0 =====
1. Bugfix
===== PSA V7.3.0 =====
1. Bugfix
===== Transponder Programmer V7.3.0 =====
1. Improvement prepare remote function
2. Immobilizer data tool: Euro->Opel->IMMO-1->68HC05 bugfix
3. Bugfix
===== Copy 48 (96 bits) V7.3.0 =====
1. Bugfix
===== J2534 V7.3.0 =====
1. Bugfix
===== Online Upate Tool V7.3.0 =====
1. Bugfix
===== Quick Start V7.3.0 =====
1. Bugfix
Xhorse Condor II Setup, Calibrate and Update Guide
This is a guide on how to setup, calibrate & test, update Xhorse Condor XC-Mini Plus II key cutting machine for the first time. Read this article carefully to learn.
How to prepare Condor II?
- Plug in device, and power it up.
- Remove brands & loosen milling bolts with provided hex wrench, then insert probe into left-side clamp, cutter into right-side.
- Align probe and cutter at visually even height once tightened.
- Fully inset M5 clamp from right to left into clamp vice, secure in place.
How to setup & bind Condor II?
- Select preferred language, accept privacy policy and continue.
- Connect to WiFi
- Log in Xhorse account to get security code, press “OK” to bind device.
Device activation success.
How to calibrate & test Condor II?
- Setting >> Device calibration >> Height calibration >> Start
Tip: install M5 clamp then select A position(side A is upwards) and tighten left, don’t insert key blank.
- Once complete begin “Cutting Calibration”, insert HO01 test key, align with last mark, flat and secured into place before starting.
Use debris brush to remove all metal shavings from the clamp and key surfaces then continue.
- Clamp Deviation >> M5-A clamp, insert and align HON66 test key to fifth and final marker. Press “Start”.
When completed, move on to side-B and place key blank into the channel, sitting atop of the clamp surface before tightening.
Tip: Incorrect insertion will result in an error code and red flashing hazard to signal need of adjustment. Simply correct and continue.
- Begin “Motor Measurement”. Run each test once to ensure proper function and movement of all rotors, for all 4 angles off motion.
- In order to test the “Electrical Conductivity”, use a key blank to ground the probe or cutter to the clamp. Green circle means good connection.
How to finish settings & upgrade?
- Select “Cutting Setting” to see available adjustments or setup options available to make the Xhorse Condor 2 your perfect cutting machine.
- Go to Update and install any every time they are available to ensure perfect function.
Once updated, check out the fully-packed, ready to work Key and Vehicle Lists.
https://www.vvdishop.com/service/set-up-calibrate-and-update-xhorse-condor-ii.html
How to Fix VVDI Prog JLR BCM XEP768 Partition information error
Problem:
I try to clone a JLR BCM XEP768 (2009-)with xhorse vvdi prog, i get a message. Partition information error.
What is the correct way, to get the full data, needed to clone these.
Solution:
Use this
Set D-Flash partition to 128 sectors (32K)
Set EEPROM partition to 0K
Pinout LANDROVER BCM 2009 MC9S12XEP768







.jpg)
.jpg)
.jpg)
.jpg)
.jpg)
.jpg)
.jpg)
.jpg)
.jpg)
.jpg)
.jpg)
.jpg)
.jpg)


