ابزار Xhorse VVDI
Xhose VVDI نرم افزار برنامه نویس اصلی و سخت افزارابزار Xhorse VVDI
Xhose VVDI نرم افزار برنامه نویس اصلی و سخت افزارHow to use Xhorse Dolphin XP005L to Cut HU66 Key?
This is an Xhorse Dolphin XP005L Review for the first time to cut a VW HU66 key. I have an original working key, so will test its decode function as well.
Power on Dolphin XP005L machine, there’s a line of light is awaken. Go to
Vehicle database >> Volkswagen >> All key blank >> HU66
Align M5 clamp side B as prompted.
Fix the VW working key on.
OK >> Learn key
Dolphin II machine starts decoding…
The blue light is normally on that means it’s working.
Wait decoding key complete.
Remove the key, and fix a blank key on.
Cut key >> Cut


Dolphin II machine starts cutting.
Just wait…
Cutting key completed.
Clear the debris and turn over the key to cut other side.
Once again as previous.
Once cutting was done, take out the key to compare.
It’s same as the original one.
Dolphin II XP005L is quite a smart and easy Xhorse Key Cutting Machine. The HU66 key cutting turns out to be accurate and workable.
Tips to Generate Toyota RAV4 Xhorse XM Smart Key
I tried to use the Xhorse Toyota XM smart key for a Rav4 2015 (8A transponder) 312.10-313.10 MHz but just work start engine touching start button with the key, remote functions do not work, is any option for this dual frequency? Is not in xhorse key tool max any option for xm key 312.1-313.1 frequency. xm key is 8A transponder and is possible learn it to the car, remote do not work.

Tips & Solution:
You can customize Xhorse XM proximity frequency in this path:
Special function/VVDI remote function/XM smart key customization
Tips to generate Xhorse XM smart remote:
- Read original key chip, make sure it is the same type as XM transponder
- Read original key frequency, make sure it is the same as XM smart key
- Remove the battery from original key during the programming process
- Put the original key to the Start button, once beep, change XM smart key (with battery) to Start button within 5s
- Remove XM key, if XM key indicator flashes, programming succeeded, otherwise program XM smart key again.
Related post:
Xhorse VVDI Key Tool Plus Customize Toyota 4D 8A XM Smart Key
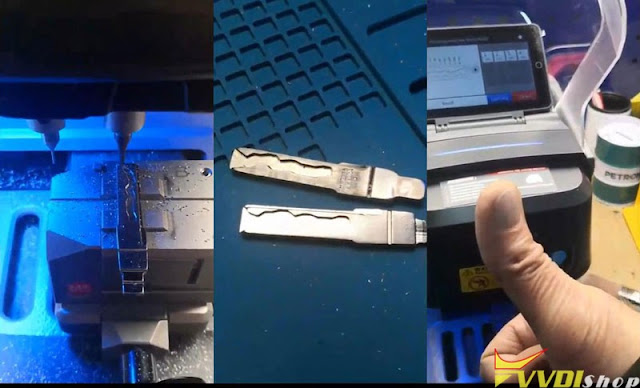
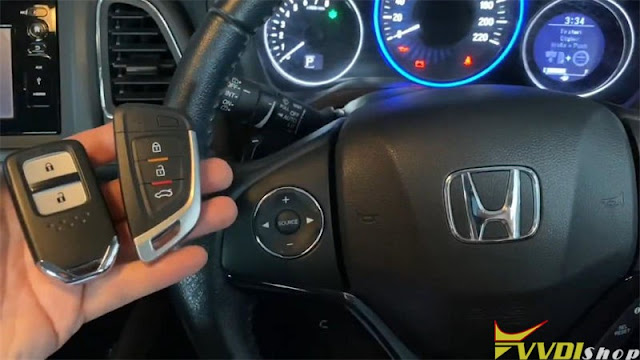
How to Program Honda HR-V 2017 Key with VVDI Key Tool Plus?
Xhorse VVDI Key Tool Plus Tablet can add a smart remote key for Honda HR-V 2017 via OBD successfully. Work with XSKF01EN Smart Key for programming.
Original remote info:
Frequency: 433MHZ FSK
Chip: 47PCF 79338
Generate Remote
Put the new smart key into VVDI Key Tool Plus coil, go to
Remote program >> Honda >> HRV >> HRV(2016-2019) KeylessGo ID47 434M >> Generate
It’s writing data, wait 1-2 minutes..
Burn success.


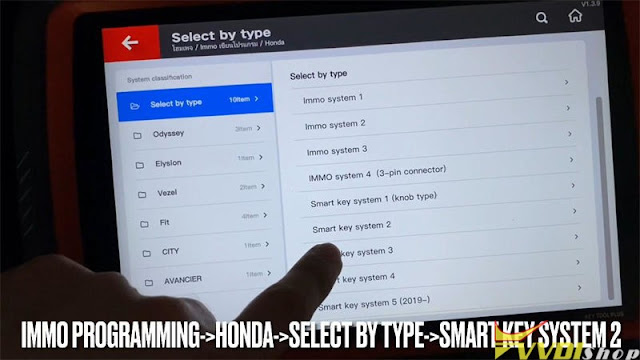
Program Key
IMMO programming >> Honda >> Select by type >> Smart key system 2 >> Start programming >> Add a smart key
Follow the instruction to operate:
Turn off ignition switch.
Switch ignition on.
Key number: 1
Take all smart keys out of the car.
Put a programmed smart key inside the car.
Take all smart keys out of the car.
Put the new smart keys in the car.
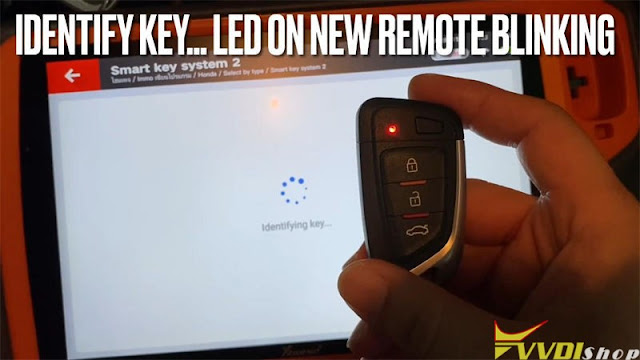
It’s identifying key…
The LED on new remote will blink.

Turn off ignition switch.
Switch ignition on.
Turn off ignition switch.
Turn on ignition switch.
Whether indicator light is out? Yes
Turn off ignition switch.
Switch ignition on.
Turn off ignition switch.
Switch ignition on.
Key number: 2
Smart key registration completed!
Test the new remote, it’s OK.
It can start the engine as normal.
Done!

Renew BMW PCF7953 Smart Key Comfort Access by VVDI Key Tool Max
Here’s the tutorial on unlocking/renewing BMW smart key comfort access (non OEM) remote with xhorse vvdi key tool max remote maker.
OEM come sealed so you have to have aftermarket shell to replace OEM. Old shell is trash after cutting open!
BMW 2004-2010
Smart key/Comfort Access
FCC KR55WK49147
Aftermarket
Remote (None OEM)
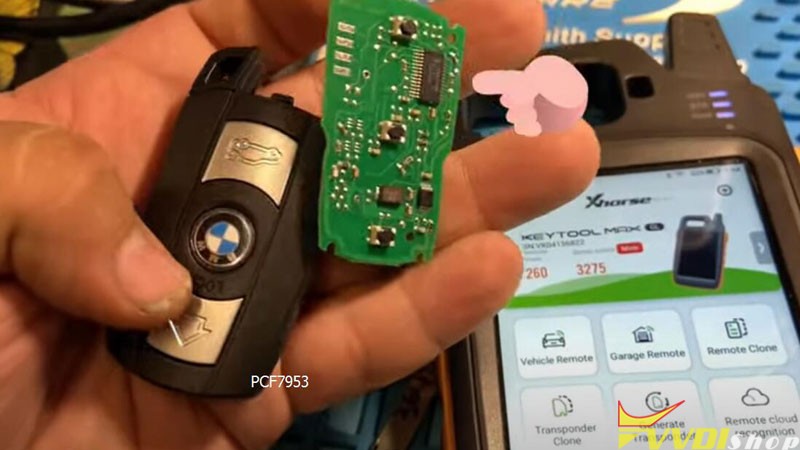
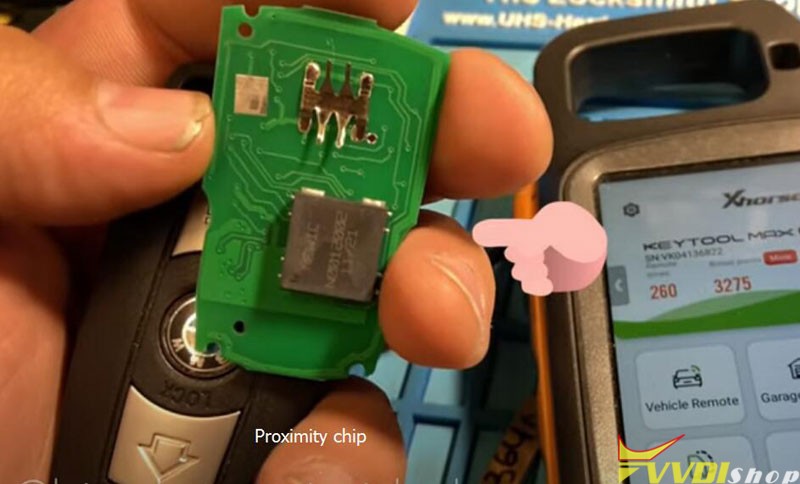
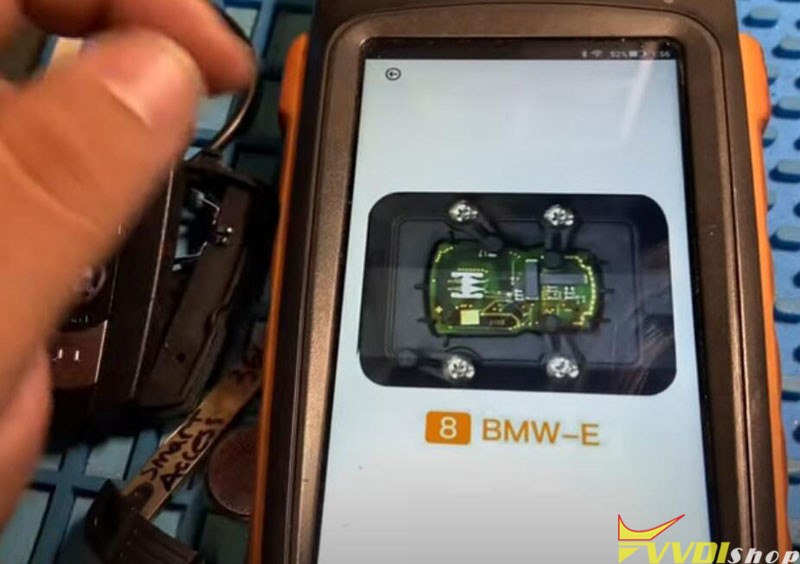
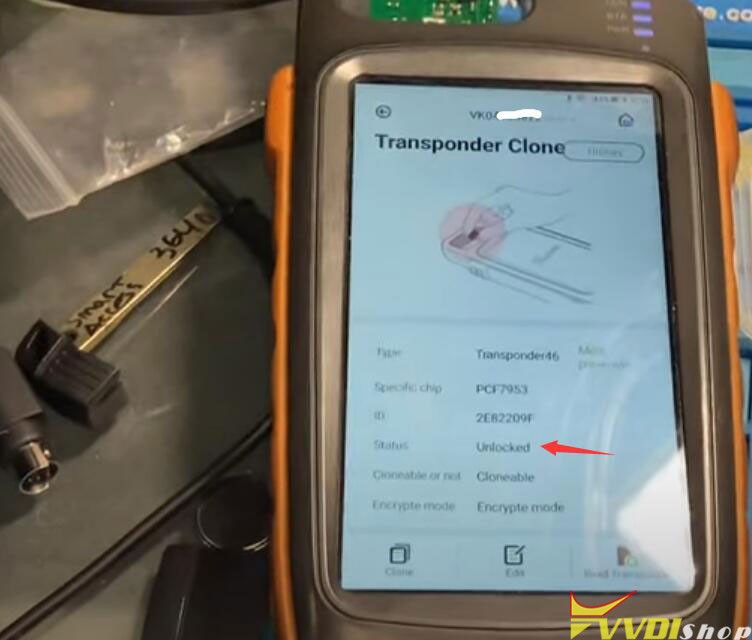
Chip PCF7953
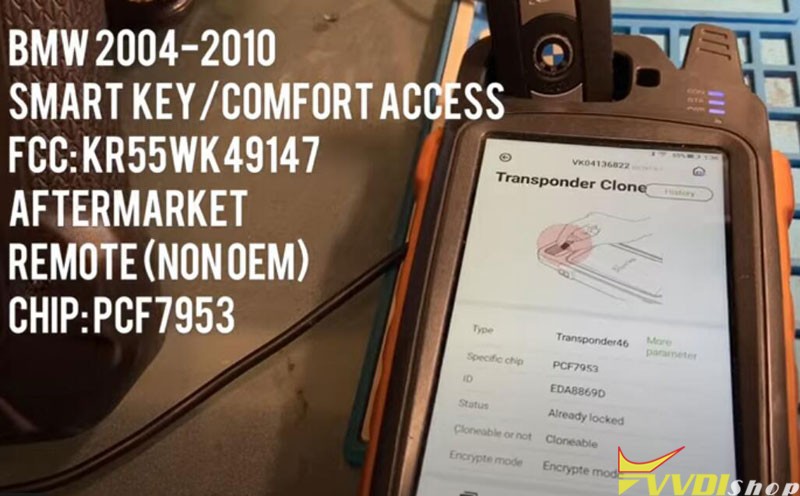
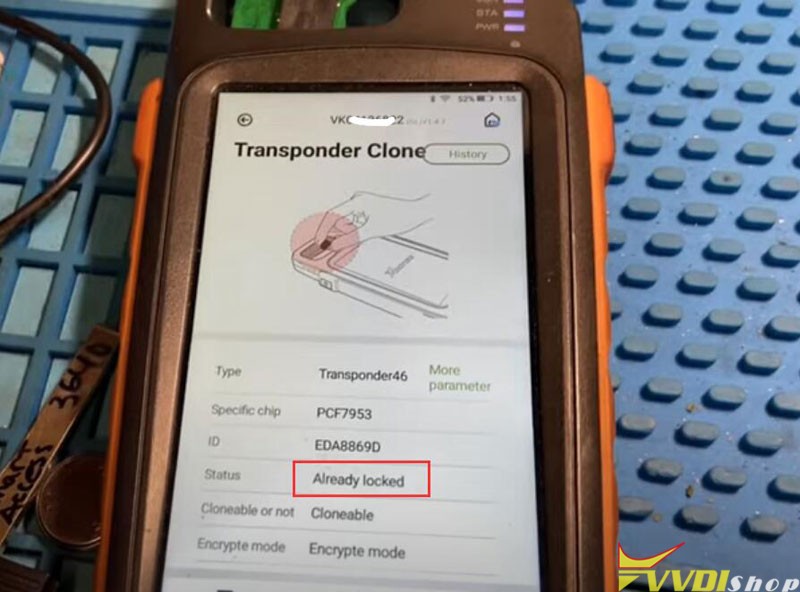
Status: already locked.
In key tool max, go to Special function- Remote Renew- BMW- 5WK49147 E series 315MHz Smart Key
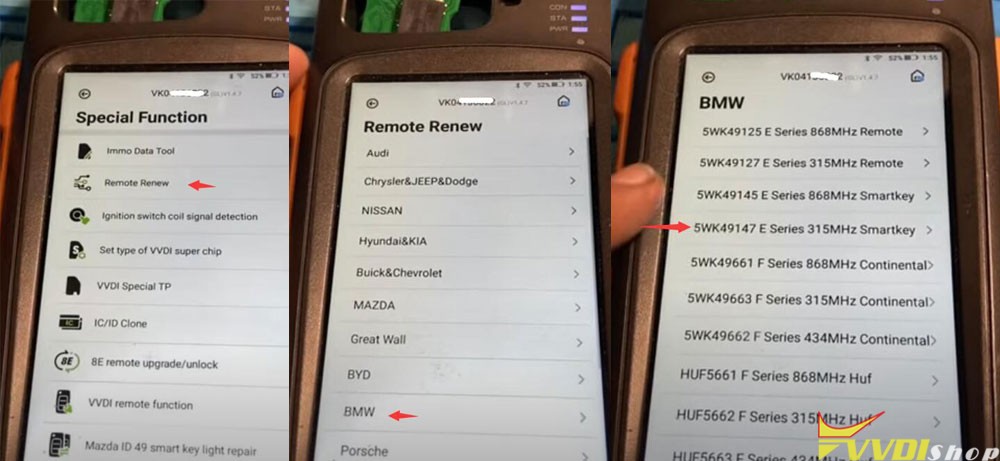
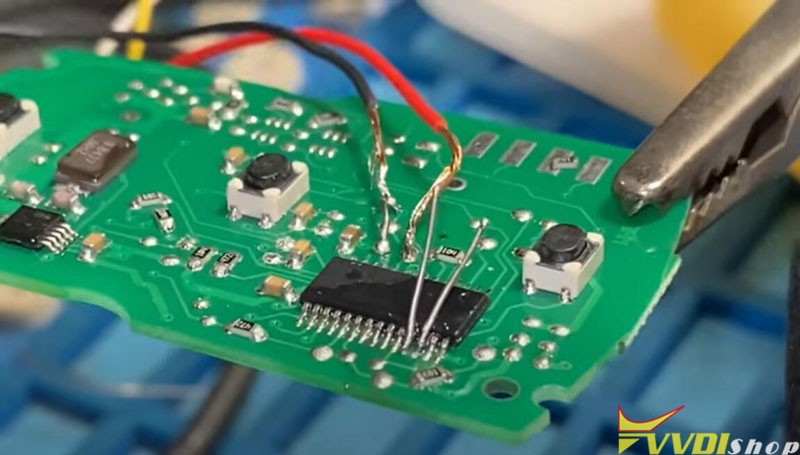
You have two options to unlock smart key, by xhorse renew adapter or soldering
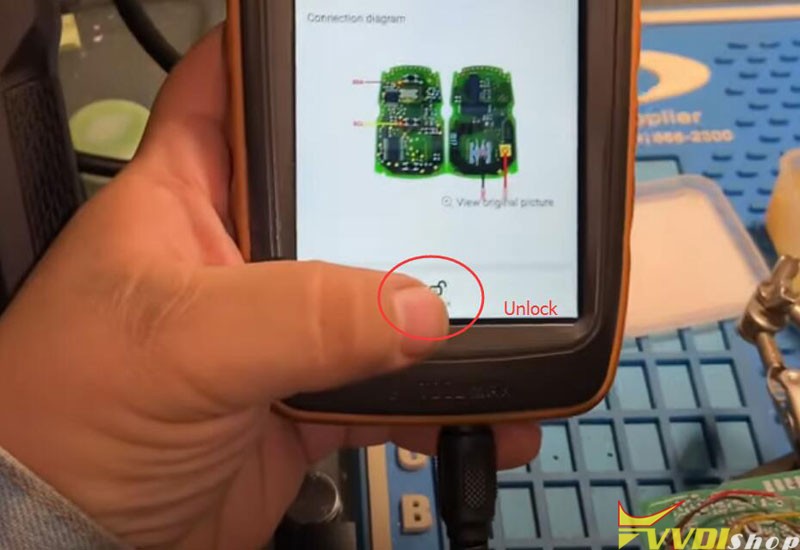
key tool max will show you wiring diagam
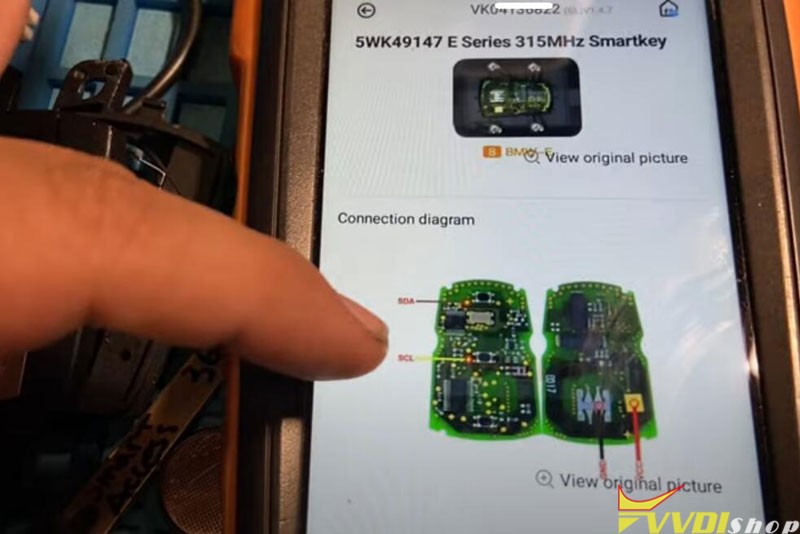
We don’t have renew adapter so we have to solder
A renew cable is required. You can make your own renew cable or buy additionally
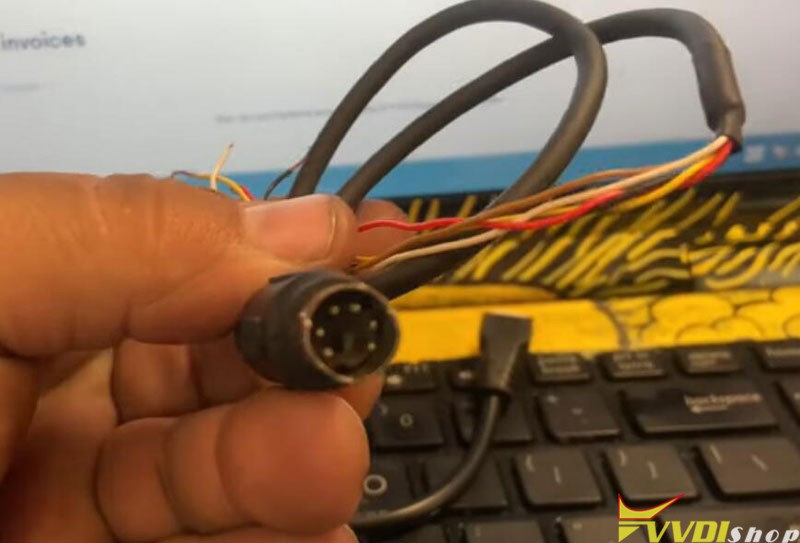
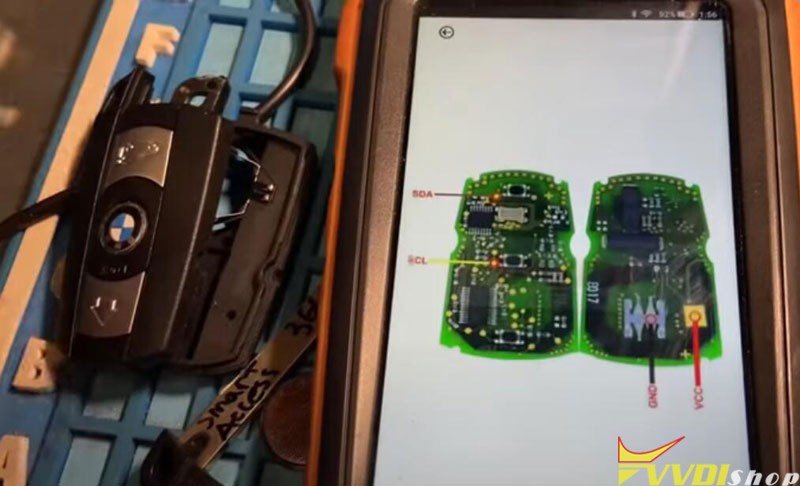
Follow key tool max wiring to connect key board with renew adapter
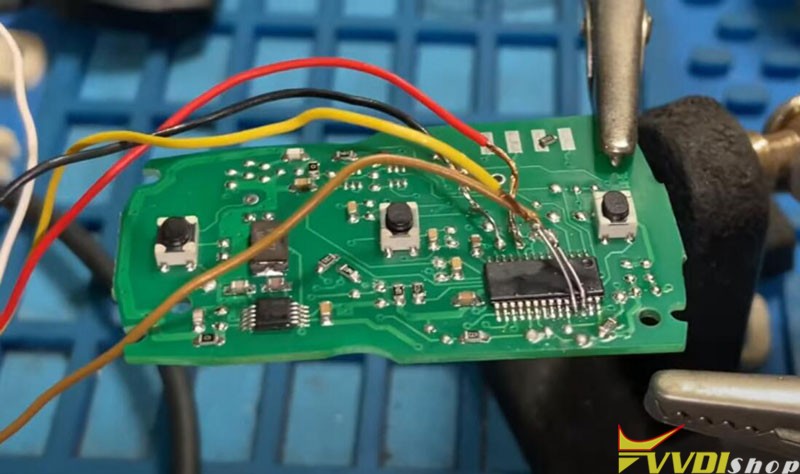
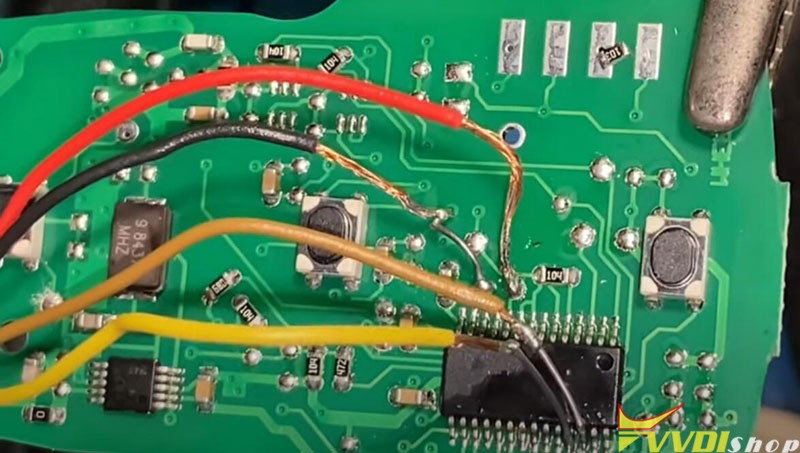
Press UNLOCK
Renew smart key success
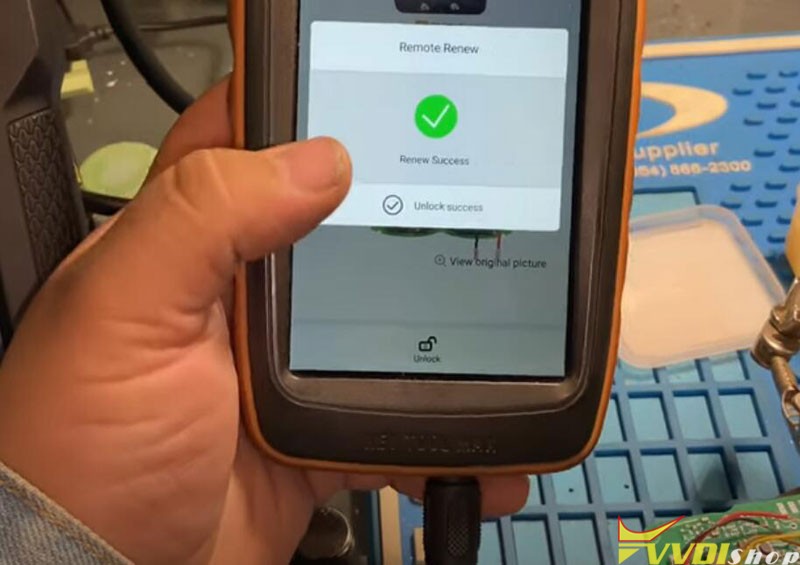
the smart remote has been unlocked successfuly
Install key shell. The smart key can be programmed to car with obd programmers.
Condor mini Plus II Engrave a Unique Key
Key blank engraving is an optional cutter newly developed for Xhorse Condor XC-Mini Plus II key cutting machine. The cutter allows locksmiths to engrave a unique key as need. It supports to engrave numbers, letters and simple patterns.
The older model such as Condor Mini Plus or Dolphin XP005 is not available for this feature currently.
How to engrave a unique key blank?
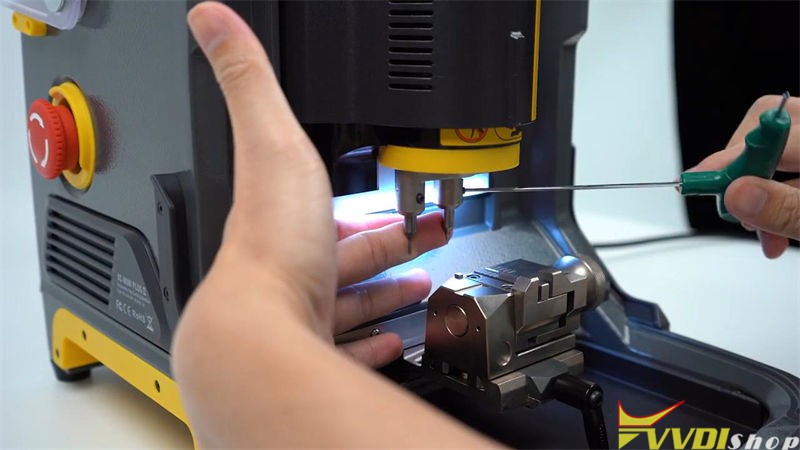
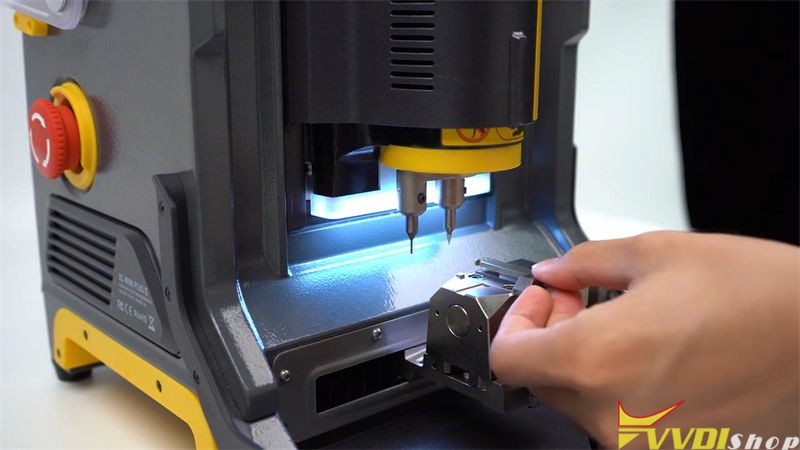
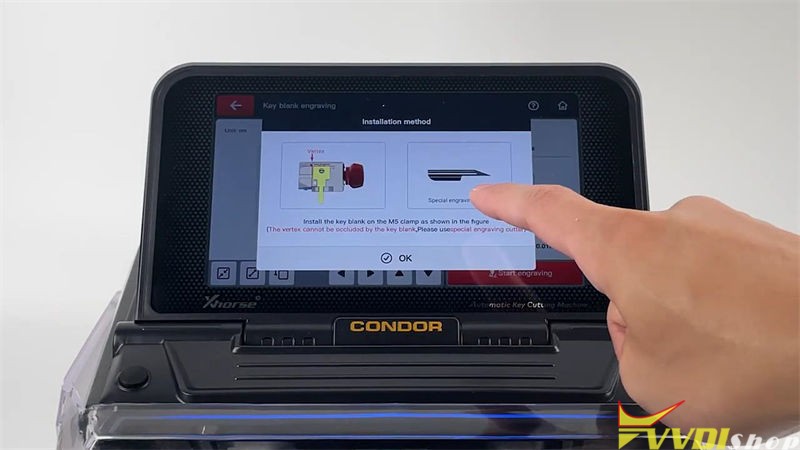
Step1. Insert the engraving cutter and key blank.
Install the key blank on M5 clamp.
The vertex cannot be occluded by the key blank.
Please use special engraving cutter.
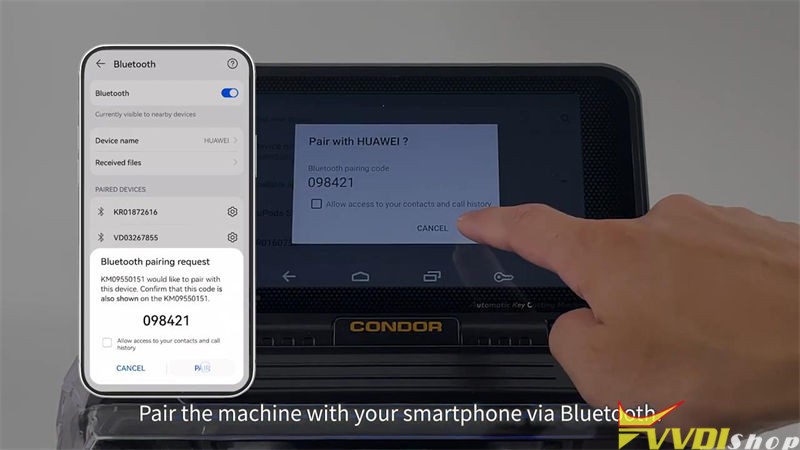
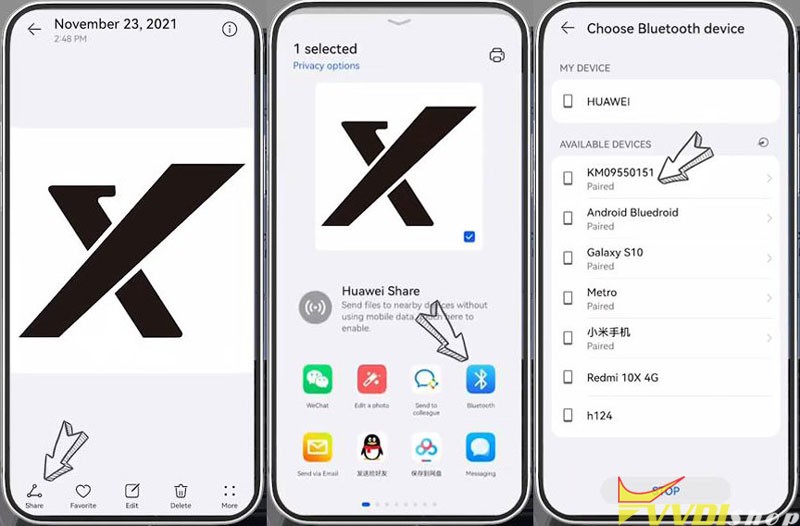
Step2. Send the picture to be cut to Condor XC-Mini Plus II.
- Pair XC-Mini Plus II with smartphone via Bluetooth(Bluetooth >> Pair new device);
- Ensure the picture is in PNG format with transparent background;
- Select picture to send.
Step3. Choose the picture and start to engrave.
Key blank engraving >> OK >> Add pictures >> Adjust the image to appropriate position
You can adjust its engrave spacing & engraving depth.
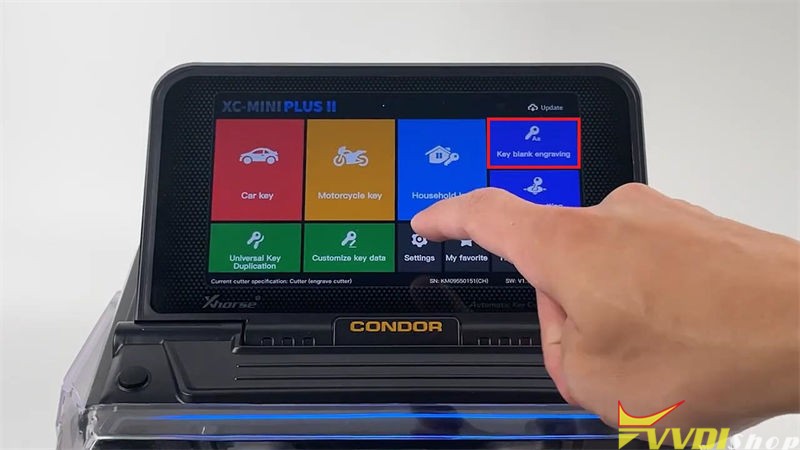
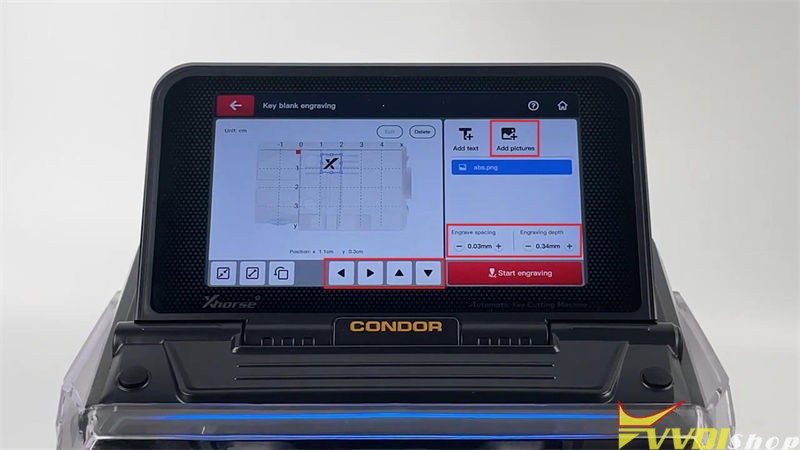
Press “Start engraving” after finished.
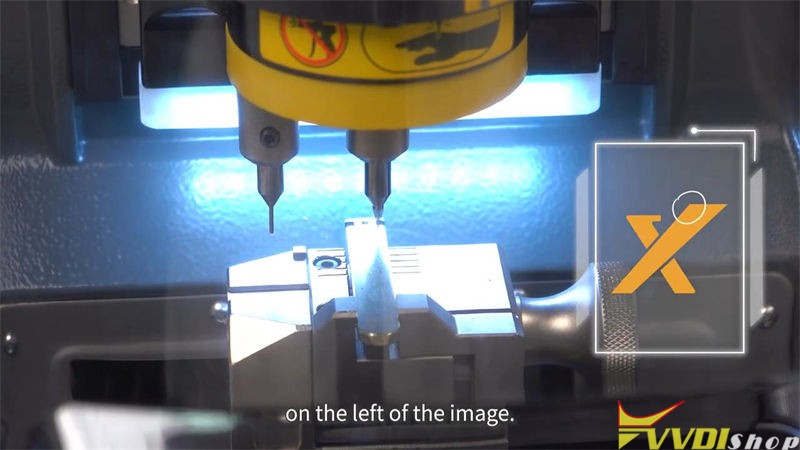
Note: the first dot engraved will start from the highest point on the left of image.
Condor Mini Plus II will starts engraving automatically.
Just wait…
Engraving completed.
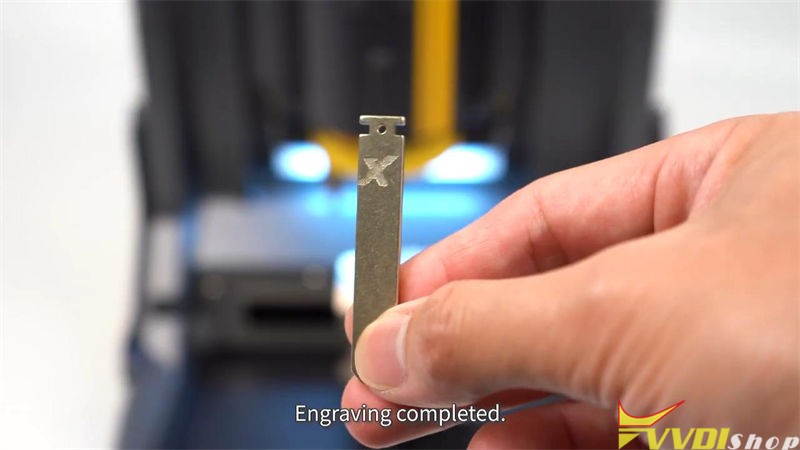
This is how to use Condor XC-Mini Plus II machine to do key blank engraving function.
You may interest:
What’s new in Xhorse Condor XC-Mini Plus II?
http://blog.vvdishop.com/what-is-new-in-xhorse-condor-xc-mini-plus-ii/
More info to be updated…