ابزار Xhorse VVDI
Xhose VVDI نرم افزار برنامه نویس اصلی و سخت افزارابزار Xhorse VVDI
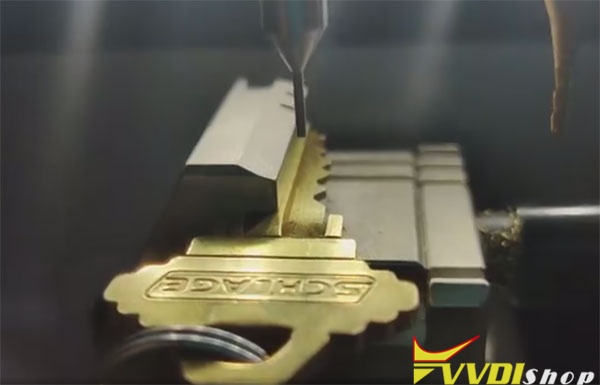
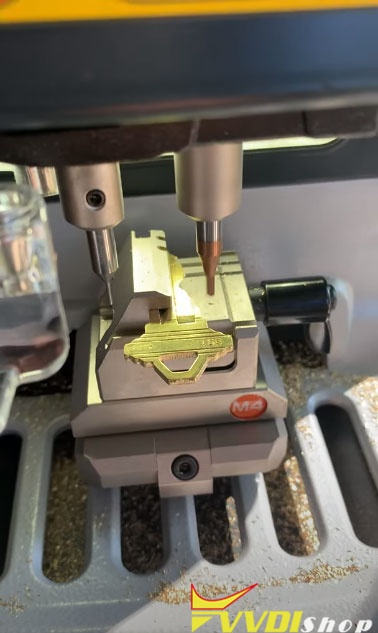
Xhose VVDI نرم افزار برنامه نویس اصلی و سخت افزارXhorse Dolphin XP005 Cut SC1 key
Problem:
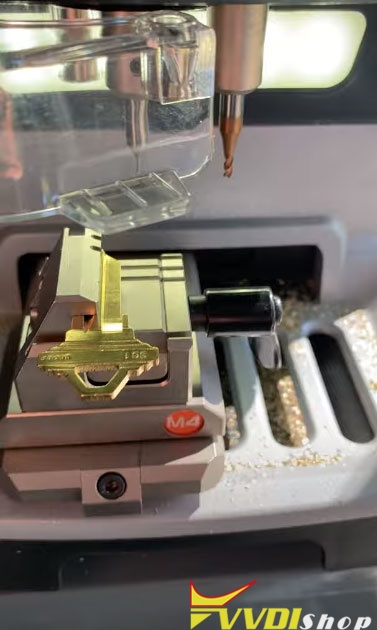
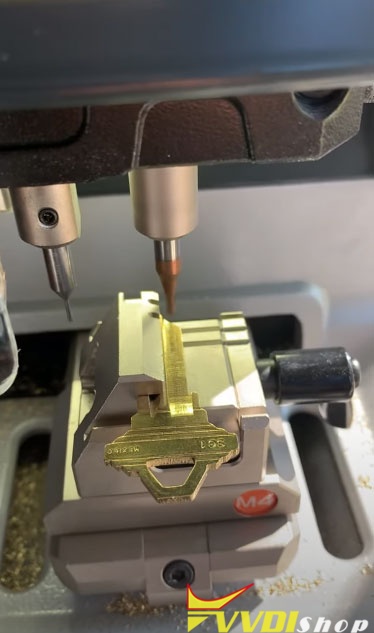
I have Key decode error with xhorse m4 jaw.
The Xhorse application doesn’t let me calibrate the m4.
My work around has been to pause the machine mid decoding and then lower the probe with a allen wrench.

Suggestion:
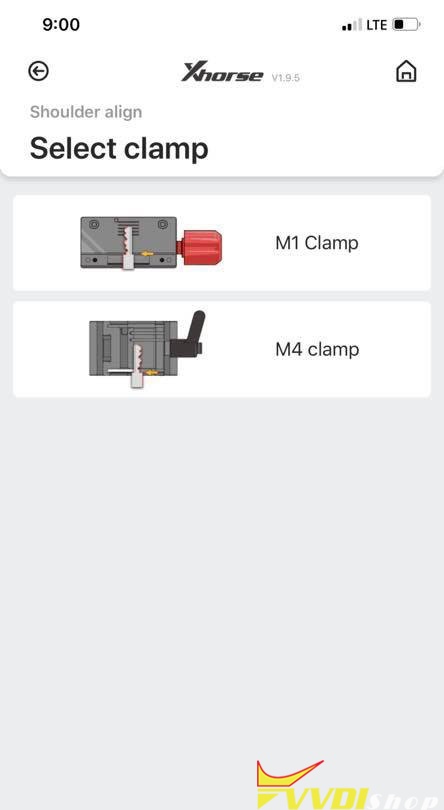
You can go under universal duplication.
Sc1 doesn’t have a key profile on xhorse app.
Select M4 clamp.
If you can put something under to lift it up a bit it should work.
Xhorse Dolphin XP005 Sc1 key traced on the Dolphin and cut on the dolphin key machine with 2.5 cutter and the m4 jaw.
Program Benz GL450 2013 KeylessGo with VVDI MB
How-to: Program Xhorse KEYLESS-GO key for Mercedes-Benz 2013 GL450 GL-Class 4Matic (add a spare key) with Vvdi MB BGA Tool.
Device required:
Original smart key
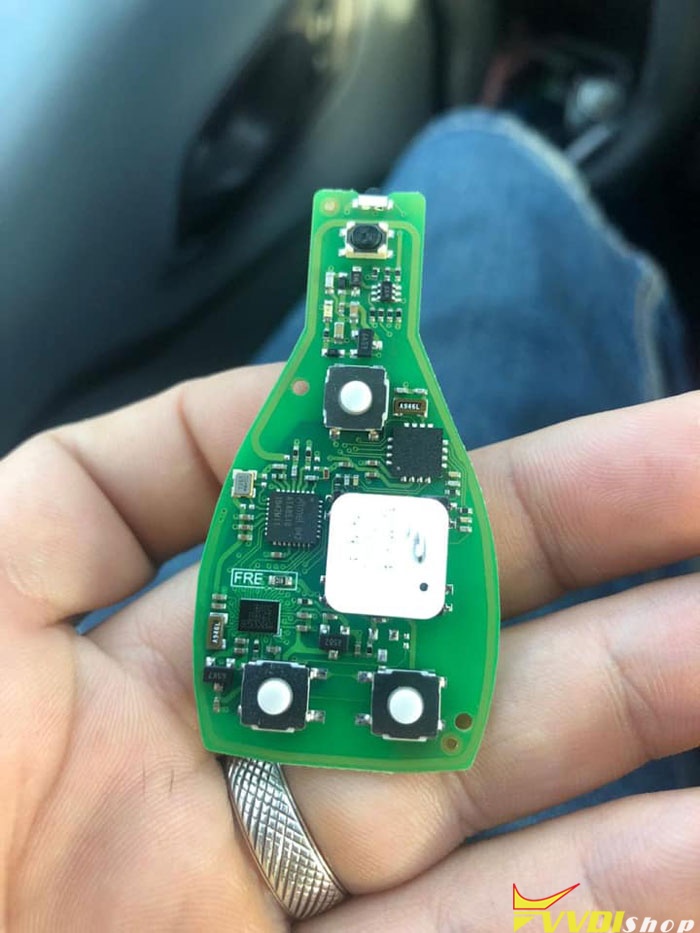
* The vvdi FBS3 keylessgo smart key can be used on W204 W207 W212 W164 W166 W221.

Procedure:
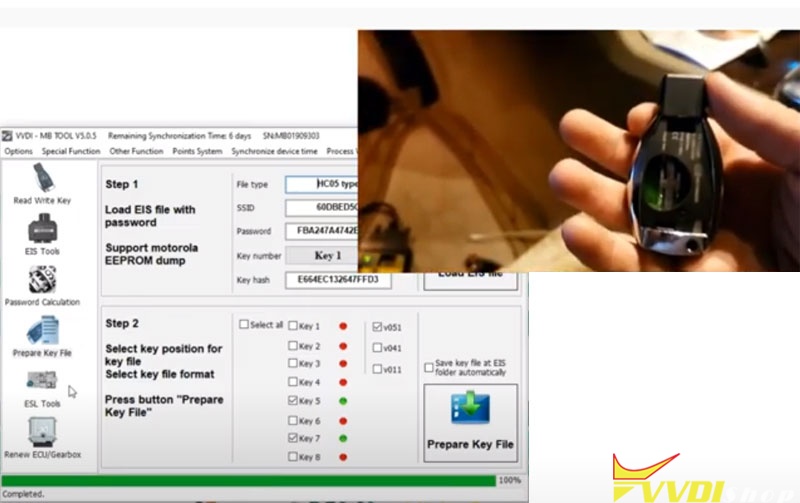
First of all calculate key password online and copy the pass

Read EIS data

Paste key password to corresponding area
Save EIS data
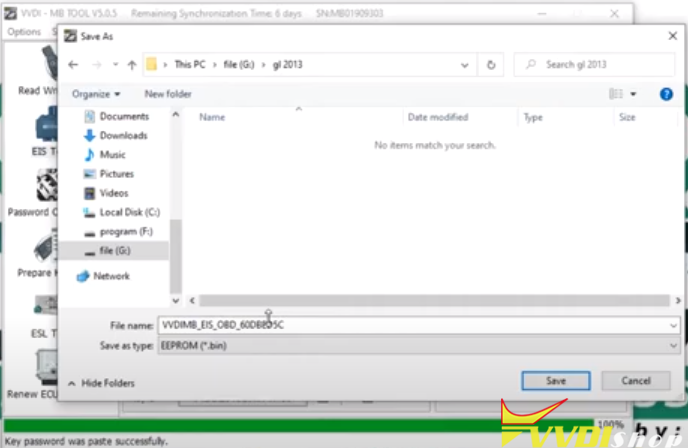
Save data as HC05 format

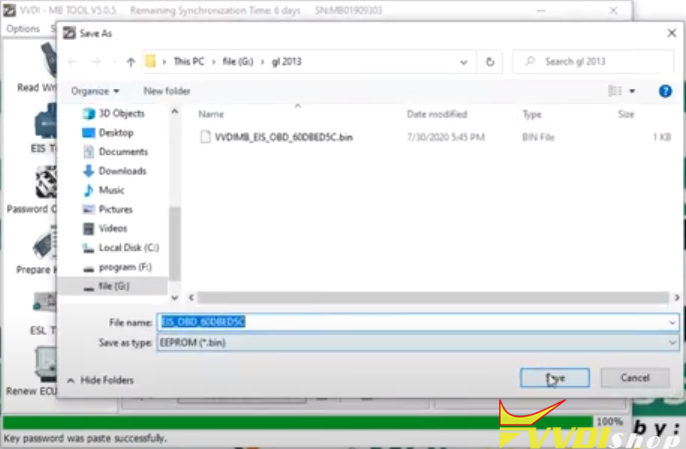
Choose Prepare Key Fille->Load EIS File

Select unused key position (i.e key 5 & key 7), and V51 format, Press Prepare Key File

Save key data

Go to Read/Write Key-> Identification Key

Renew key

Select key data file (key 7)
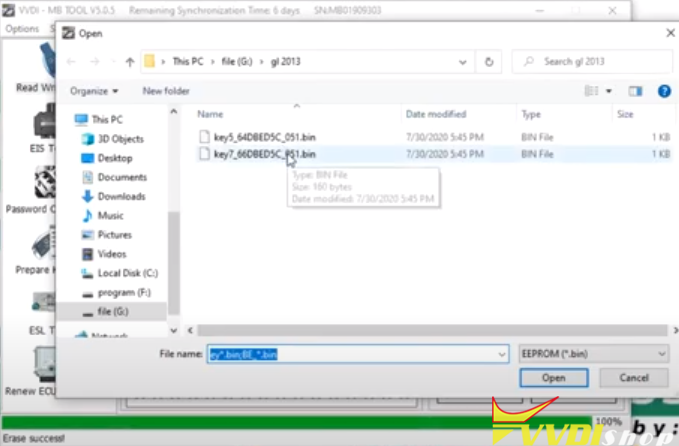
Write key

Write key success

Test the new keylessgo smart key
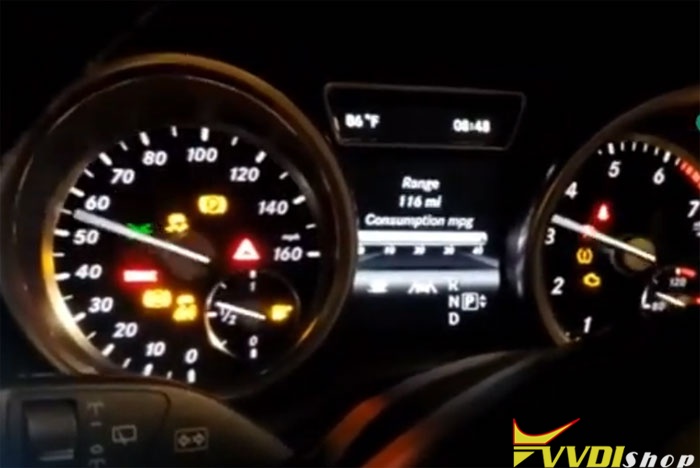
Done.
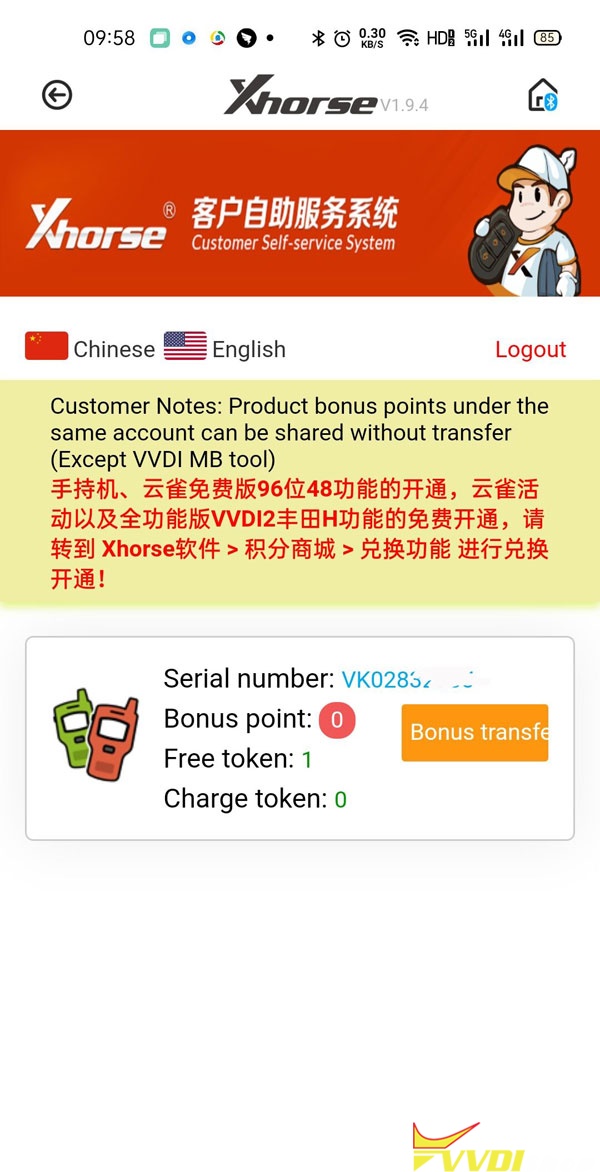
How to check Token for VVDI Mini Key Tool?
To check how many tokens left in Xhorse vvdi mini key tool, you need to register Xhorse app and combine device first.
1. After combine device in Xhorse app, select Account
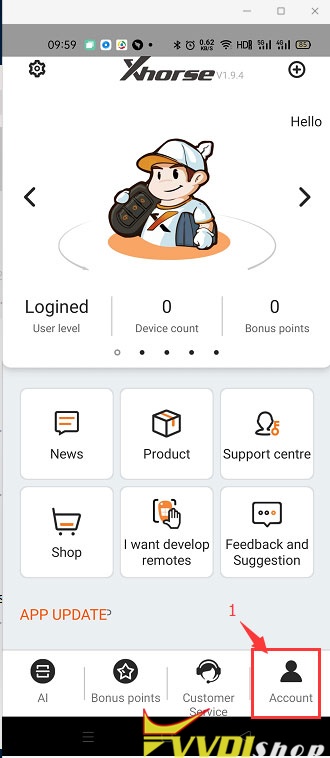
2. Go to Customer Self-Service
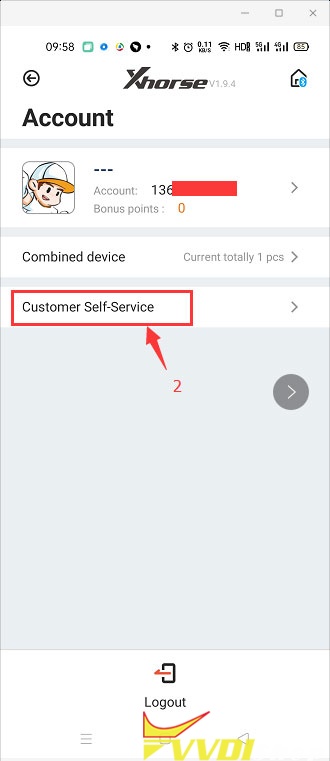
3. Now you can see mini key tool bonus points and tokens information
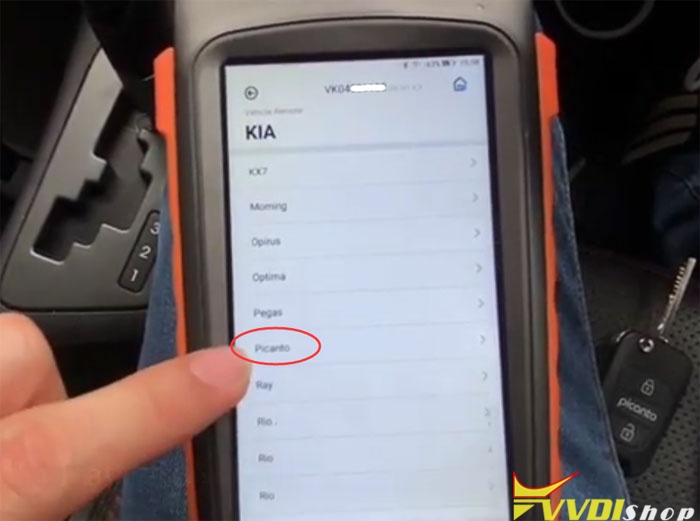
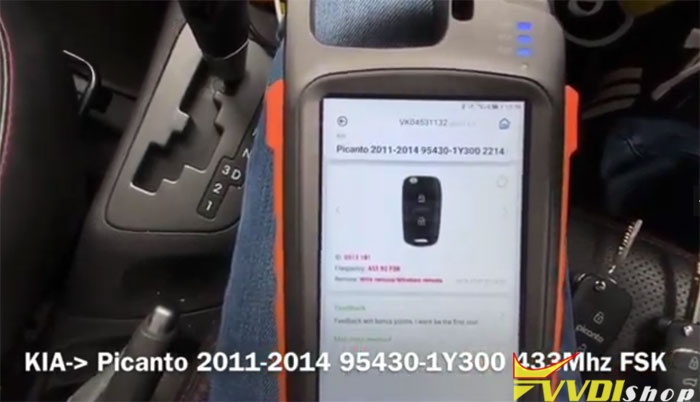
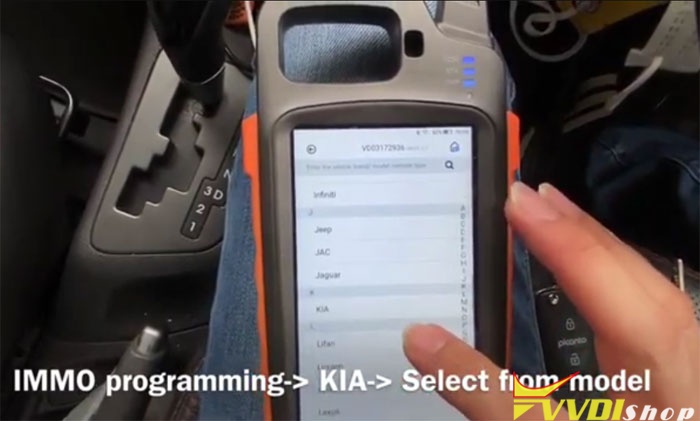
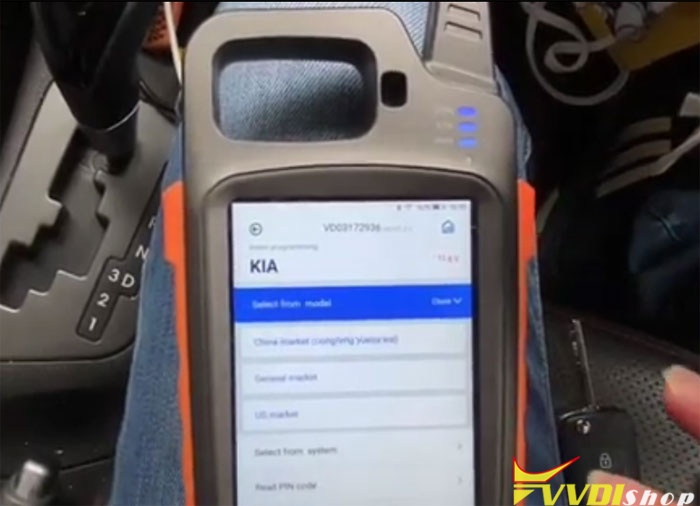
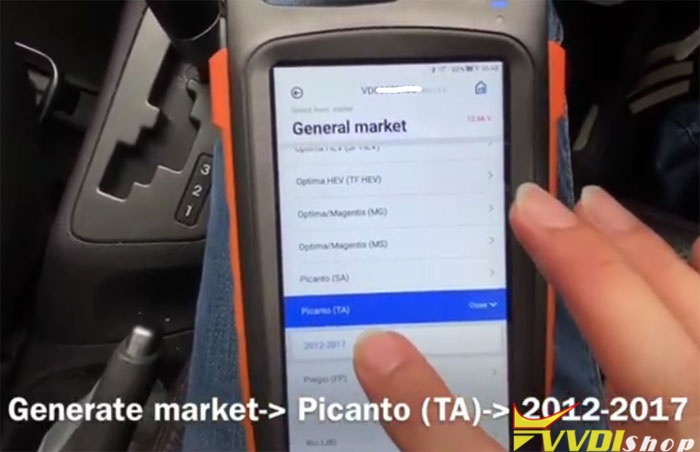
Program Kia Picanto Remote with VVDI Key Tool Max
How-to: generate and program Kia Picanto 2014 2015 remote key by Xhorse Vvdi Key Tool Max and MiNi OBD Tool.
Tools required:
Original remote
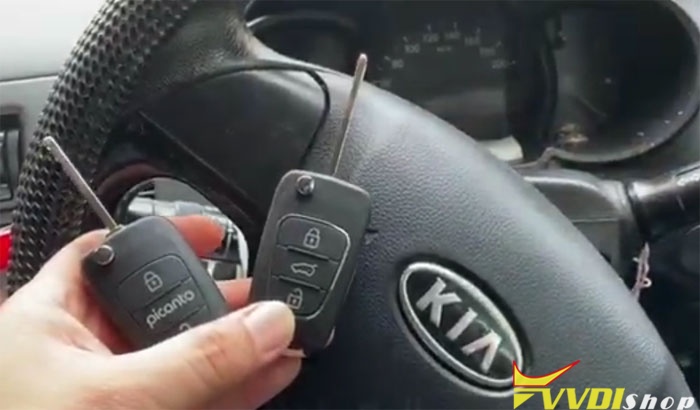
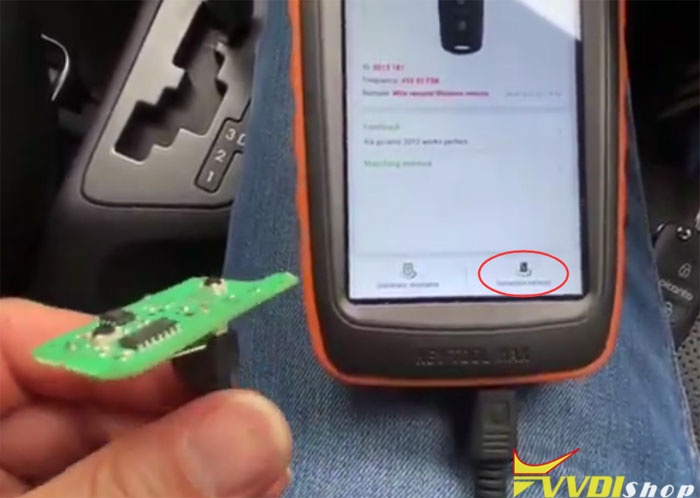
Left: customer original remote; Right: xhorse new wire remote
Procedure:
Step 1: Generate Remote
Step 1: Generate Remote
In key tool max app, select Vehicle Remote -> KIA-> Picanto->Picanto 2011-2014 95430-1Y300 433MHz FSK
Connect VVDI wired remote with cable, press Generate remote
Burn remote success
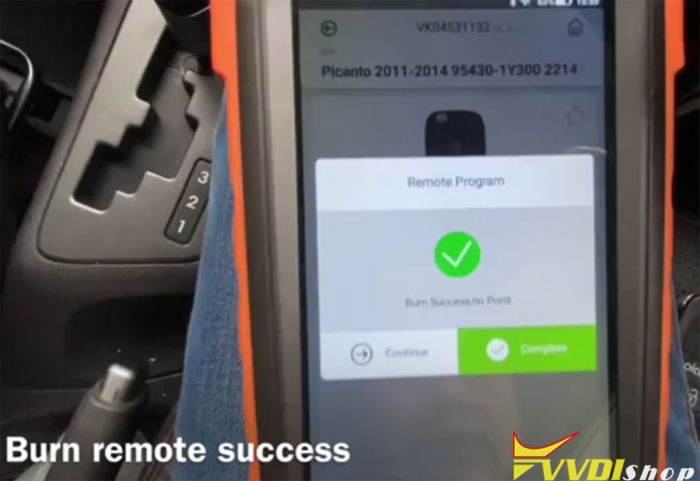
Install in remote shell and put battery.
Step 2: Program remote
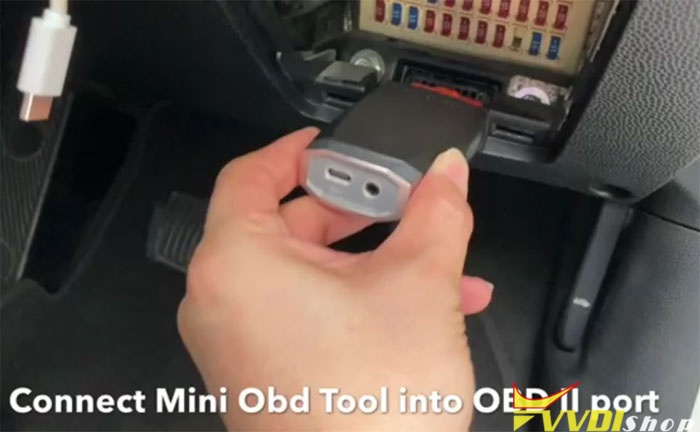
Connect VVDI Mini OBD Tool with vehicle via OBD socket
Choose MINI OBD menu
Connect with Mini OBD via Bluetooth
Select IMMO Programming->Kia->Select from model->Generate market->Picanto (TA)->2012-2017->Remote Programming
Connect with Mini OBD via Bluetooth
Select IMMO Programming->Kia->Select from model->Generate market->Picanto (TA)->2012-2017->Remote Programming

Read programming description
Loading
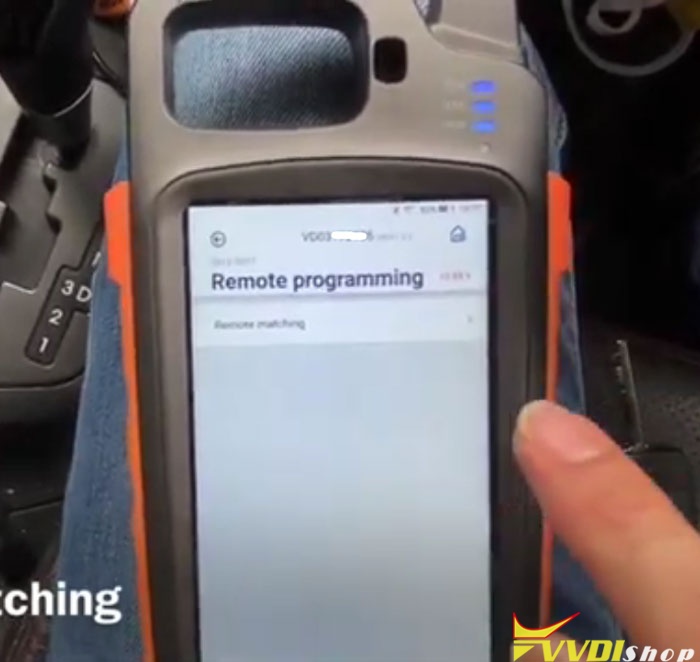
Select Remote matching
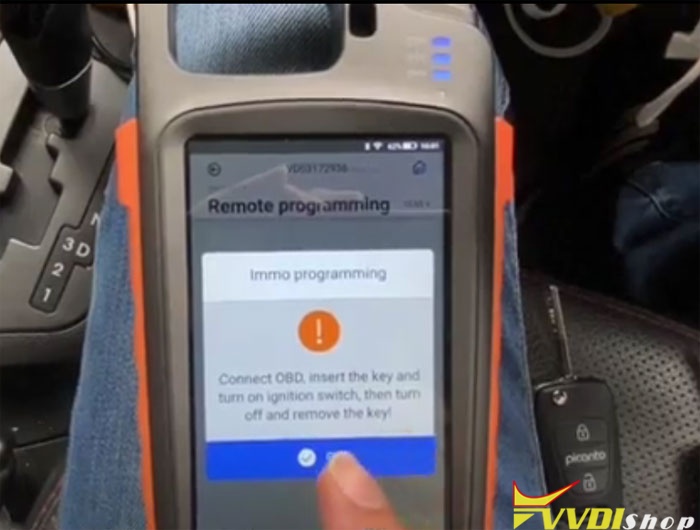
Insert key turn on and turn off then remove key
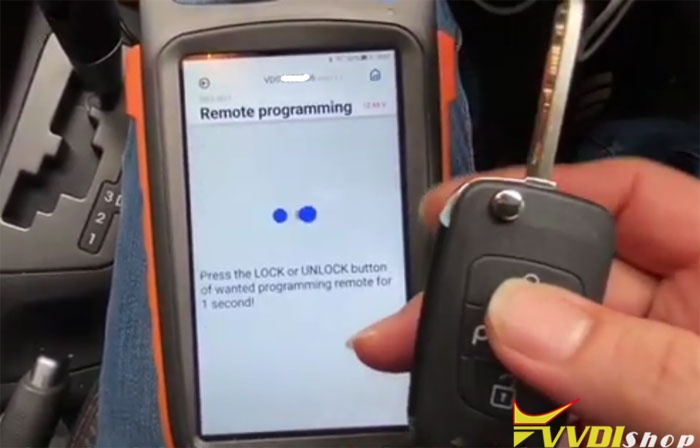
Press Unlock or Lock button on wanted remotes for 1 second
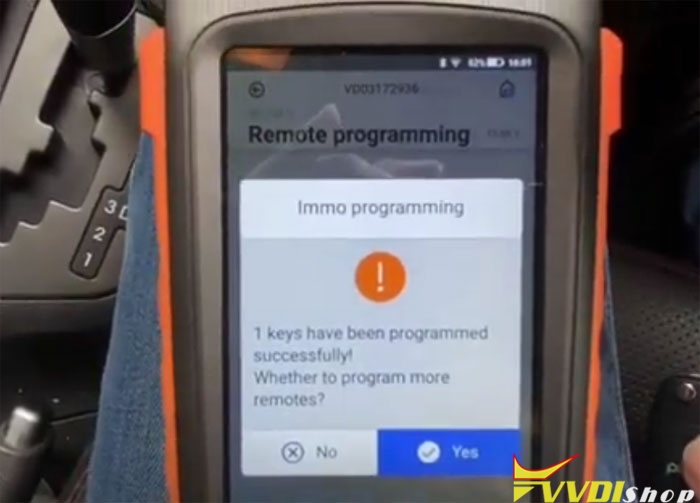
1st key have been programmed successfully. Press Yes to program 2nd remote
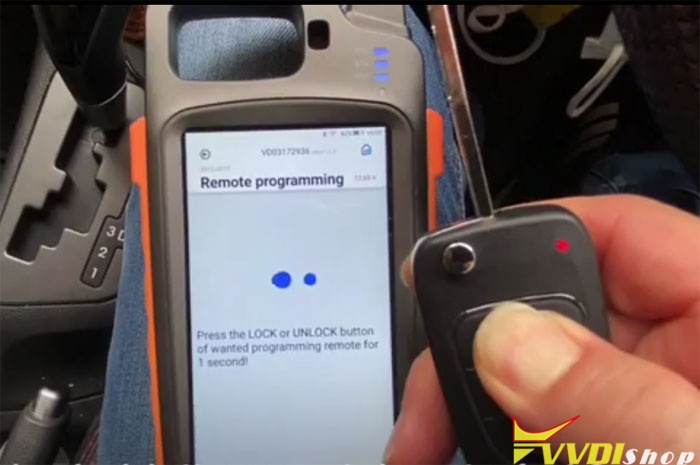
Press Unlock or Lock button on 2nd remotes for 1 second
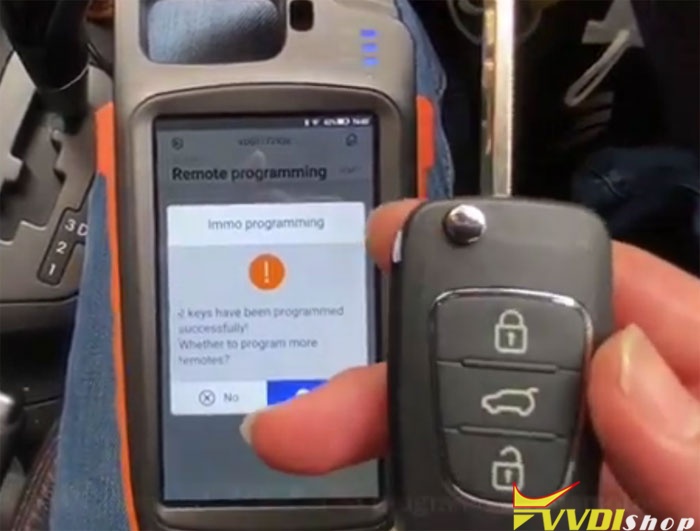
2nd key have been programmed successfully.
2 remotes have been programmed. Press No for finish.
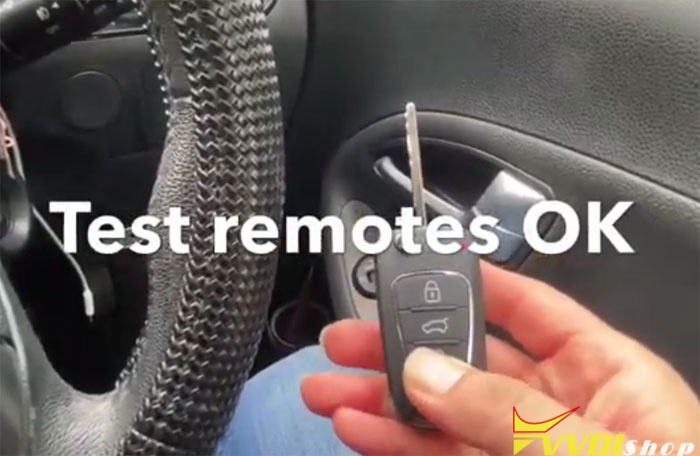
Test both remote keys. Both working no problem.
Done.
Program Skoda Octavia Key with VVDI Prog and Key Tool Max
How-to: program Skoda Octavia 2001- 93c86 key using Xhorse Vvdi Key Tool Max and Vvdi prog.
Step 1: Read dump
Remove dashboard and desolder 9C386 chip


Solder 93c86 chip to vvdi prog adapter and connect adapter with vvdi-prog


In VVDI Prog software, select EEPROM->ST->M93C86
Read and save eeprom data, i.e 93c86 eeprom.bin


Step 2: Prepare dealer key
In VVDI Key Tool Max, select Special Function->IMMO Data Tool->Europe->Skoda->Octavia->VDO 2001- 93C86


Now you will see File Management menu
Open windows browser on PC and login “My Data”, website address http://i.xhorse.com
or scan PC QR code to quick login

Login data center, upload 93c86 eeprom to the center

Now you can see 93c86 eeprom on keytool max File management, select the eeprom

Insert a new key or transponder chip into keytool max induction coil
Select an unused key position and press Prepare Dealer Key

Prepare dealer key success

Solder 93c86 chip back and reinstall dashboard

Test the new key

Done.