ابزار Xhorse VVDI
Xhose VVDI نرم افزار برنامه نویس اصلی و سخت افزارابزار Xhorse VVDI
Xhose VVDI نرم افزار برنامه نویس اصلی و سخت افزارHow to use Xhorse VVDI Key Tool Plus cloud disk ?
Please be informed: Xhorse VVDI Key Tool Plus Pad cloud disk has the function of transferring data.
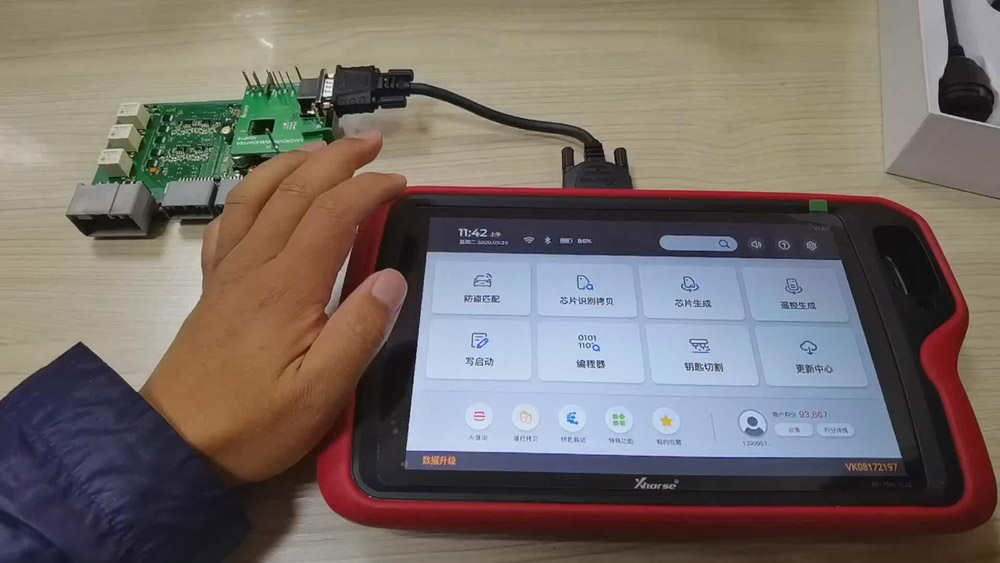
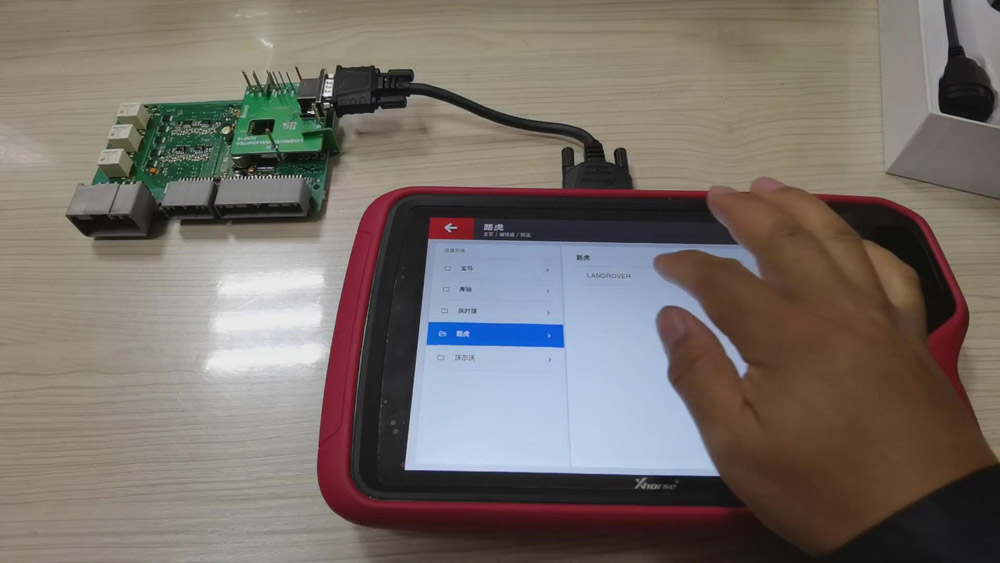
Here are the detailed steps (take JLR KVM module as an example):
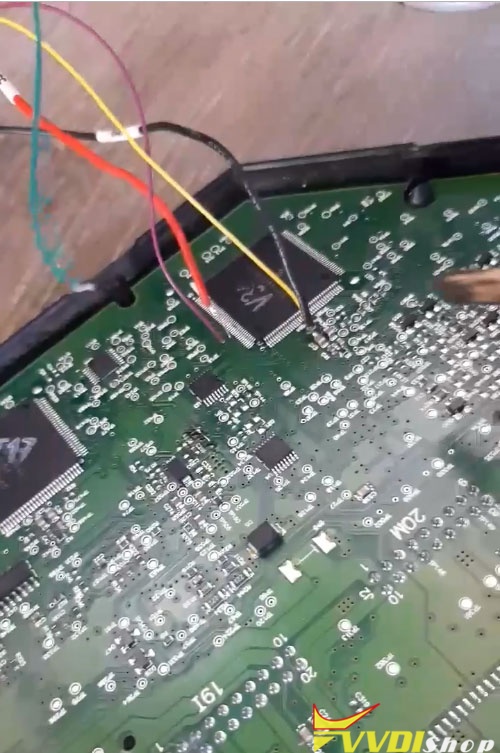
What we’ve connected is Land Rover’s KVM module.
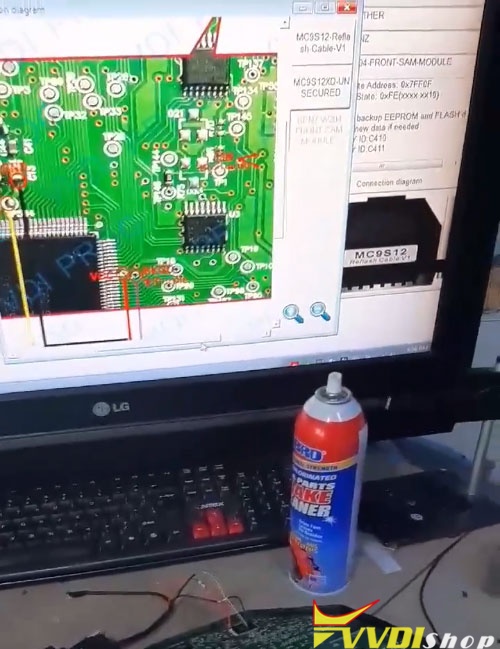
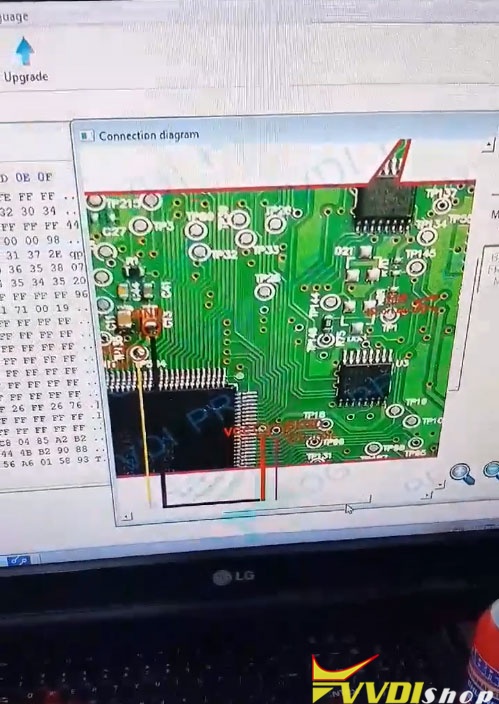
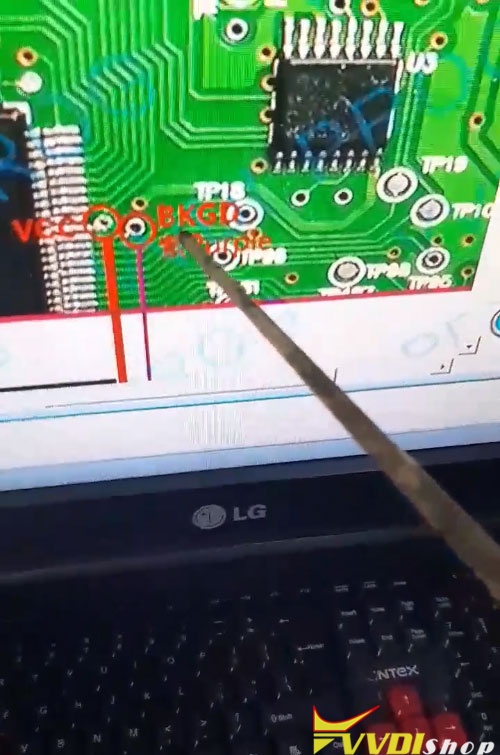
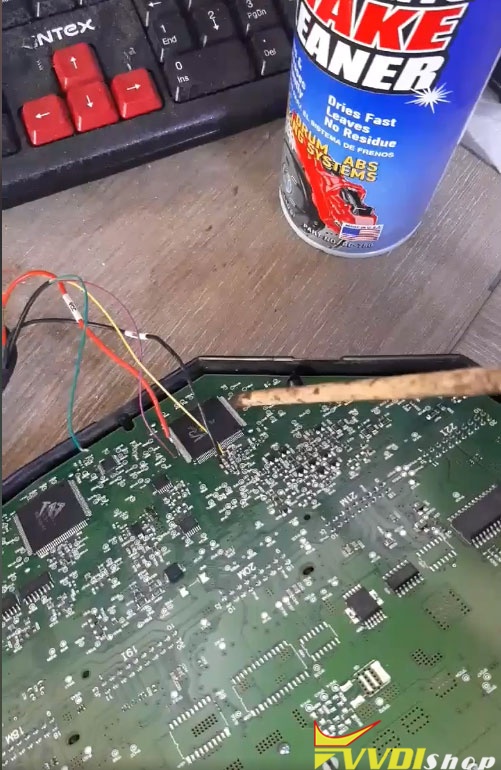
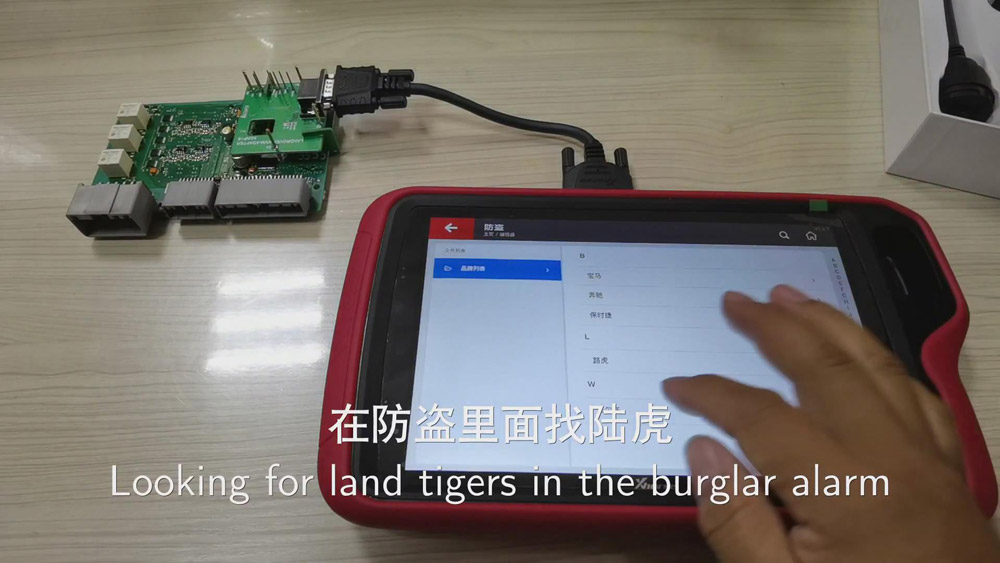
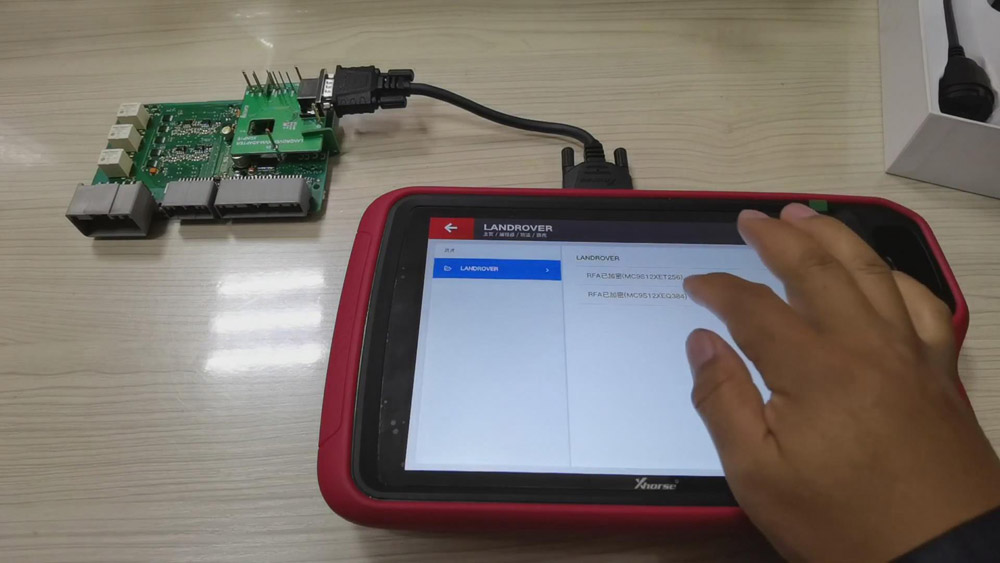
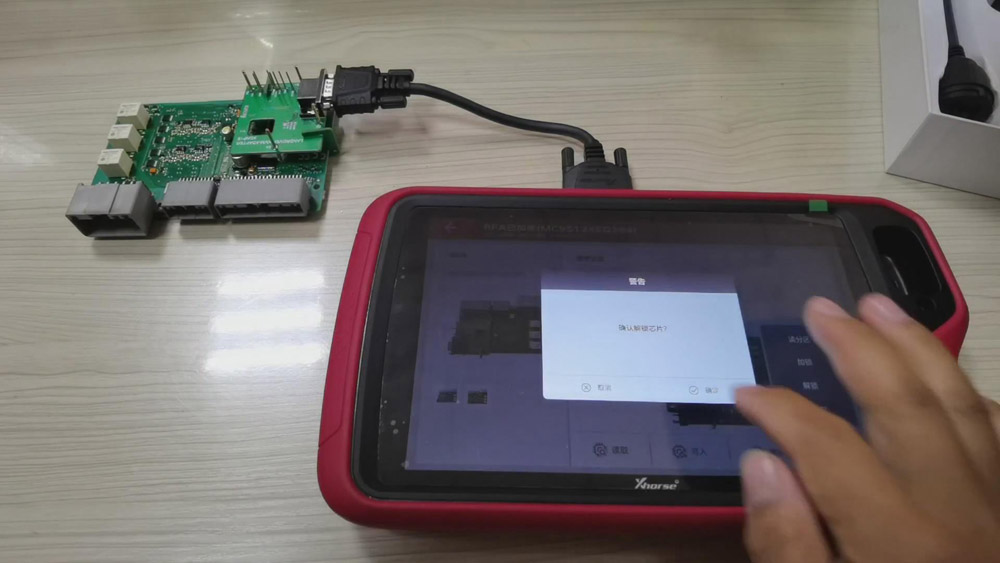
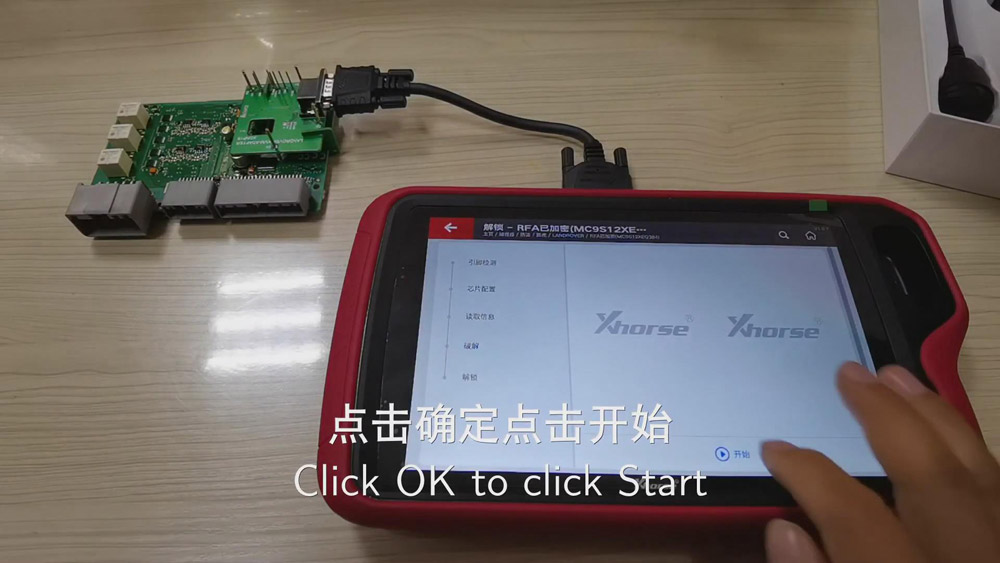
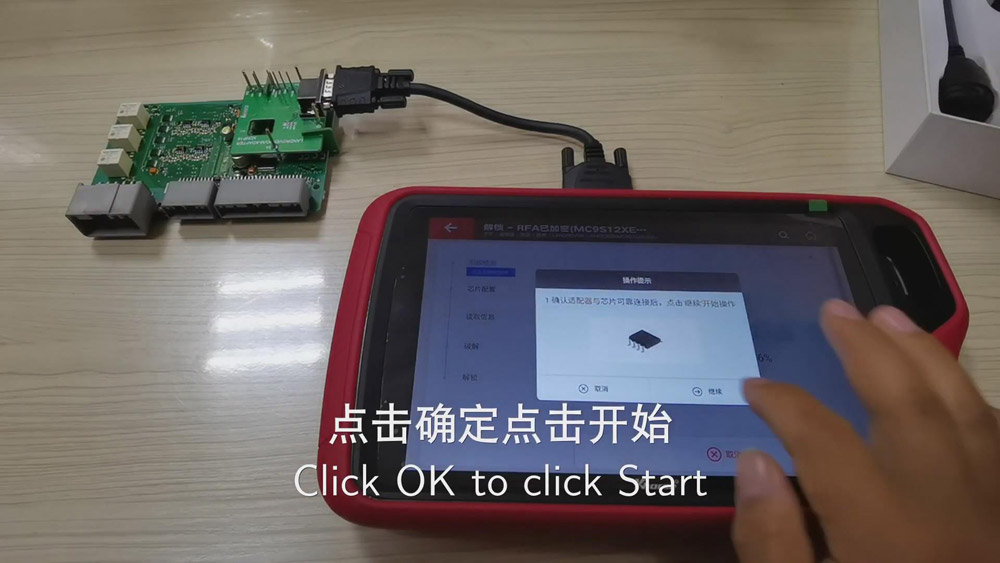
Ⅰ.Decode the chip
- Now, please click “Programmer”>>“Immo”>>“Land Rover”>>“LANDROVER”again>>“RFA Encrypted(MC9S12XEQ384)”>>“More functions”>>“Unlock”>>“Confirm”>>“Start”>>“Continue”.
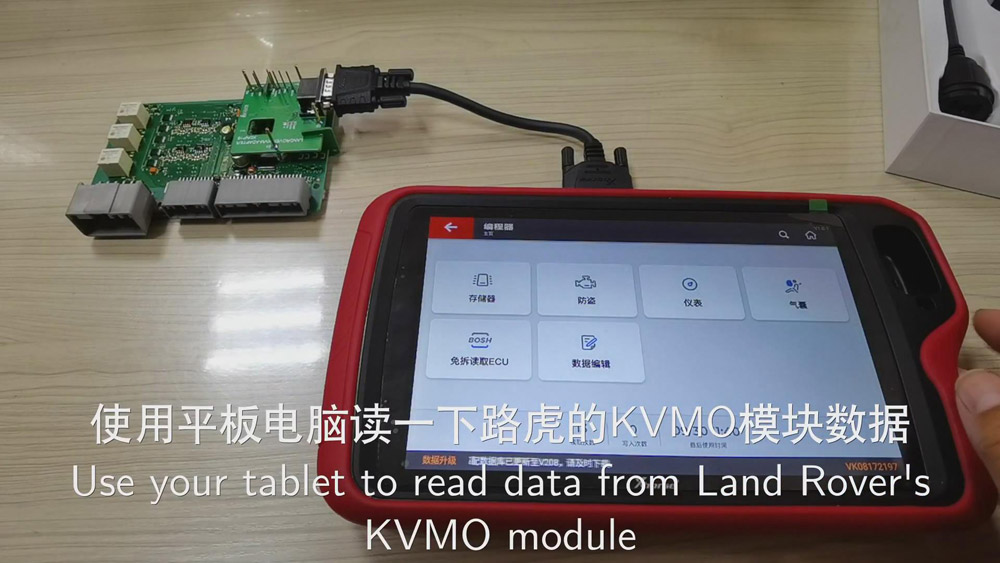

Ⅱ.Read the data
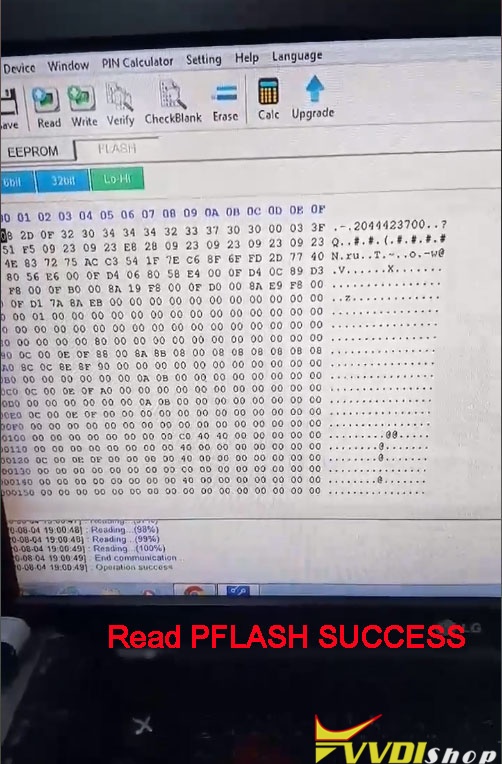
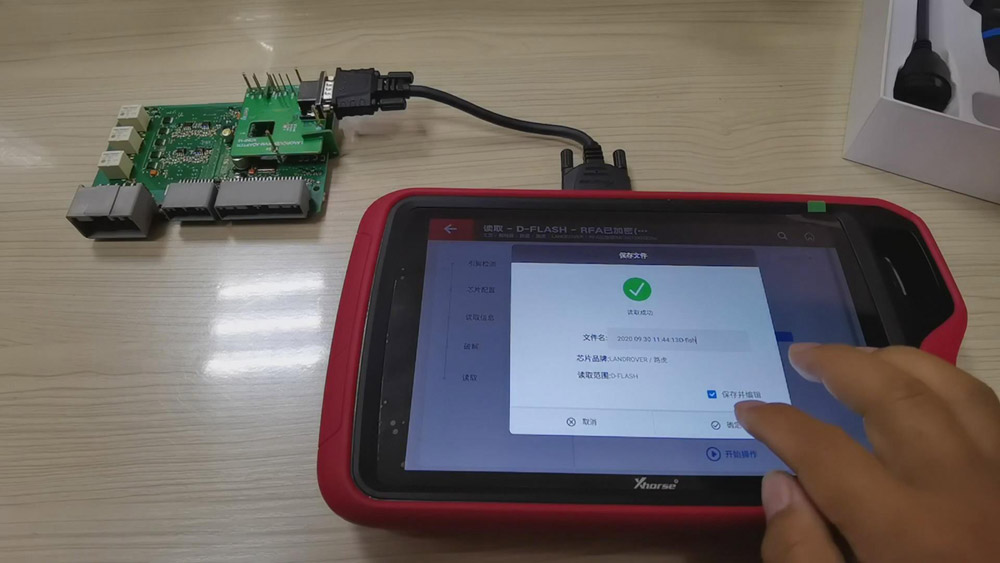
1.When the chip has been decoded, then we can start to read “D-Flash”, then rename and save the D-Flash file.

Read “EEE”, rename the EEE file and save it.
- Read “P-Flash”, rename the P-Flash file and save it.
Ⅲ. Transfer the data
After finishing reading the data, then we can transfer the data freely.
For transferring data to the computer, we need to:
- Open a web page and enter the website address “xhorse.net.cn”, then a QR code will appear.
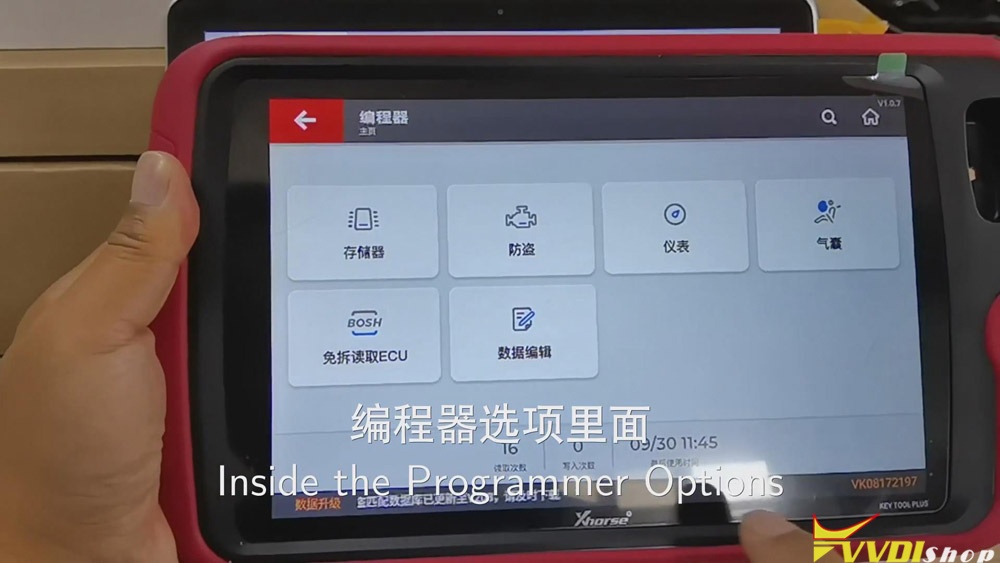
- Click “Programmer” of the vvdi key tool plus, and choose “Data edit”>>“Scan code&login”, then scan the QR code on the computer and login.

- Enter “Local document” and upload the file we want, say, D-Flash file, the EEE file or the P-Flash file we’ve read just now, to the cloud disk.
- Refresh the web page, then we can see D-Flash file, the EEE file and the P-Flash file. If we want to download them to the computer, we can choose them and click “download”.
For transferring the data to the tablet, we need to:
- Upload the document of the computer, say, “AAAAA” file, to the cloud disk.
- Click “My data” of the tablet, then we can see “AAAAA” file.
- If we want to use the file, then we can download it to the tablet.
How to Send Xhorse Feedback Message on Xhorse App?
If anyone need to contact Xhorse Tech Support / send feedback – here is quick view how to do that.
How to post feedback / send message to tech support:
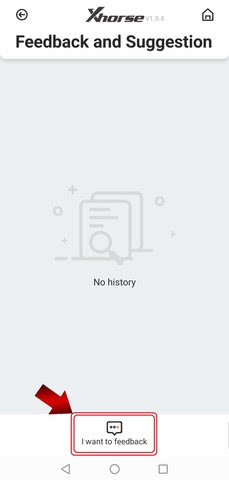
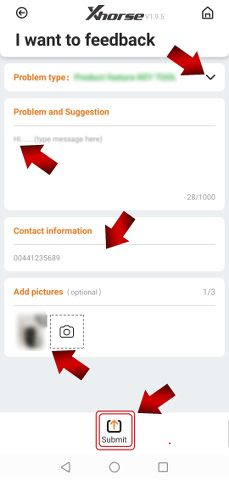
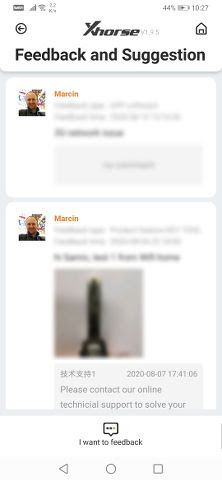
In Xhorse App, select Feedback and Suggestion-> I want to feedback
Enter problem type and suggestion, then Submit.

https://www.vvdishop.com/service/post-feedback-to-xhorse-tech-support.html
How to Send Xhorse Feedback Message on Xhorse App?
If anyone need to contact Xhorse Tech Support / send feedback – here is quick view how to do that.
How to post feedback / send message to tech support:
In Xhorse App, select Feedback and Suggestion-> I want to feedback
Enter problem type and suggestion, then Submit.
https://www.vvdishop.com/service/post-feedback-to-xhorse-tech-support.html
VVDI2 Change VAG EDC17 Immo Data in EEPROM
Here vvdishop.comm presents how work Xhorse VVDI2 VAG for change immo data in eeprom from Seat Ibiza EDC17U01 .
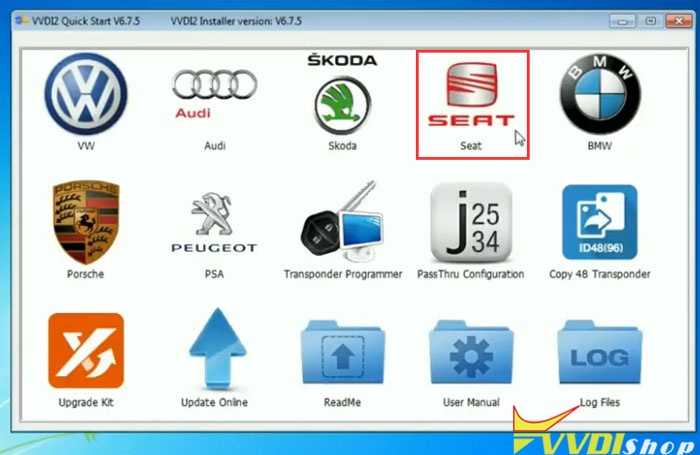
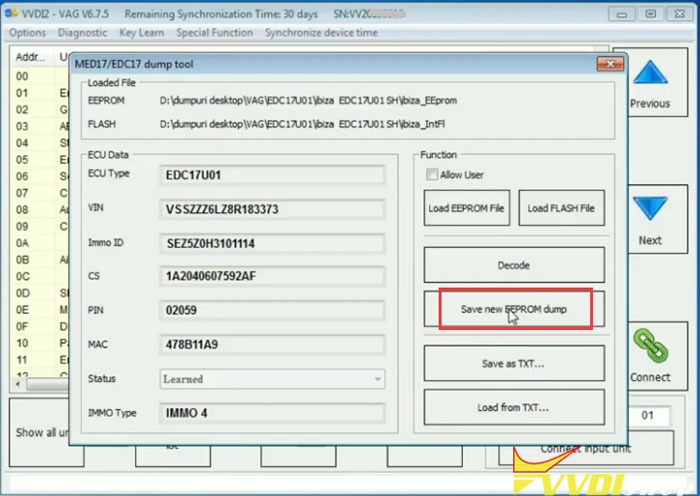
Run VVDI2 Quick Start->Seat->Special Function->MED17/EDC17 dump tool

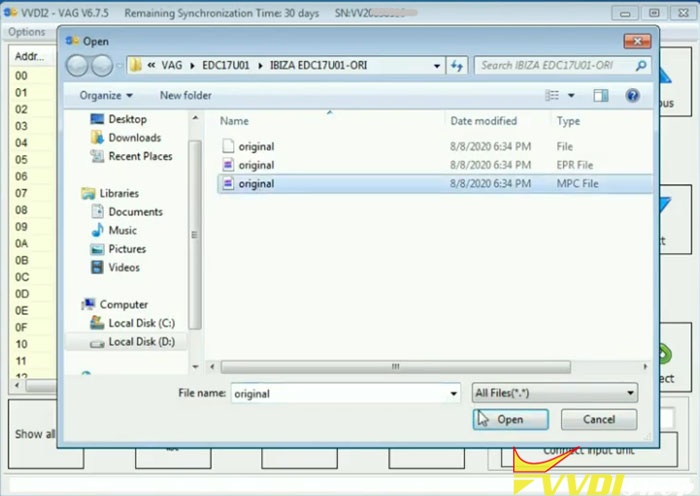
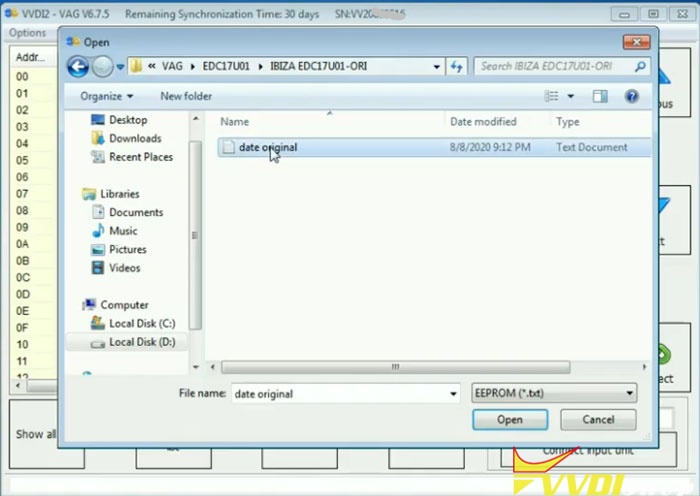
Load EEPROM File, upload original Ibiza EDC17U01 eeprom
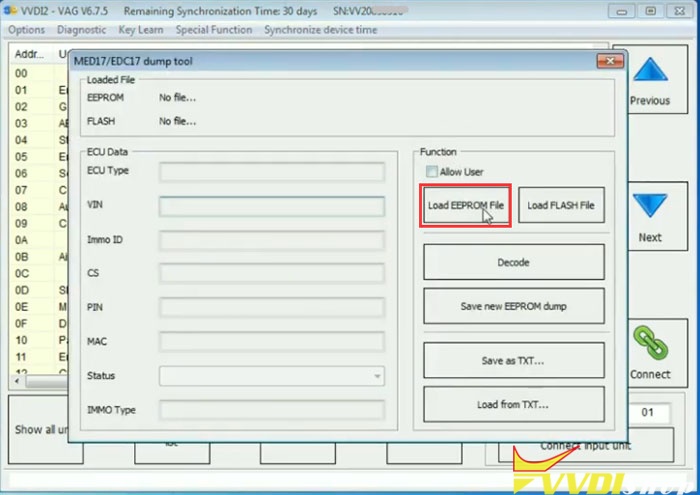
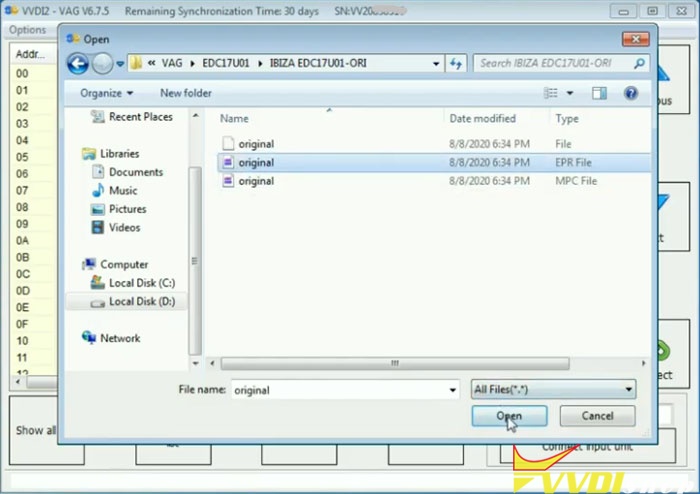
Load Flash file, upload original EDC17U01 flash file
Then press Decode

Decode ECU information, incl. ECU Type, CIN, CS, PIN MAC, Immo type

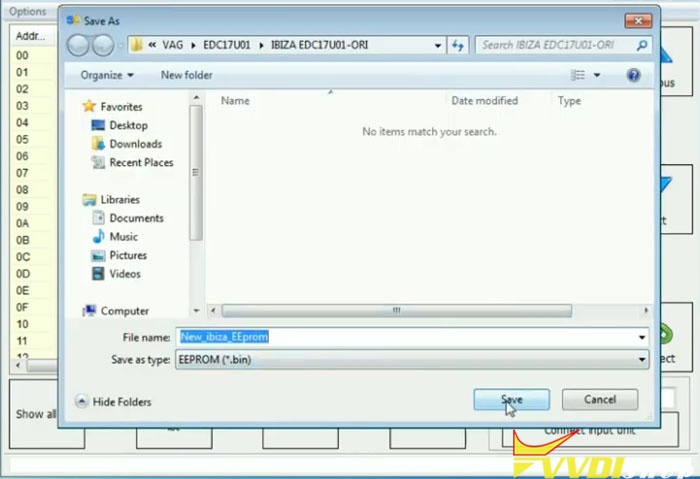
Save as TXT
Upload EEPROM file and Flash File you want to change respectively
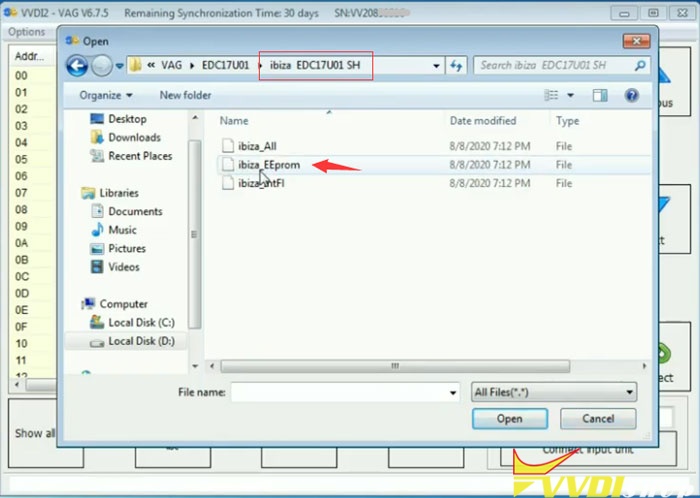

Then Decode
missing IMMO ID, Load from TXT saved previously
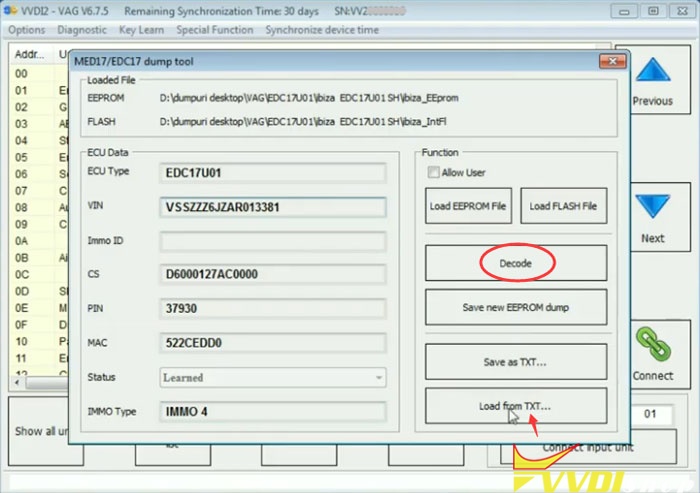
Decode success. Save new EEPROM dump.
Open txt file to check ECU information

change EDC17 immo data in eeprom success.
https://www.vvdishop.com/service/vvdi2-change-vw-edc17-immo-data-in-eeprom.html
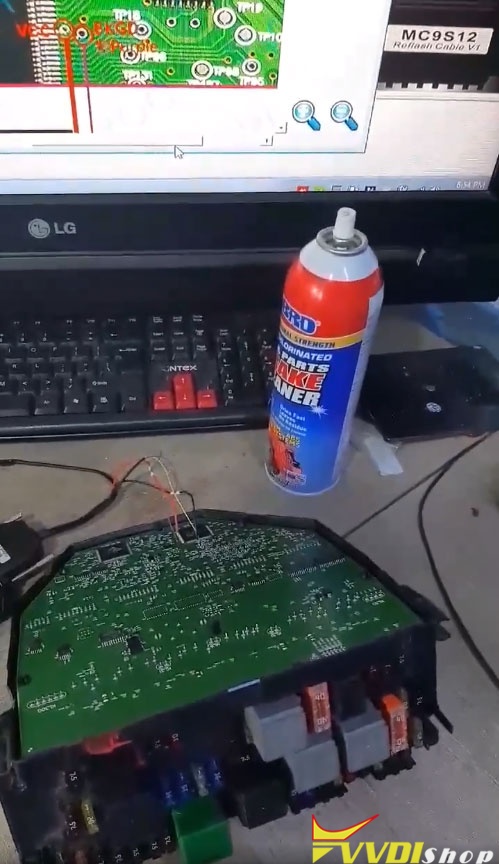
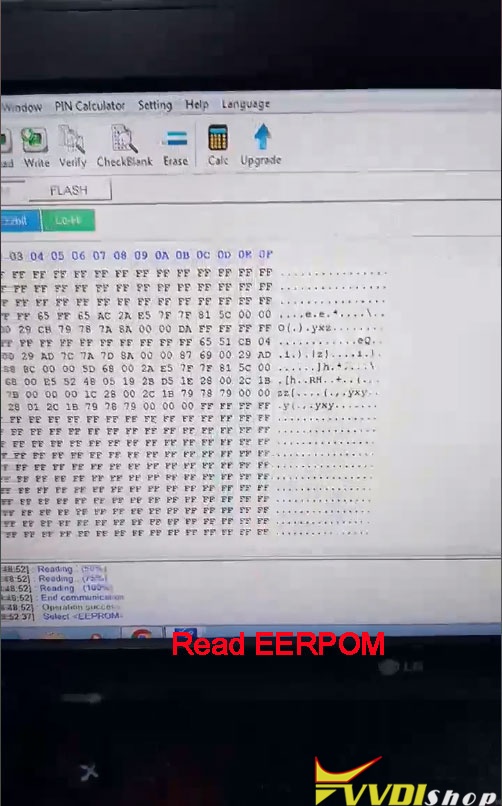
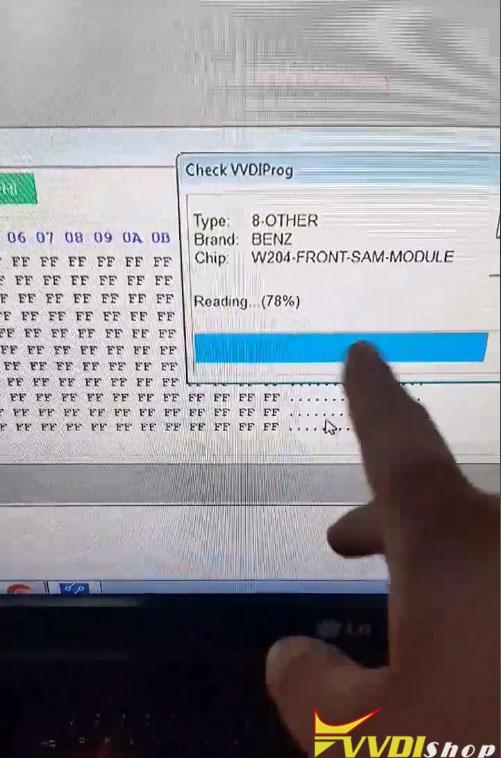
Mercedes W204 Front SAM Cloning by VVDI Prog