ابزار Xhorse VVDI
Xhose VVDI نرم افزار برنامه نویس اصلی و سخت افزارابزار Xhorse VVDI
Xhose VVDI نرم افزار برنامه نویس اصلی و سخت افزارVVDI Mini OBD Tool Add Alfa Romeo Stelvio 2018- Key
Programming a new key for your Alfa Romeo Stelvio (2018-2023) can be a straightforward process if you know where to locate the bypass connection. In this guide, we’ll walk you through the steps to program a key without removing the instrument cluster, using a FCA 12+8 bypass cable with 2-pin.
Tools You’ll Need
Xhorse Mini OBD tool (or a compatible key programming device)
FCA bypass cable (with 2 pins, black and red wires)
Basic prying tools
The Mini OBD tool is used to read the vehicle’s pin code and program the new key. The key programming process involves placing the new key in the bottom section of the center armrest and pressing the unlock button.
NOTE: Xhorse FCA bypass cable does not have 2-pin. You can use xtool/obdstar FCA 12+8 bypass cables or Lonsdor L-JCD Cable.
- Remove the Cover: Locate the cover near the center console (exact location may vary slightly by model year). Gently pry it off using a trim tool or similar instrument. This cover is the only component you need to remove, making this method less invasive than disassembling the dashboard or cluster.
- Identify the Bypass Cable: Inside, you’ll find several cables. Look for the specific 2-pin bypass cable, which may be tucked away but can be pulled out by hand. Be cautious not to confuse it with other cables, such as a blue one that may be present. The correct cable has brown and green wires.
- Black to Brown: Attach the black pin of the 2-pin bypass cable to the brown wire.
- Red to Green: Attach the red pin to the green wire.
- Place the new key in the bottom section of the center armrest.
- Use the Xhorse Mini OBD tool to read the pin code and initiate the programming process.
- Follow the tool’s prompts, which typically involve pressing the unlock button on the key.
- Reattach the Cover: Position the cover by aligning the top first, then gently press the bottom until it clicks into place. There’s no need to remove or disassemble additional components, as some methods suggest.
- Verify Functionality: Test the new key to ensure it works correctly with the vehicle’s locks and ignition.
Failed to Update VVDI Mini OBD Tool Firmware 2.0.1 Solution
Problem:
I have failed to update the Xhorse VVDI Mini OBD Tool firmware from 1.0.5 to 2.0.1. I have no luck in the App or via the Upgrade kit. Is there any solution?
Solution:
If failed to update mini obd tool firmware from 1.5.0 to V2.0.1, replace battery of mini obd tool.
Replace a new battery (CR2032), update firmware and sync device again.
How to Read Opel Insignia PIN Code with Xhorse
Possible to read pin code for Opel Insignia with xhorse vvdi mini obd tool?
Yes, it is possible and easy to read pin code for Opel Insignia. Do the same in vvdi key tool max pro.
Go to IMMO Programming->Opel->Read PIN Code->Select Type 5 (IPC)
Read 4-digit pin code successfully.
Then you can add key with pin code.
User feedback:
Opel Insignia, successfully key Add.
Done very simple in 20 min.
How to Replace Battery of Xhorse VVDI Mini OBD Tool
Some users reported that they have problems updating vvdi mini obd tool firmware and sync device.
If the version is lower than 1.5.0, try several times, change PC or network, if all failed, device information is missing. Need to send back for repair.
If the version is 2.1.50, disassemble the device, replace a new battery, update firmware and sync device again.
Sync device again after replacing battery. Then update firmware via Upgrade kit again.
Follow steps below to replace battery.
Update VVDI Mini OBD Tool Firmware to 1.5.0
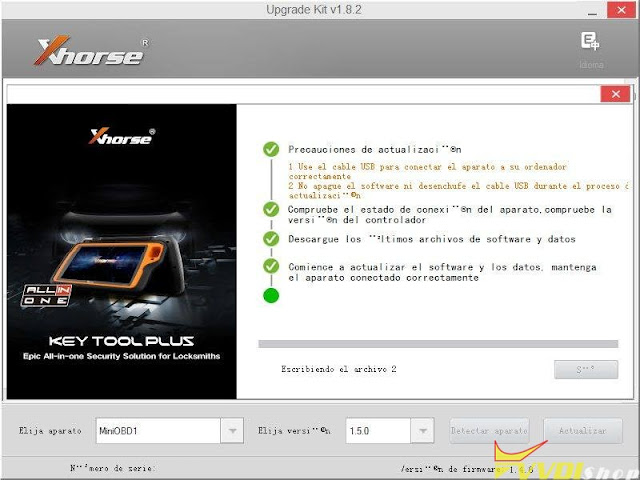
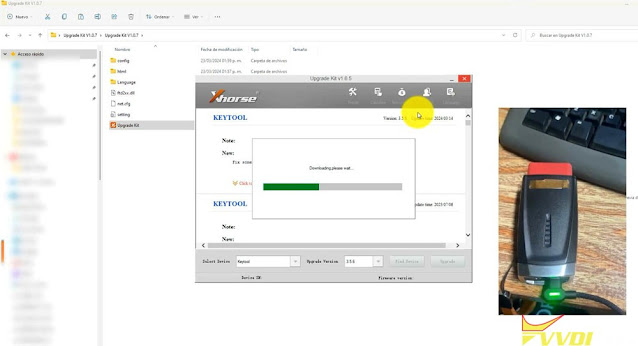
If Xhorse VVDI Mini OBD tool asks to update the firmware to V1.5.0 or above using the Xhorse Upgrade kit, here are the upgrade tips. Update is done via Upgrade kit from PC (not phone).
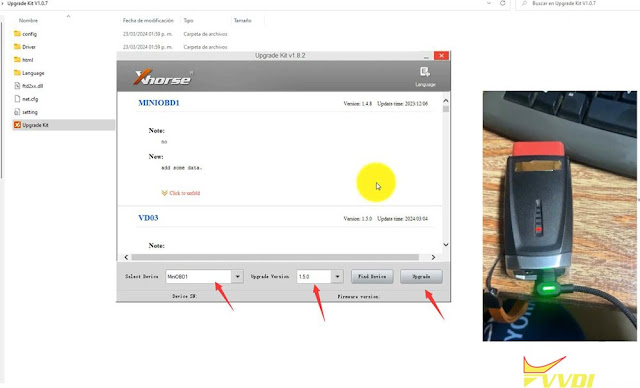
First of all, update Xhorse upgrade kit to 1.8.2 online or directly install Upgrade kit 1.8.2.
Select device as MiniOBD1 and version 1.5.0.
Press Upgrade.
Update firmware successfully.
If it is not possible to update from the Upgrade kit on PC, for example Win11, you may need to install the xhorse upgrade kit system driver.
Then update Upgrade kit to 1.8.2
Then update xhorse mini obd tool to 1.5.0.


