ابزار Xhorse VVDI
Xhose VVDI نرم افزار برنامه نویس اصلی و سخت افزارابزار Xhorse VVDI
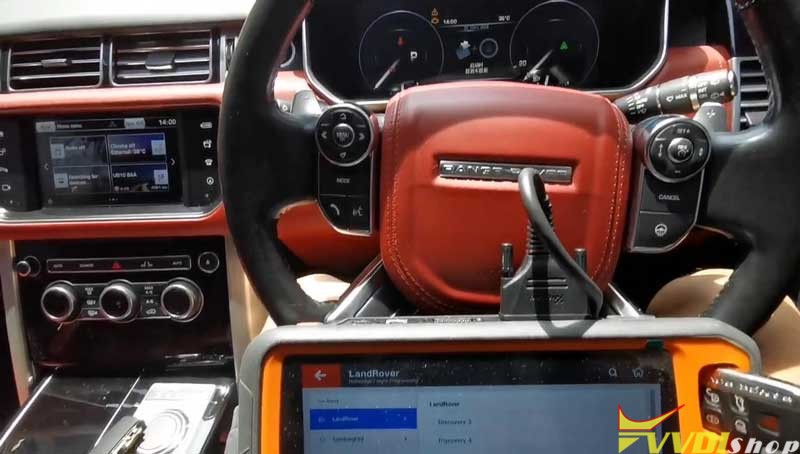
Xhose VVDI نرم افزار برنامه نویس اصلی و سخت افزارXhorse Key Tool Plus Program Range Rover 2016 Key via OBD
Xhorse VVDI Key Tool Plus Pad is able to add a new smart key for 2016 Range Rover via OBD without assembly successfully.
Plug VVDI Key Tool Plus connector into OBD port, press
Immo programming >> LandRover >> LandRover(2015-2018) >> OBD matching without disassembly >> Start programming >> Smart key recognition

Put the original working key into Key Tool Plus coil, press “OK”.
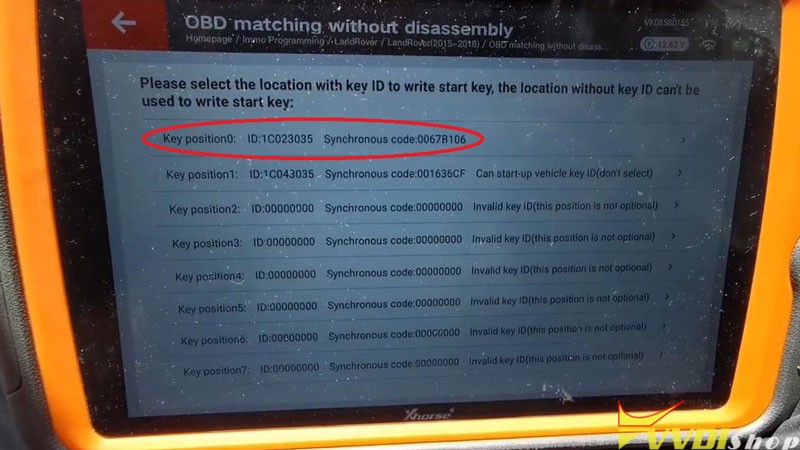
To check the key ID: 1C043035
Select “Smart key adding/all key lost”.
Note: key adding will not delete the programmed key
OK >> OK

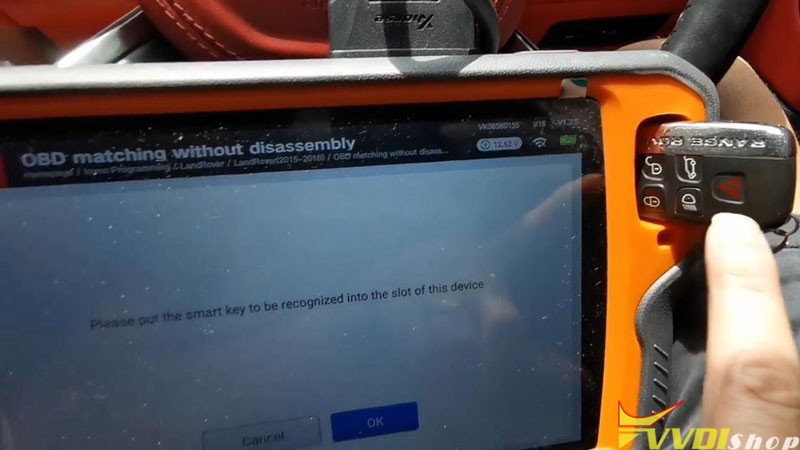
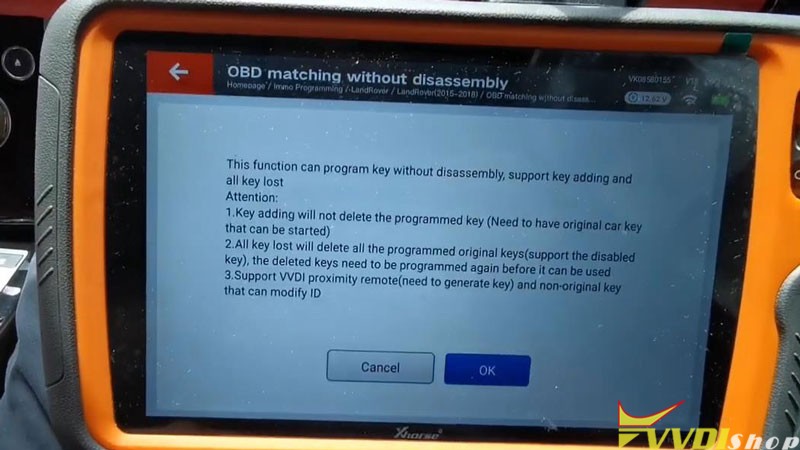
Do not remove the original working key, press “OK”.
Select a key location with Key ID to write: Key position 0
Put the new key to be programmed into Xhorse Key Tool Plus coil, press “OK”.
Programming success.
Let’s test the keys, both of remotes are fine, and can start the engine.
Done!

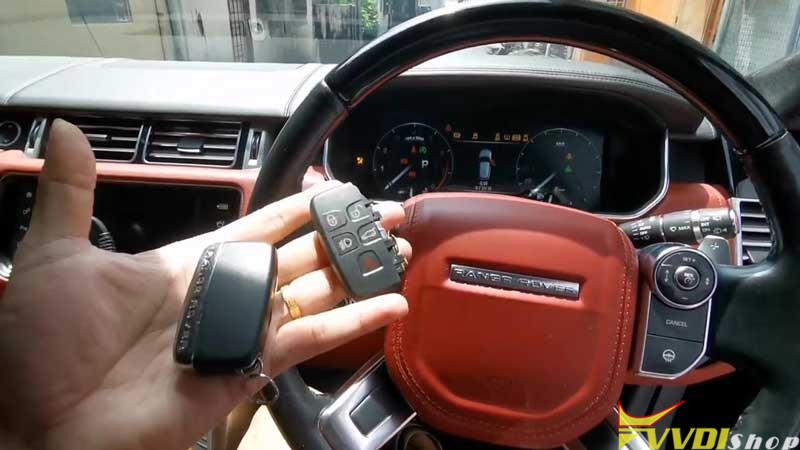
Programming a new 2016 Range Rover key with VVDI Key Tool Plus is easy to be done in 2 minutes
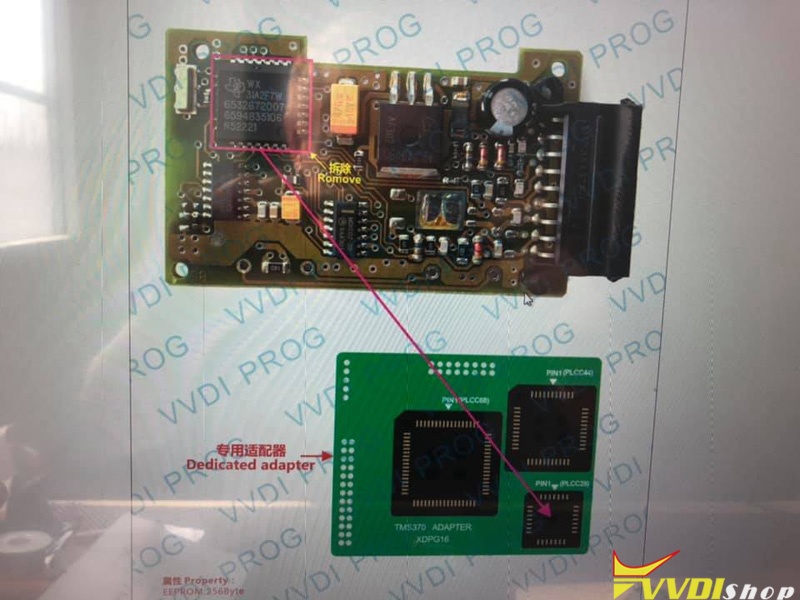
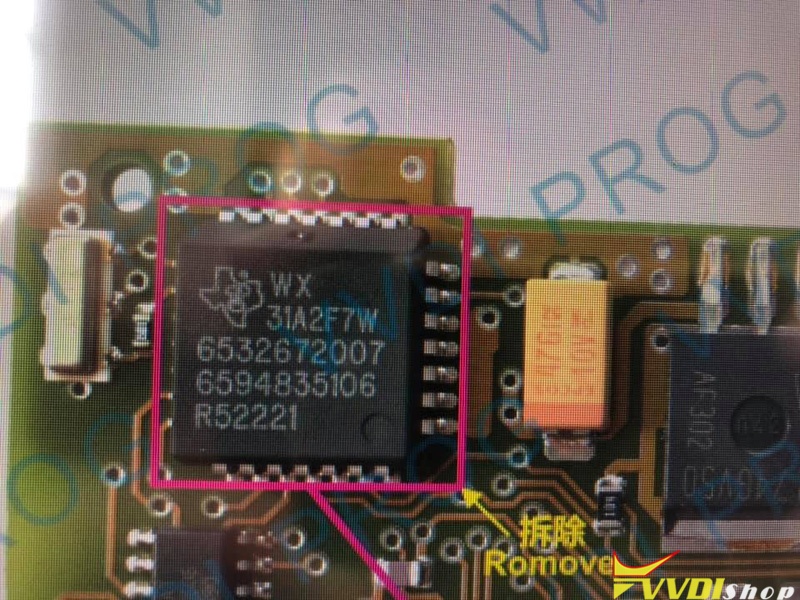
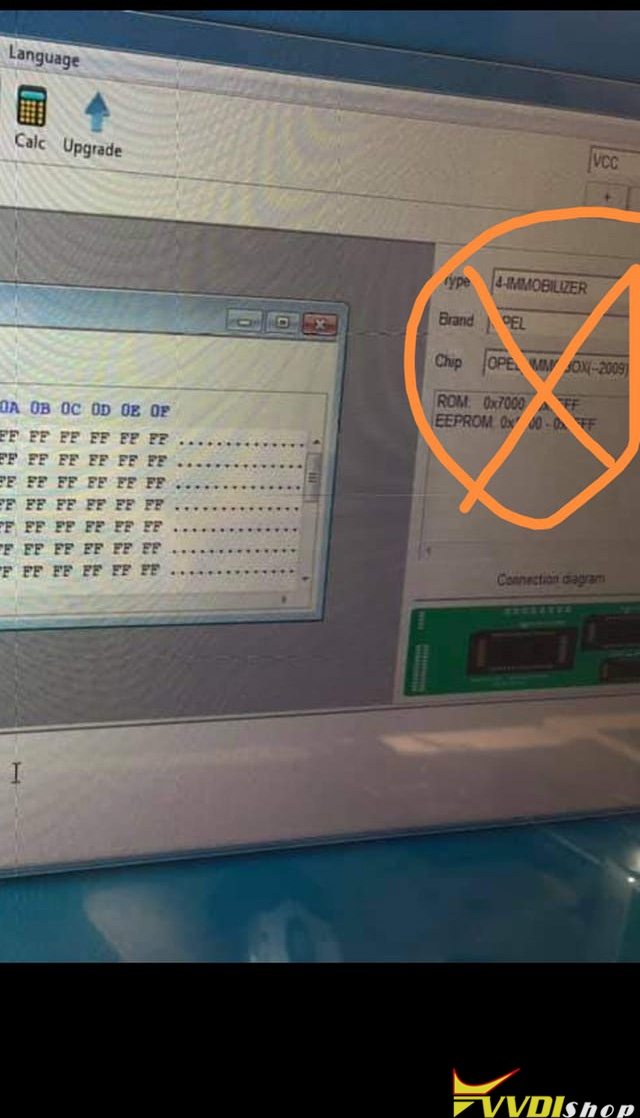
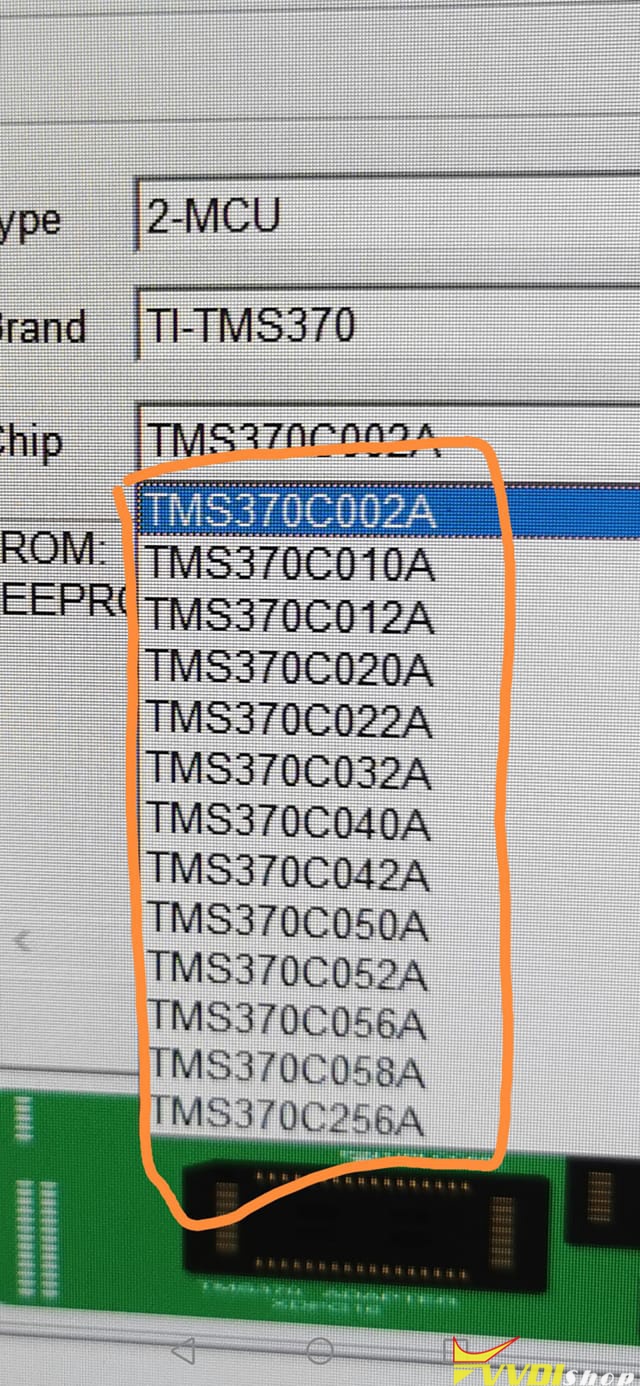
Xhorse VVDI Prog Failed to Read Opel mcu Tms370 Solution
With the help of vvdishop.com engineer, my problem was settled.
The problem goes like this: xhorse vvdi prog said chip not connected when i tried to read mcu Tms370 from an Opel 2008. I did desolder chip onto the TMS370 adapter.
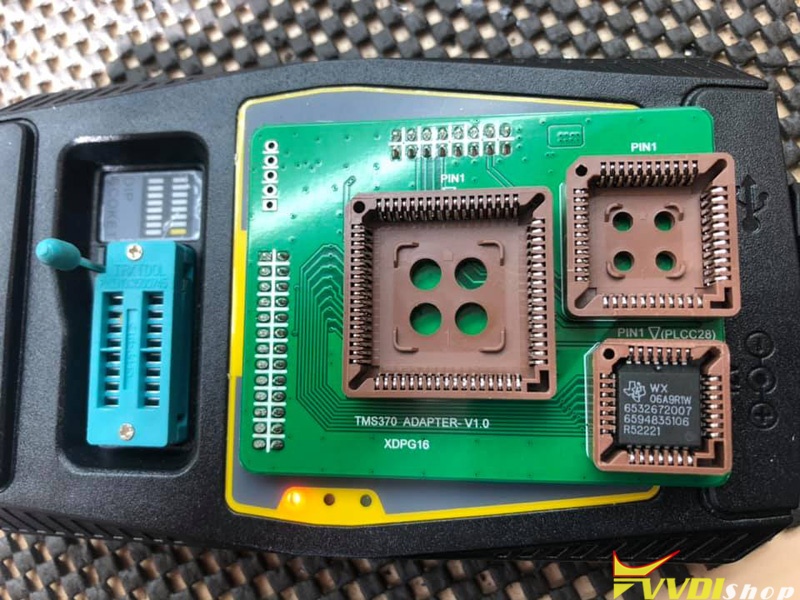

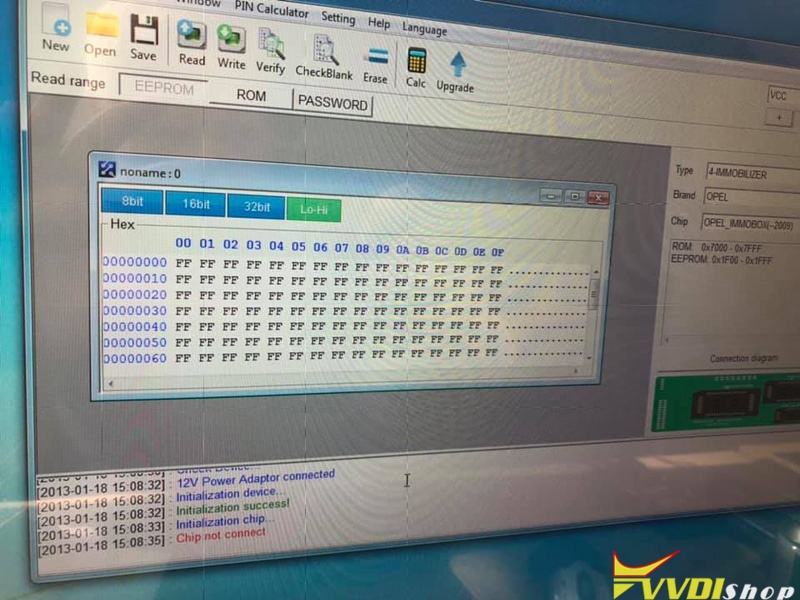
Connection is not the problem. You use Opel Immo menu. It is wrong. Don’t put 12v.
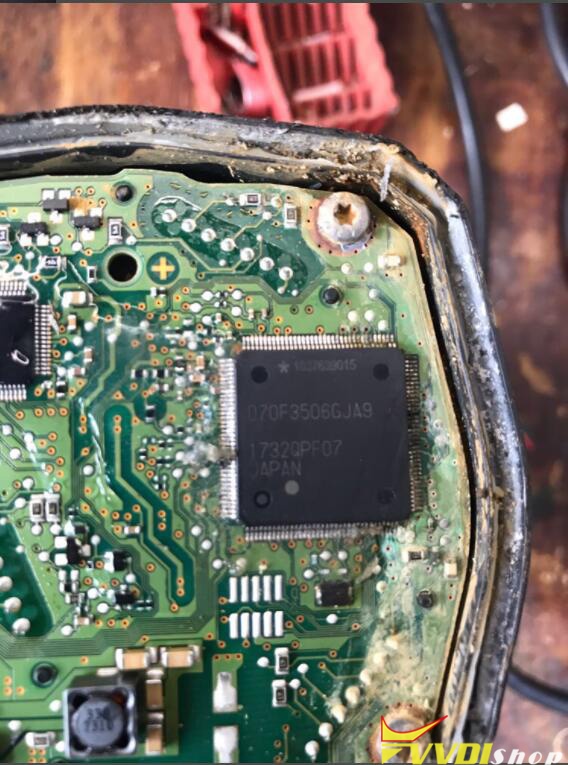
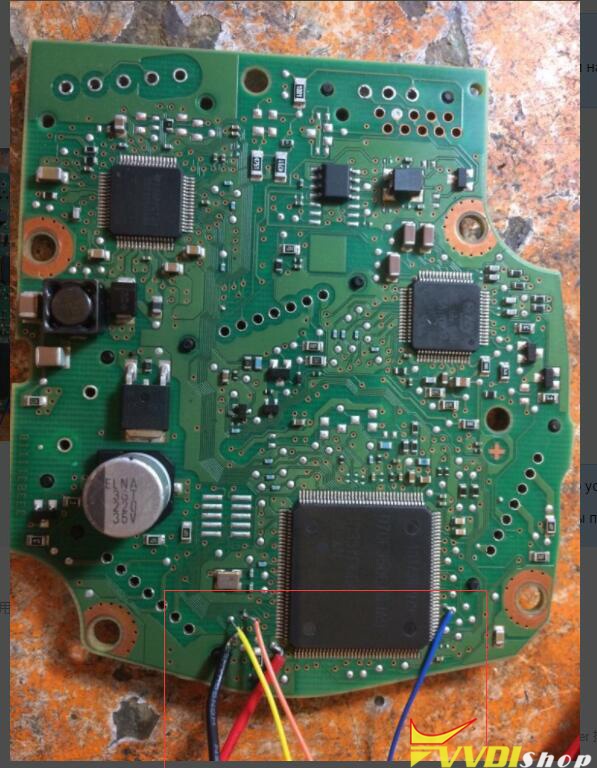
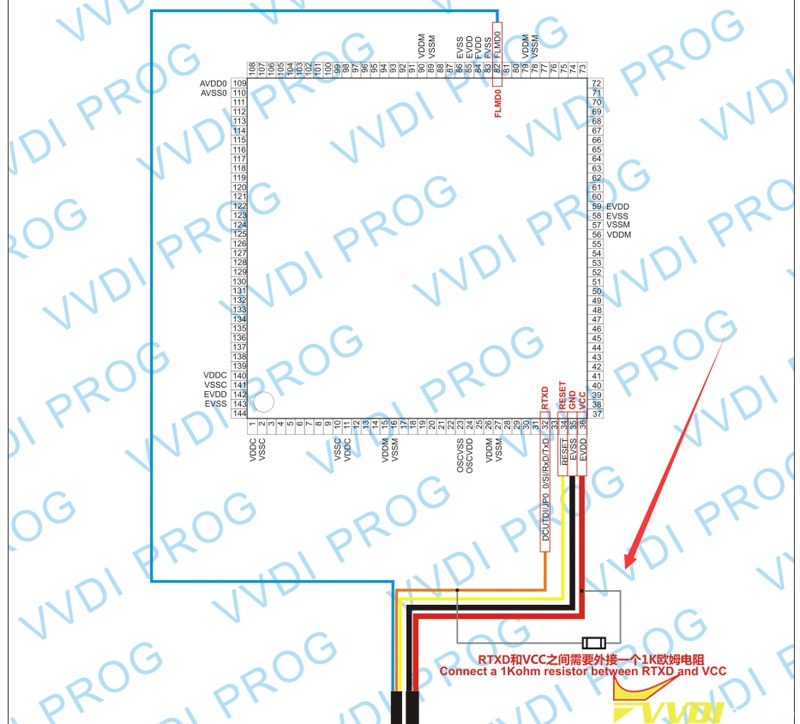
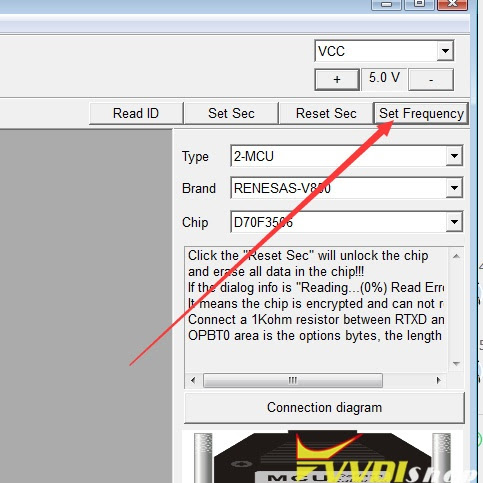
Xhorse VVDI Prog Wiring Diagram to Range Rover velar 2018 D70F33506
Problem:
I had a problem with the xhorse vvdi prog. It failed to read Range Rover velar 2018 Renesas V850 D70F33506 mcu and gave error try frequency failed.
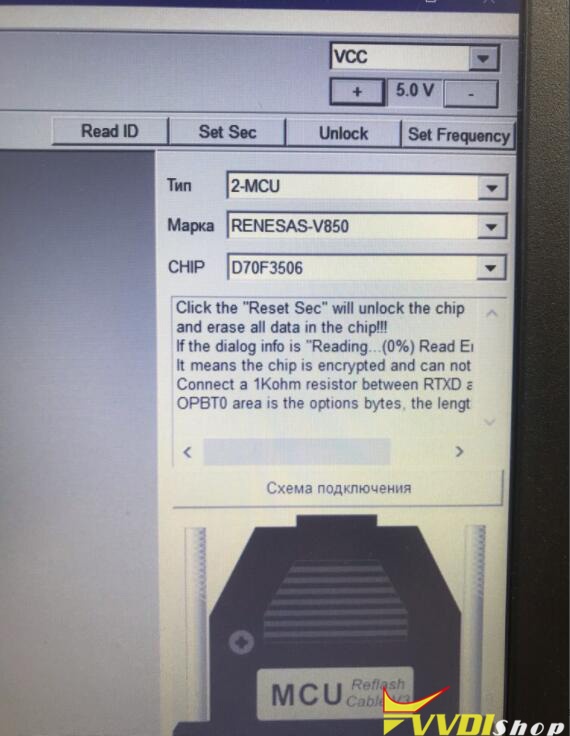
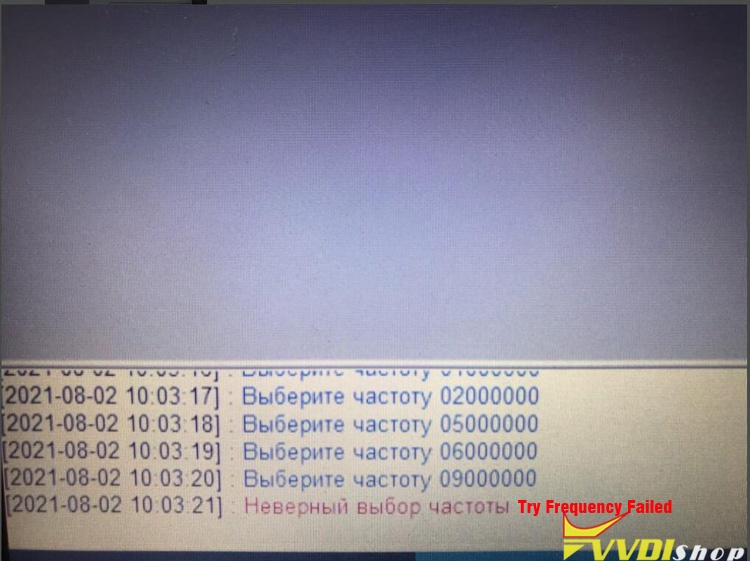
Solution:
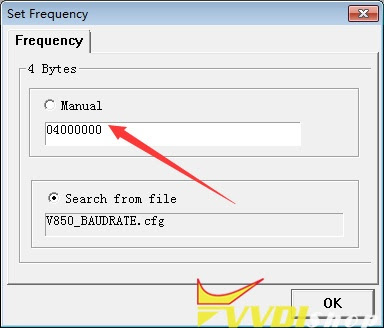
1.Follow the wiring diagram here to make a connection. Connect a 1Kohm resistor between RTXD and VCC
2.If fails again, change frequency and try again.
Searching on Frequency for this MCU And click Reset Sec (Security) for reading.
http://blog.vvdishop.com/vvdi-prog-range-rover-velar-2018-d70f33506-try-frequency-failed-solution/
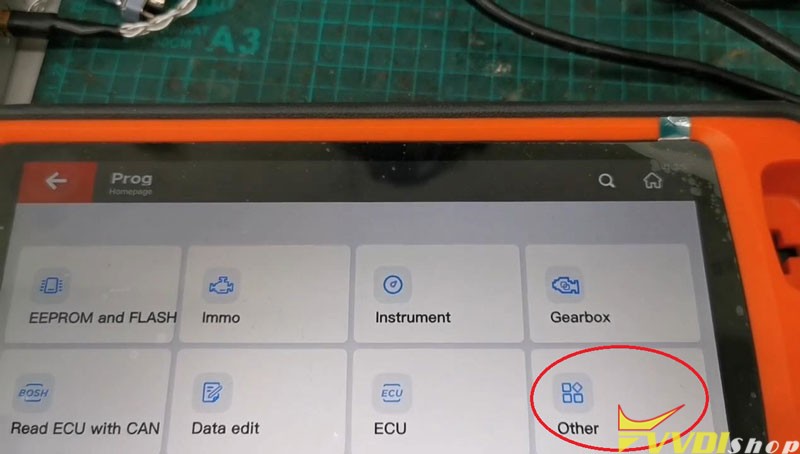
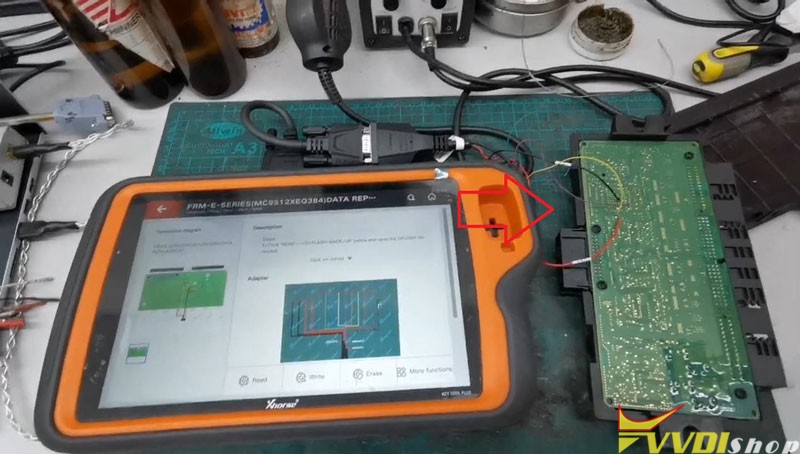
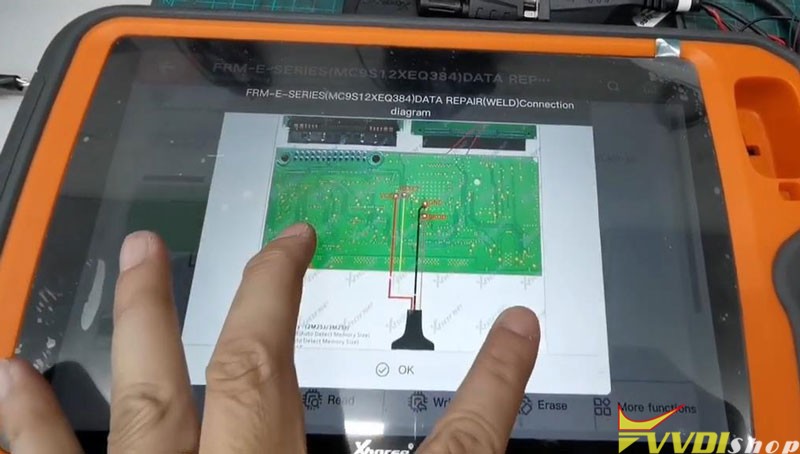
How to Repair BMW FRM XEQ384 data with Xhorse Key Tool Plus?
How to repair BMW MINI FRM E series XEQ384 data via Xhorse VVDI Key Tool Plus? Following I’m gonna make a quick demo to show the procedure.
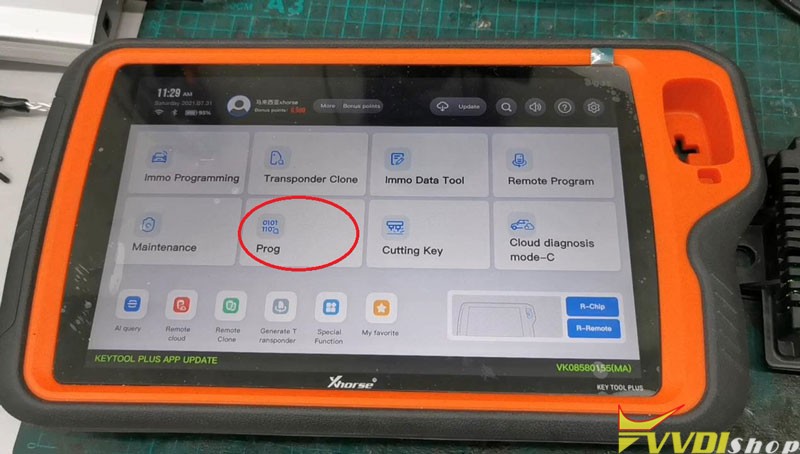
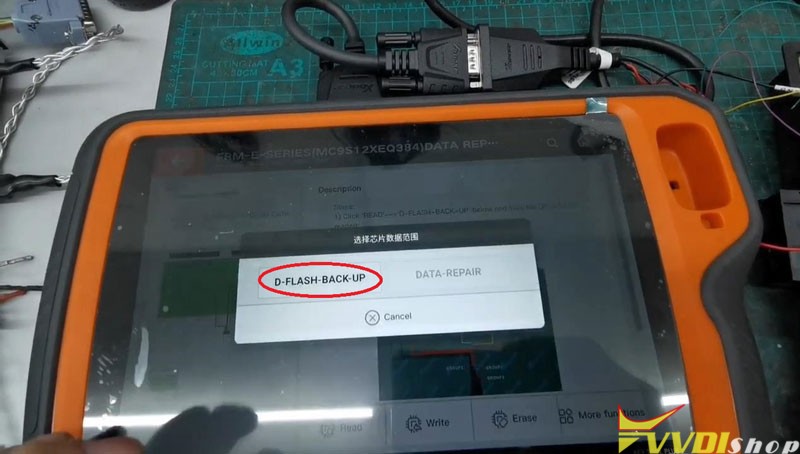
Prog >> Other >> BMW >> Select “FRM – E – SERIES(MC9S12XEQ384)(WELD)” or “FRM – E – SERIES(MC9S12XEQ384)(ADAPTER)”
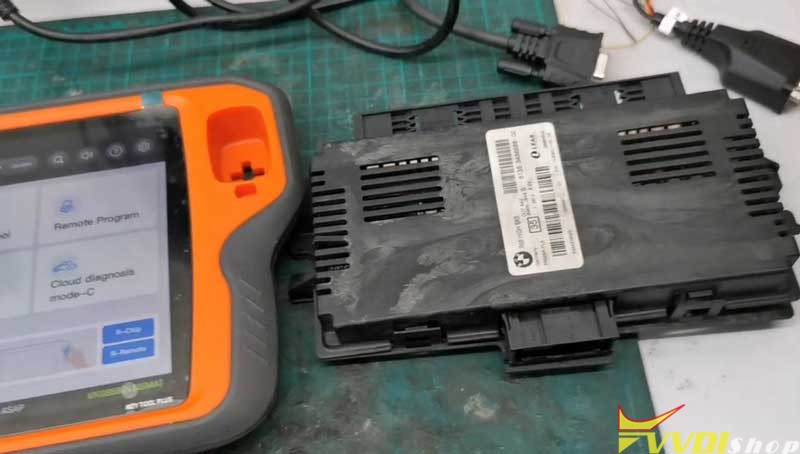
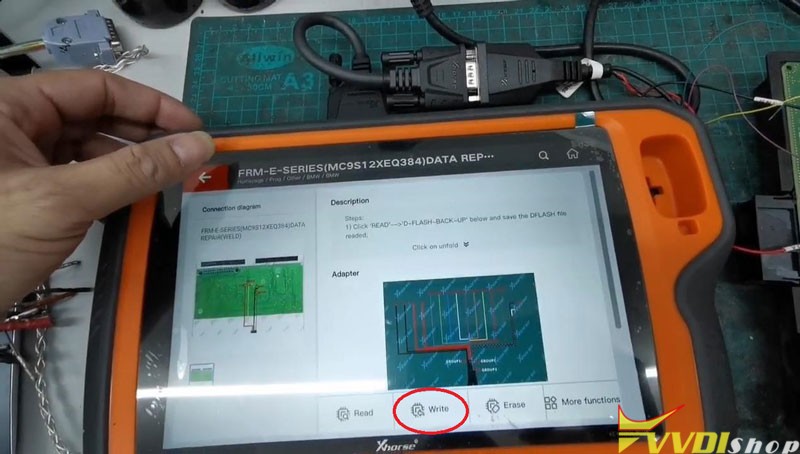
Wire FRM module according to the connection diagram.
Fortunately, we can also use a Solder Free Adapter instead to save time.

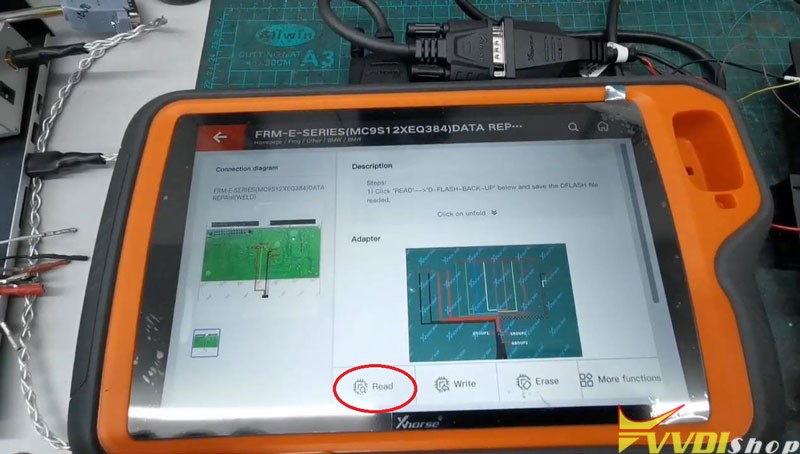
After connect FRM successfully, press
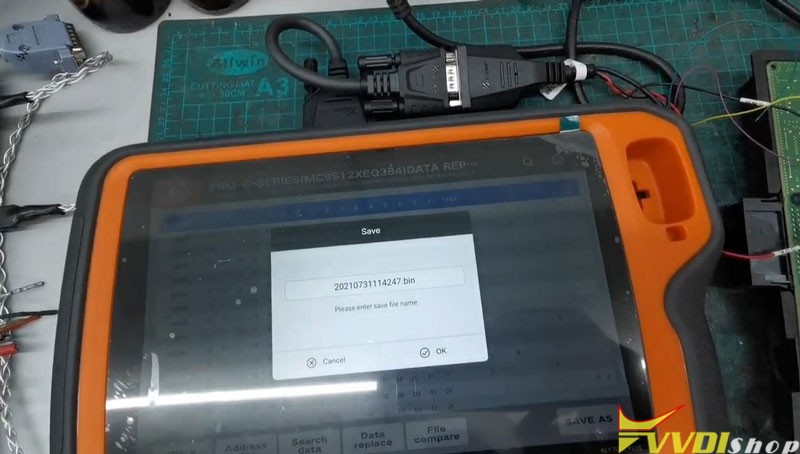
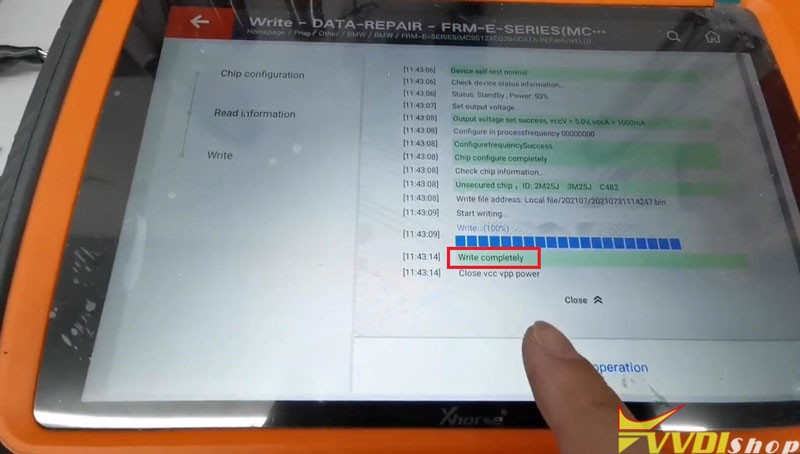
Read >> D-FLASH-BACK-UP >> Begin >> Continue >> OK >> Save as, OK
Save success.
Go back to
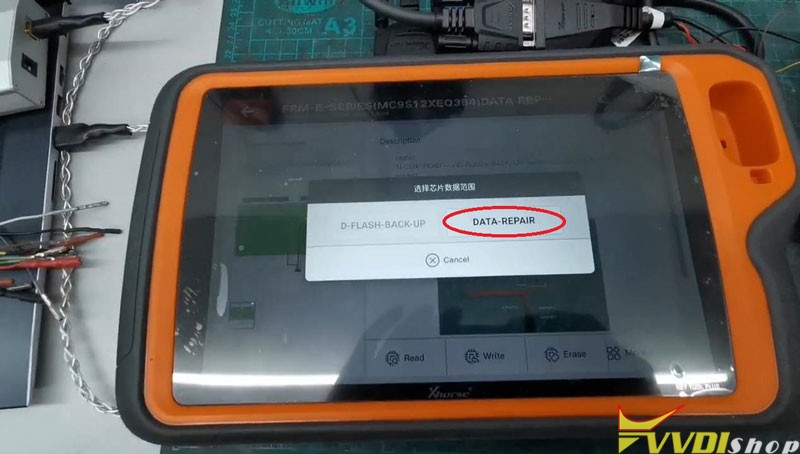
Write >> DATA-REPAIR >> Begin >> OK >> Select the saved data file, OK >> Begin >> Continue
Waiting for processing…
Write completely.
Repair FRM data successfully!
Use VVDI Key Tool Plus working with BMW FRM Adapter can easily repair XEQ384 data in 2 minutes.
http://blog.vvdishop.com/xhorse-vvdi-key-tool-plus-repair-bmw-frm-xeq384-data/
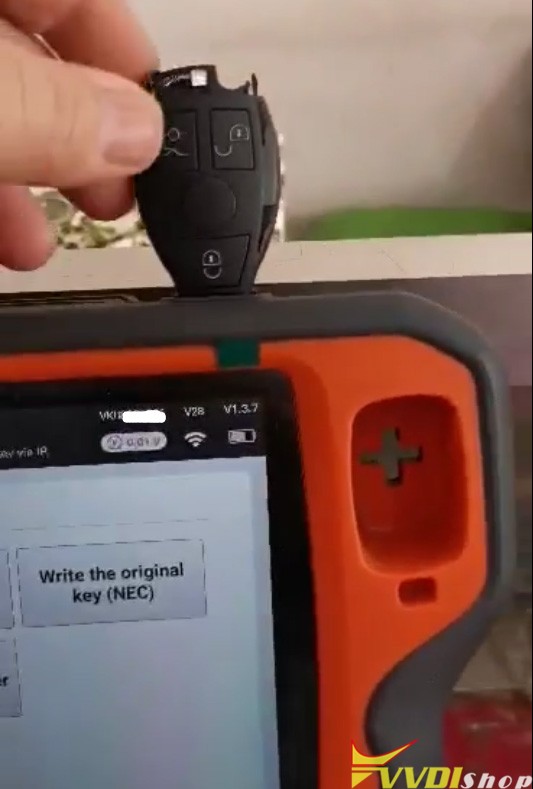
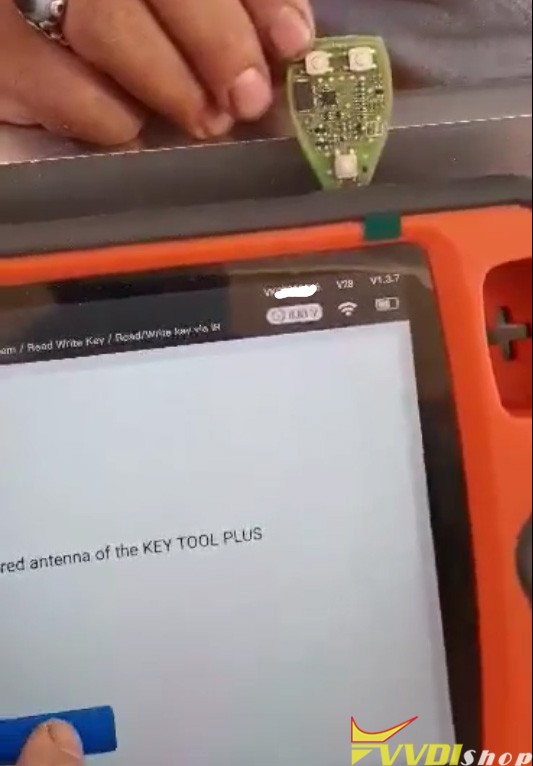
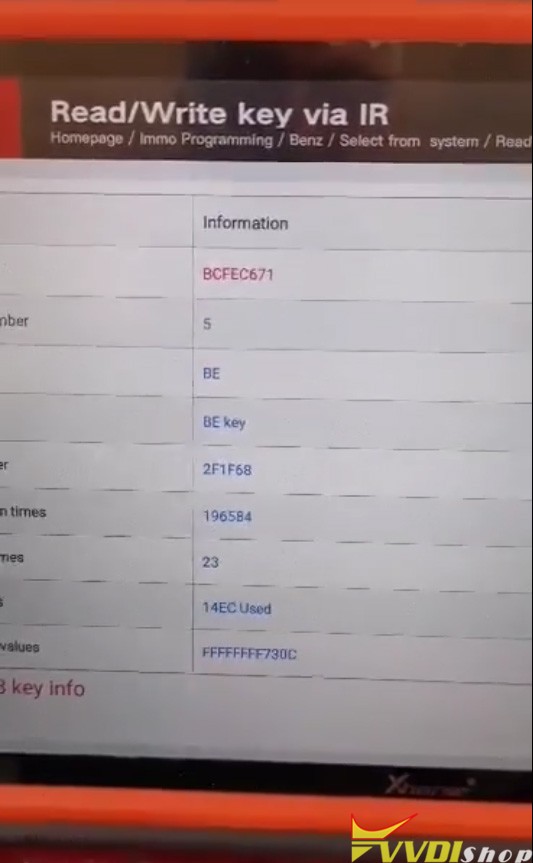
Xhorse VVDI Key Tool Plus No BE Key Detected Solution
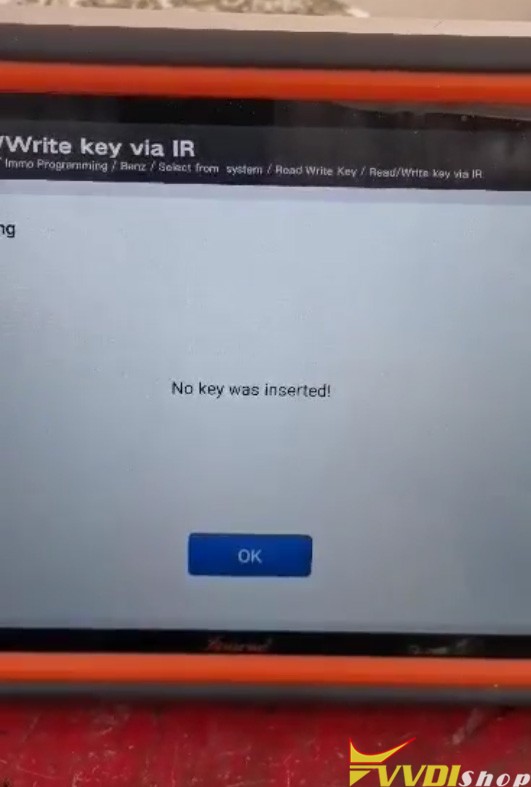
Here comes the problem with xhorse vvdi key tool plus: When I put the xhorse BE key with shell to check it doesn’t work and when I take the lid off him. It works normally.
Vvdishop solution:
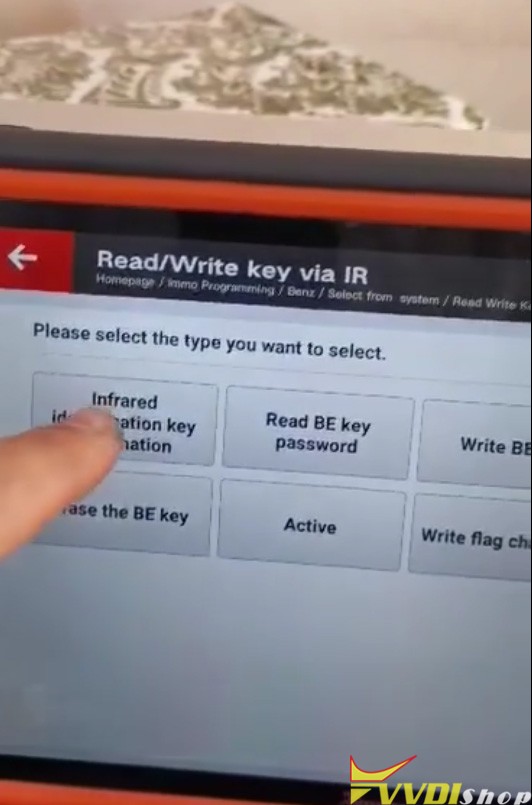
BE key information is identified via infrared. It is normal, sometimes you need to change a key position or insert it correctly.
One of our customers found that this red piece was the obstacle in not reading the key. He said it’s a key manufacturing defect by the manufacturer, and they’ve been able to fix the bug by grinding/polishing the red piece.
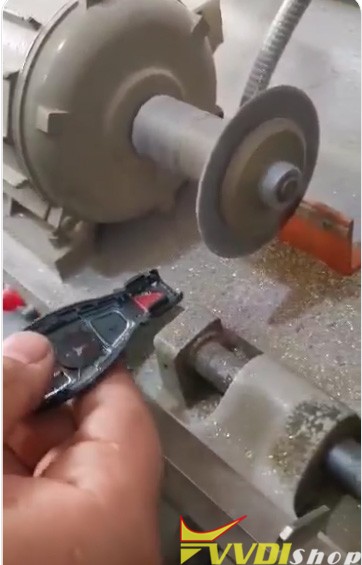
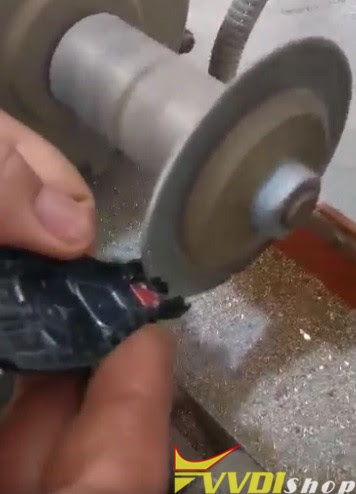
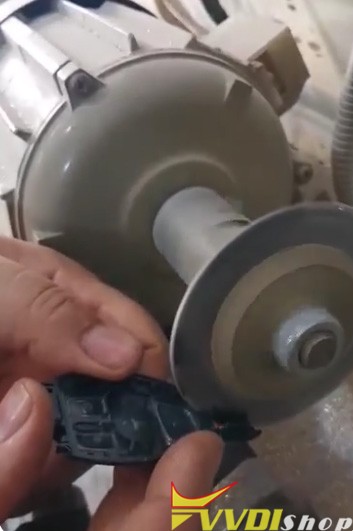

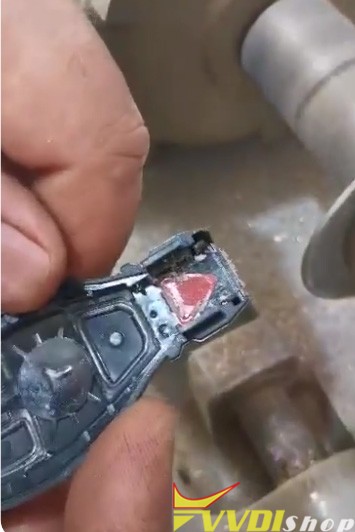
If you are afraid to damage the key shell, better take the lid off the key and read. Hope it helps.
http://blog.vvdishop.com/xhorse-key-tool-plus-cannot-read-be-key-no-key-insert-solution/