ابزار Xhorse VVDI
Xhose VVDI نرم افزار برنامه نویس اصلی و سخت افزارابزار Xhorse VVDI
Xhose VVDI نرم افزار برنامه نویس اصلی و سخت افزارEDC16U1 Change KM and IMMO Off using Xhorse VVDI2
How-to: read EDC16U1 ECU CS, MAC code, change km and IMMO Off using Xhorse vvdi2 programmer.
Run vvdi2 software
Select VW program
Go to Special Function-> Engine Control Unit
Read memory data

Detect type as EDC16U1
Read CS and MAC successfully

Input KM you desired to change and press write KM
Switch ignition OFF for 5 seconds, then switch ignition ON
Write KM successfully


Select IMMO OFF
Switch ignition OFF for 5 seconds, then switch ignition ON
IMMO OFF with vvdi2.
Switch ignition OFF for 5 seconds, then switch ignition ON


How to Use Xhorse Toyota BA 30-PIN Cable
This is a tutorial to show how to use Xhorse Toyota BA Cable step by step. The cable can be used for 2022- Toyota BA models adding key and all keys lost. It can work with VVDI Key Tool Plus, Key Tool Max Pro & Mini OBD Tool(FT-OBD version).
In this article, we’ll use the cable to read immo data and add a new key for 2022 Alphard as demonstration. The tools used in the whole process also include Key Tool Max PRO and a new XM38 Smart Key.


Learn tutorial on video:
Step1. Generate Remote
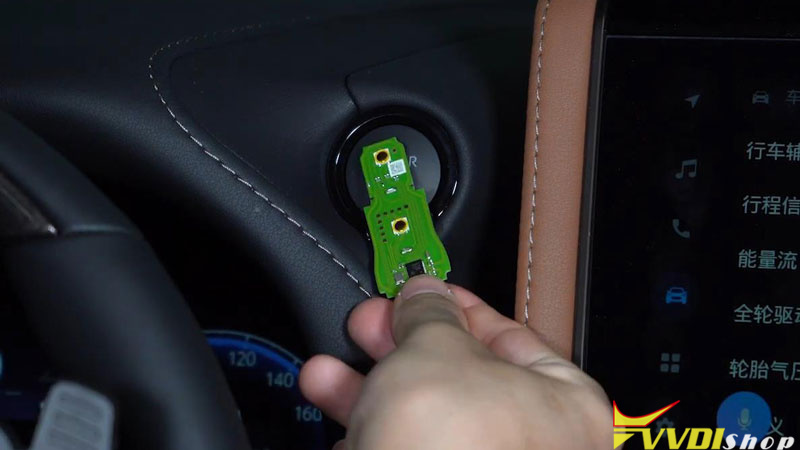
- Take out the PCB board of key to pop in the battery. Place the PCB board on the coil of Xhorse Key Tool Max PRO.
- Remote program >> Toyota 3041(BA) 433.58/434.42 >> Generate
The smart key has been generated.

Step2. Read Immo Data
- Connection
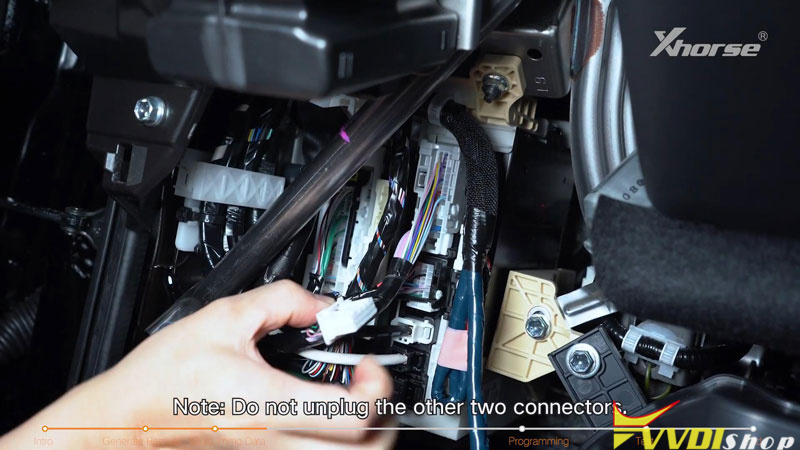
The smart key box of 2022 Alphard is above the driver brake pedal. Remove these 3 trim panels in a proper order. Then you’ll need to locate the smart key box.
- Remove the 30-pin plug of the smart key box on vehicle.
Note: DO NOT unplug the other 2 connectors.
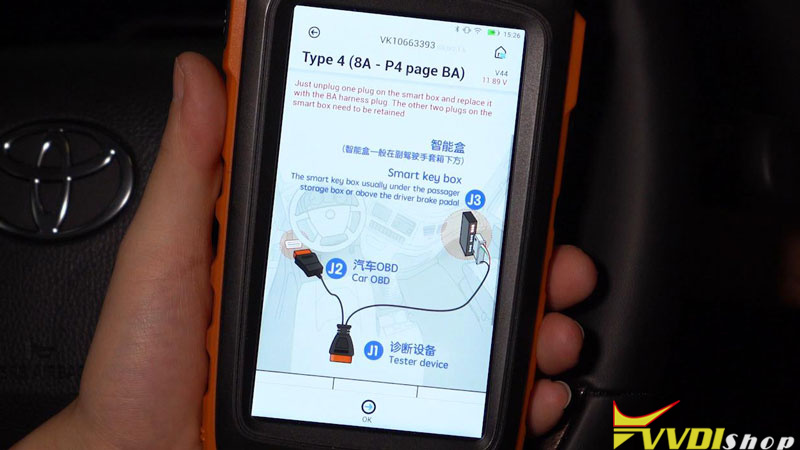
- Plug Toyota BA AKL Cable into the smart key box, connect the OBD end to the vehicle OBDII port.
- Connect the BA cable to Key Tool Max PRO via OBD cable.
- Read Data
Immo programming >> Toyota >> Classified by type >> Smart key after 2016 >> Type 4(8A-P4 page BA) >> Immo programming >> Backup smart box EEPROM data >> 30PIN cable reading
Turn on the double flash.
Make sure connection is well, press “OK”.
Key Tool Max PRO will tell how to connect the cables, press “OK”.
Waiting for the calculating…
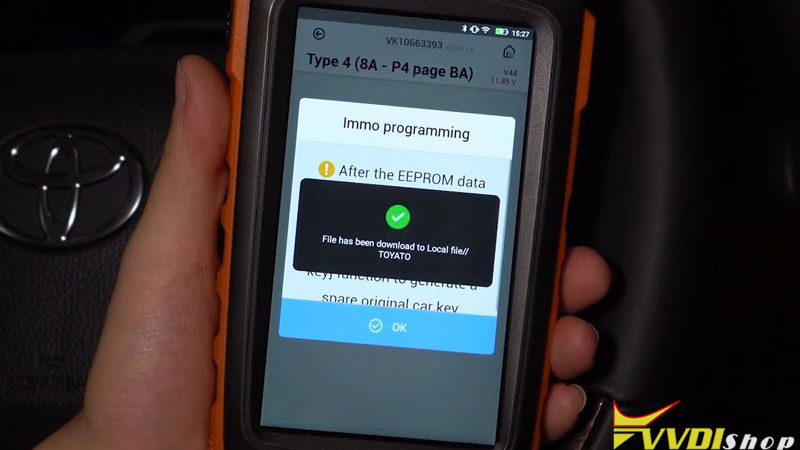
Save the file when calculating success.
We can use the data to add smart keys or generate keys when all keys lost.
Note: Before going next step, unplug the BA cable and restore the original 30-pin plug of the vehicle.
Step3. Key Programming
Click “Add smart key”.
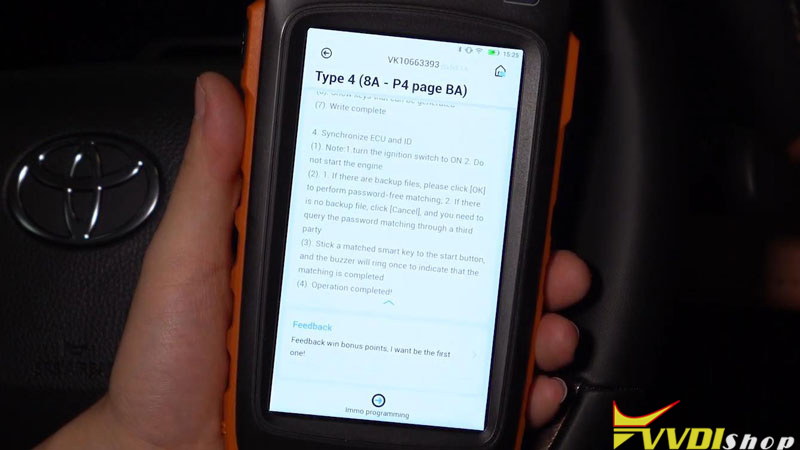
Turn on the ignition.
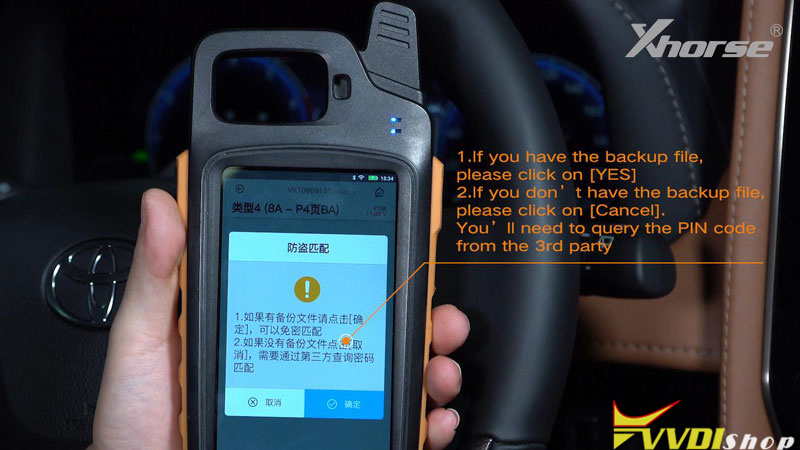
- If you have the backup file, please click “Yes”.
- If you don’t have the backup file, please click on “Cancel”. You’ll need to query the PIN code from the 3rd party.
Since we already have the file, click “Yes”.
Select the file and now we know we can add up to 6 keys to this car, click “OK”.
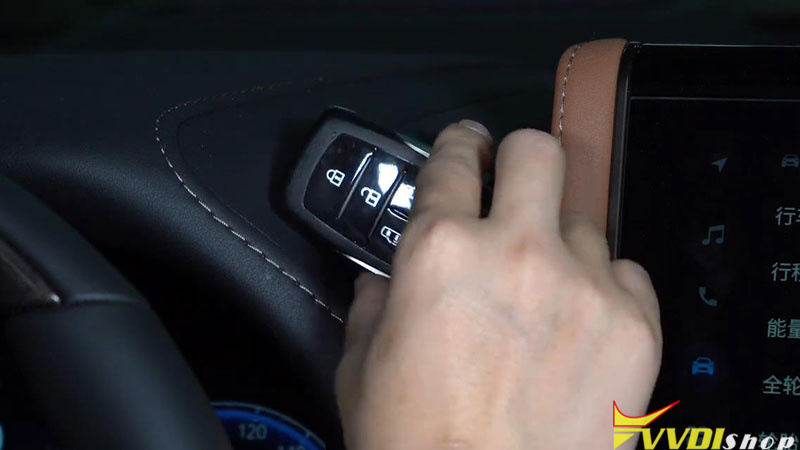
Place the registered key near the power button, and take it away after we hear the beep sound.
Then we need to take every key to be programmed to the power button, and take it away after it beeps twice.
Now we can see we’ve successfully added a key to the vehicle.
Then we can test the remote and smart function of this new key.
All functions work perfectly.
Do not forget to restore the trim panels.
How to Solve Xhorse Dolphin XP005L Decode Error Code 2?
Problem:
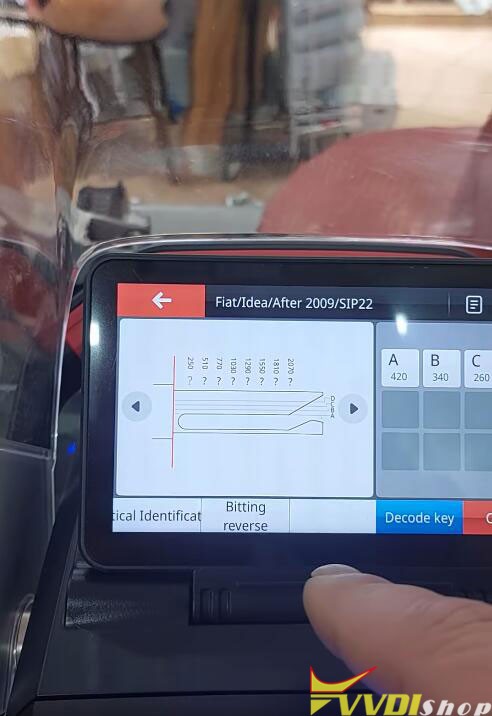
I did the first installation but my xhorse dolphin ii key cutter doesn’t decode the keys. Fiat Idea SIP22 blank.


Solution:
You didn’t put the key in the clamp correctly.

Key needs to sit higher in clamp on top level.

Re-adjust the key in the m5 clamp.
The shoulder of the blade is your stop point at the jaw.
This is how you must place the key.

Xhorse Multi Prog Adds VAG MQB RH850 Dashboard
Xhorse Multi Prog programmer released new software version 1.1.2.0 on Feb, 26th, 2024.

Database V11
2024-02-26 14:36:44
* MCU STM8S and STM8AF series wiring diagram update.
* MQB dashboard options process optimization and wiring diagram update.
* Repair NATS5-IMMO option in <IMMOBILIZER>-><NISSAN>
+ Add SPC582B50,
SPC582B54,
SPC582B60,
SPC584B60,
SPC584B64,
SPC584B70,
SPC584C70,
SPC584C74,
SPC584C80,
SPC584E84,
SPC584G80,
SPC584G84,
SPC584N80,
SPC58EC60,
SPC58EC70,
SPC58EC74,
SPC58EC80,
SPC58EE84,
SPC58EG80,
SPC58EG84,
SPC58EN80,
SPC58EN84,
SPC58NE84,
SPC58NG84,
SPC58NH92,
SPC58NN84
options in
<MCU>-><ST>-><SPC58XX>
+ Add MQB-LOCK(D70F3423)-READ(WELD),
MQB-LOCK(D70F3423)-WRITE(WELD)
MQB-LOCK(D70F3426)-READ(WELD),
MQB-LOCK(D70F3426)-WRITE(WELD)
MQB48/49/5C-LOCK(R7F701401)-READ,
MQB48/49/5C-LOCK(R7F701402)-READ,
MQB48/49/5C-LOCK(R7F701404)-READ,
MQB48/49/5C-LOCK(R7F701407)-READ options in <DASHBOARD>-><VOLKSWAGEN>-><MQB>
+ Add AUDI Q3 DASHBOARD(2018–)(D70F3426)-READ, AUDI Q3 DASHBOARD(2018–)(D70F3426)-WRITE options in <DASHBOARD>-><AUDI>
+ Add Q7 BCM2 J393(2016)(SPC5646C) option in <IMMOBILIZER>-><AUDI>
+ Add MOTO REPAIR-MC9S12XS256 option in <IMMOBILIZER>-><BMW>
+ Add PCX(MC9S12G64) option in <IMMOBILIZER>-><HONDA>-><PCX>
+ Add CRV(R7F701033)(WELD), XRV(D70F3634)(WELD), AVANCIER(R7F701033)(WELD), BREEZE(R7F701033)(WELD), VALEO MOTORCYCLE EPROM options in <IMMOBILIZER>-><HONDA>-><HONDA>
+ Add BCM(D70F3634)(WELD) option in <IMMOBILIZER>-><HONDA>-><Vezel>
+ Add GEELY AIRBAG(R7F701018) option in <AIRBAG>-><GEELY>
+ Add Lithium Battery(MC9S12XET256) option in <Other>-><BYD>
+ Add JIEFANG DRAGON_V BCM option in <Other>-><FAW>
Requires extra MQB RH850/V850 cable for Multi Prog (purchase separately).
Keep updating more RH850 types.

It will MQB RH850 dashboard only, cannot write. Read data and upload to vvdi2 or vvdi key tool plus to program key.
Combine multi-prog with vvdi2 or key tool plus will get free MQB license.
MQB48/49/5C R7F701401 dashboard pinout

MQB48/49/5C R7F701402 dashboard pinout

MQB48/49/5C R7F701404 dashboard pinout

MQB48/49/5C R7F701407 dashboard pinout

Update software online. Press Update Online tab to update software, firmware and database.
Xhorse Multi Prog Read Renault SID301 by BDM
It is a Renault SID301 ECU from a Renault Megane 2. It was water damaged. Need to read it and copy to another ECU. This ECU is really cheap and don’t want to repair.
We can read this ECU with Xhorse Multi Prog via BDM.
Pinout is included in the multiprog documentation.
Select Renault->SID301

Check wiring diagram


Connect SID301 ECU with multiprog via MCU adapter follow the wiring diagram


Pinout is included in the multiprog documentation.
Solder carefully, don’t mix up the connection.
Double-check connection and make sure everything is connected to the device.
Then go to multi prog software.
Select Renault SID301.

Read chip ID
Read EXT eeprom
It was readed 100% now we are in the verify State and we have data overall. It took 12 seconds to read the eeprom memory.
Save eeprom. It reads eeprom very fast (28s).

Let’s read EXT flash data

Reading flash takes longer, but it worked.
It takes 8min 32s to read the flash data.

Then you can write original eeprom and flash to a donor ECU.