ابزار Xhorse VVDI
Xhose VVDI نرم افزار برنامه نویس اصلی و سخت افزارابزار Xhorse VVDI
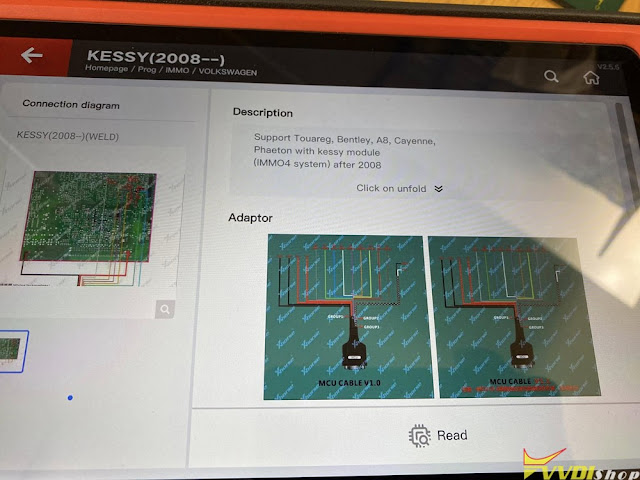
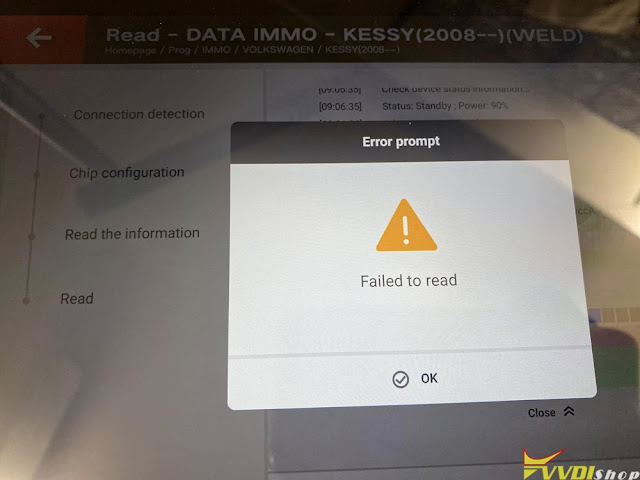
Xhose VVDI نرم افزار برنامه نویس اصلی و سخت افزارRead 2008 VW Toureg Kessy IMMO Data with VVDI Key Tool Plus
Problem:
It is a 2008 VW Toureg with Kessy module. Weld up and read back-up data with xhorse vvdi key tool plus successfully. But it fails to read immo data. Tried several times. Welding is good.
What could be the problem?
Solution:
Don’t have to read immo data from the Programmer menu.
Go through the IMMO menu and loaded the “backup data” you read with the programmer, and it will give the the pin and 7 byte cs code.
Go to this screen and load the data you’ve read.
Same system as 2008 Porsche Cayenne.
Will VVDI Key Tool Max Pro Add Peugeot Marelli ID48 Key
Question:
Will Xhorse VVDI Key Tool Max Pro Add a Key to my Peugeot Boxer 2.2 2009 with magneti marelli immo?
Yes, key tool max pro will add a spare key to Peugeot Citroen ID48 with Marelli IMMO system.
Go to IMMO system (Marelli 70F3238 + 95320 ID48) function.
Supports read eeprom, write eeprom, make dealer key, key programming, adapt remote key and renew remote.
If need to add a new key, follow steps below to finish key programming.
FYI:
If your car has id46 transponder then no problem for you, can use precoded transponder and program in car via diagnostic device but if is immo3 with id48 than you need special precoded id48 chip from vin from dealer or need make transponder with key maker from dump and need rewrite new dump which will be produce during transponder programing. in this mean the transponder is ready to start car.
www.vvdishop.com
Xhorse Condor 2 Error Code 6 Solution
Here comes the solution to Xhorse Condor XC-Mini Plus II error code 6. Hope it helps if the same error occurs.

Solution:
When decoding or cutting keys by Condor 2, Error Code 6 indicates abnormal conductivity in the probe or cutter.
Follow the step-by-step guide below to solve it.
Step 1: Conductivity Test
Perform a conductivity measurement to diagnose the problem:
1.Navigate to Settings > Machine Test > Electrical Conductivity Measurement.


2.Follow the on-screen prompts to connect either the probe or cutter (not both).
3.Start the test.
Step 2: Test Results
If both the probe and cutter light up green simultaneously:
This indicates a short circuit between the probe and cutter.
Step 3: Inspect for Iron Filings
Check for iron filings around the three screws above the probe.

Clean the area thoroughly to remove all debris.
Step 4: Reinstall Screws
If the problem persists, remove the three screws above the probe.
Clean the area around the hole to ensure no iron filings remain.
Reinstall the screws, but:
Do not overtighten, as this can damage the insulation plastic ring on the screws, causing a short circuit.


Step 5: Check Conductive Wires
Restart the test. If the probe green light turns on before connecting:
- Indicates the probe is in a short circuit state.
Inspect the conductive wires on the probe disk for damage.
- Damaged wires should be wrapped with insulating tape.


Conclusion:
Retest conductivity using the Xhorse Condor XC Mini Plus II Key Cutting Machine’s test interface.
If the issue persists, consider replacing faulty components or contacting the manufacturer.
How to Cut Aluminium key by Xhorse Dolphin II M5 Clamp
Question:
Where is the option for aluminium key in Xhorse dolphin xp005l I can’t find it having to use old dolphin XP005.
Answer:
You have to use the M2 clamp.
There is no such an option for the M5 clamp. The Plastic key/aluminium key function was removed.
Xhorse engineer solution:
For keys made of normal conductive materials, place them directly for cutting. For keys made of non-conductive materials, place the keys normally at the beginning of cutting. When the milling cutter starts to rotate, click Pause. After changing the key, click Continue Cutting.
1. Mount blank metal and machine to do a detection test.
2. After detection finishes, simple click PAUSE, swap blade.
3. Click RESUME, this is just 1 step before the spindle start, so no more blank key detection.
Customer simple solution.
Take a metal version key blank and I use the should stopper against the back edge of the clamp, so when u put the key blank in the clamp the tip of the key hits the shoulder stopper ur holding fast up against the clamp.
Then let the machine “located” the key. then as soon as it turns the motor on hit pause.
Then take the metal blank out and swap it with the aluminum blank. again using the shoulder stop to stop the tip of the key.
Then hit continue.
Some people do this for JLR hu101 keys
It works fork plastic keys (HU66) too.
How to Program Toyota Smart Key with Xhorse Mini FT OBD Tool
How to erase and add a smart key for your Toyota vehicle using the VVDI Key Tools Max and Xhorse FT-OBD tool. This is a step-by-step guide on how to program a Toyota Camry smart key using the Mini FT tool. You can also run App on a mobile phone instead of key tool max. The Xhorse FT-Mini OBD tool is a Toyota specific tool that can be used to program smart keys for a variety of Toyota models, including the Toyota Camry, Sequoia, RAV4, and 4Runner up to 2023. We will demonstrate how to use the Xhorse FT-OBD tool to complete the programming process. With these tools, you’ll be able to delete and add smart keys with ease.
Take an example of Camry 2015 smart key.
Select IMMO Programming- Select from model- Camry- KeylessGo- 2013-2017 Type 1(8A-Page P4 88)
If all keys lost, you need to perform all these steps.
Step 1: Read EEPROM data
Step 2: Generate emergency key
Step 3: Add keys
Here just add a spare key, so choose Adding Keys.
Select Clear smart keys.
Turn the ignition to ON position.
Xhorse FT OBD Tool detects that 1 key was registered.
Touch the ignition with a registered key within 30s.
Erase key successfully.

Select Add smart keys
Turn the ignition to ON position.
Keep the ignition switch with a registered key with the marked surface within 30s.

Key detected. prgramming…
Keep the key touching the igntion switch.
Register a new key successfully.
Test the new key and remote control.
Check:
https://www.vvdishop.com/service/how-to-bine-xhorse-ft-mini-obd-tool.html


