ابزار Xhorse VVDI
Xhose VVDI نرم افزار برنامه نویس اصلی و سخت افزارابزار Xhorse VVDI
Xhose VVDI نرم افزار برنامه نویس اصلی و سخت افزارProgram Ford Edge 2013 All Keys Lost by Xhorse Mini OBD
How-to: program Ford Edge 2013 US model blade key all keys lost using xhorse vvdi mini obd tool.
Connect vvdi mini obd tool with vehicle via OBD
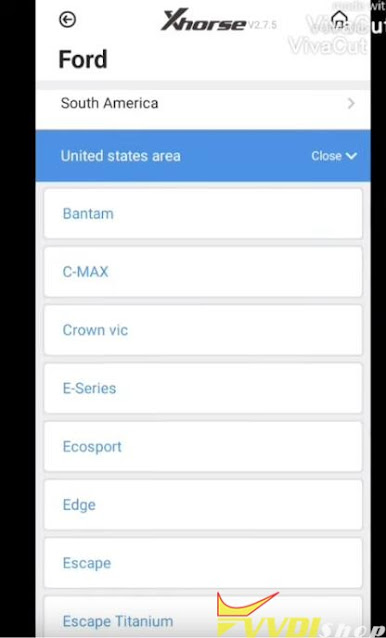
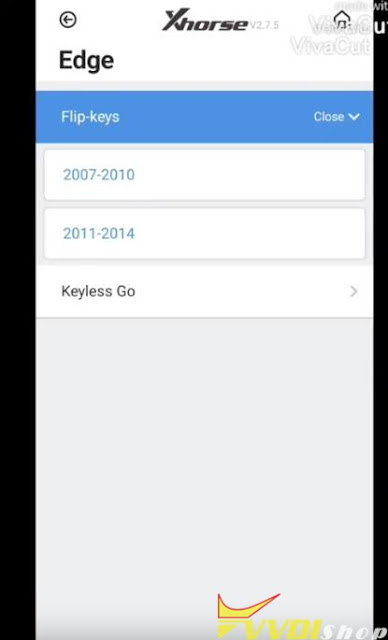
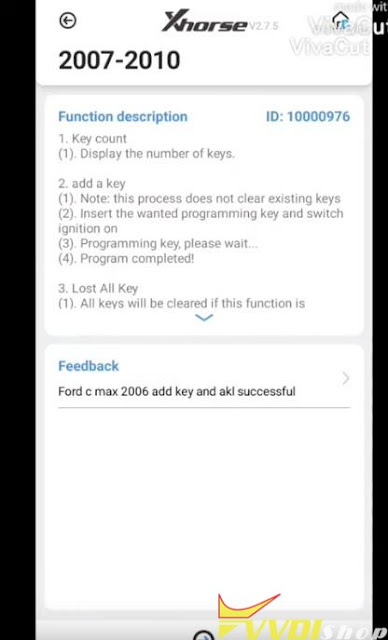
Immo Programming->Ford-> United states area->Edge->Flip key-> 2007-2010
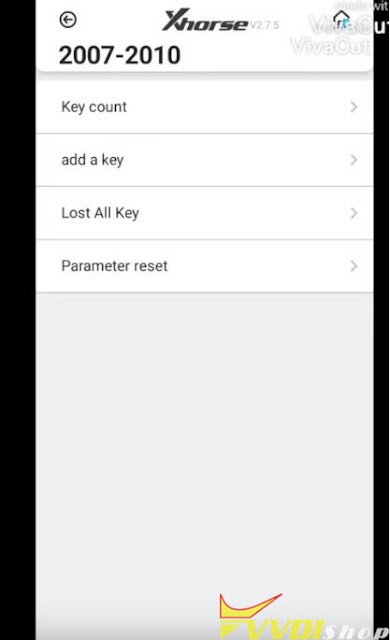
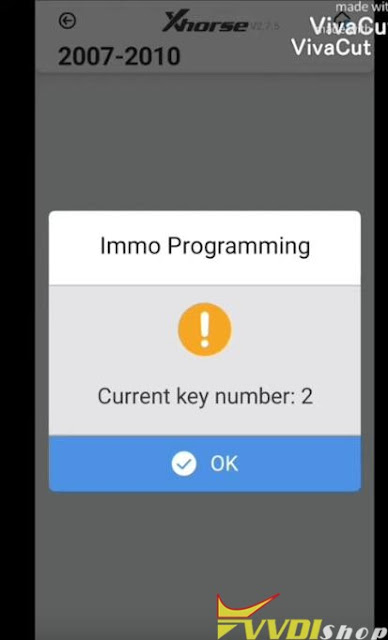
Read number of keys
2 keys detected
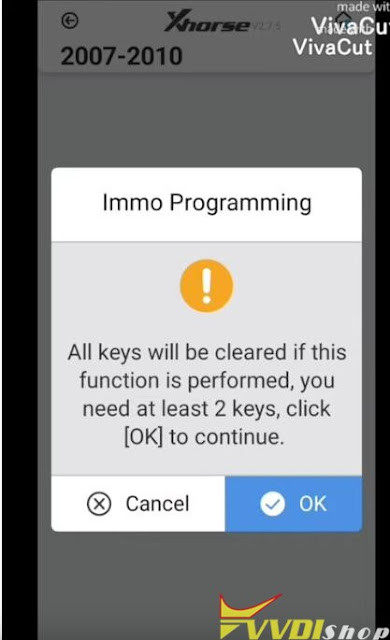
Select Lost all key
All keys will be cleared if this function is performed, you need at least 2 keys
Turn on ignition switch
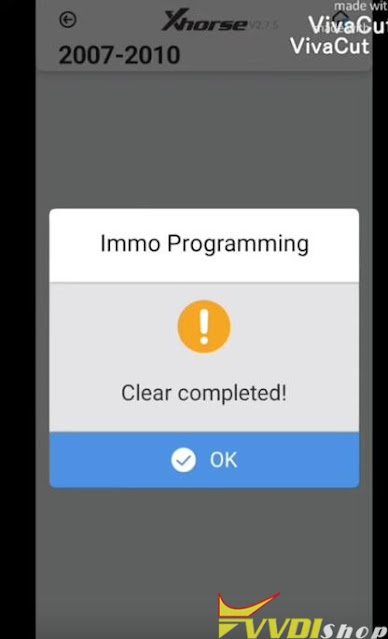
Erase key
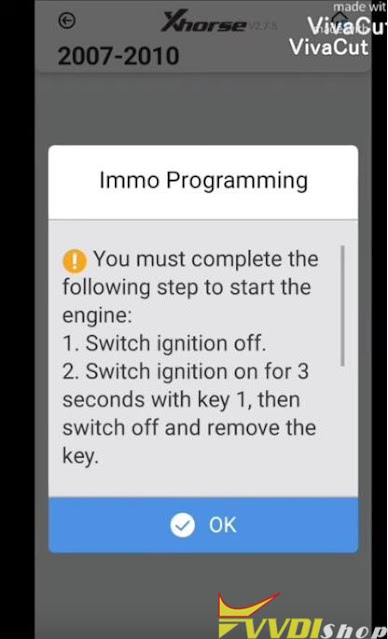
Complete the following step to start the engine
Switch ignition off
Switch ignition on for 3 seconds with key 1, then switch off and remove the key
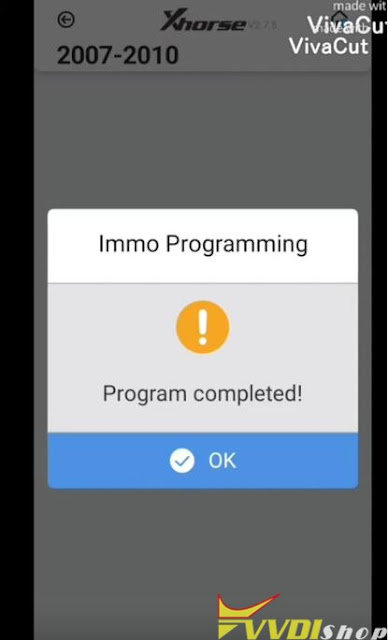
VVDI Mini OBD Tool Program key completed.
Test the new key.
http://blog.vvdishop.com/xhorse-vvdi-mini-obd-program-ford-edge-2013-all-keys-lost/
How to Solve VVDI Super Chip Toyota 4D70 Key Not Start?
Question: Toyota Yaris 07 4D70 Europe all keys lost try to make a key. Open the immo box read the 93c56 atmel. Make a key in autel and vvdi key tool plus with super chip xt27. Write the file and car doesn’t start Any idea?
Solution:
Solution 1:
One of our customer did the same with same result. Removed again and written Ori key from scrap. Then when car start just cloned to dedicated key.
Solution 2:
Read atmel chip and all good the car was start with OEM chip and vvdi key tool plus
Solution: 3:
Xhorse mini prog and key tool plus works without problem using OEM chip.
Solution 4:
The job can be done by xhorse vvdi2.
Did just this job today. 93c56. 4d70. With vvdi2. Works perfectly.
super chip as 4d70 new dump saved and written etc.
in vvdi2 you need to write the modified file back to eeprom.
How to Register and Update Xhorse Key Tool Max Pro?
This is a guide on how to register & update Xhorse VVDI Key Tool Max PRO for the first time. Follow the steps below to get started.
How to register VVDI Key Tool Max PRO?
- Power on Key Tool Max PRO>> Select language >> Set date & time zone >> Agree to enter >> Start to set >> Connect WiFi
- Enter cell phone number & password to login >> Send >> Enter security code >> Combine device
Tip: Please contact your dealer if cannot receive security code.
Warning
– After device combined to account, account will share this device bonus points;
– Parts of devices support to share function.
Press “Combine device”.
Combined device success.
Device activation success.
Press “Start to use” to next step.
How to update Xhorse Key Tool Max PRO?
Tips: current device need to synchronize, please go to Update Center to synchronize device, in case device no working.
Press “Update”.
* This may take some time, make sure good network before upgrade.
Here users can update system, APP, firmware & database.
Please update to the latest version as prompted:
Update APP >> Install >> Open >> Agree to enter >> Update
Update database >> Update all
Completed.
https://www.vvdishop.com/service/register-and-update-xhorse-vvdi-key-tool-max-pro.html
Xhorse Key Reader Cannot See Key Bitting Solution
Problem:
My xhorse key reader cannot identify key bitting anymore. It starts Scanning the key and never ends. Any solution?
VVDISHOP working solution:
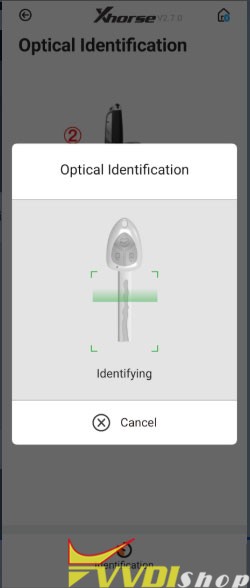
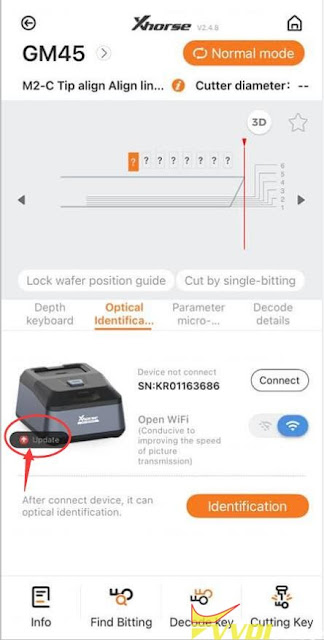
in Xhorse App, go to Optional Identification
Update xhorse key reader firmware via WiFi (Don’t forget to open WiFi)
2) Calibrate key reader
Keep press the key reader icon until it shows “Calibration”, calibrate the device
3). If failed, open device, check if this cable gets loose and replug it.
VVDI Prog MQB ELV uPD70F3624 Try Frequency Failed Solution
Problem:
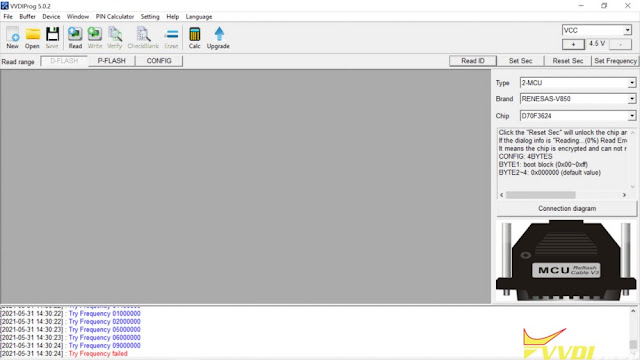
Need help reading uPD70F3624 by Xhorse VVDI Prog. Connected in-circuit according to their scheme. But the programmer does not see the ID.
Gives: Try Frequency failed
Try low frequency, still no luck. It doesn’t even give me an ID.
Technical Support:
If the ELV Renesas is alive and correctly soldered according to the scheme, then it should connect and read the ID without raising/lowing frequency.
It vvdi prog cannot read the ID, it will not read the mcu. This was confirmed by xhorse engineer.
Which tool will read?
Here is the user’s working experience. Share for purpose.
‘I read the Uart mode in orange. At first, the orange5 programmer also refused to read, until I set the quartz frequency to 2000 kHz and after clicking on the MCU info icon, he gave me the MK parameters and it turned out that the MK was 70F3371 and not 70F3624 as it was written on the stone. After choosing 70F3371 and setting the frequency to 8000 kHz, everything was fine.


.jpg)
.jpg)
.jpg)
.jpg)
.jpg)
.jpg)
.jpg)
.jpg)
.jpg)
.jpg)
.jpg)
.jpg)

