ابزار Xhorse VVDI
Xhose VVDI نرم افزار برنامه نویس اصلی و سخت افزارابزار Xhorse VVDI
Xhose VVDI نرم افزار برنامه نویس اصلی و سخت افزارProgram Toyota Corolla 2018 Remote Key by Xhorse Key Tool Plus
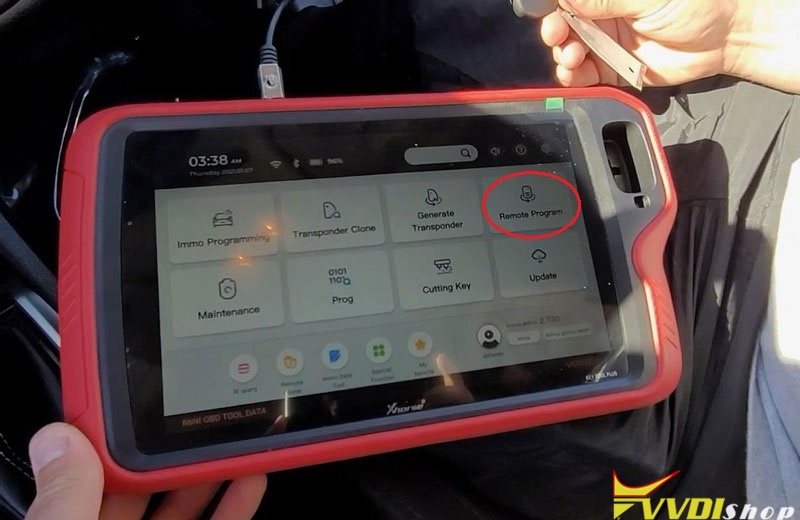
Hello guys, today I’m gonna program Toyota Corolla 2018 remote & key clone with the new tool Xhorse VVDI Key Tool Plus Pad.
Generate Remote
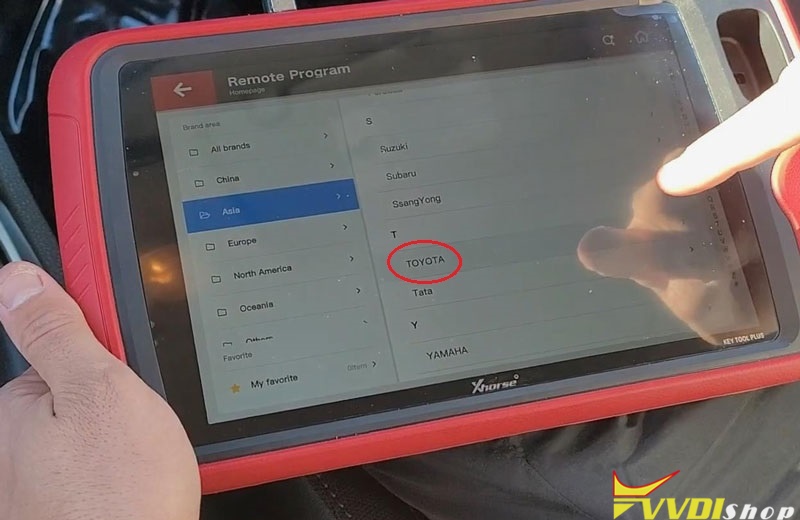
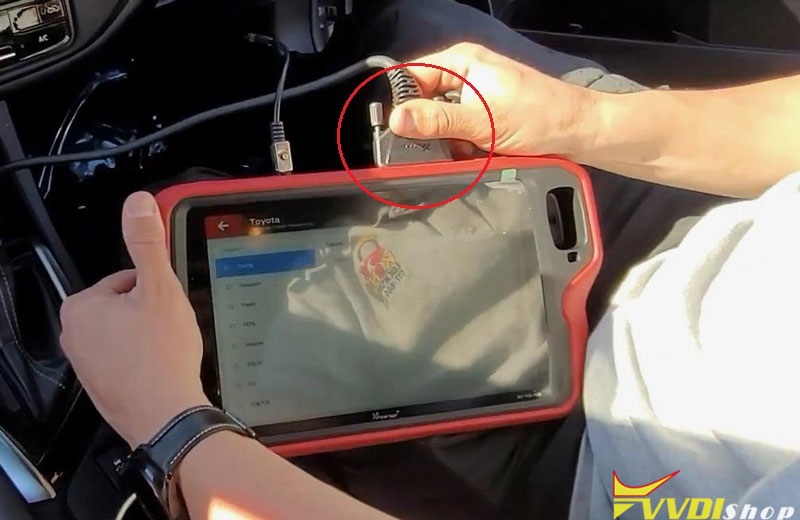
Connect VVDI Key Tool Plus Pad with Toyota Remote Key via cable, press
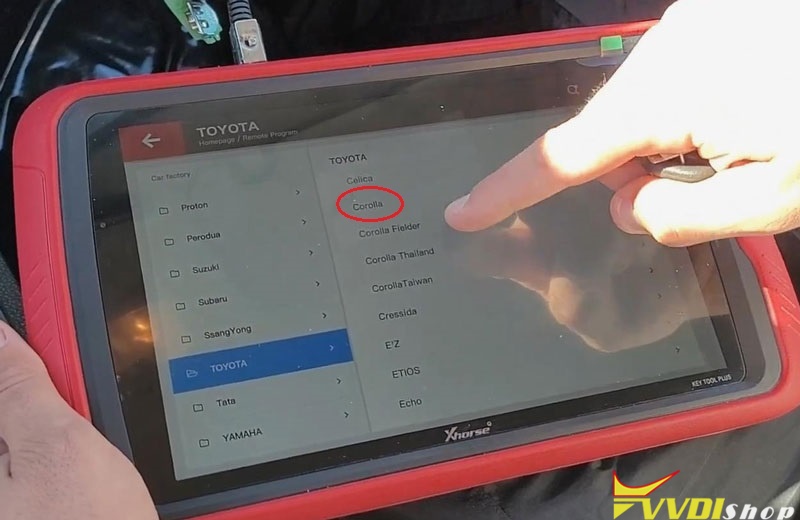
Remote program >> Asia >> TOYOTA >>Corolla
HYQ1 2BDM 14-19 >> Generate
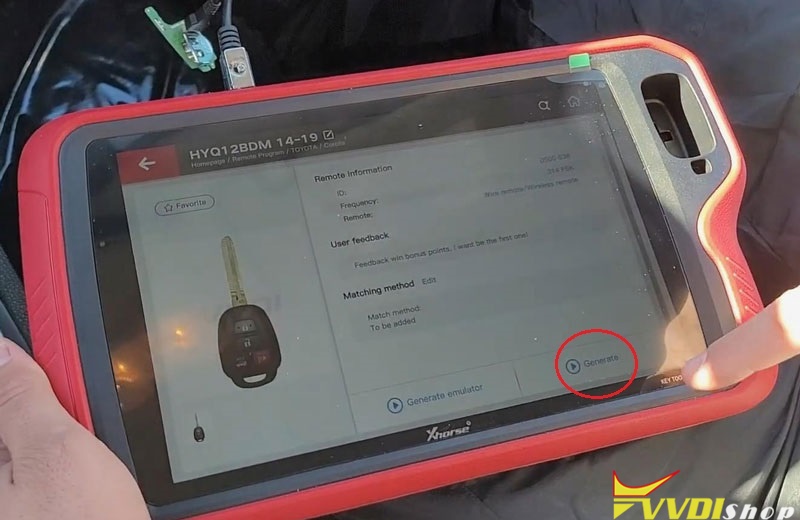
Writing data, please wait…
Burn success. Press “Complete”.
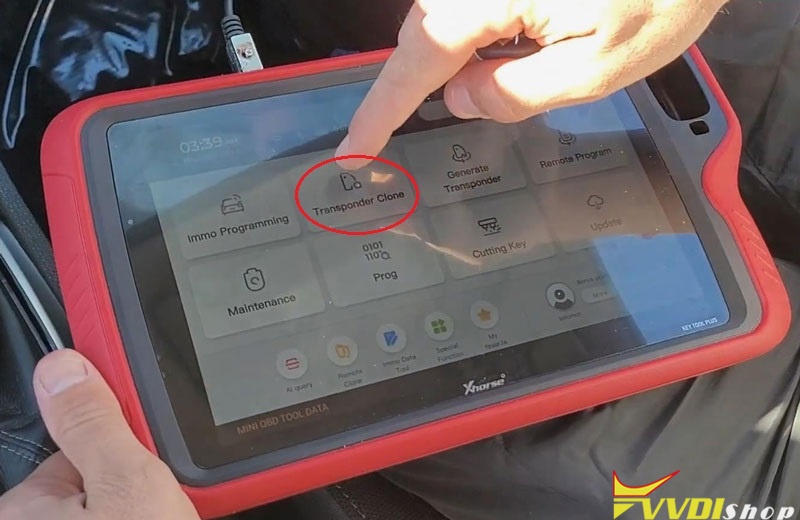
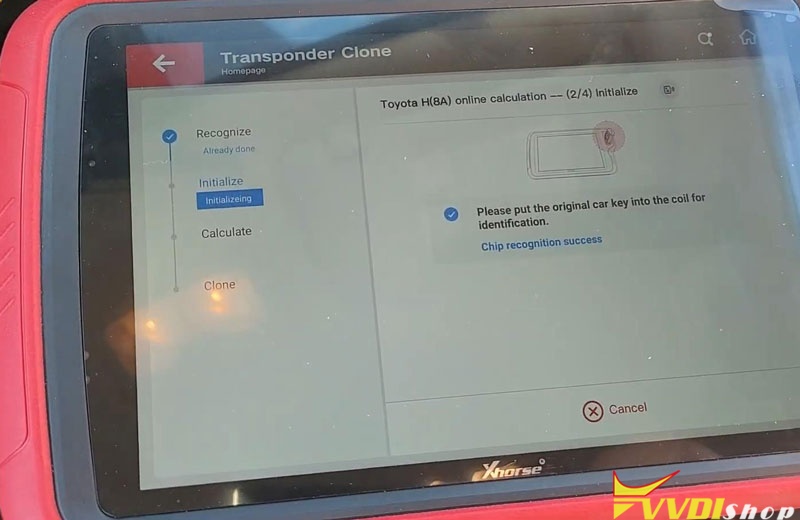
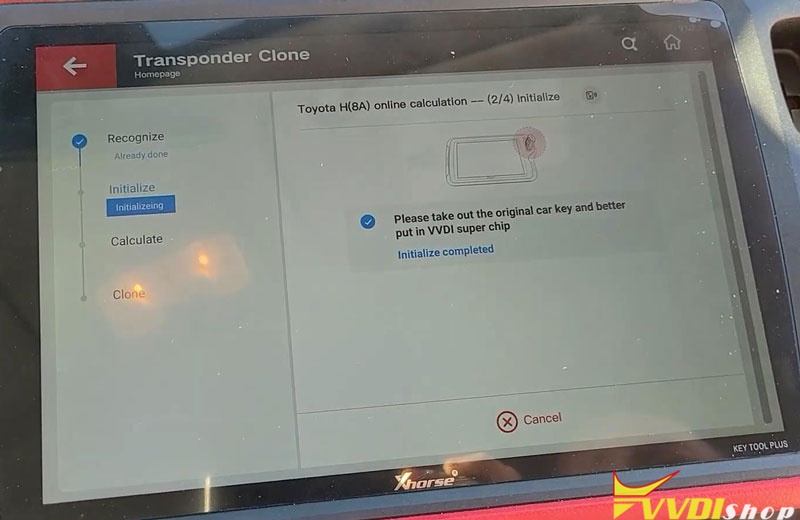
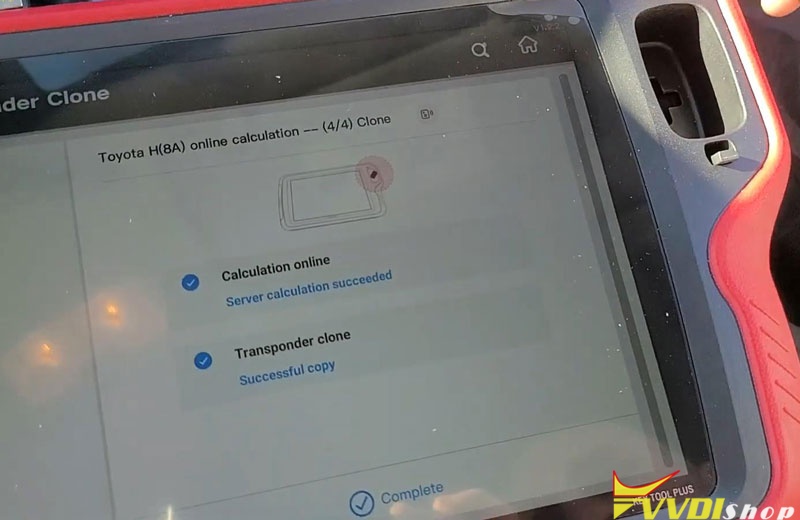
Clone Key Chip
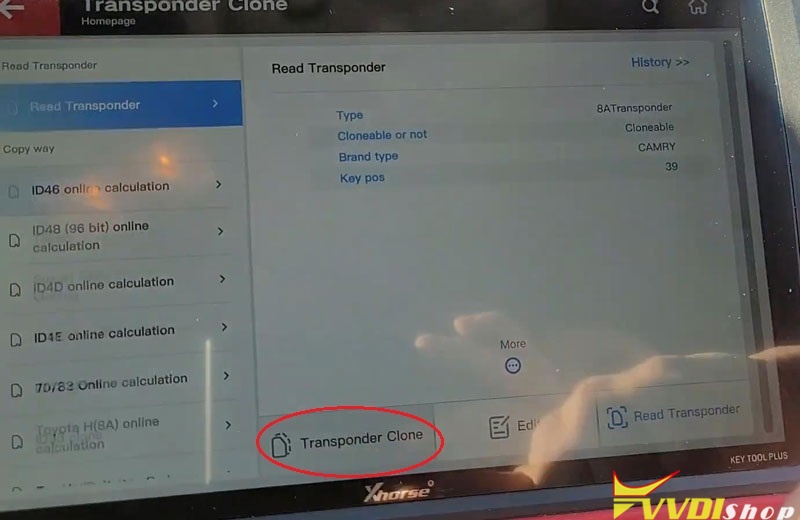
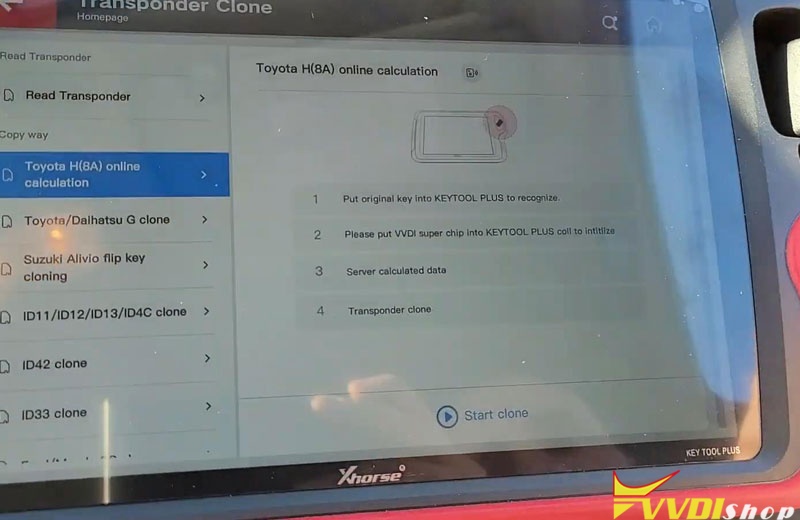
Transponder clone >> Read transponder >> Transponder clone
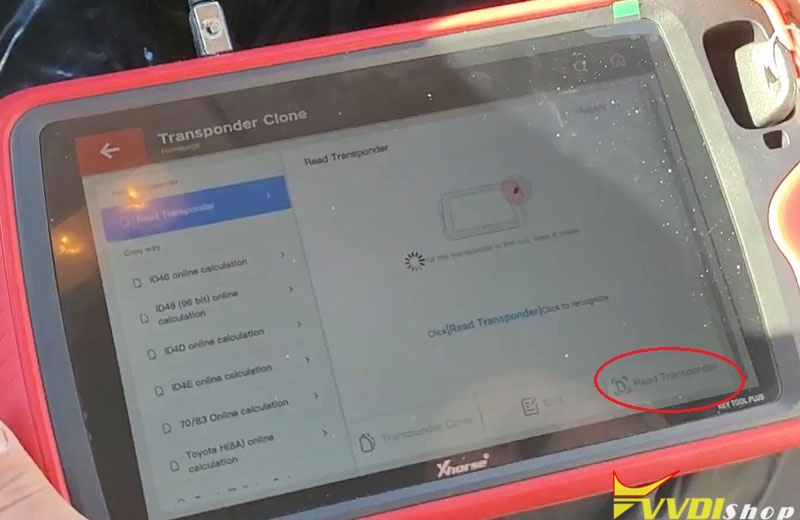
Following the notes to operate:
- Put original key into Key Tool Plus to recognize.
- Put VVDI Super Chip into Key Tool Plus coil to initialize.
- Server calculated data.
- Transponder clone.
Press “Start clone”…
Please take out the original car key and better put tin VVDI super chip.
Chip recognition success.
Initialize completed.
Server calculation succeeded.
Successful copy.
Complete!
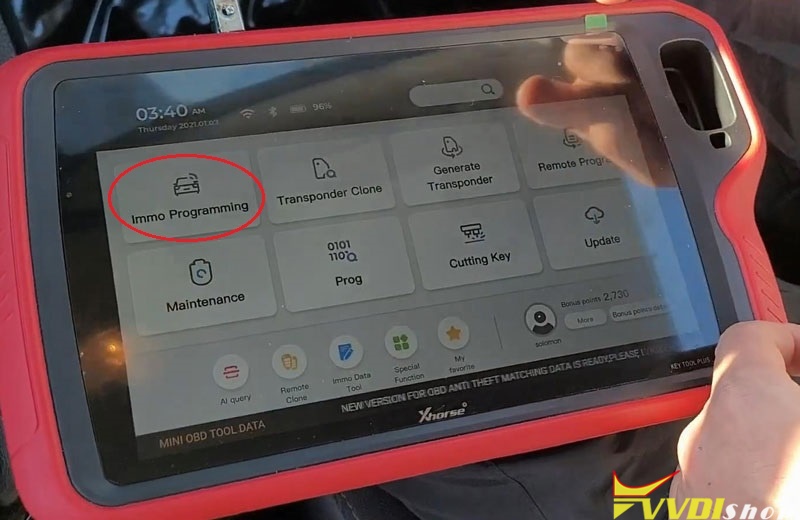
Program Remote
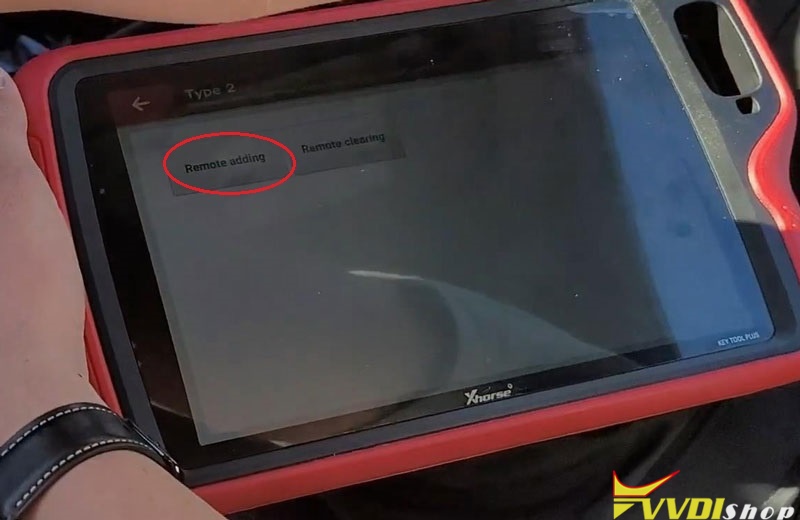
Connect VVDI Key Tool Plus with OBD2, and turn ignition on, press
Immo programming >> Toyota >> Select by type >> Remote system >> Type 2 >> Begin >> Remote adding
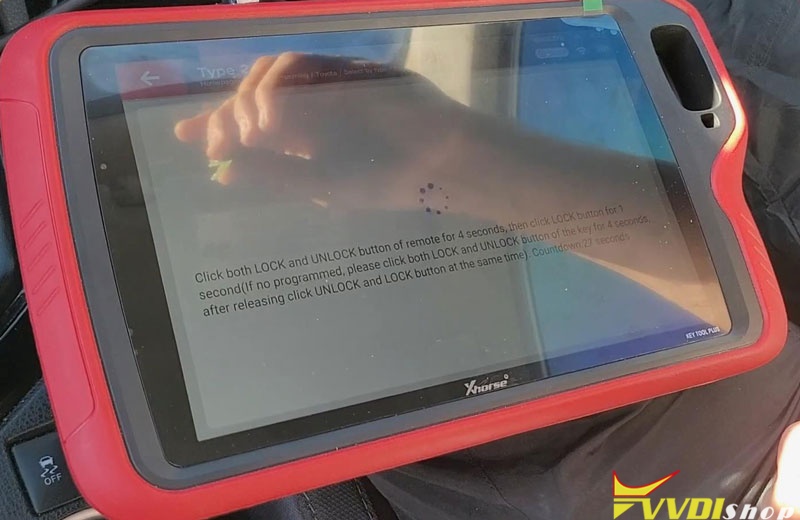
Press both LOCK and UNLOCK button of remote for 4 seconds, then press LOCK button for 1 second(if no programmed, please press both LOCK and UNLOCK button of the key for 4 seconds, after releasing press UNLOCK and LOCK button at the same time.)
Okay it is done.
Let me have a check, everything is work! Job has done.
Toyota Corolla 2018 key remote programming is done. With OBD connect to the Xhorse Key Tool PlusPad, it is quick and easy to operate in 4 minutes.
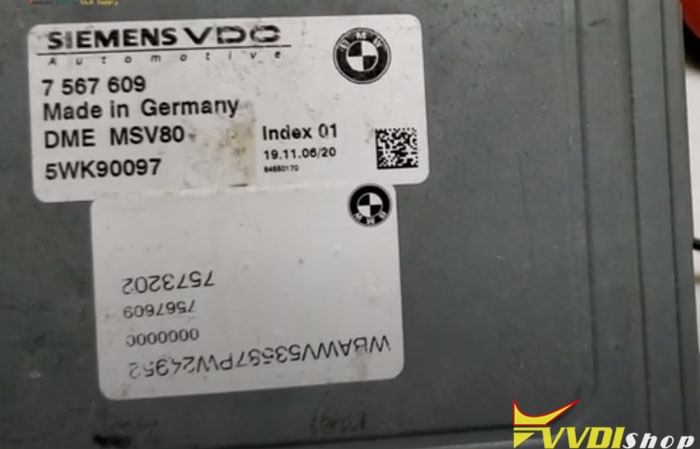
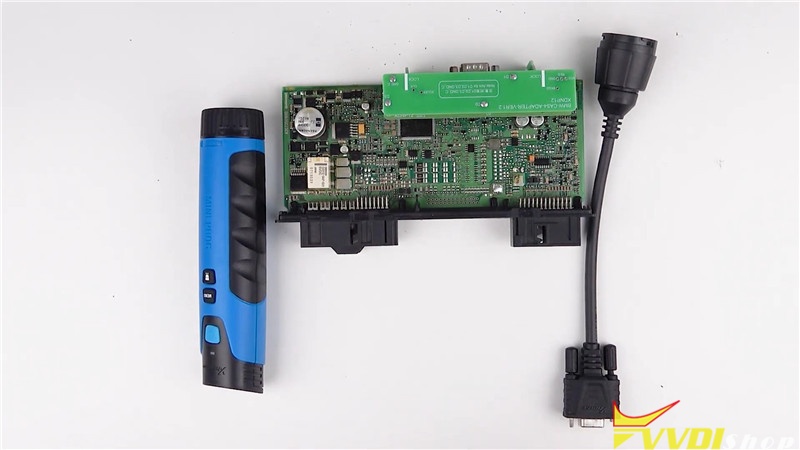
Xhorse Key Tool Plus read MSV80 DME ISN
Xhorse VVDI Key Tool Plus PAD inherited feature of VVDI BMW to read read engine basic information and ECU ISN via OBD. Supports reading ISN from ECU/DME MSV80, MSV801, MSD80, MSD81, MSD802, MSD812, MSD851 MED17xx, MVD17xx MEVD17XX MV1722 MED172 MEV17N46 ME17N45 etc.
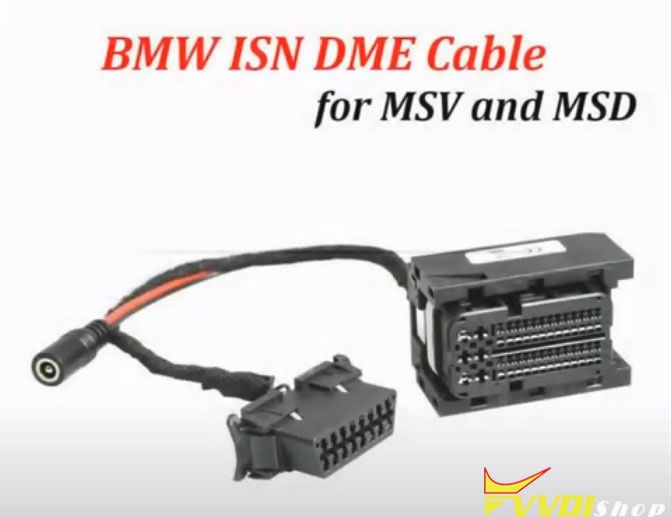
Here is the demo guide to read MSV80 ECU ISN using key tool plus and BMW ISN DME cable (fast read no soldering)
Procedure:
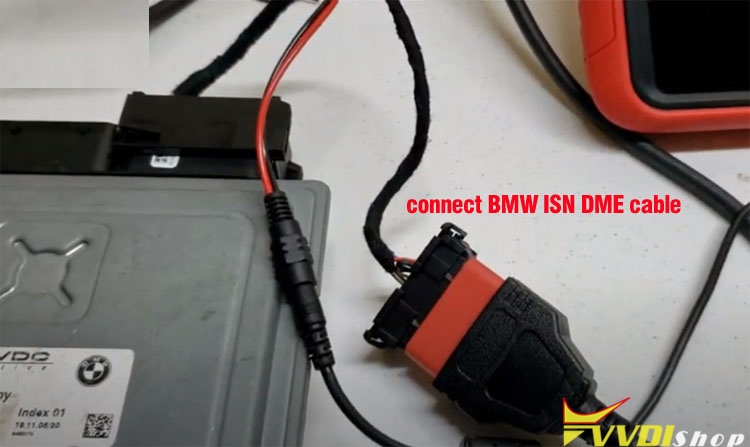
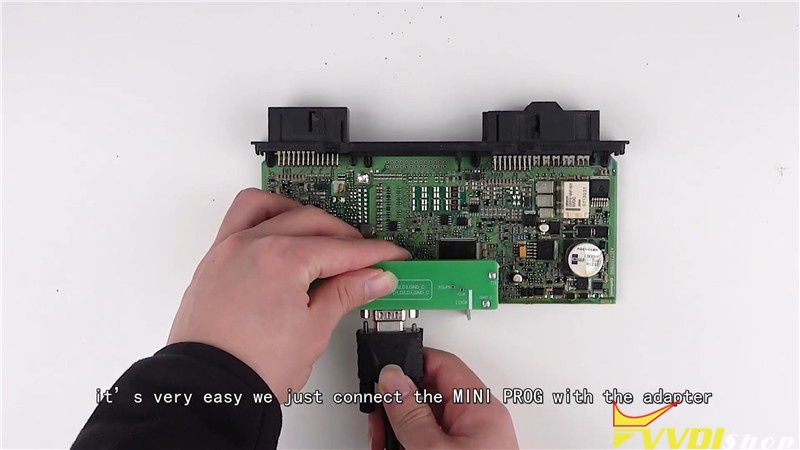
Connect BMW DME cable with xhorse key tool plus and MSV80 DME
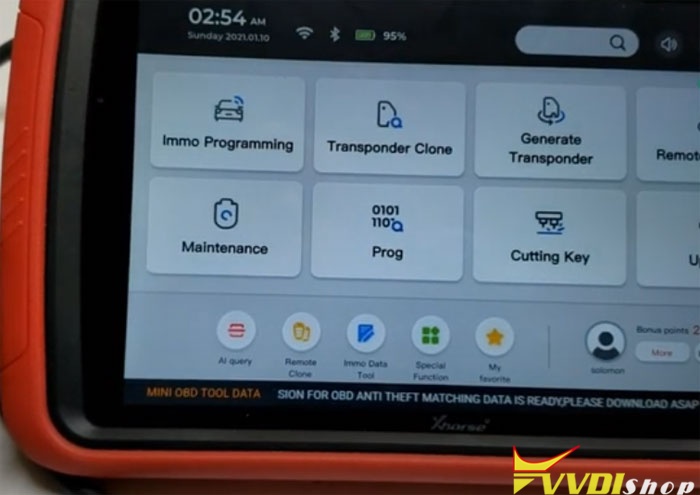
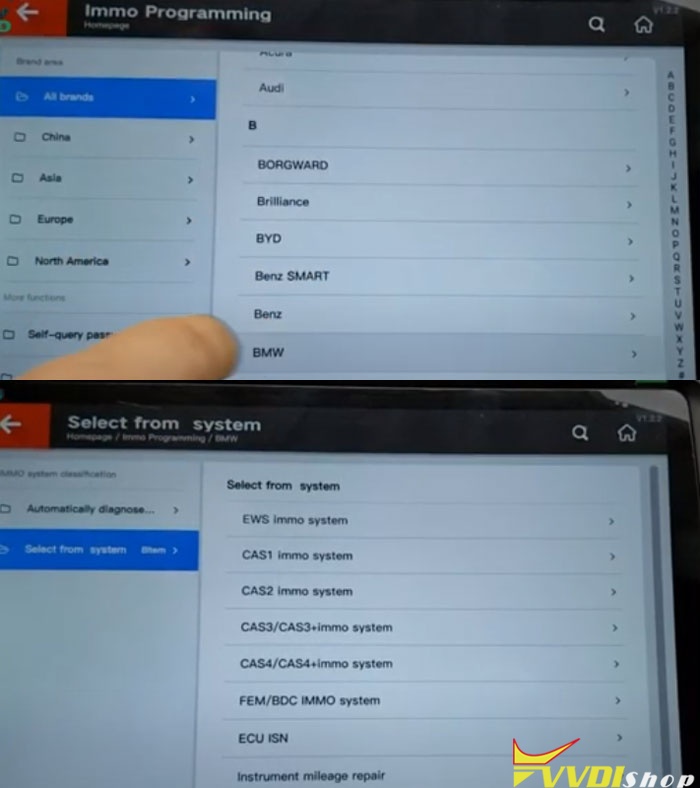
Select IMMO Programming->BMW->Select from system->ECU ISN->Begin
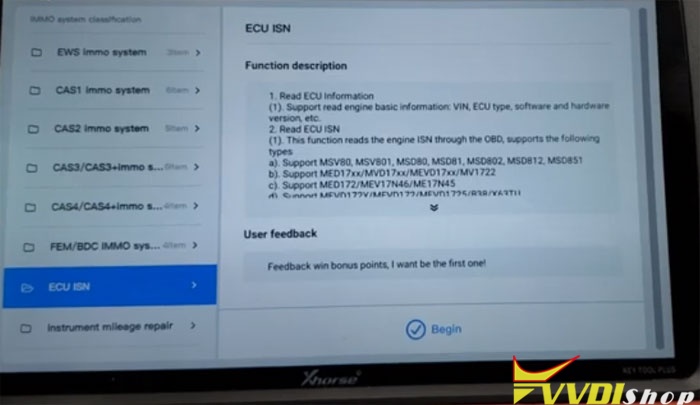
Select system type: MSV80->Read ECU information
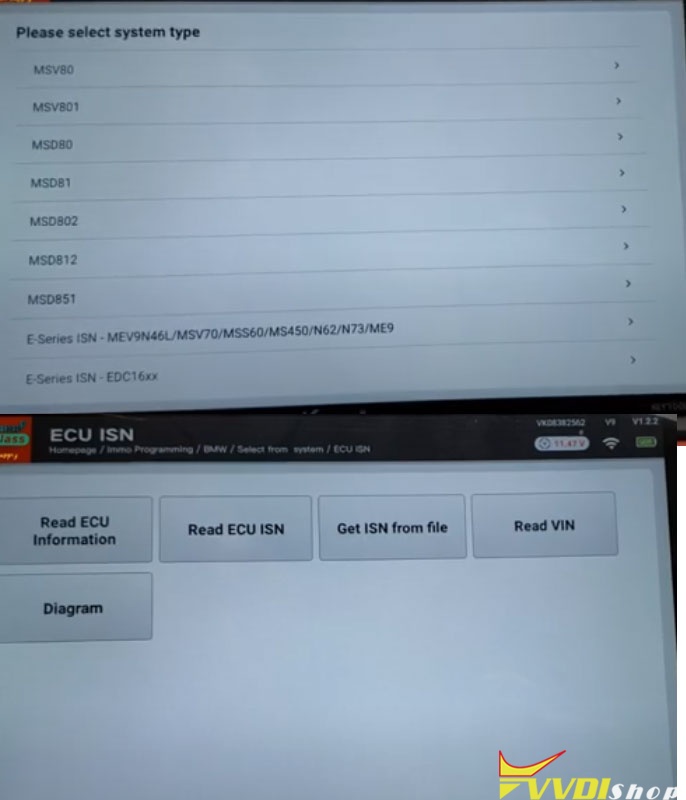

Read ECU basic information VIN, HW, SW, Type etc
Then press Read ECU ISN
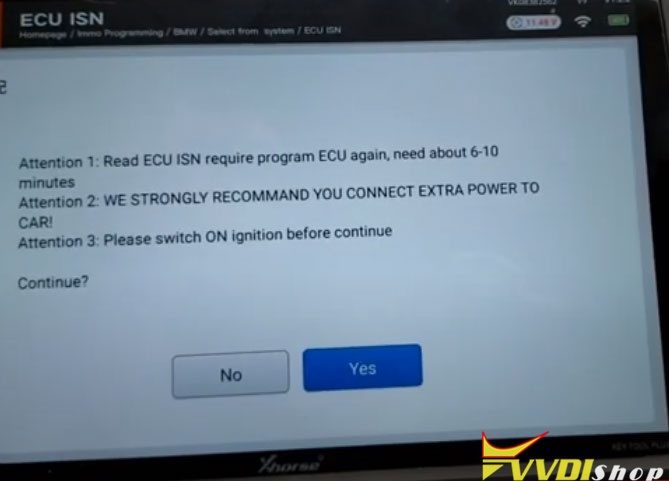
The procedure takes 6-10 minutes, switch ON ignition before continue
Enter programming session
Erasing flash
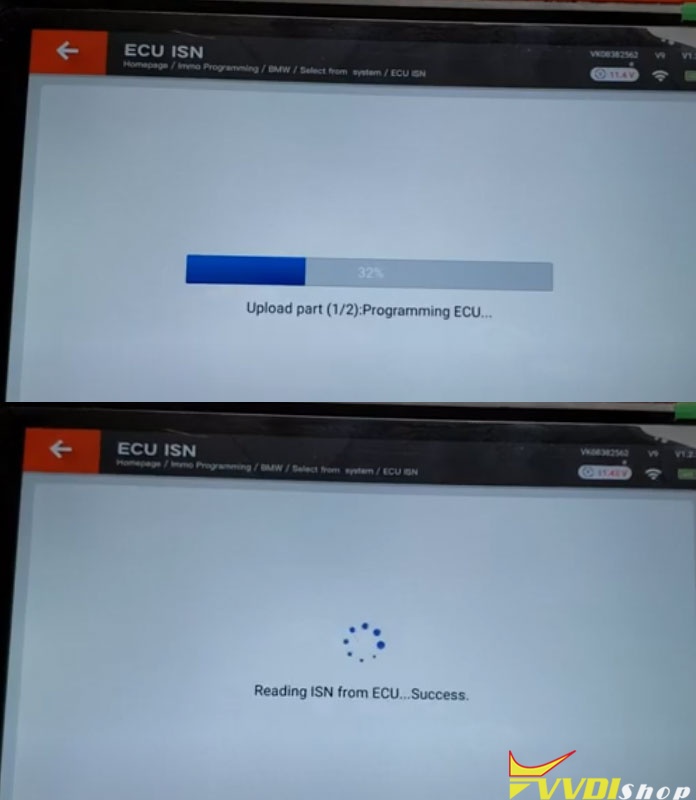
Programming ECU
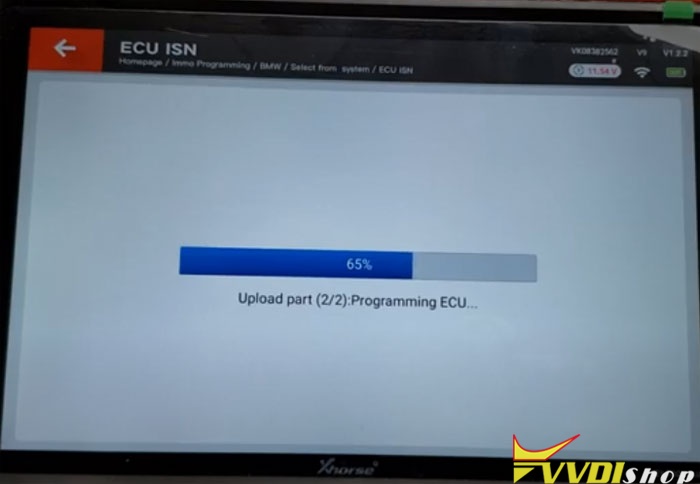
Processing upload part 2
Checking signature
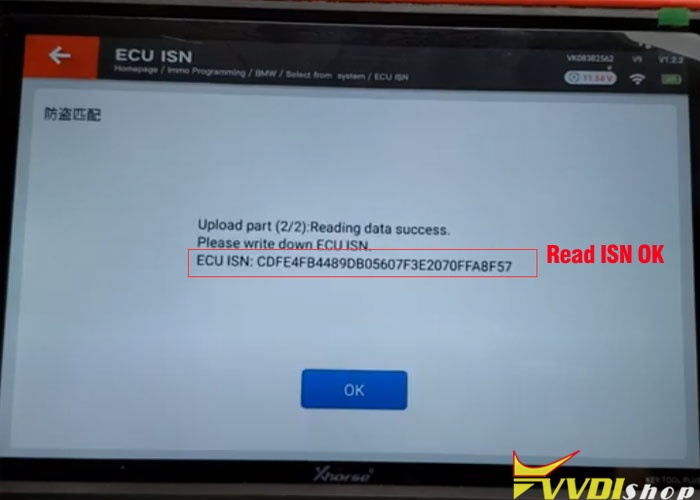
Read ECU ISN success.
www.vvdishop.com
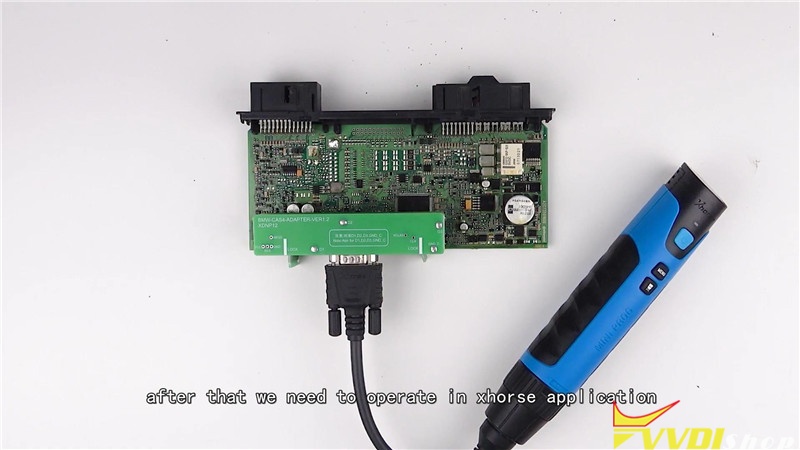
Xhorse VVDI Mini Prog Read BMW CAS4 Without Soldering
How to use Xhorse VVDI Mini Prog Programmer to read BMW CAS4+ 5M48H eeprom D-flash? Today I’m gonna show how easy to read the solder free adapter that Xhorse released.
Preparation
A Mini Prog Programmer, Mini Prog solder free adapter and a BMW CAS4+ adapter.
Procedure
Step 1. Connection
Insert the cable into Mini VVDI Prog Programmer, rotate the head for fixation. Insert the other side of cable to BMW CAS4+ adapter, and fix it.

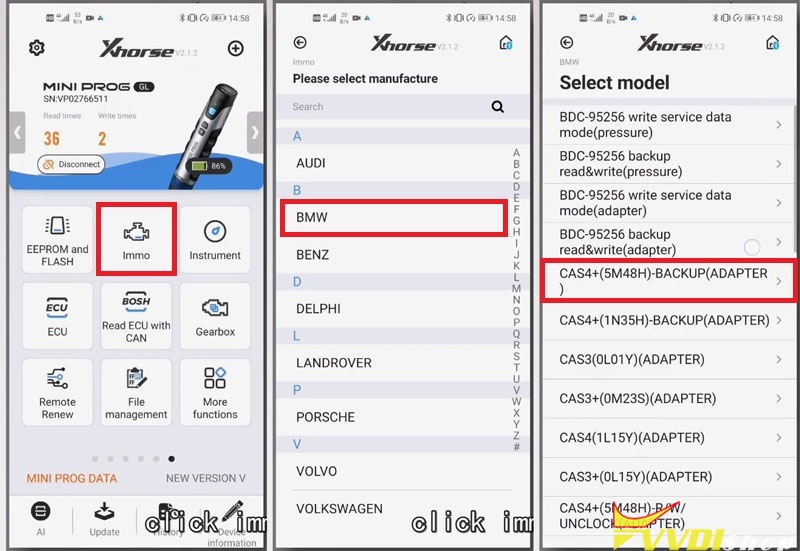
Step 2. Go to Xhorse App
Start up Xhorse app on smart phone, connect it with Mini Prog via Bluetooth.
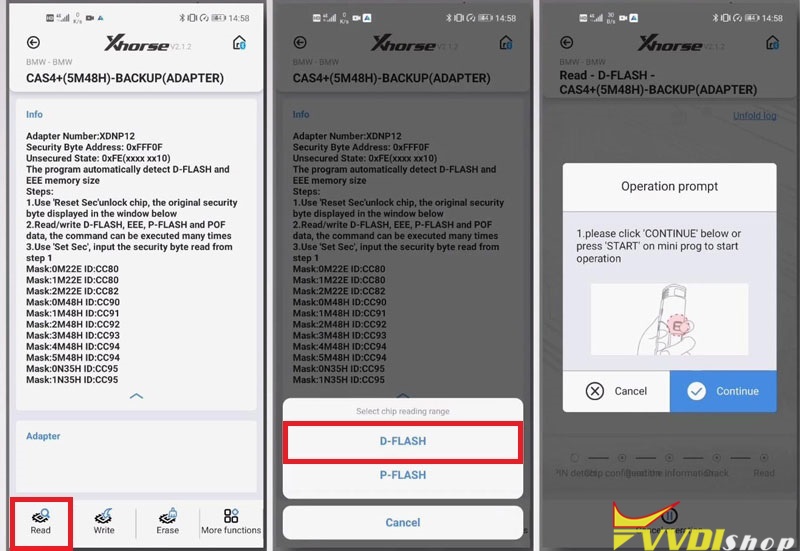
Step 3. Read D-Flash
Press IMMO >> BMW >> BMW >> CAS4+(5M48H)-Backup (Adapter) >> Read >> D-Flash
Press “Continue” or START button on Mini Prog to start reading.
It may take some time for reading…
Step 4. Load D-Flash data file.
Rename the file, press “OK” to save.
Reading complete, it will display the saved path of file. We can load the data to Xhorse VVDI2, which will help to program the key.
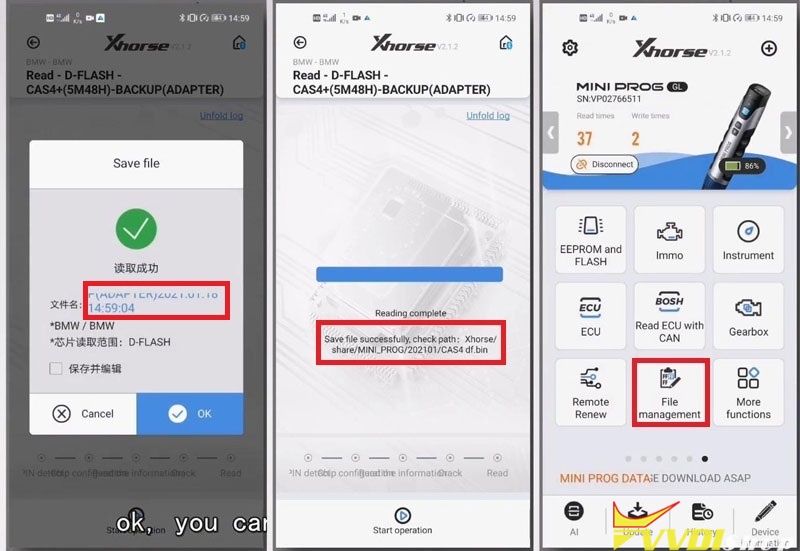
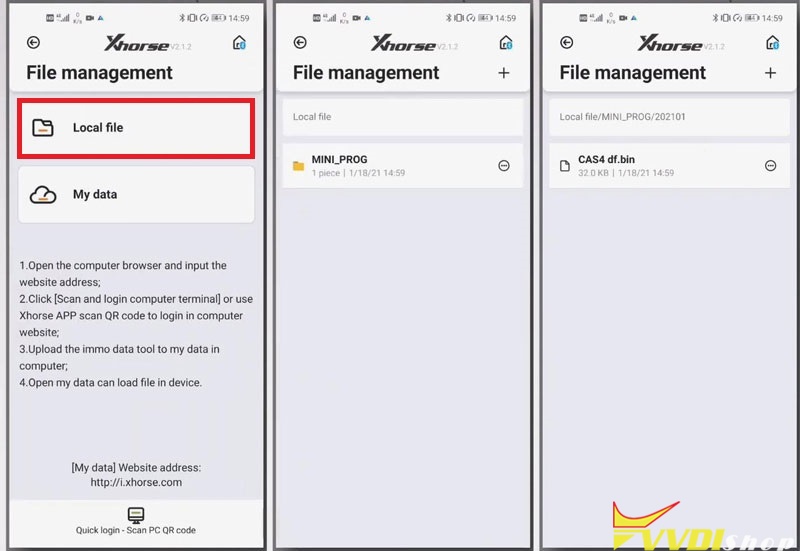
Step 5. Find data file for programming.
Exit back to main page, find out the file data as saved path.
File Management >> Local File >> Mini_Prog >> 202101 >> CAS4 df.bin
Check full video for reading Land Rover RFA adapter:
VVDI Mini Prog solder-free adapters bring users easy and fast for daily work.
How to Calibrate Condor XC-Mini Plus Key Cutting Machine?
How to calibrate Xhorse Condor XC-Mini Plus automatic key cutting machine? This post is going to show the procedure in details.
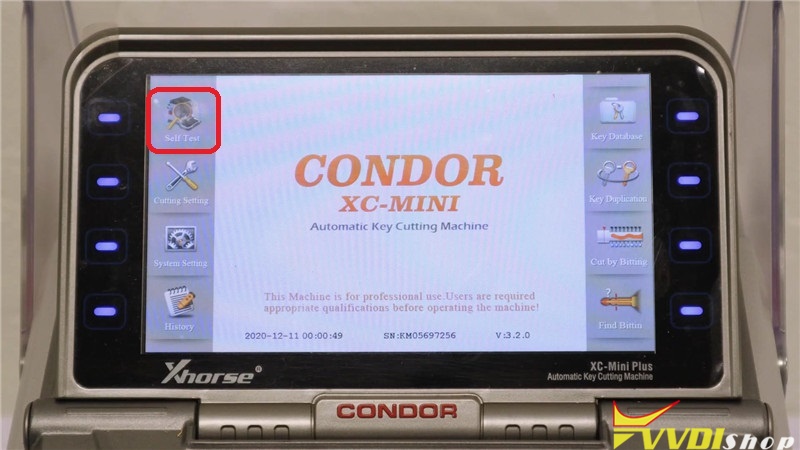
Power on Condor XC-Mini Plus, press “Self Test” on main menu.
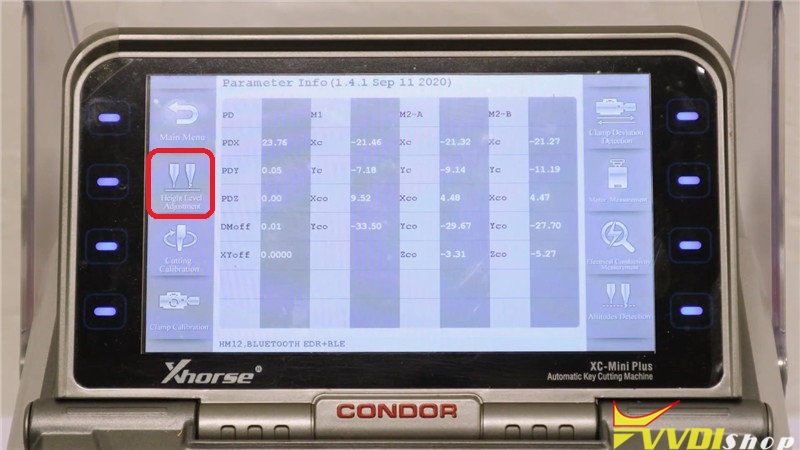
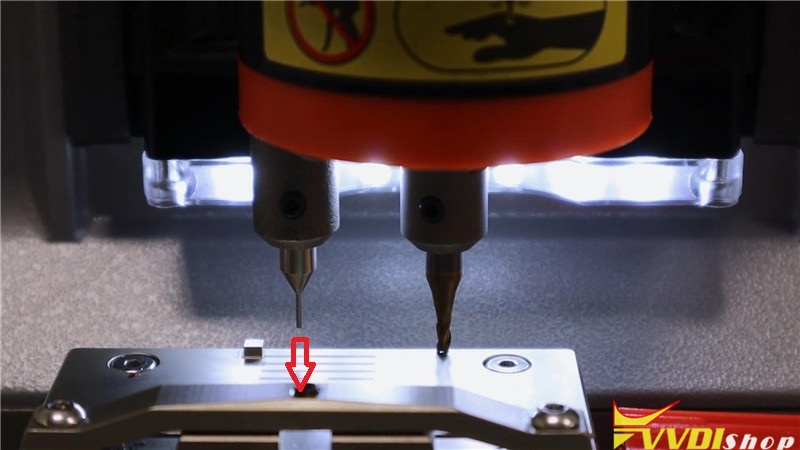
Step 1. Height Level Adjustment
To start this process, make sure the cutter is lower than the probe. Press “Height Level Adjustment”.
Reminder:
- Install and tighten Clamp M1. there is no need to put any key on the clamp.
- Cutter lever needs to be adjusted every time after changing the probe and the cutter.
- Then length of the A position should be less than 2cm.
- After the fixed installation of the probe and the cutter, then end tip of the probe needs to be lower than the cutter’s(see ex.I).
- Must use the original probe.
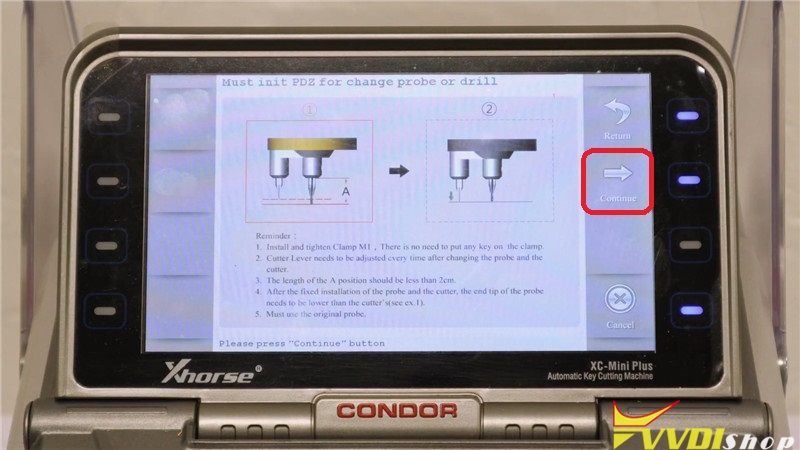
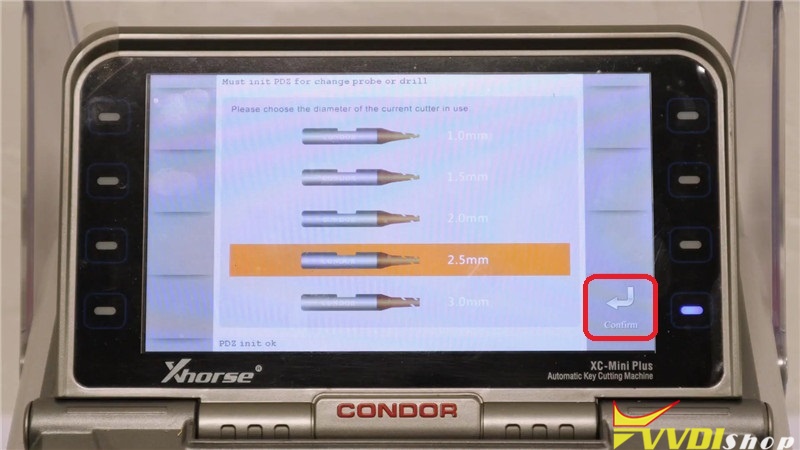
Press “Continue”, the cutter on XC-Mini Plus starts touching the clamp, you should lower the probe to be same height level. Press “Continue” again.
It will ask what type of cutter you’re using on Condor Mini Plus screen, today we are taking 2.5mm as example, so select “2.5mm”, then press “Confirm”.
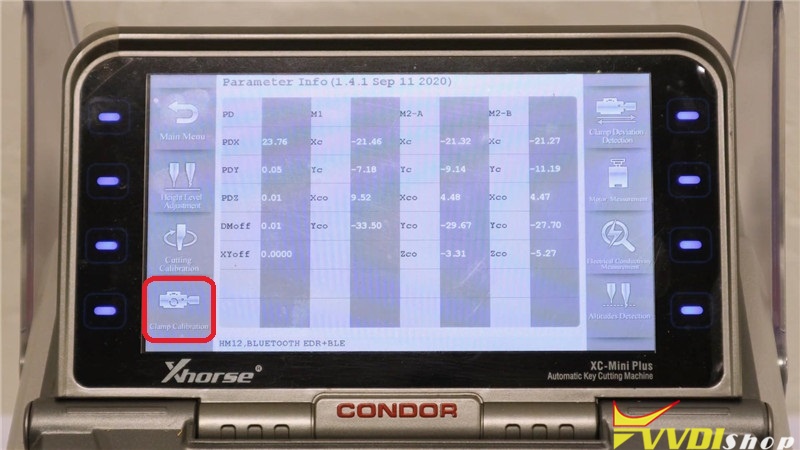
Step 2. Clamp Calibration
Press “Clamp Calibration”, select the clamp type you’re using: M1/M2. Today we are using an M1 clamp, so select M1.
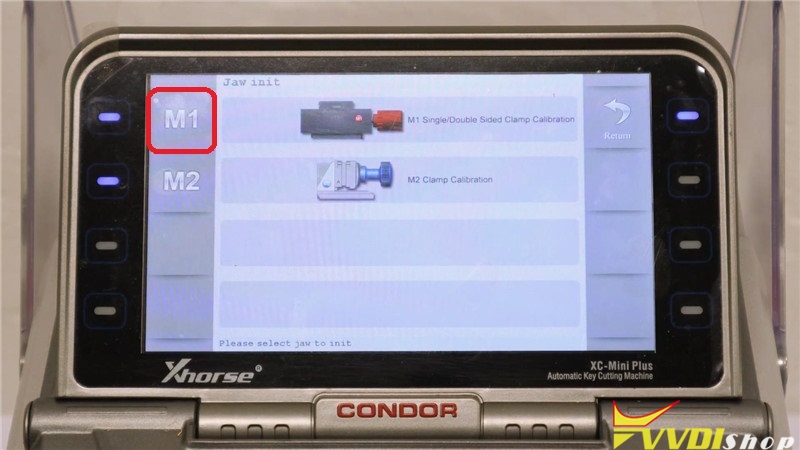
Reminder:
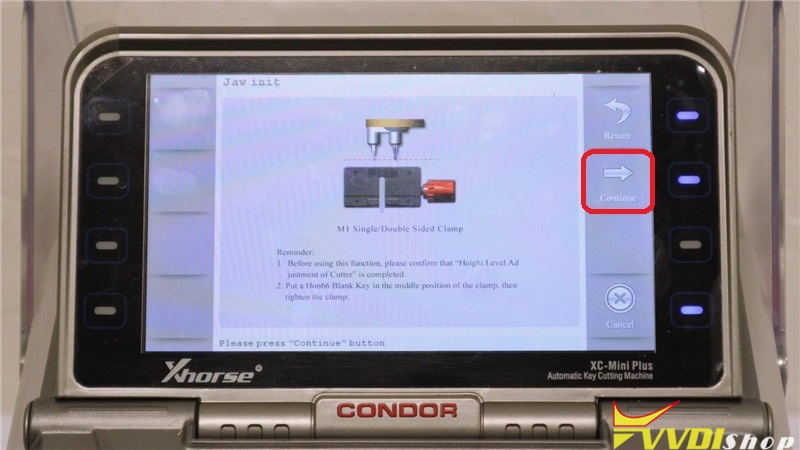
- before using this function, please confirm that “Height Level Adjustment of Cutter” is completed.
- Put a Hon66 blank key in the middle position of the clamp, then tighten the clamp.
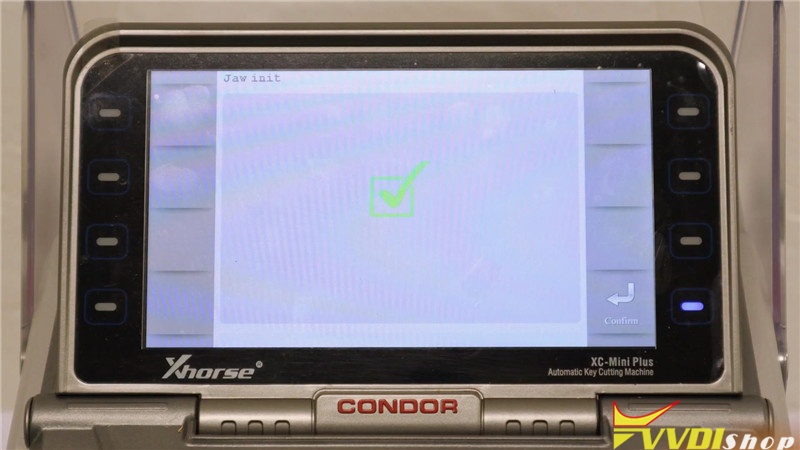
Press “Continue”, XC-Mini Plus starts calibrating…
Calibrate OK, press “Confirm” to return.
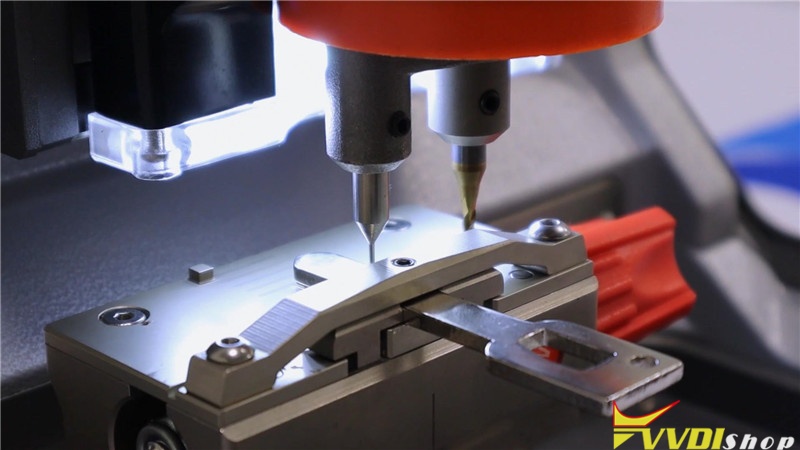
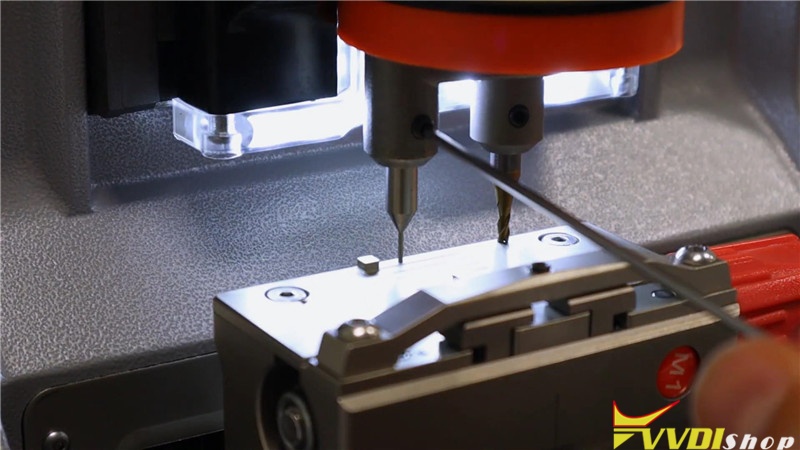
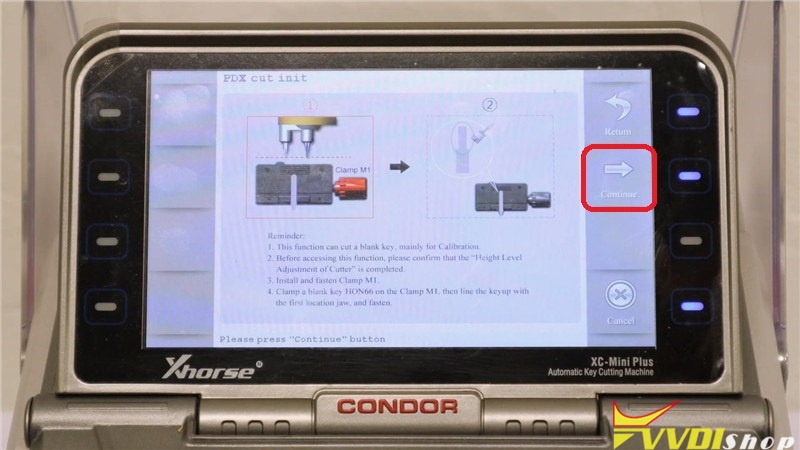
Step 3. Cutting Calibration
Return back to upper level, press “Cutting Calibration”.
Reminder:
- This function can cut a blank key, mainly for calibration.
- Before accessing this function, please confirm that the “Height Level Adjustment of Cutter” is completed.
- Install and fasten clamp M1.
- Clamp a blank key Hon66 on the Clamp M1, then line the key up with the first location jaw, and fasten.
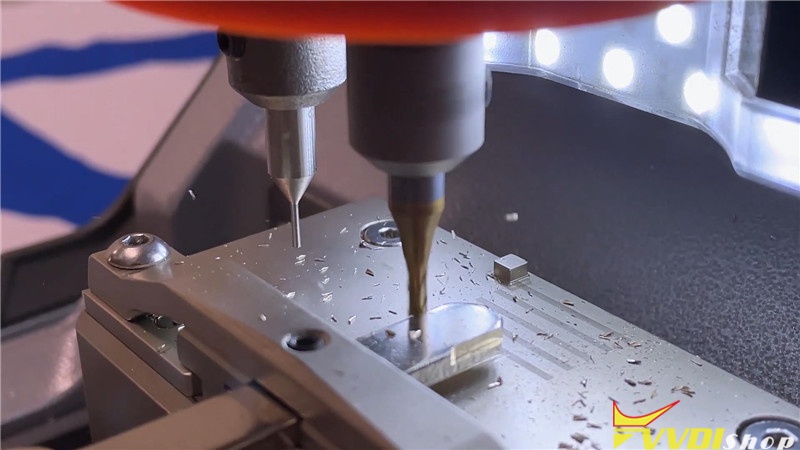
Press “Continue”, Xhorse condor starts cutting…
Completed!

You are now set to use the Condor XC-Mini Plus key cutting machine.
https://www.vvdishop.com/service/xhorse-condor-xc-mini-plus-calibration.html