How-to: add a new key to Land Rover Range Rover 2015 up using Xhorse VVDI Prog and VVDI2 key programmer. It is also work with all key lost by the same way.
ابزار Xhorse VVDI
Xhose VVDI نرم افزار برنامه نویس اصلی و سخت افزارابزار Xhorse VVDI
Xhose VVDI نرم افزار برنامه نویس اصلی و سخت افزارHow to use VVDI Prog and BMW CAS4 No Soldering Cable?
VVDIShop.com rolls out a new cable for Xhorse vvdi prog programmer to read BMW CAS4 1N45H 5M48H immobilizer data without removing components.
Advantages of the BMW CAS4 cable:
- No remove components. No welding.
- Prevent data loss
- Easy to use.


How to use the BMW CAS4 adapter?
This auxiliary clip is divided into: adapter cable (for VVDI PROG) , A clip, B clip
A clip and B clip (Before using the auxiliary clip, you need to use a blade to remove the glue on the contact surface to prevent poor contact between the probe and the circuit board.)
A clip and B clip (Before using the auxiliary clip, you need to use a blade to remove the glue on the contact surface to prevent poor contact between the probe and the circuit board.)
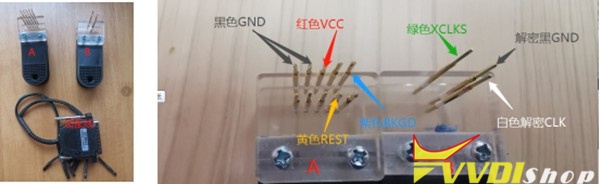
Operation Diagram:

Note: This auxiliary clip reads CAS4 data without welding, but lengthens the length of the wiring harness. Some types of CAS require multiple attempts to read out.
It is recommended to try 3-5 times (the data will not be lost). If you can’t read the data repeatedly, please use the traditional wiring method.
It is recommended to try 3-5 times (the data will not be lost). If you can’t read the data repeatedly, please use the traditional wiring method.
VVDI Prog Failed to Read Benz Sprinter W906 EIZ Solution
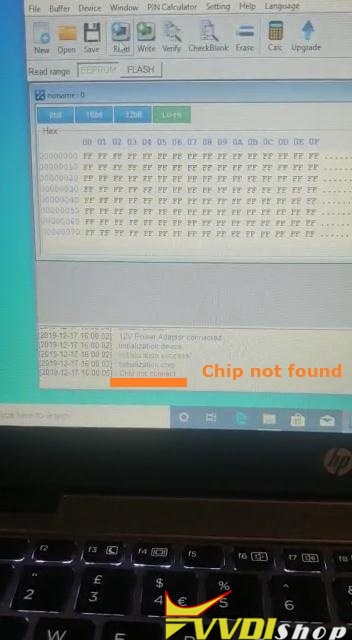
Problem:
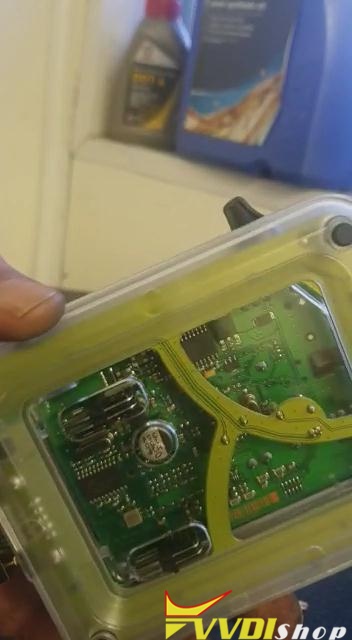
Used Xhorse VVDI PROG and Sprinter(ST12) Benz EIS /EZS adapter to read chip data for sprinter 2006 W906 model, got error ” chip not found”.
Last time I red 2013 Sprinter fbs3, it failed neither.
I’ve tried Vito model perfect and W211 perfect.


vvdishop.com engineer solution:
If you have qualified welding skill, please try to weld instead of using the Sprinter(ST12) adapter.
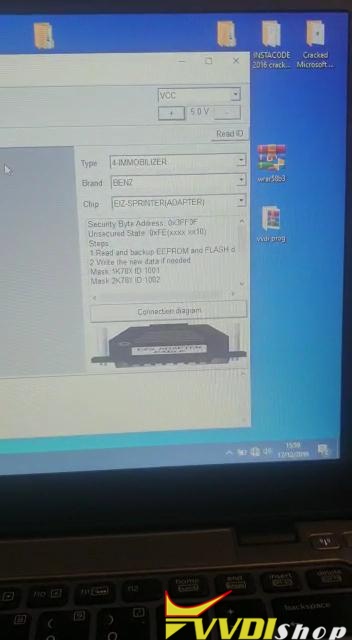
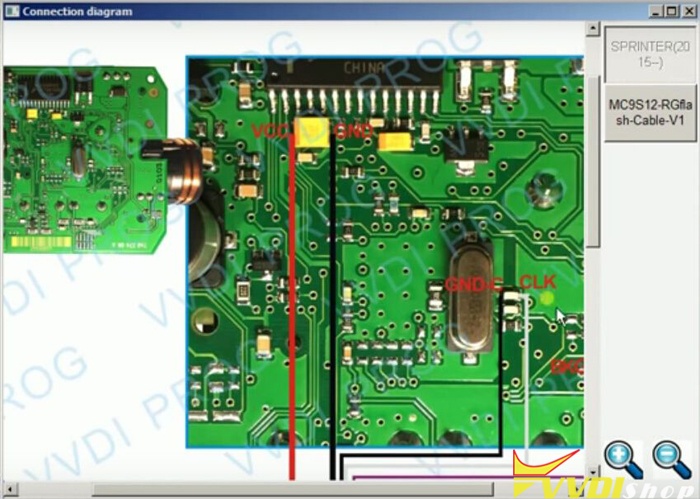
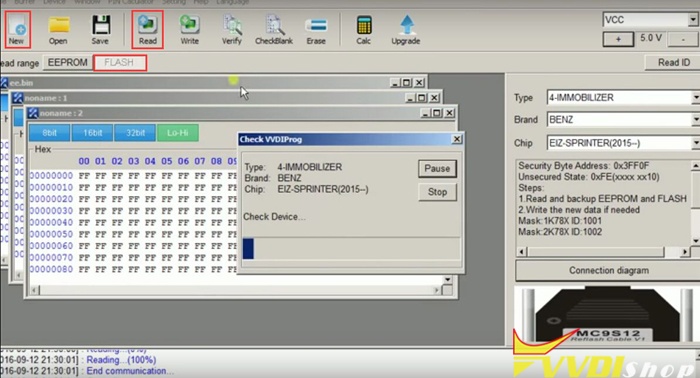
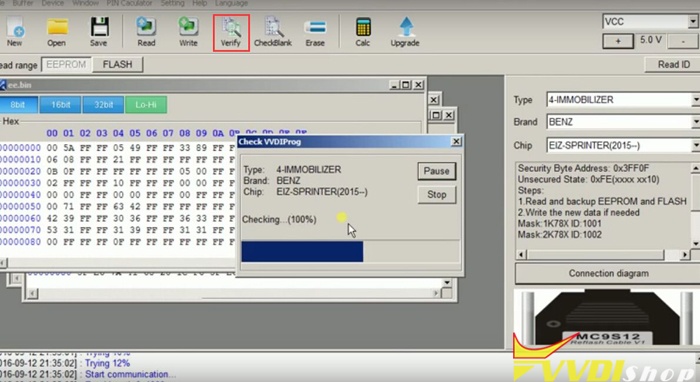
Step1. Open VVDI PROG software. Choose “Type: 4-immobilizer”, “Brand: Benz” and “Chip: EIZ Sprinter (2015-)” then click on “Connection diagram”.

You can see the wiring diagram of EIS 0L01Y:
Step2. Click on “Read ID” then “Read”. VVDI-PROG read Mercedes W906 EIS 0L01Y OK!

Click on “Save” and name the file “ee”.

Step3. Click on “Flash” then “New” then “Read”.
Click on “Save” and name the file “flash”.

Step4. Click on “Erase” and “Yes” to confirm that.
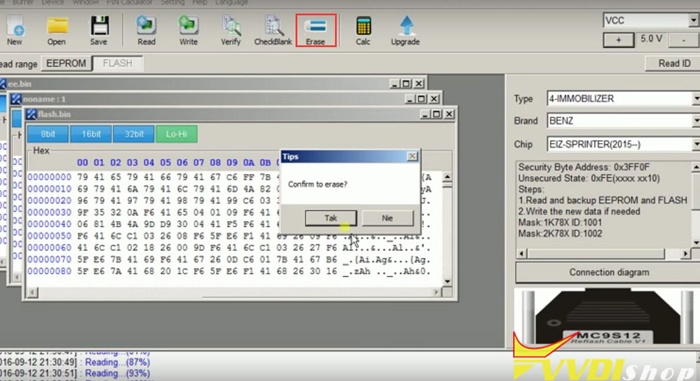
After that, click on “Check Blank”.

Step5. Click on “Write” and “Yes” to confirm that.

Now you just need to wait about 3 minutes and Xhorse VVDIPROG write Mercedes W906 Sprinter EIS 0L01Y successfully!
Click “Verify” as the last step to check and things done!
Good luck.
VVDI Prog 4.8.8 read CAS4 5m48h no remove components
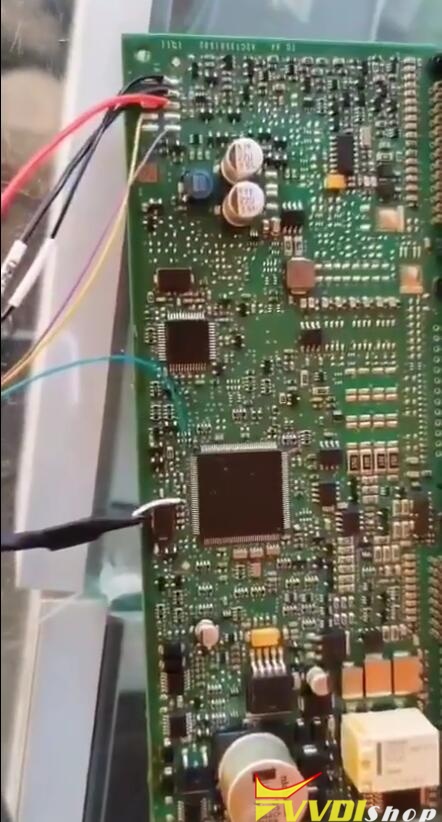
One user (DK Veteran) tested new Xhorse VVDI Prog software 4.8.8 update CAS4 5m48h:
without removing any component – read backup FAIL to crack
with removing only 1 resistor – read backup SUCCESSThat’s very good job by xhorse
without removing any component – read backup FAIL to crack
with removing only 1 resistor – read backup SUCCESSThat’s very good job by xhorse
And attach two images:
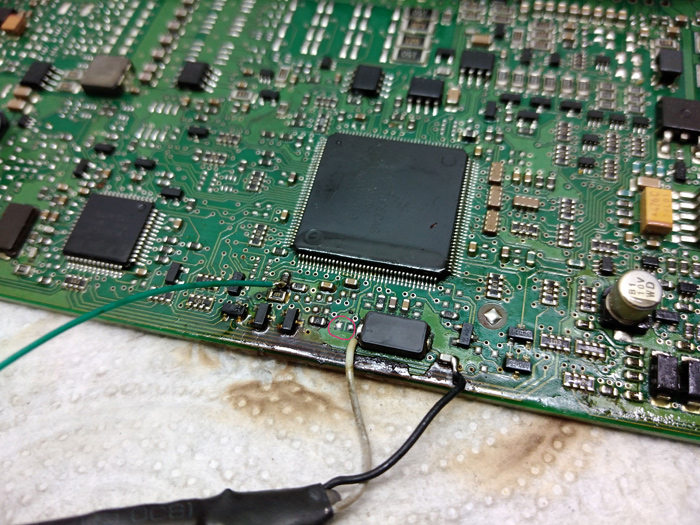

However, one user said “green soldered wrongly”, saying the green wire need connect to other side of resistor (check from vvdi prog diagram).
OS:
I’ve it on win7 and win10…
On both running without issues after adding it to antivirus…
On both running without issues after adding it to antivirus…
VVDI-Prog 4.8.8 update on CAS4 5m48h all details:
+ Add CAS4-5M48H-CERAMICS-NO-NEED-
REMOVE-COMPONENTS,
CAS4-5M48H-METAL-NO-NEED-REMOVE-
COMPONENTS PICTURE in
<4-IMMOBILIZER>-><BMW>->
<CAS4-5M48H-R/W/UNLOCK>
+ Add CAS4-5M48H-CERAMICS-NO-NEED-
REMOVE-COMPONENTS,
CAS4-5M48H-METAL-NO-NEED-REMOVE-
COMPONENTS PICTURE in
<4-IMMOBILIZER>-><BMW>->
<CAS4-5M48H-FORCE-UNLOCK>
+ Add CAS4-5M48H-CERAMICS-NO-NEED-
REMOVE-COMPONENTS,
CAS4-5M48H-METAL-NO-NEED-REMOVE-
COMPONENTS PICTURE in
<4-IMMOBILIZER>-><BMW>->
<CAS4-1N35H-BACKUP>
+ Add CAS4-5M48H-CERAMICS-NO-NEED-
REMOVE-COMPONENTS,
CAS4-5M48H-METAL-NO-NEED-REMOVE-
COMPONENTS PICTURE in
<4-IMMOBILIZER>-><BMW>->
<CAS4-1N35H-R/W/UNLOCK>
+ Add CAS4-5M48H-CERAMICS-NO-NEED-
REMOVE-COMPONENTS,
CAS4-5M48H-METAL-NO-NEED-REMOVE-
COMPONENTS PICTURE in
<4-IMMOBILIZER>-><BMW>->
<CAS4-1N35H-FORCE-UNLOCK>
REMOVE-COMPONENTS,
CAS4-5M48H-METAL-NO-NEED-REMOVE-
COMPONENTS PICTURE in
<4-IMMOBILIZER>-><BMW>->
<CAS4-5M48H-R/W/UNLOCK>
+ Add CAS4-5M48H-CERAMICS-NO-NEED-
REMOVE-COMPONENTS,
CAS4-5M48H-METAL-NO-NEED-REMOVE-
COMPONENTS PICTURE in
<4-IMMOBILIZER>-><BMW>->
<CAS4-5M48H-FORCE-UNLOCK>
+ Add CAS4-5M48H-CERAMICS-NO-NEED-
REMOVE-COMPONENTS,
CAS4-5M48H-METAL-NO-NEED-REMOVE-
COMPONENTS PICTURE in
<4-IMMOBILIZER>-><BMW>->
<CAS4-1N35H-BACKUP>
+ Add CAS4-5M48H-CERAMICS-NO-NEED-
REMOVE-COMPONENTS,
CAS4-5M48H-METAL-NO-NEED-REMOVE-
COMPONENTS PICTURE in
<4-IMMOBILIZER>-><BMW>->
<CAS4-1N35H-R/W/UNLOCK>
+ Add CAS4-5M48H-CERAMICS-NO-NEED-
REMOVE-COMPONENTS,
CAS4-5M48H-METAL-NO-NEED-REMOVE-
COMPONENTS PICTURE in
<4-IMMOBILIZER>-><BMW>->
<CAS4-1N35H-FORCE-UNLOCK>
Now update your VVDI Pro 4.8.8 by clicking on the mega link:
VVDI Prog Read BMW N55 MEVD17.2.4 ECU
Question:
Xhorse VVDI Prog failed to read ECU N55 MEVD17.2.4 from a BMW 5 series 2014. I am using the new Bosch ECU adapter. Is the server down or am I doing something wrong?

Solution:
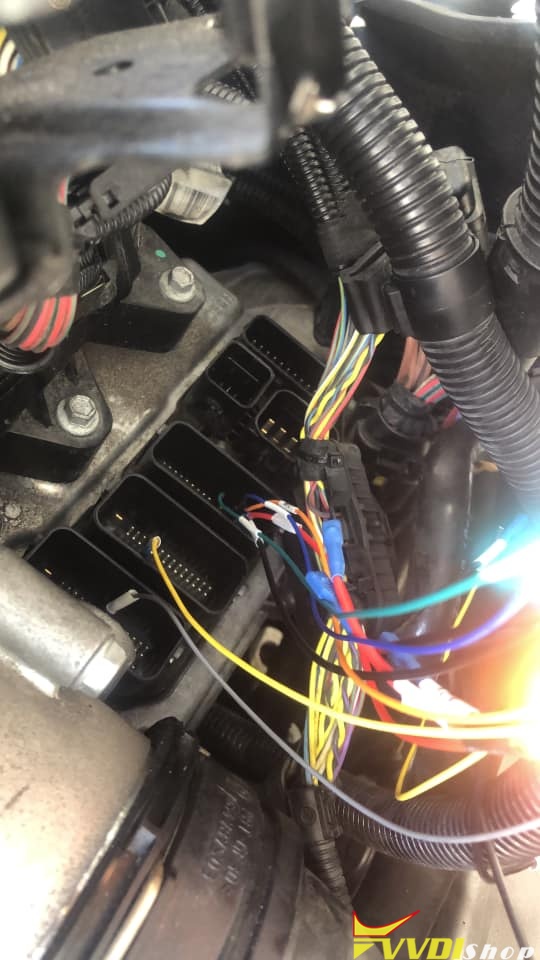
With vvdi prog need boot pin like picture below
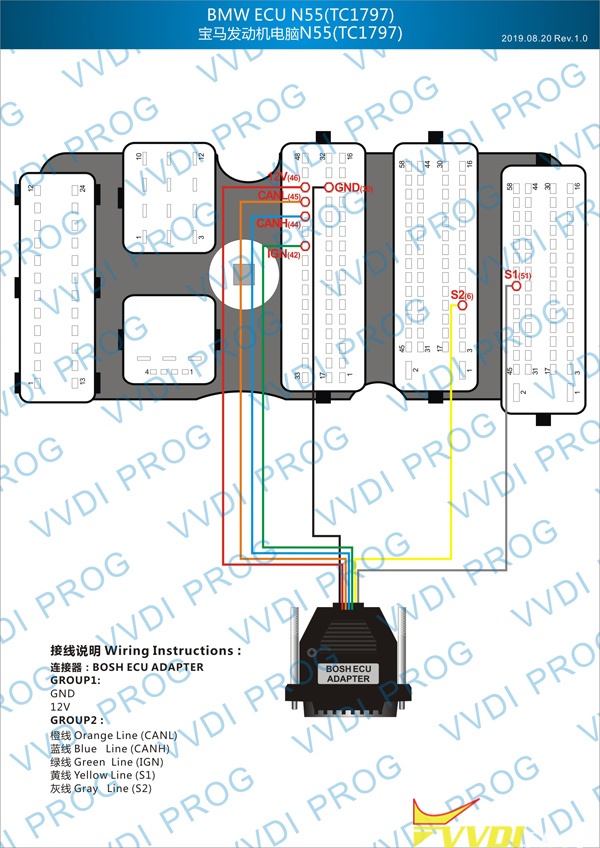
With Autohex or Yanhua Mini ACDP can do with adapter without boot pin (N55).
http://www.vvdishop.com/service/vvdi-prog-read-bmw-n55-ecu.html
Program Range Rover 2015 Up Key by Xhorse VVDI2
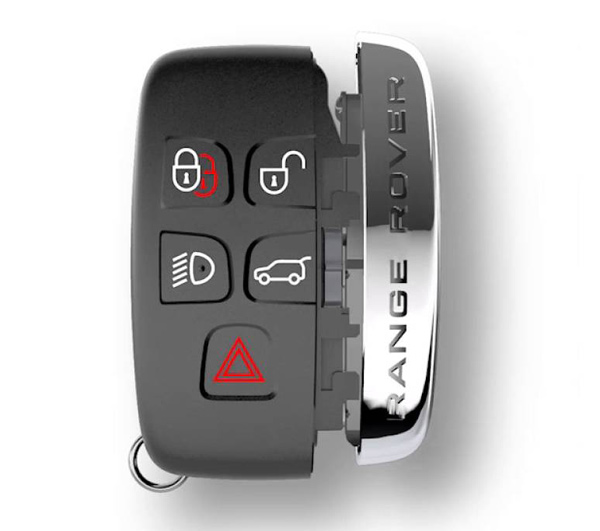
Main steps:
Read KVM RFA data
Write Key
Rewrite data
Step 1: Read KVM Data

Remove the KVM module

Locate IC Chip RFA MC95S12XET265

In VVDI Prog software, select Land Rover->RFA Unsecured (MC95S12XET265)
Check connection diagram
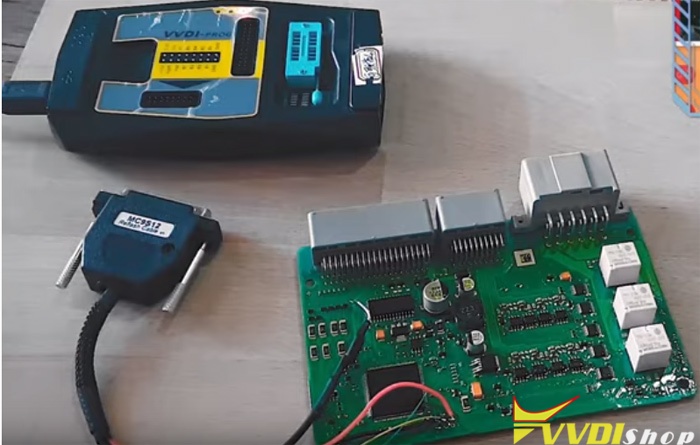
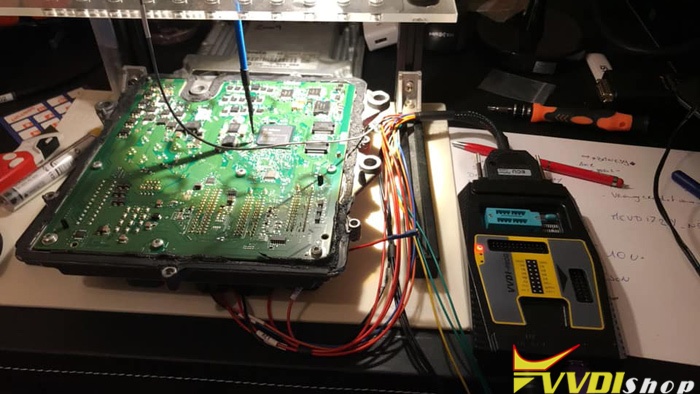
Connect KVM module with vvdi-prog through MC9S12 adapter


Read D-Flash and save data
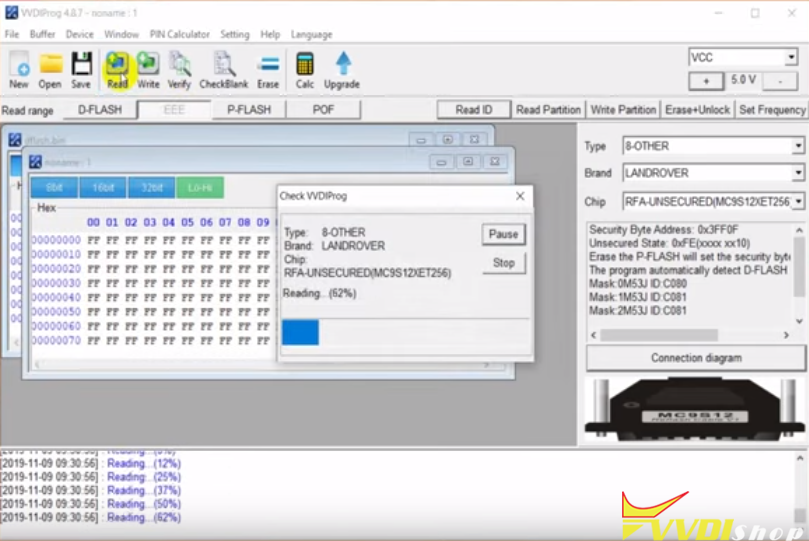
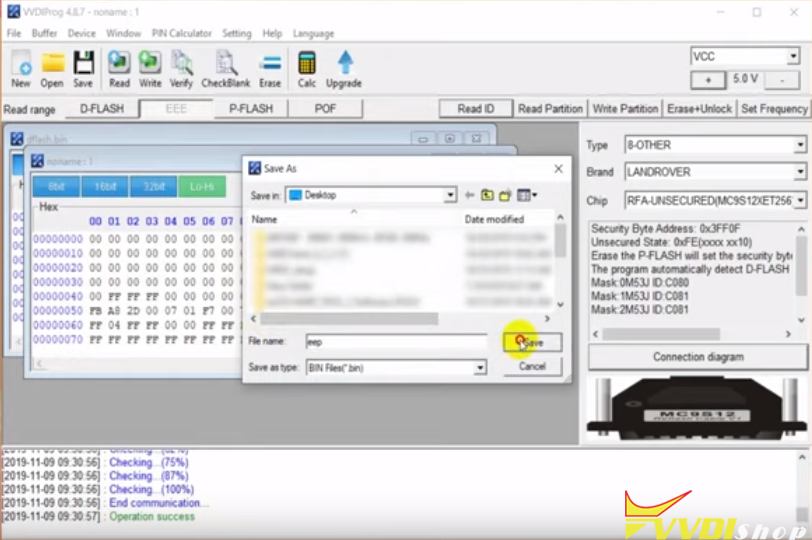
Read EEPROM and save data
Step 2: Write Key with VVDI2
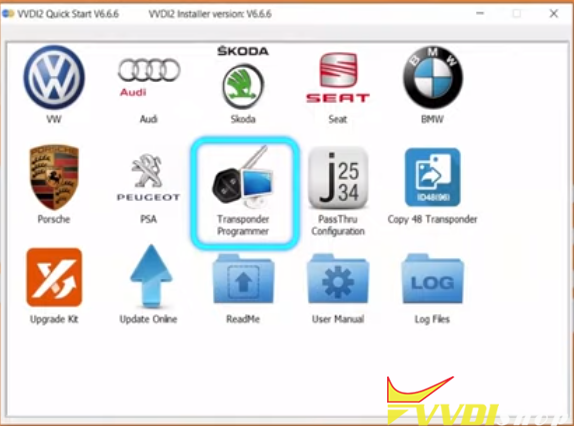
In VVDI2 software, select Transponder Programmer

Select Euro->Rover->-Rover/Jaguar 2015-
Load RFA DFLASH and EEPROM data respectively


select a unused key position
Insert new key into VVDI2 programmer
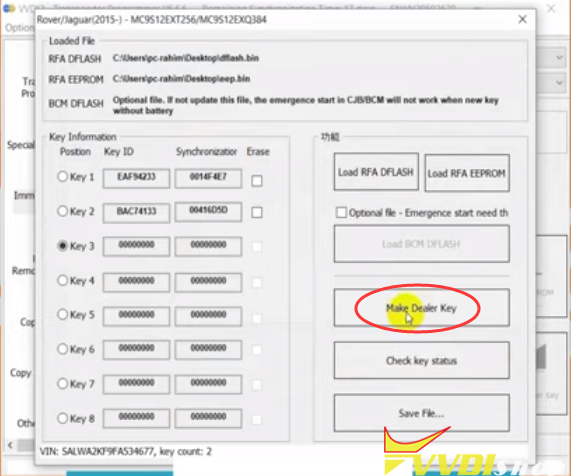
Select Make Dealer Key
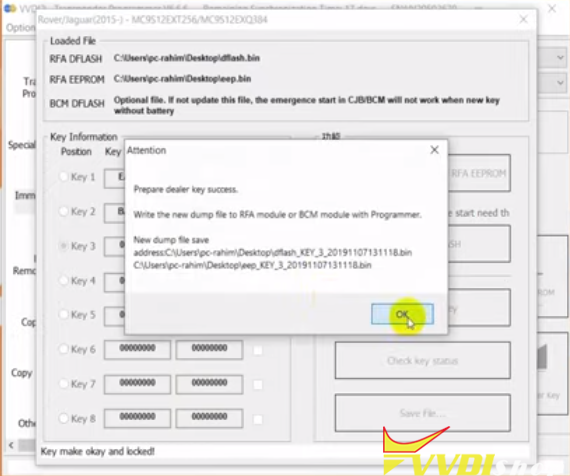
Prepare dealer key success.
Write the new dump file to RFA module with programmer

Check key status
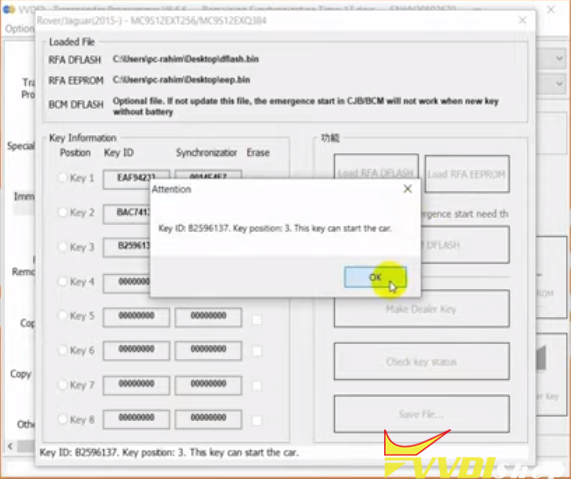
Show key ID. The key can start the car.
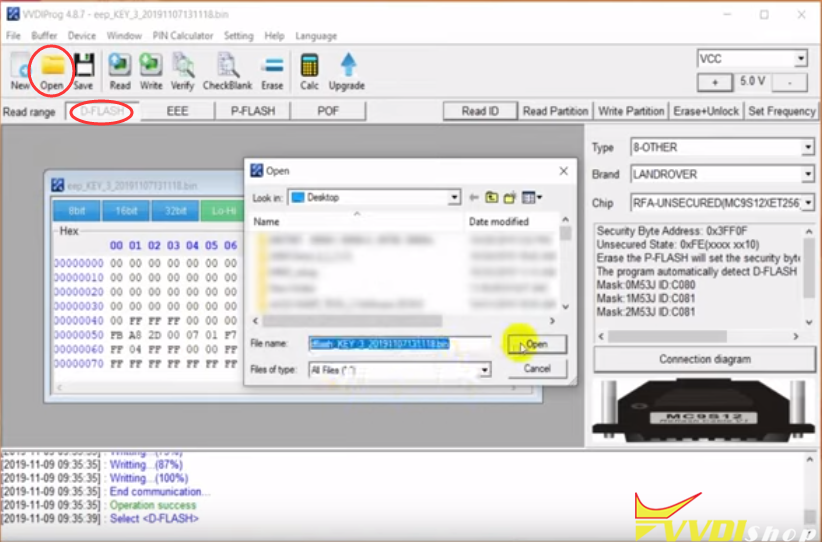
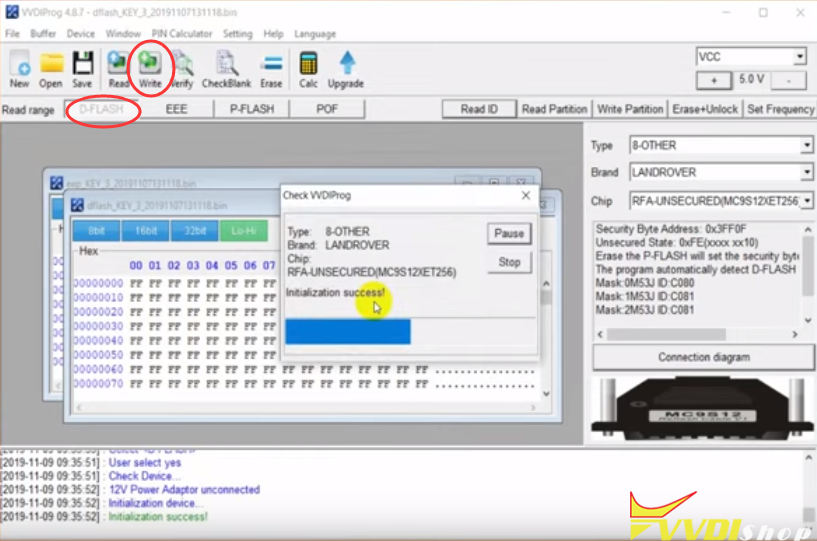
Step 3: Rewrite Data

In VVDIProg software, open EEPROM and write new dump to RFA module

Open and upload DFLASH and write new dump to RFA module
Install RFA module to vehicle.
Test thew new key.
Done.
http://www.vvdishop.com/service/vvdi-prog-and-vvdi2-program-range-rover-2015-key.html