ابزار Xhorse VVDI
Xhose VVDI نرم افزار برنامه نویس اصلی و سخت افزارابزار Xhorse VVDI
Xhose VVDI نرم افزار برنامه نویس اصلی و سخت افزارProgram Benz C240 2004 All Keys Lost by Xhorse Key Tool Plus
Today I’m going to use the Xhorse VVDI Prog & VVDI Key Tool Plus to program 2004 Mercedes Benz C240 when all keys lost on bench. I took out the EIS to program key in a fast way.
Tools
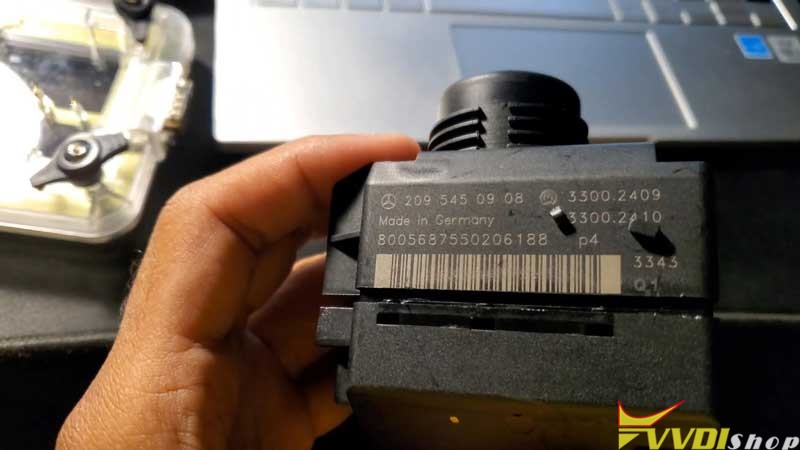
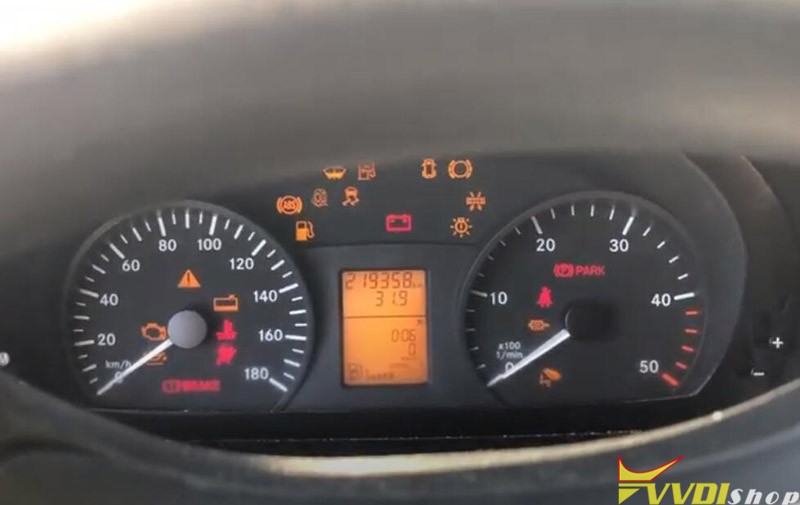
A Mercedes 209 EIS
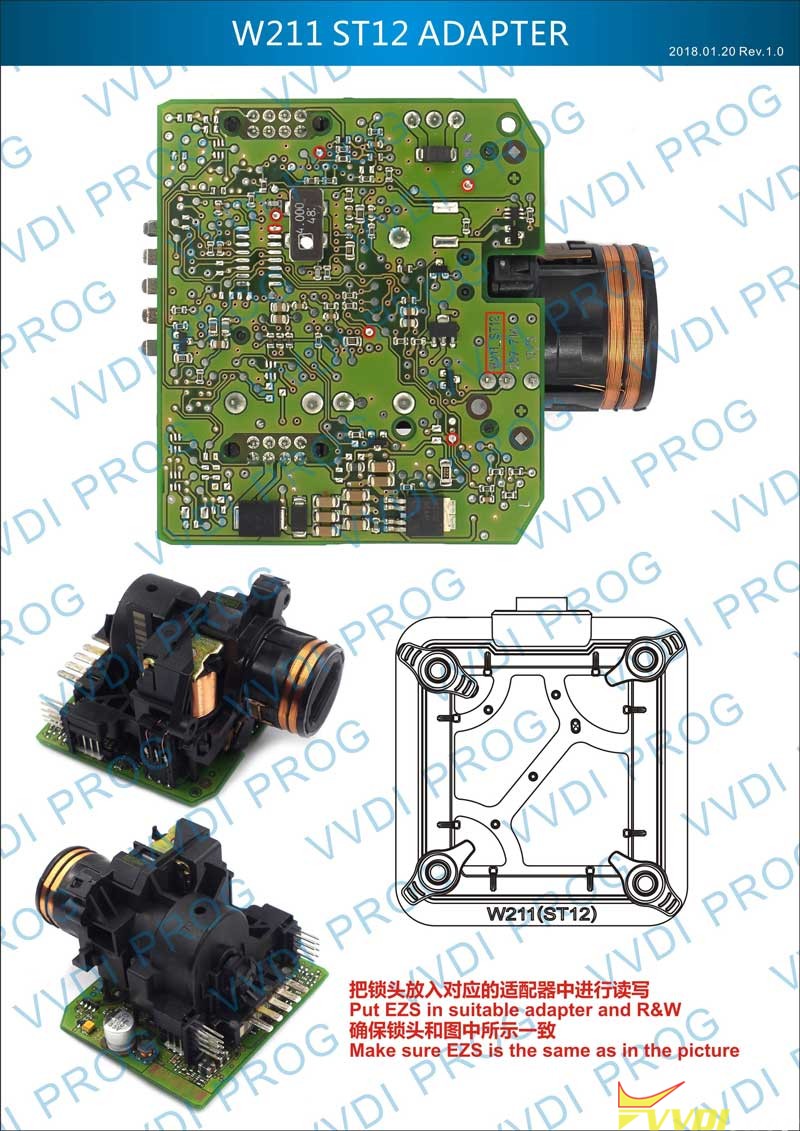
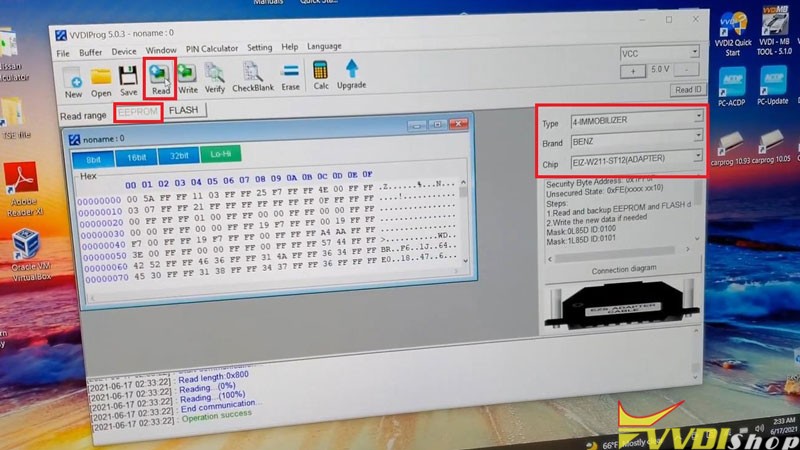
There are W209/211 ZGW and W209/211(HC12) adapter in my box, but I won’t be reading it as a 209. Instead I’ll read it as 211, different variations of this 209. So what I’m going to use is the W211(ST12) adapter.
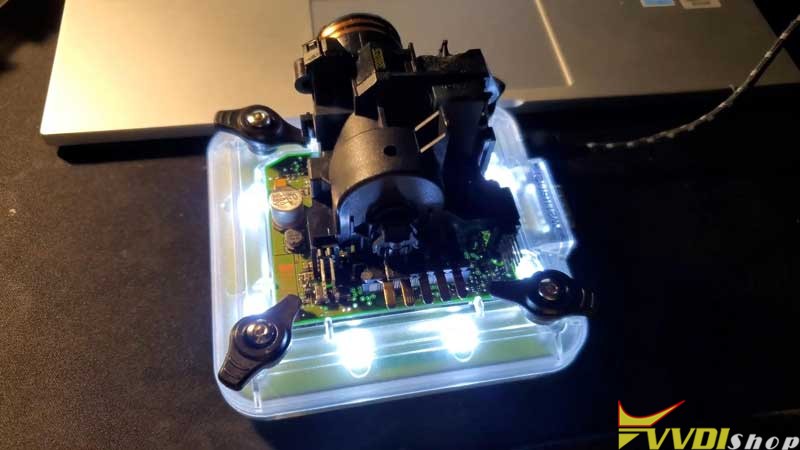
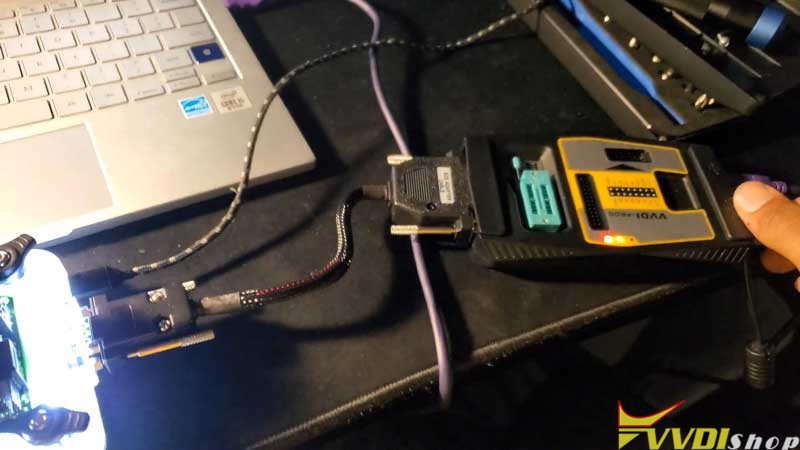
Install EIS on W211(ST12) adapter, connect it with VVDI Prog & computer.
Let’s start:
Read & Save EIS Data via VVDIProg
Start VVDI Prog software, select correct info on right side options, click
EEPROM >> Read >> Operation success
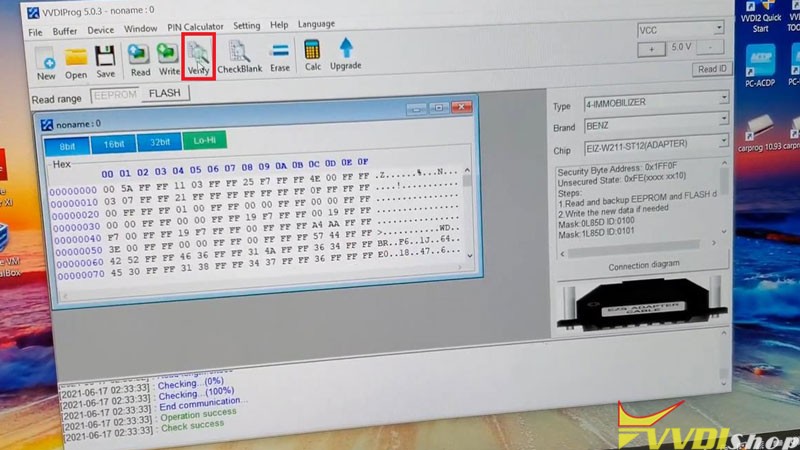
Verify >> Check success >> Save
FLASH >> Read >> Operation success
Verify >> Check success >> Save
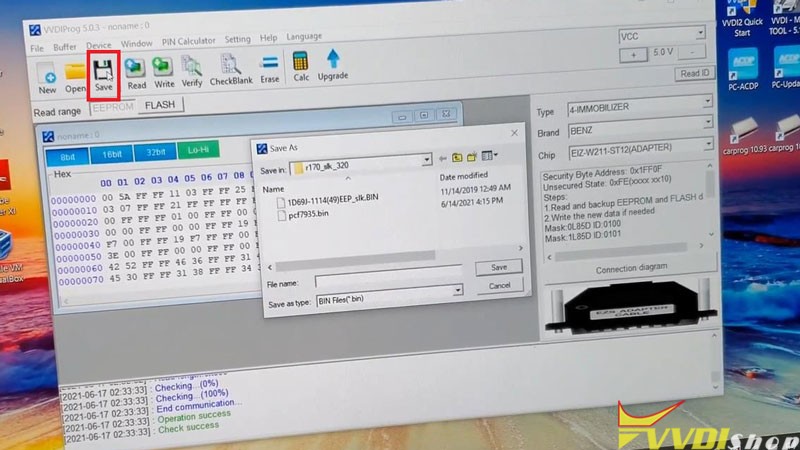
Everything was good, save EEPROM & FLASH file success.
Transfer the files to Key Tool Plus for next step.
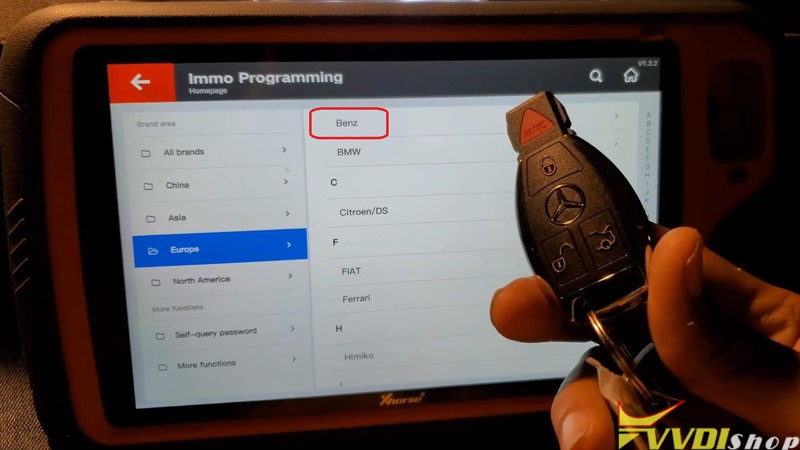
Program Key via VVDI Key Tool Plus
Disconnect VVDI Prog, replace Key Tool Plus for connection, press
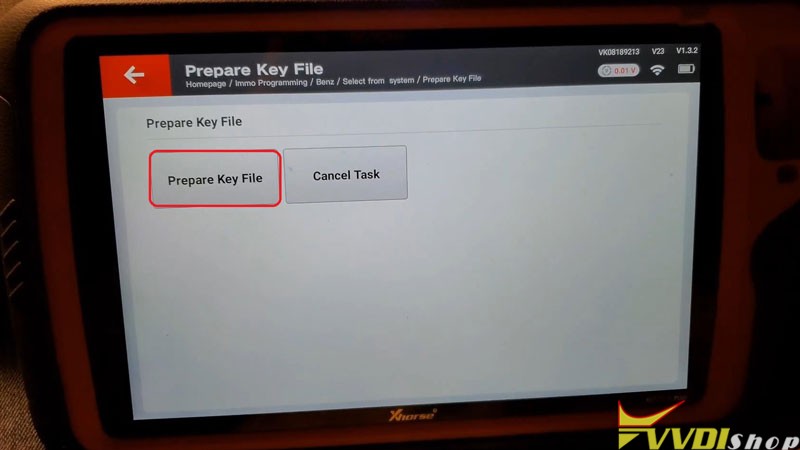
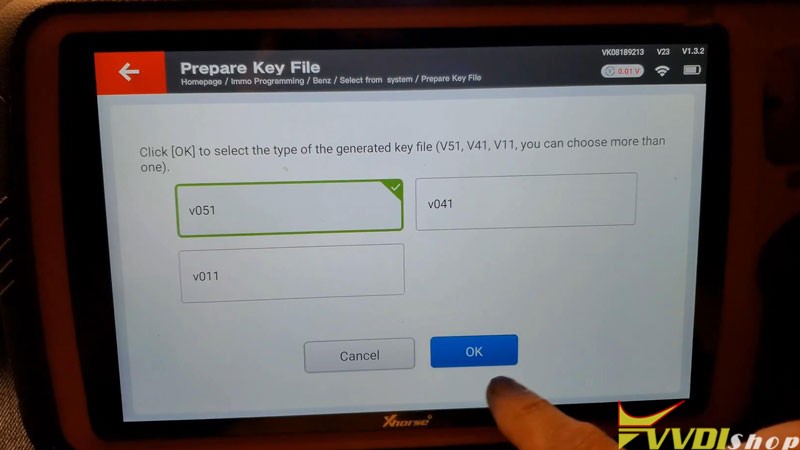
Immo program >> Europe >> Benz >> Select from system >> Prepare key file >> Start programming >> Prepare key file >> OK >> Load EEPROM file >> Yes >> OK >> v051
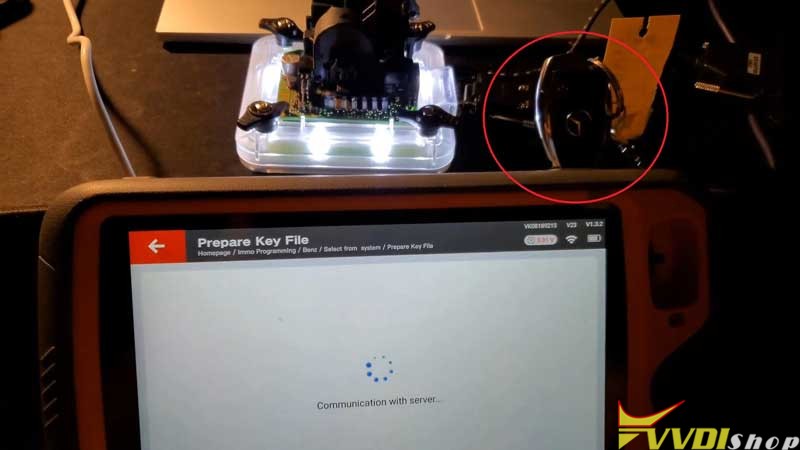
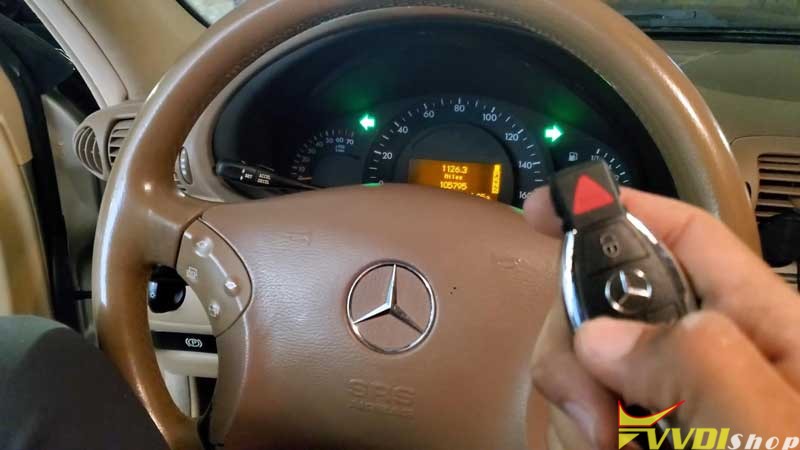
Insert Benz Smart Key into the infrared antenna of Key Tool Plus.
Calculating require 30s, please wait…
OK >> Save here >> OK
It is preparing all keys, wait until 100%…
Key file generation completed, press “OK”.

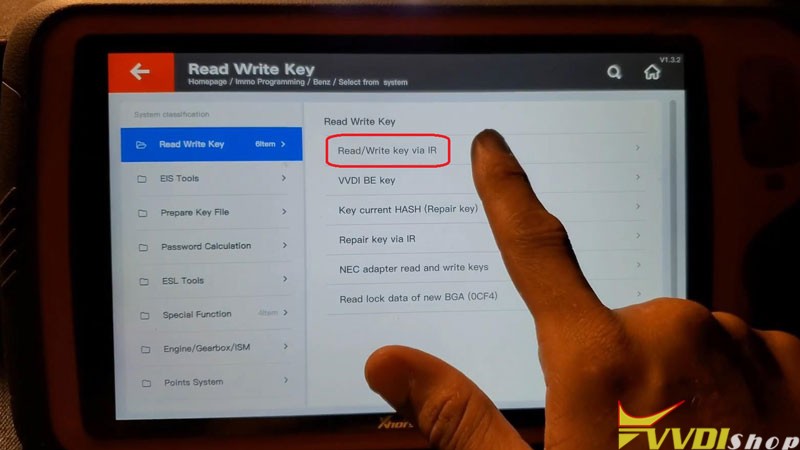
Go back to
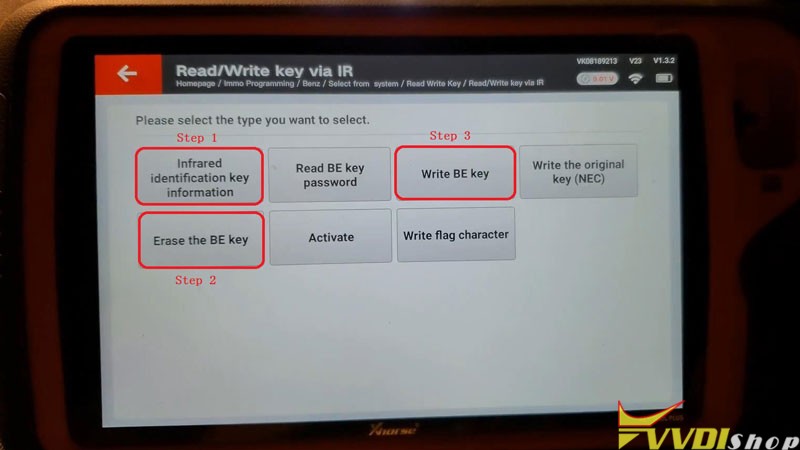
Read write key >> Read/write key via IR >> Start programming >> Infrared identification key information >> OK >> Continue >> Erase the BE key >> OK
Erase success!
Infrared identification key information >> OK >> Continue >> Write BE key >> OK >> Load data file >> OK
Writing data success.
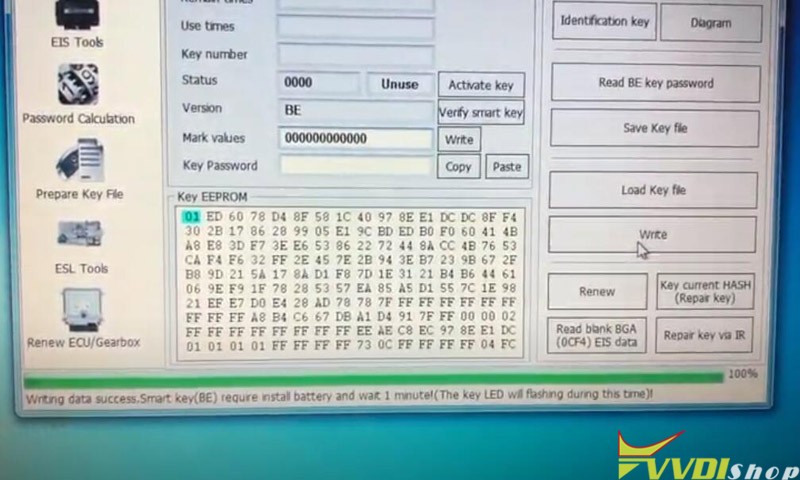
If key is smart key(BE), please install battery and wait 1 minute before learn key to car!(The key LCD will flash during this time!)
Activate Key
The activation key generally directly inserted into the car to activate, if you cannot activate, please try the following methods:
- Manual activation by select from “system >> read write key >> read/write key via IR >> activate”;
- Read EIS data again and generate key file again;
- Try to unplug the OBD connector, inset BE key into EIS to activate.
Unplug the W211(ST12) adapter, setup the EIS back to car together.
Insert the key into ignition, it can start the engine, and its remote works.
Success!
Using VVDI Prog + Xhorse Key Tool Plus is much faster than Autel. The Autel is telling to take 20-40 minutes for password calculation while Xhorse does not. Take out the EIS to read & program by Xhorse tools rather saved me lots of time.
http://blog.vvdishop.com/xhorse-vvdi-prog-key-tool-plus-program-2004-mercedes-c240-akl/
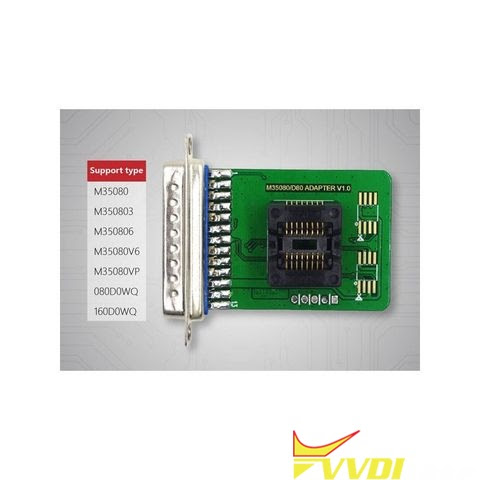
How to Solve VVDI Prog M35080 Fail to Erase & Write 160d0wq
Problem
My Xhorse VVDI Prog M35080/D80 Adapter can read 160d0wq chip successfully, but cannot erase & write it. No error. It says cracking then erase and after erase. What’s the problem? Please help me.
Solution
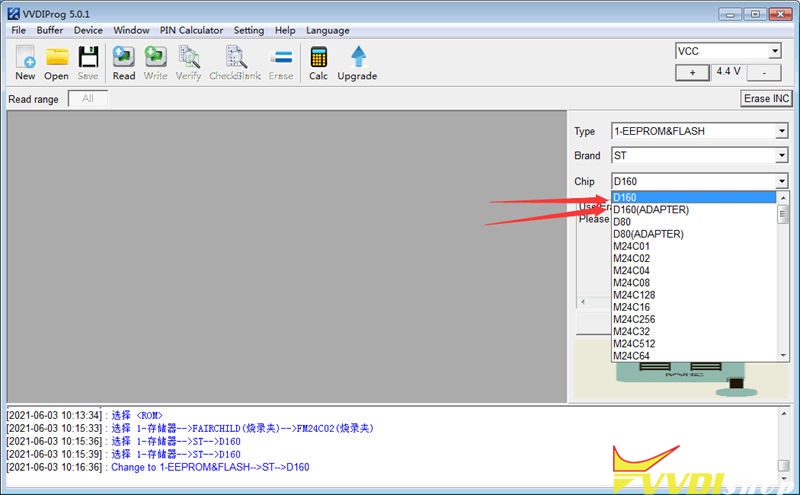
Please make sure you’ve selected the correct options, it has probability of failure to erase & write the chip. It is suggested to use the Xhorse 35160DW Chip to do it instead.
Note: The chip can be used as replacement of ST company 35080xxx, 35160xx, 080D0xx, 160D0xx …etc.
How to use 35160DW Chip with VVDI Prog?
- Backup data.
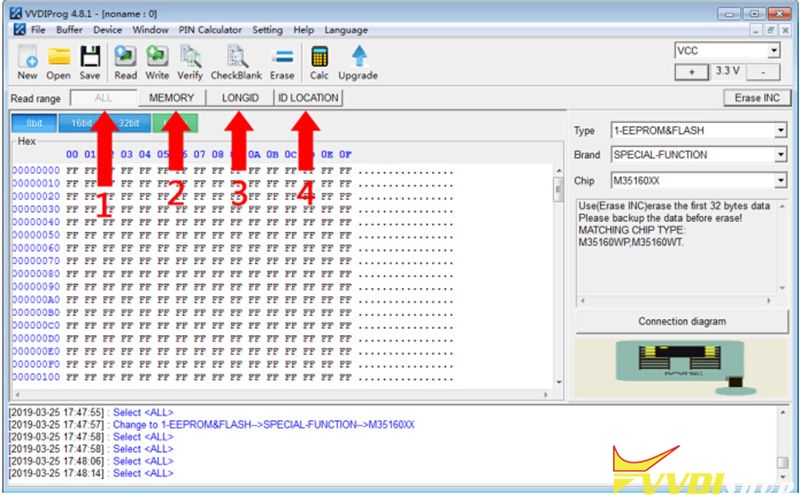
Read & save the dashboard original IC from “MEMORY + LONGID + ID LOCATION” or “ALL” option.
- Write data.
Replace original chip to 35160xx chip, write step1 to save 3 dumps to each partition(MEMORY/LONGID/ID LOCATION) on Xhorse chip by VVDI Prog.
- Mileage correction.
Perform “Erase INC” button(erasing the front 2 lines), select “ALL” or “MEMORY” option to read data for verify.
The front 2 lines should be all ‘0’ when reading data, manually input the target mileage, then perform “Write” option, completed!
- Verify data.
Soldering the chip back to dashboard, check whether it is working well without red dot.
VVDI MB Program Spinter W906 All Keys Lost without Token
Mercedes Sprinter W906 all keys lost programming by xhorse vvdi prog and vvdi mb tool on bench. Reading MCU data using vvdiprog, no need to calculate password online. Password is extracted directly from dump.
FYI: Add a spare key is easier, check the guide here.
Device used:
Lishi HU64 auto pick
2 VVDI BE keys to be programmed
Benz EIS EZS Gateway test platform
Main steps:
Decode door lock
Remove EZS
Read EZS adapter
Make key
Procedure:
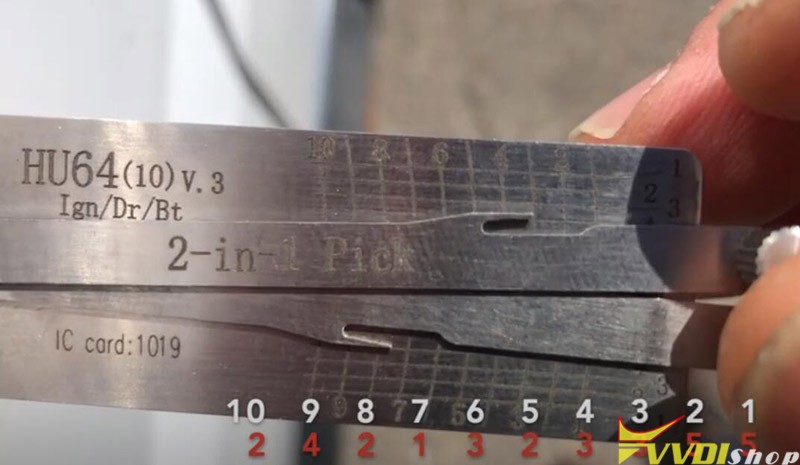
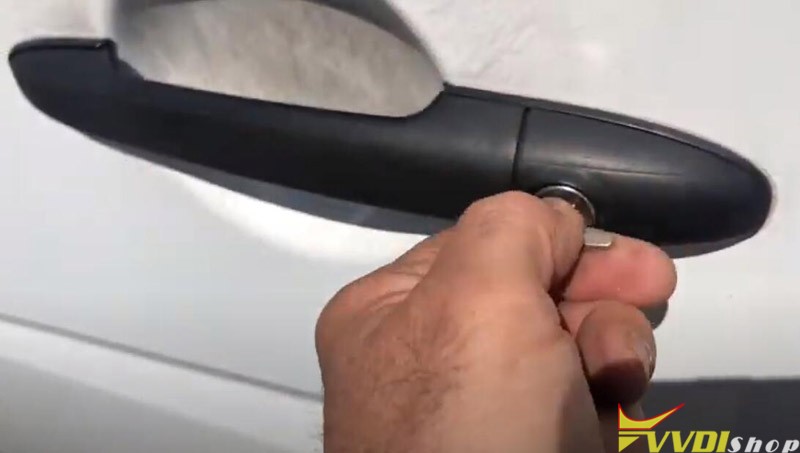
Decoding of the door lock (HU64) with the Lishi 2in1 Pick tool
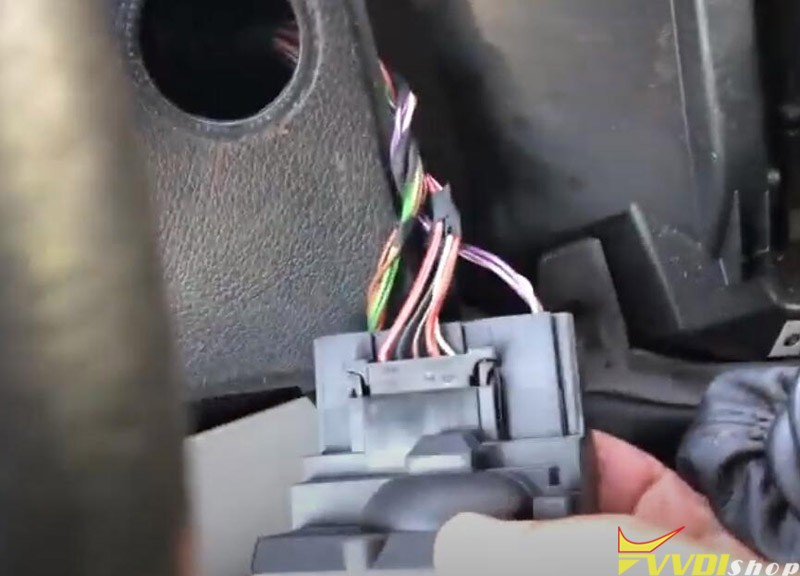
Remove EZS
Read data with VVDI Prog software and EZS adapter (without soldering)
If don’t have EZS adapter, check wiring diagram and solder
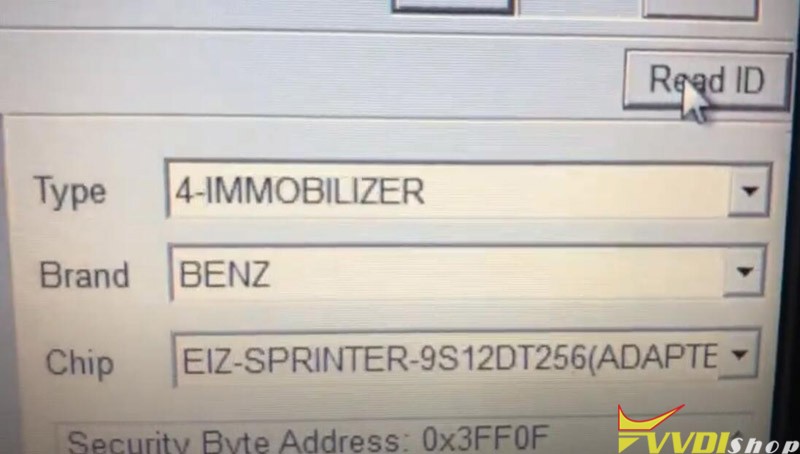
In VVDIProg software, select Immobilizer->Benz-EIS Sprinter 9S12DT256 (Adapter)->Read ID
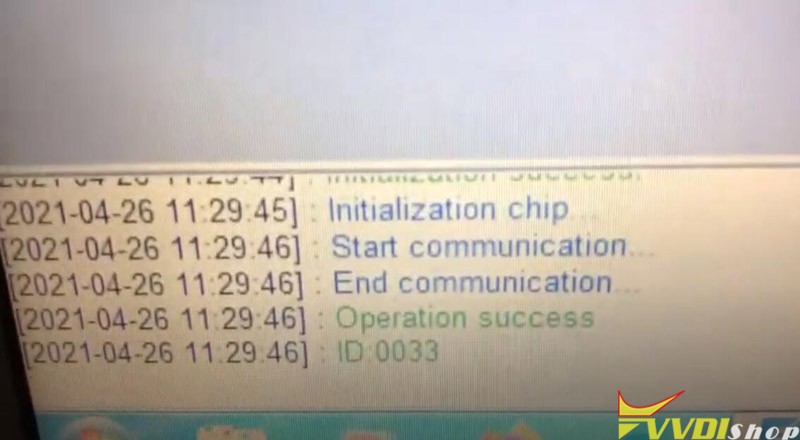
Read ID success
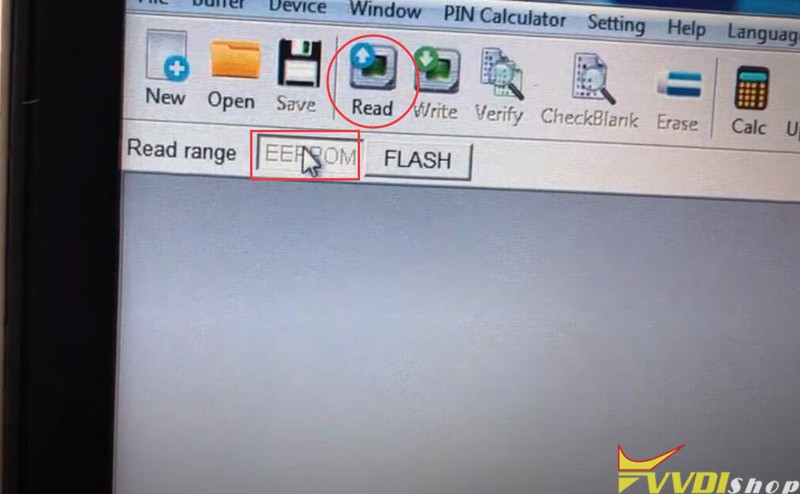
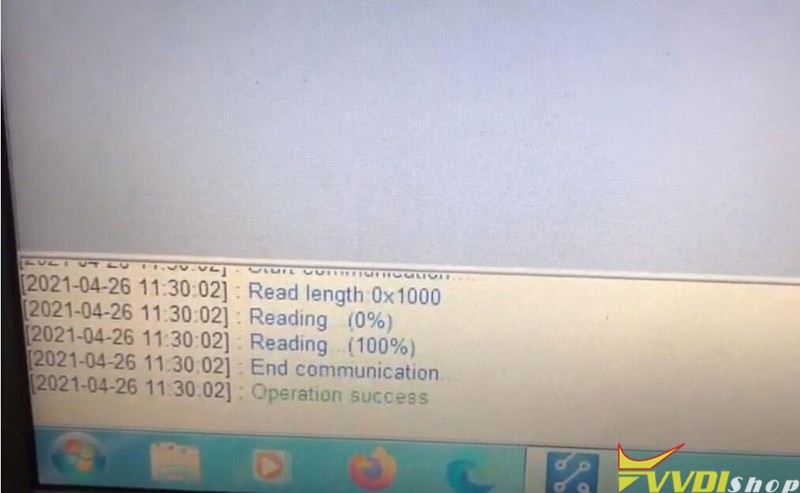
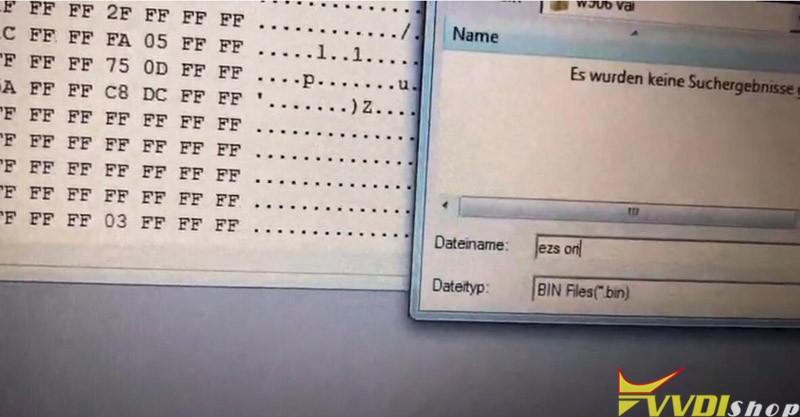
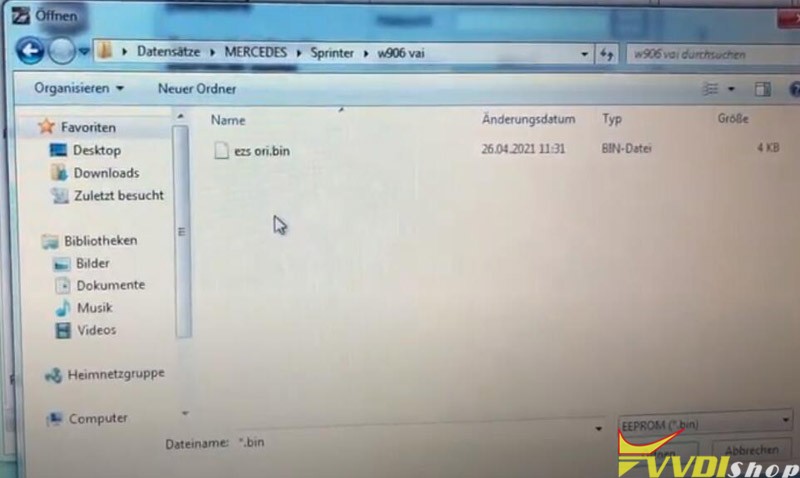
Read EEPROM and save data
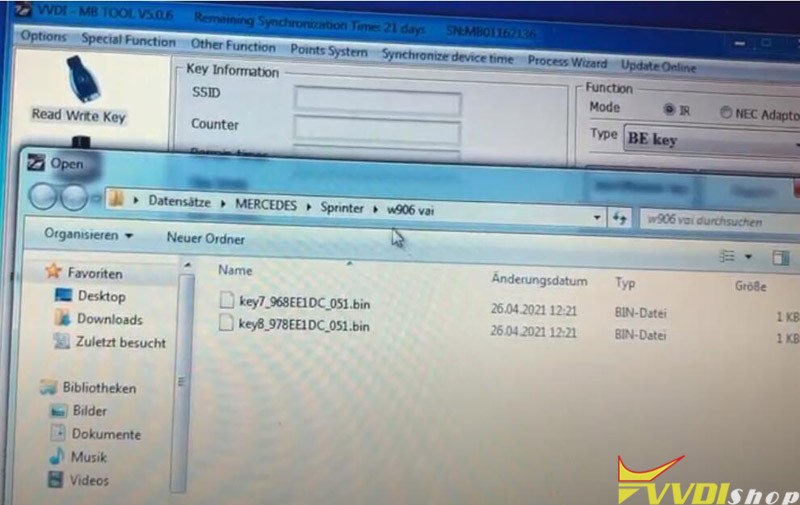
Run VVDI MB software, select Prepare Key File-> Load EIS file
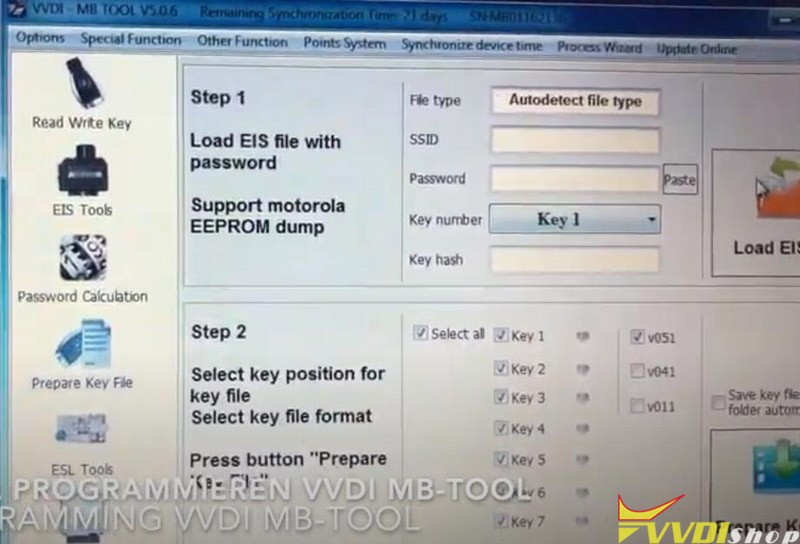
Load EIS data read by vvdi-prog
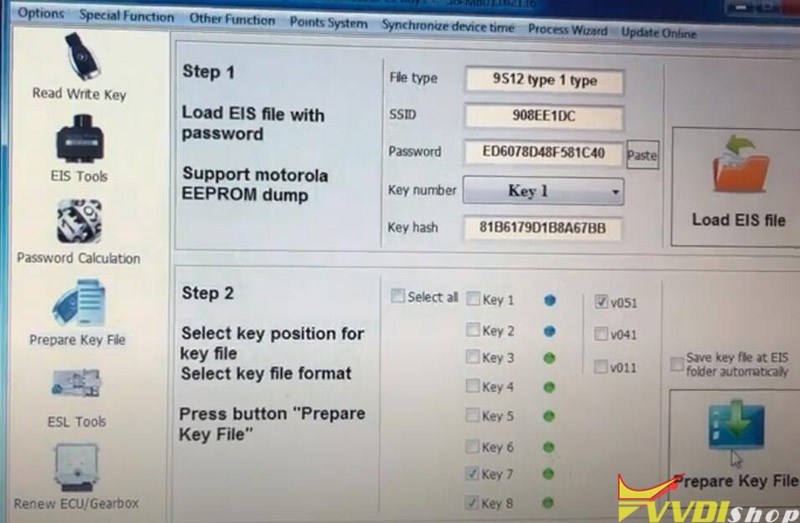
Select key7 and key8 unused key position and Prepare Key File
Insert key into EZS and turn ignition ON

Then remove key and insert BE key into vvdi mb tool
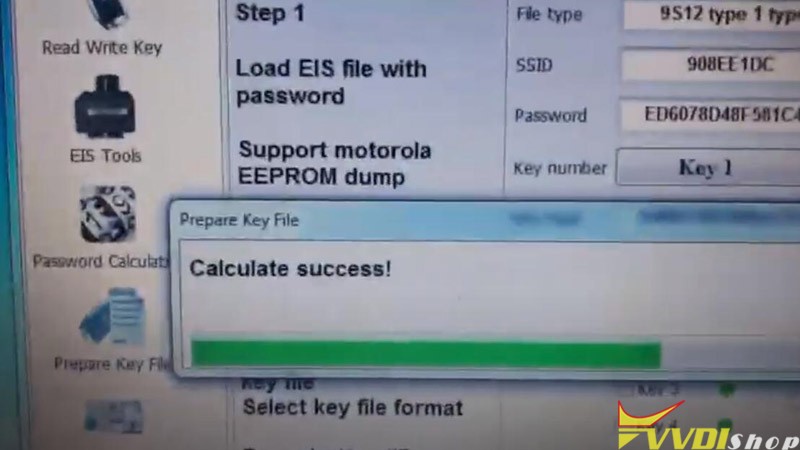

Calculate password success. Save key file.

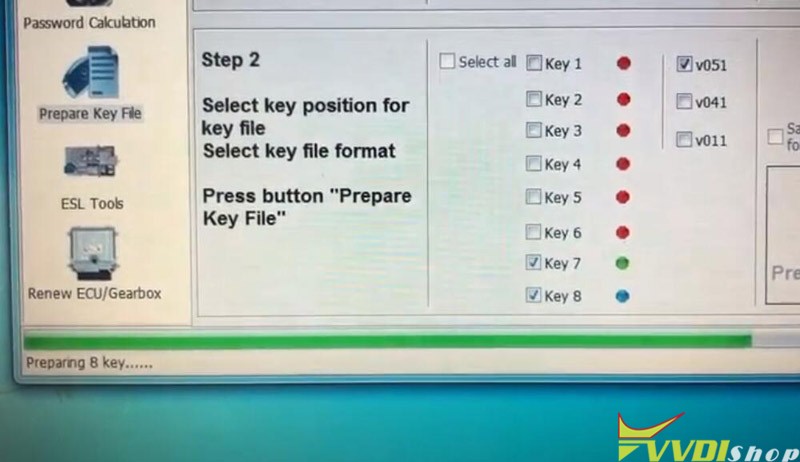
Preparing key 7 and key 8 until completed
Go to Read Write Key function.
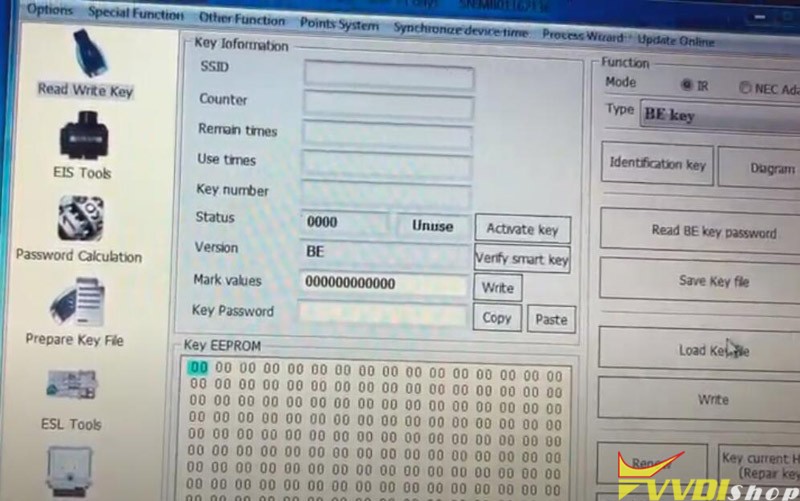
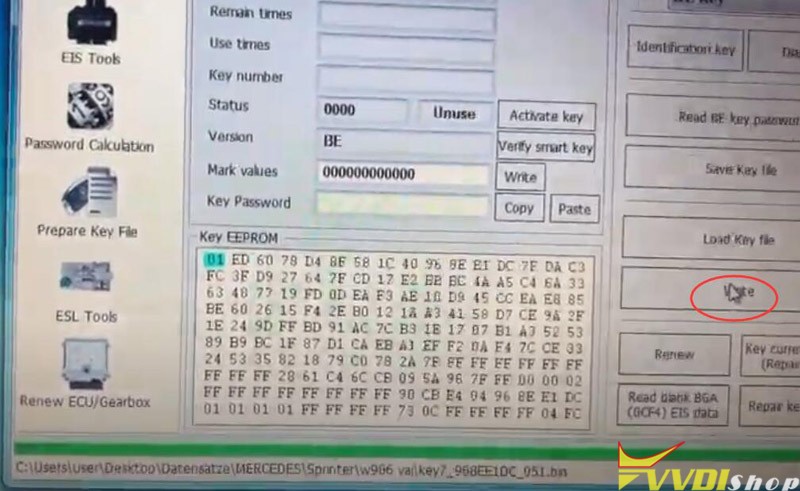
Load key7 key file and write key
Turn on ignition switch and turn off
Insert key into VVDI MB, write 1st key success
Repeat the procedure to write 2nd key.
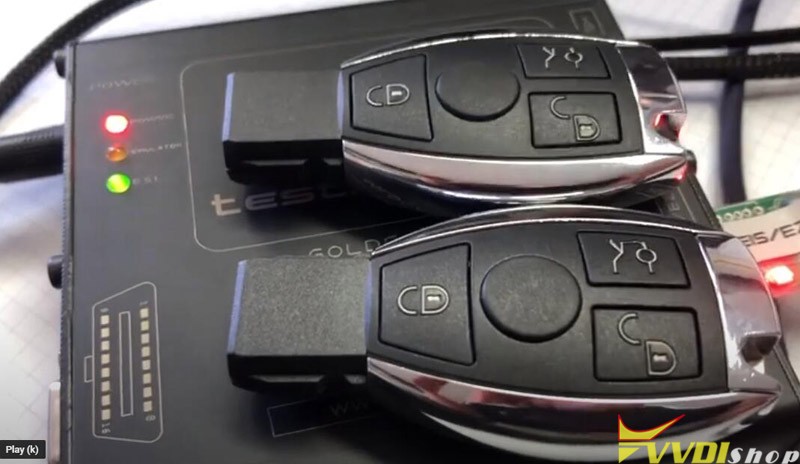

Test both new keys. Working no issue, car starts, remote control works.
Done.
http://blog.vvdishop.com/xhorse-vvdi-mb-program-mercedes-sprinter-w906-all-keys-lost/
VVDI Prog Wiring Diagram to MC9S12XEP100 Secured
Xhorse VVDI Prog supports the Motorola MCU MC9S12XEP100 chip. There is a secured and unsecured variant.
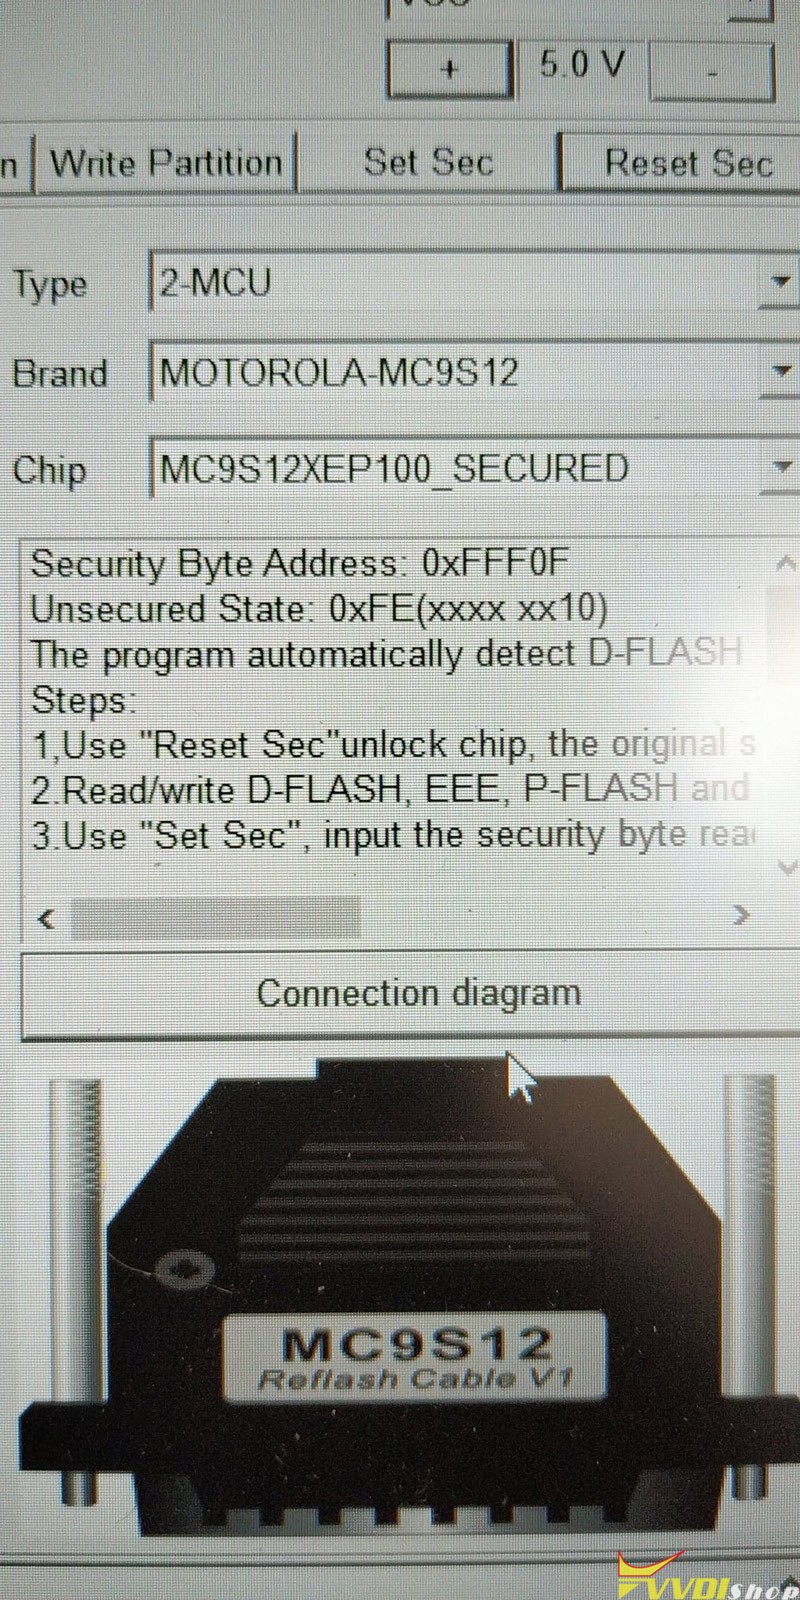
I going to read the secured mcu data.
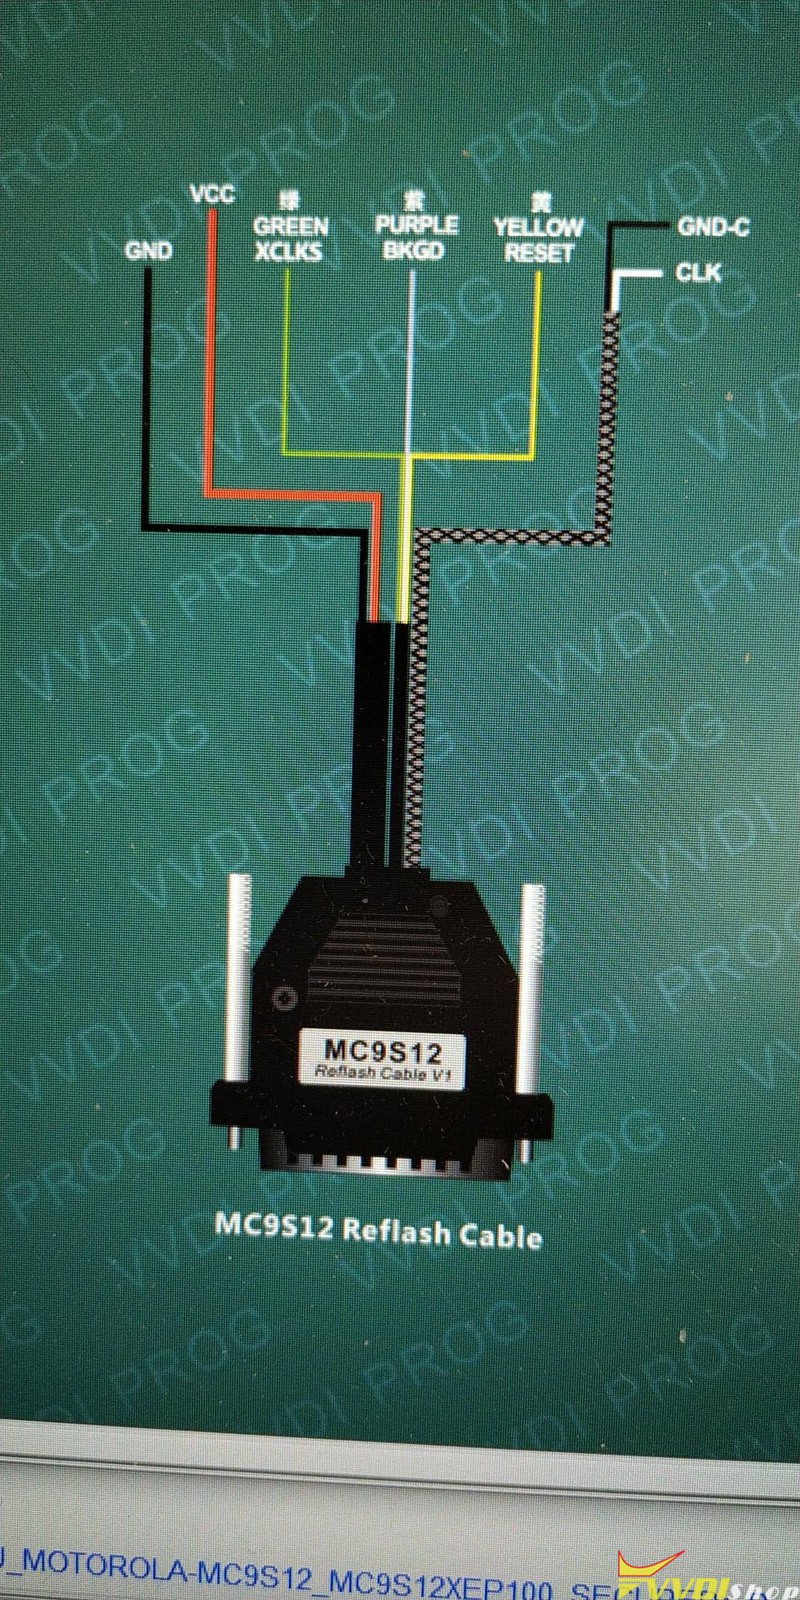
The connection diagram shows the cable. Extra connections over BDM.
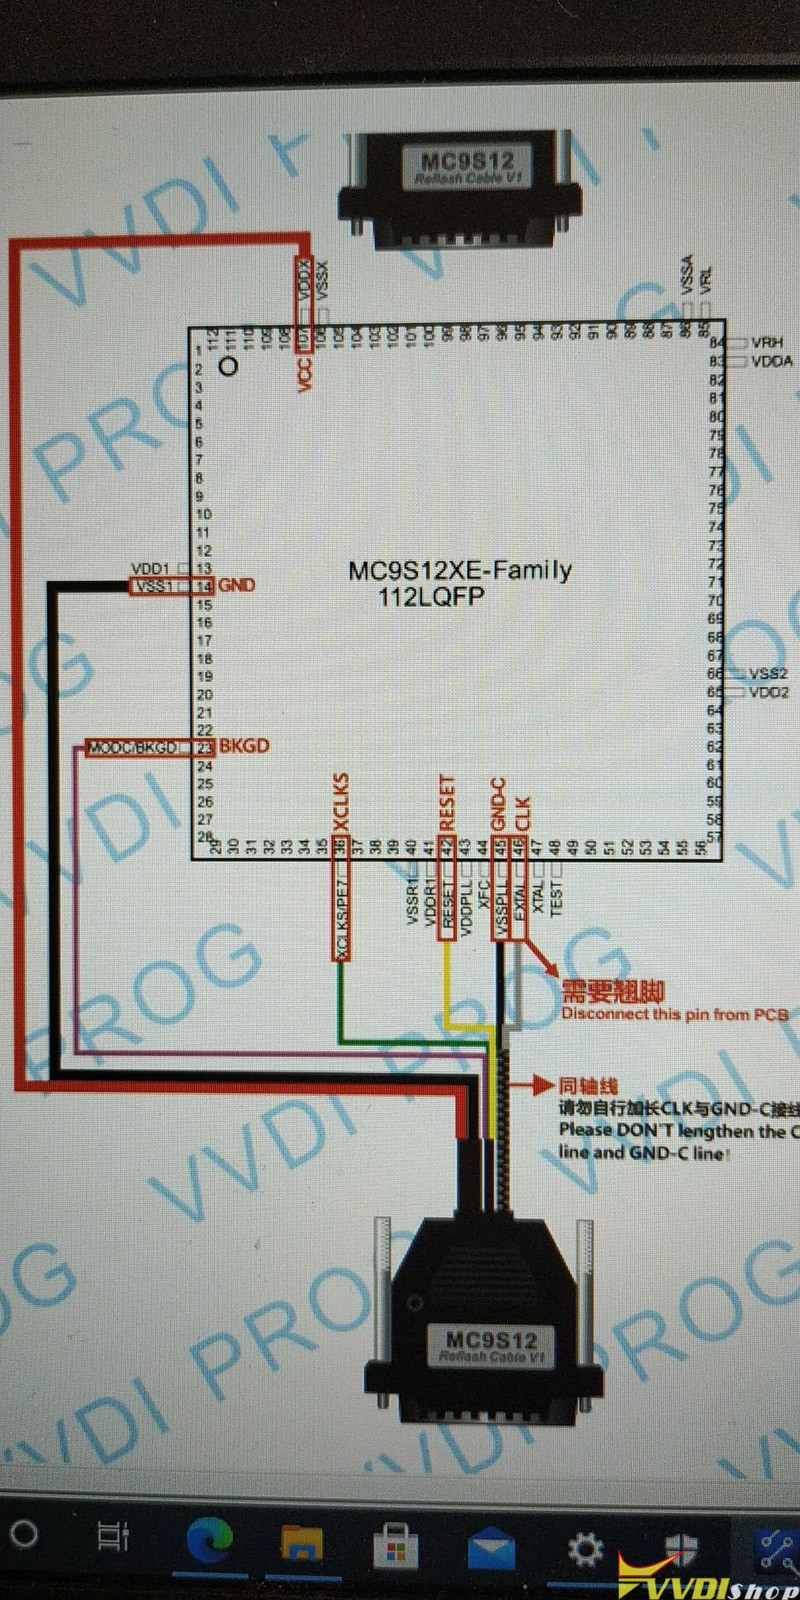
Specific pins for the package. Quite helpful.
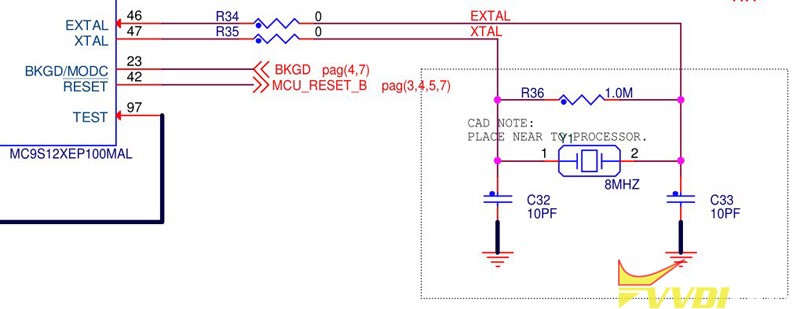
No need to lift the pin for EXTAL – I’ll just take the zero Ohm R34 off the board.
I can’t see the ground needing to be immediately next to the EXTAL pin. Bottom of C32 or C33 should do.
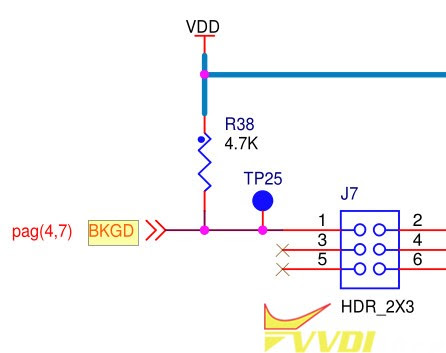
BKGD can come off TP25…. Reset off TP26. This might be easy!
And we’ll smack GND and VCC onto the BDM header on the board.
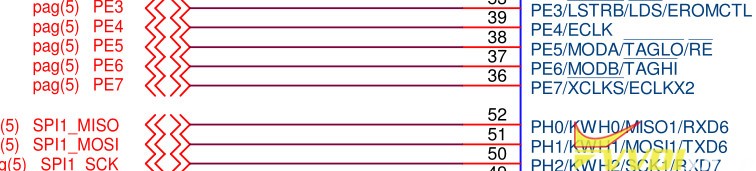
Urgh, XCLKS is needed as well… PE7
Which pops out on one of the Arduino-ish headers. Hoping that isn’t too far away from the chip.
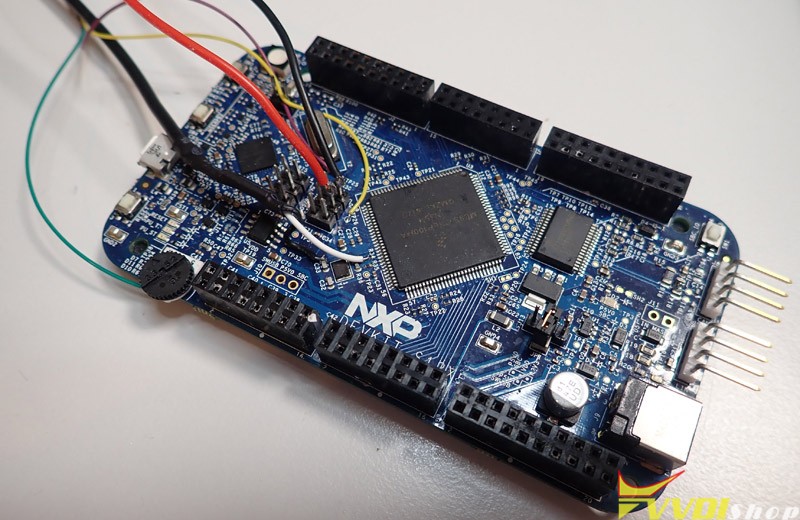
Then do soldering job. Not too bad on this. XCLKS (green) is on the underside on one of the Arduino headers. Massive long trace. I think that this is just going to signal to the micro that it’s to expect an external clock signal on EXTALS instead of the crystal.
The EXTAL and ground are in a bit of coax and it warns not to shorten them… so it might be getting a bit fruity on that front.
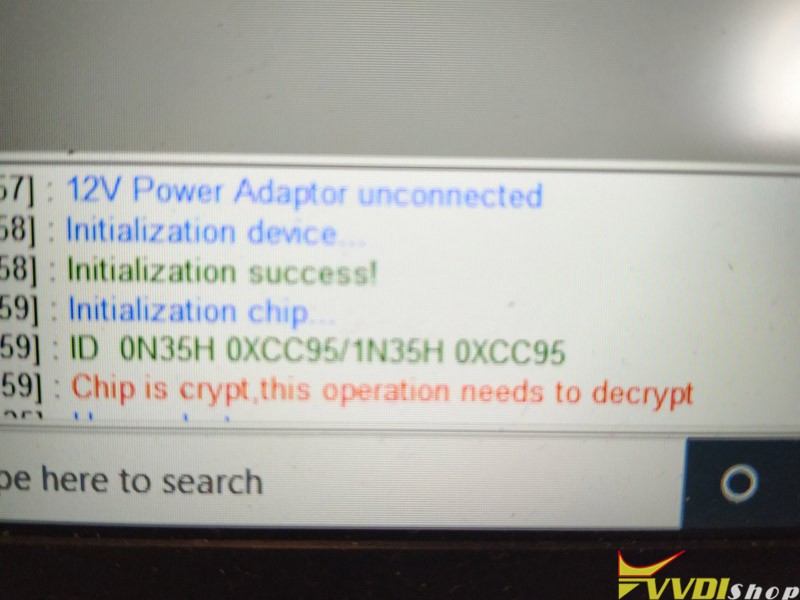
Looking good. The vvdi prog programmer makes and audible noise when interacting with the micro.
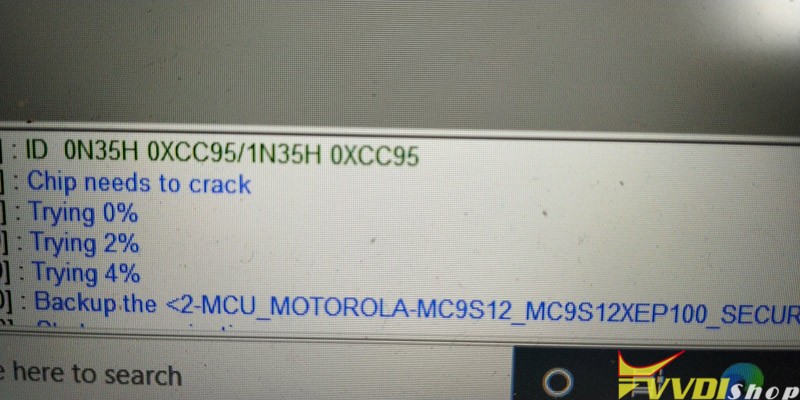
It clearly asked me if I wanted to bypass security. More audible noise, like cool whine. And there we go… It’s unsecured.
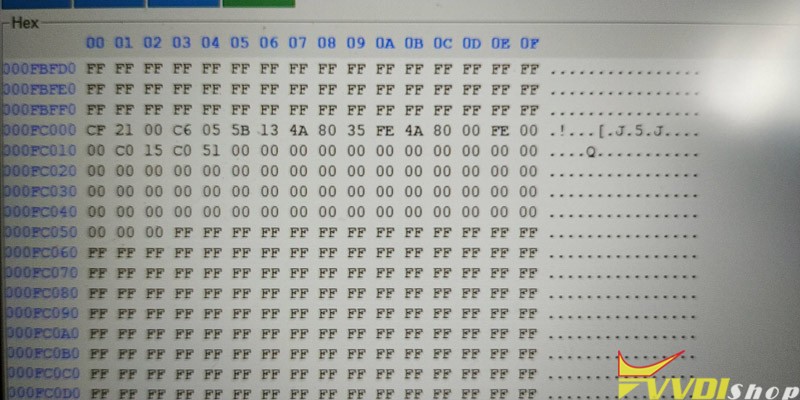
It works. Flash contents are still there. Nice.
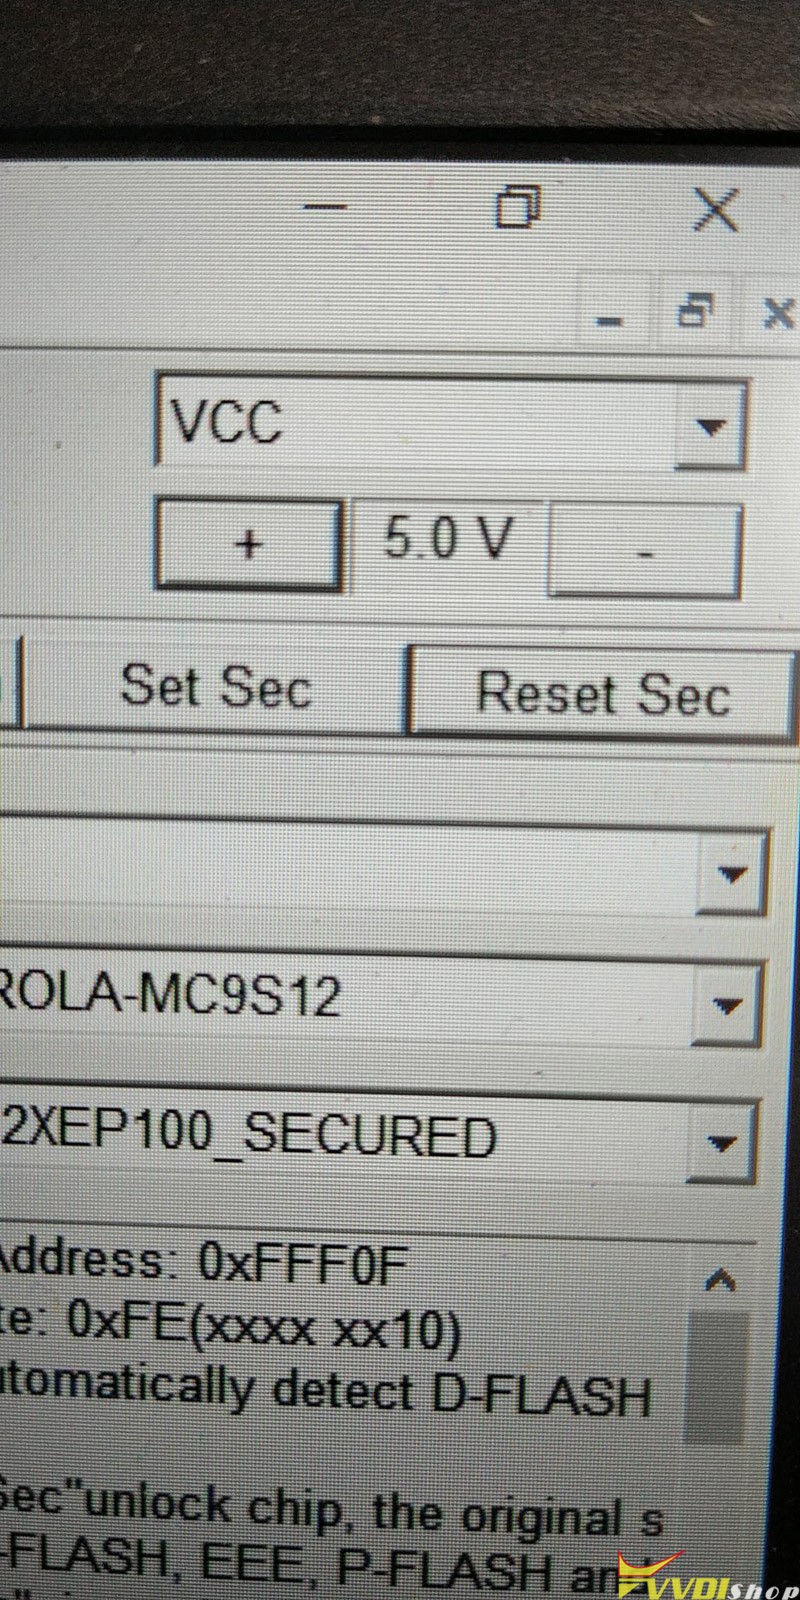
Allows control of VCC!
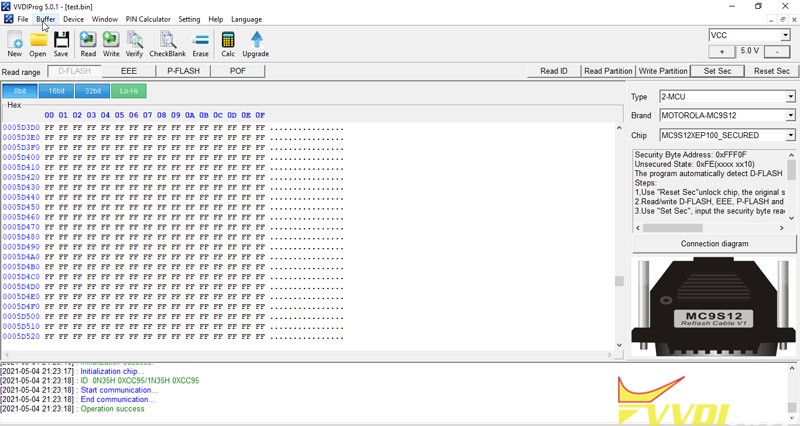
Operation success. Save data.
Credit to @cyber gibbons.
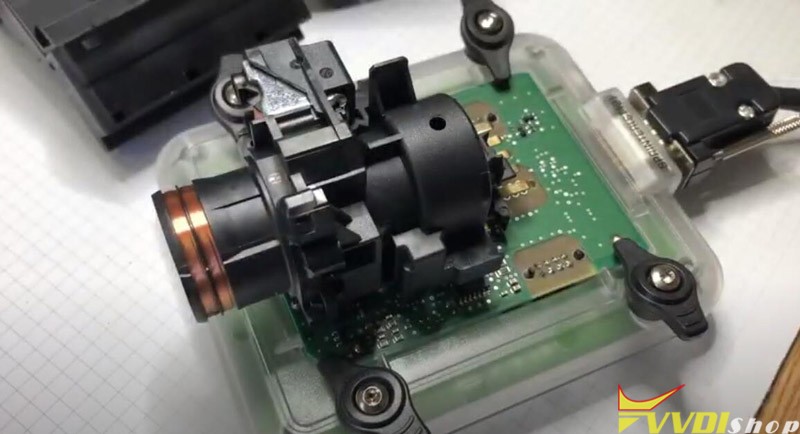
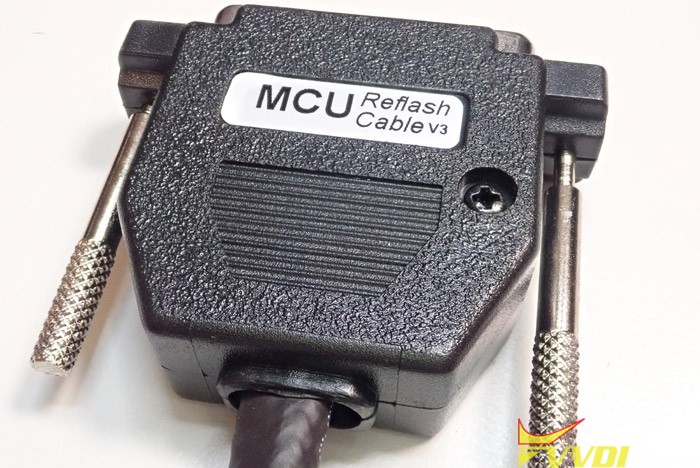
Check Xhorse VVDI Prog Firmware PCB and Inside Components
Xhorse VVDI Prog programmer is an interesting device carrying out some quite advanced attacks.
Here comes the 2021 hardware review.
Disclaimer: Credit to the contributor cyber gibbons. The review here is for sharing purpose. We are not holding the responsibility if cause damage by disassembling the vvdi-prog..
The vvdi-prog has arrived.
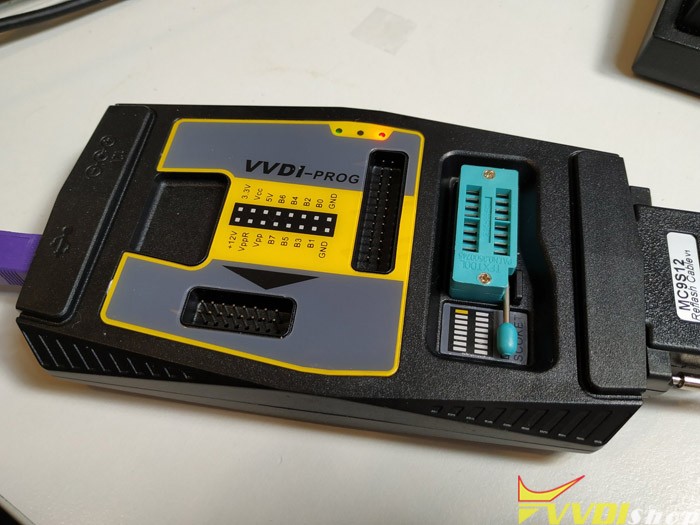
DIP socket is for EEPROMs and SPI flash – it can read a lot of the common ones in socket or via a clip.
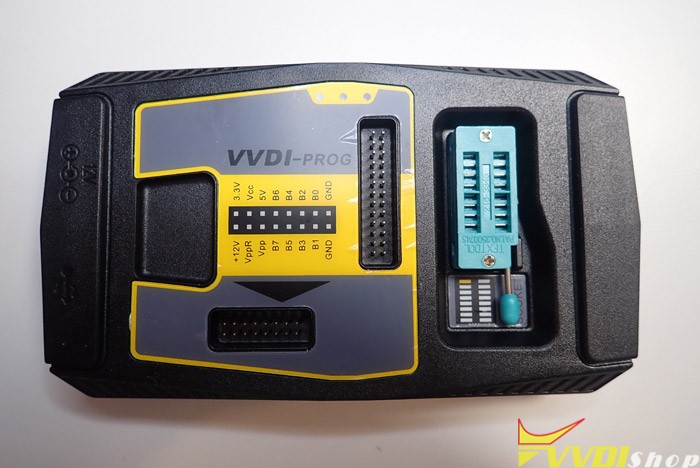
It’s actually really quite polished, and significantly above average in build quality and design. Strong plastics.
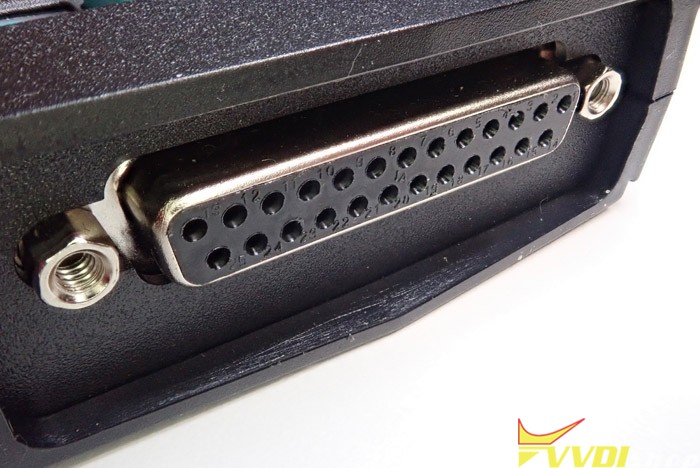
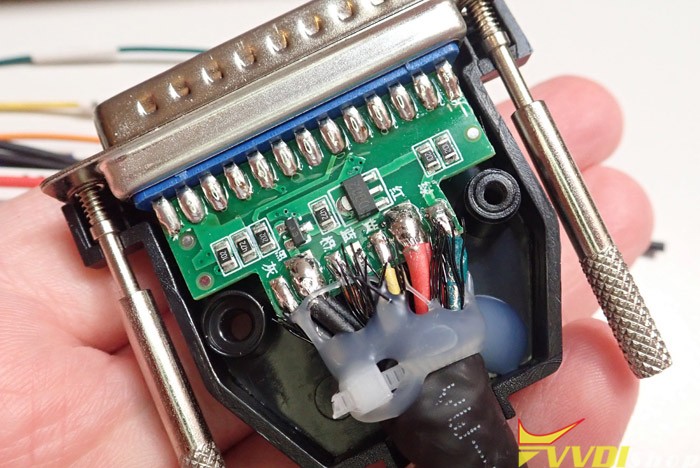
The MCU stuff comes off this DB25 connector on the end.
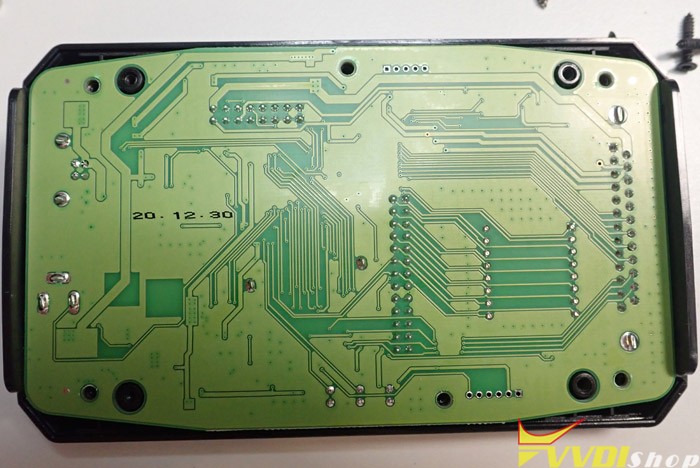
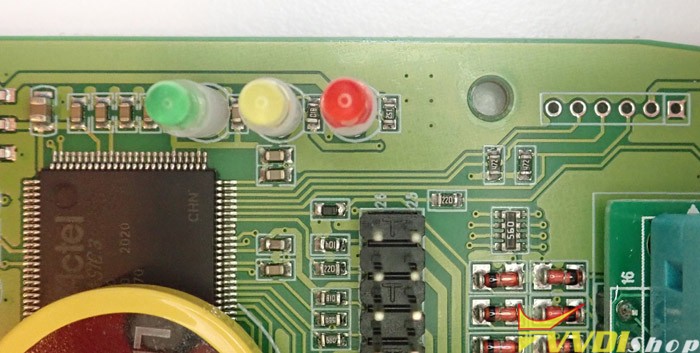
On opening it, a largely single-sided board. Recent date. Very clean inside, no flux residue.
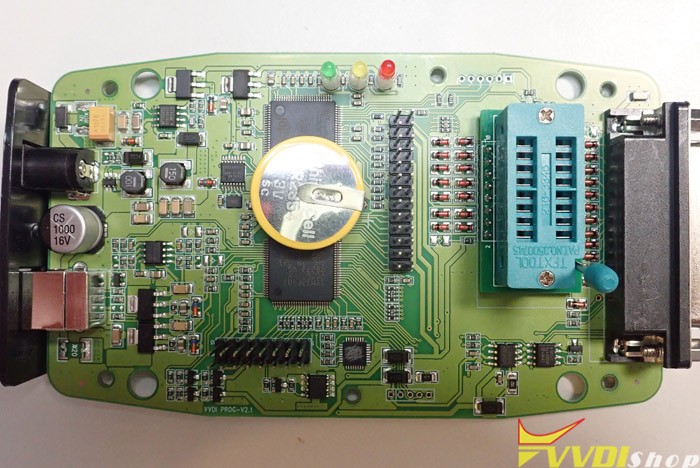
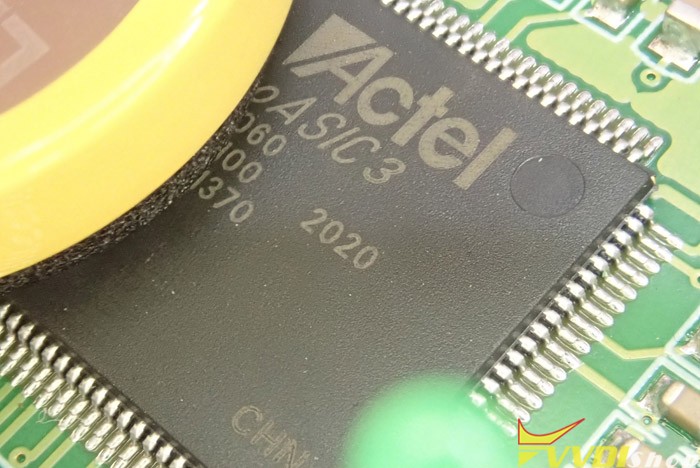
Interesting inside. An STM32 and a ProASIC. Power supply section looks like thought has gone into it. Loads of diodes, probably for protection in the automotive environment. No sure what the lithium cell is doing.
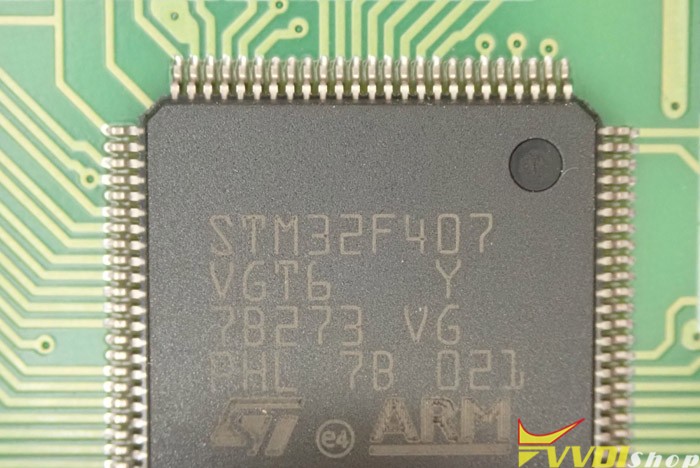
STM32F407. One of the most common chips out there.
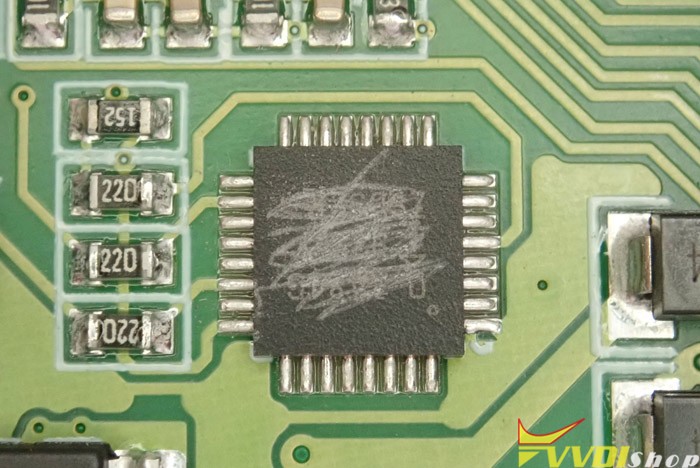
A K-Line bus driver, probably for interacting with certain ECUs.
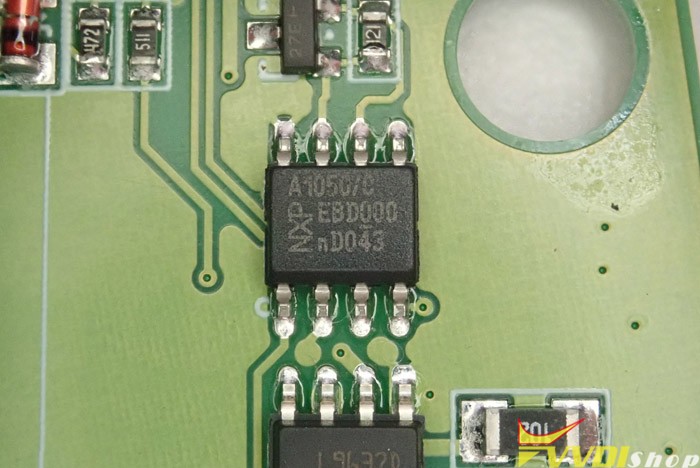
NXP chip

that’s a SWD header for the STM32 up there.
A header for the ProASIC… not worked with these
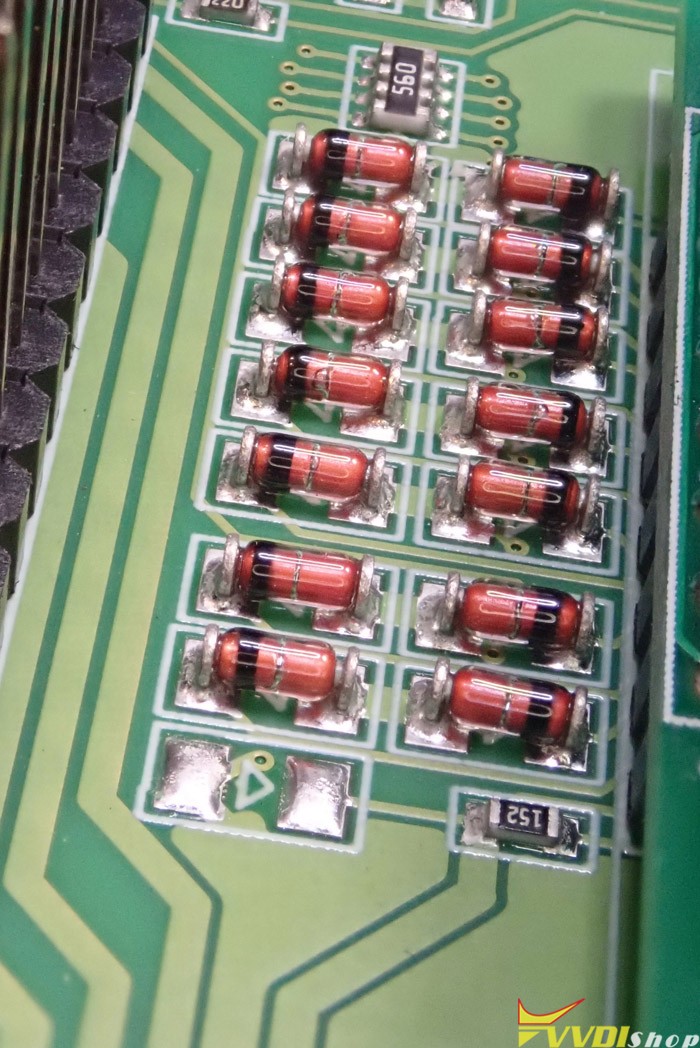
Protection diodes – not cheap to do this stuff.
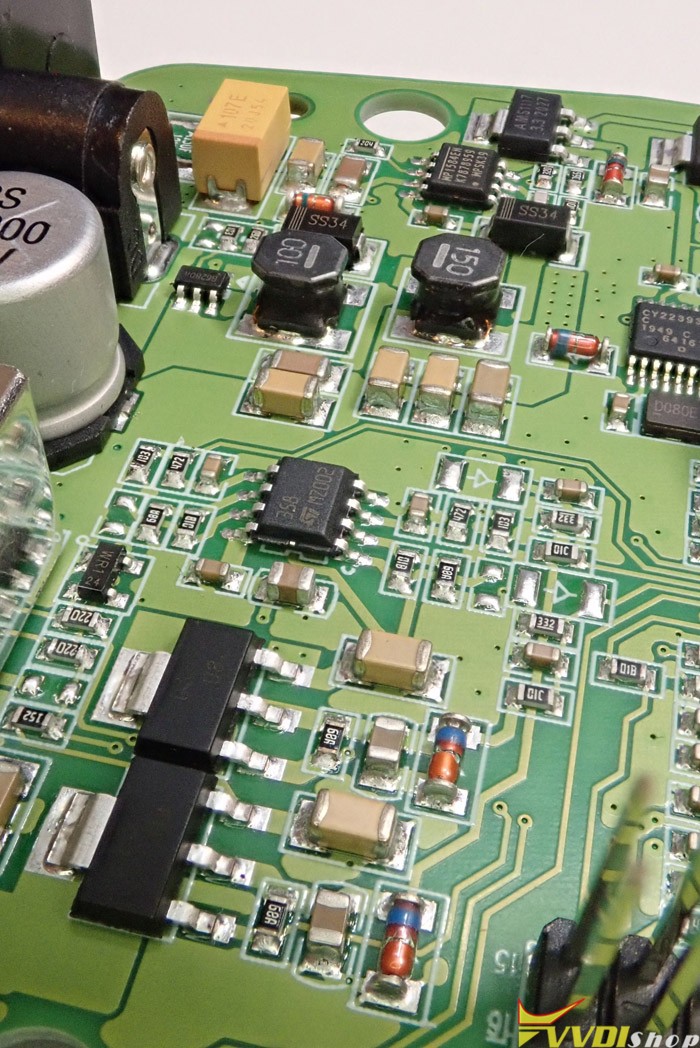
It takes 12V and can supply a decent amount of current for some ECUs.
Comes with a series of cables. Braided, sleeved. Nice quality.
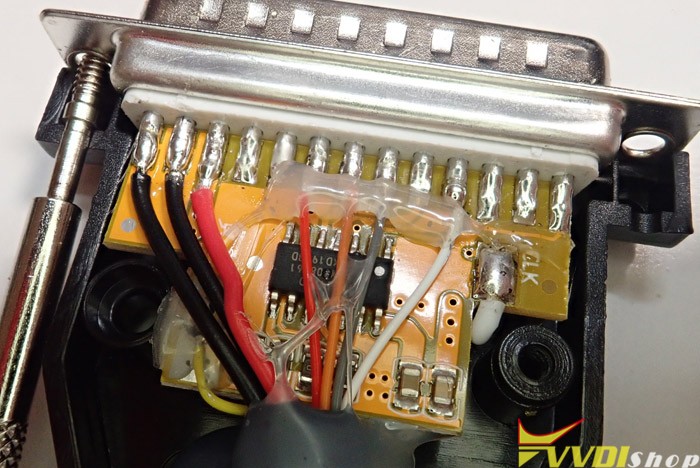
Some active components inside… and hot snot. Not sure what the chip is.
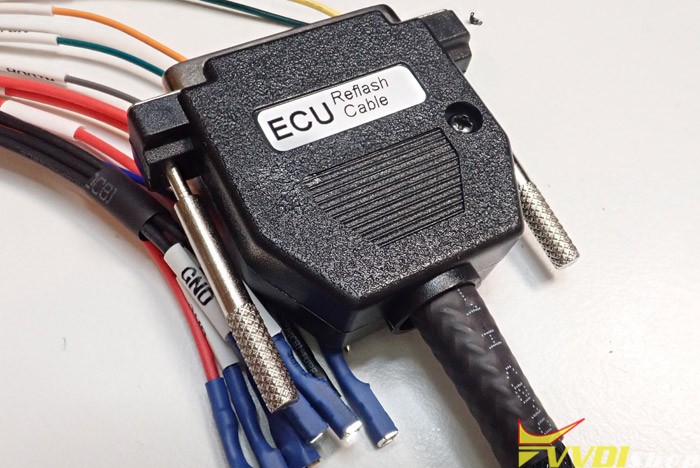
This ECU one is a bit more interesting.
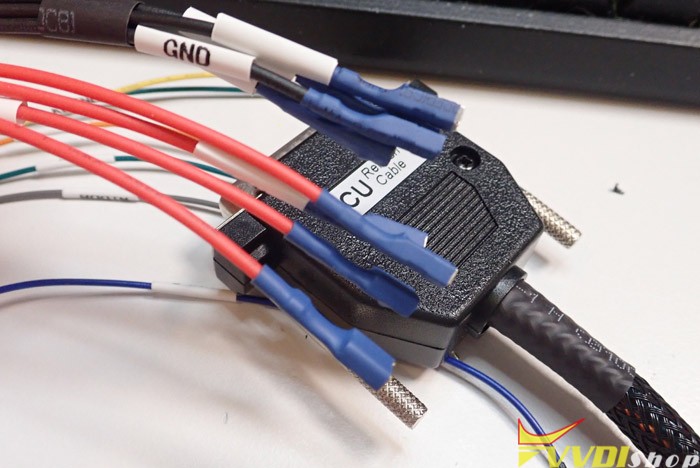
Four of each for ground and power – I think this is for powering bigger ECUs like BCMs and immobilisers.

CAN, K-Line, ignition and boot mode come as signals.
Again, some active components inside.
Xhorse vvdiprog is a complex product. Certainly not just something the a TL866 in another box. A device that bypasses security on a range of devices!
https://www.vvdishop.com/service/xhorse-vvdi-prog-hardware-review.html