ابزار Xhorse VVDI
Xhose VVDI نرم افزار برنامه نویس اصلی و سخت افزارابزار Xhorse VVDI
Xhose VVDI نرم افزار برنامه نویس اصلی و سخت افزارVVDI Key Tool Max Adds Suzuki Dzire Smart Key
How to program a smart remote key for Suzuki Dzire using with Xhorse VVDI Key Tool Max + MINI OBD Tool? As below I will show you the procedure step by step.
For key cutting procedure:
http://blog.vvdishop.com/dolphin-xp005-vvdi-key-tool-max-cut-suzuki-swift-key/
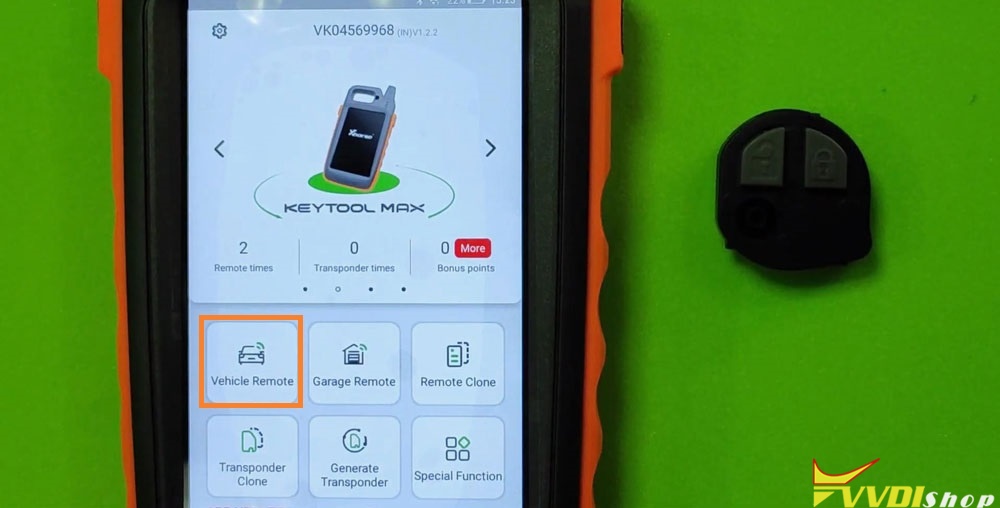
Start up VVDI Key Tool Max key programmer:
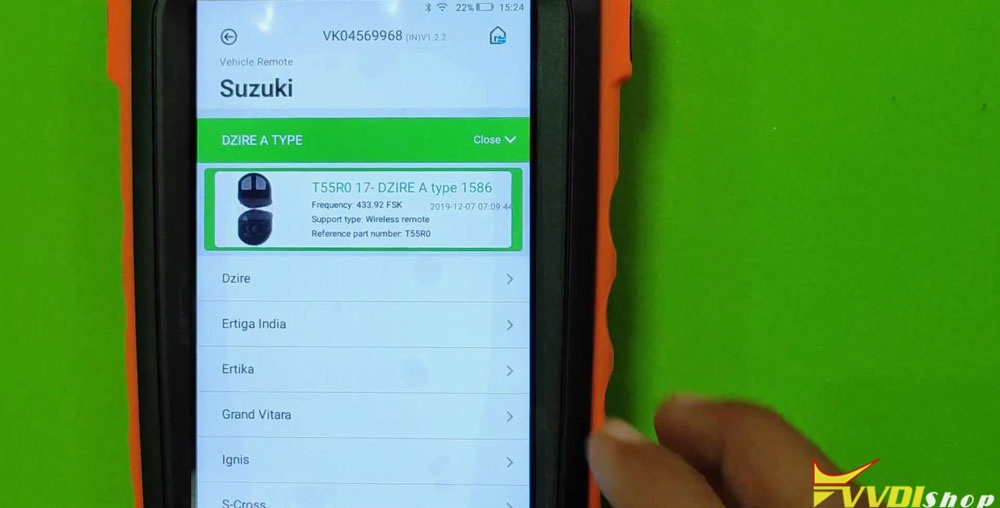
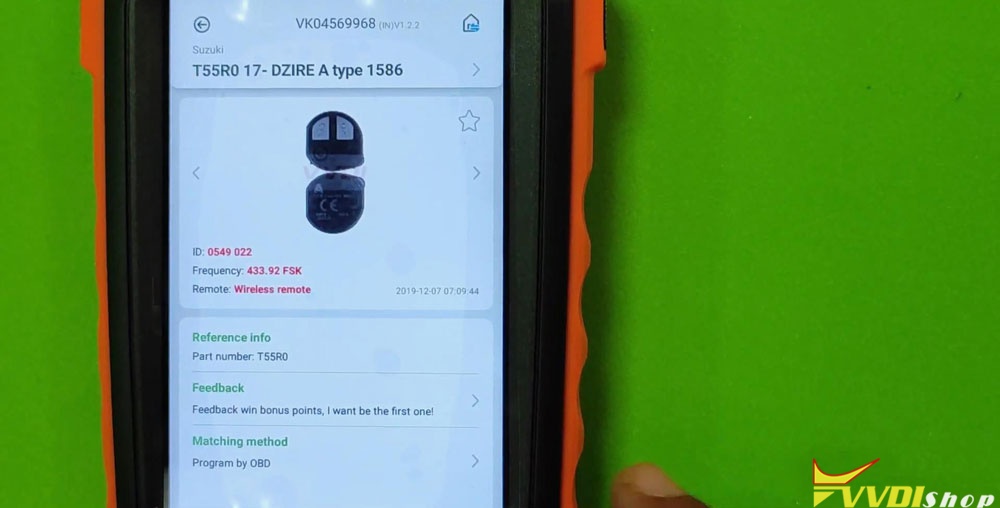
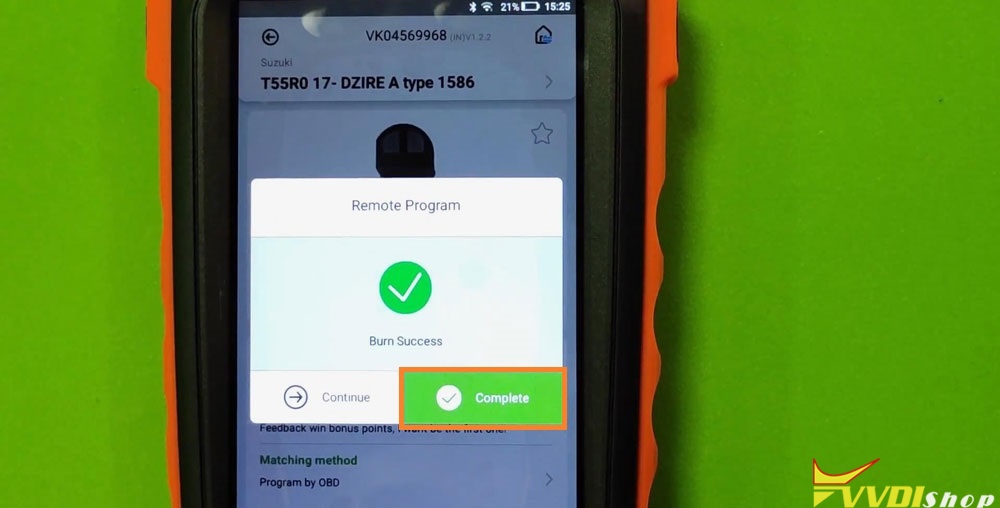
Vehicle remote >> Suzuki >> Dzire a type >> T55R0 17-DZIRE A type 1586

Put the remote chip into VVDI Key Tool Max slot on top.
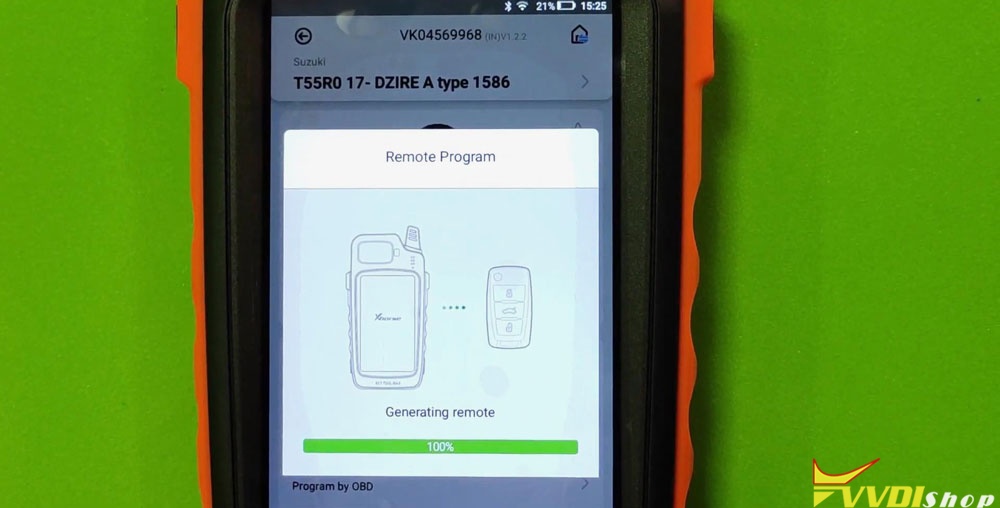
Generate remote >> Wait until 100%… >> Burn Success, press “Complete”.
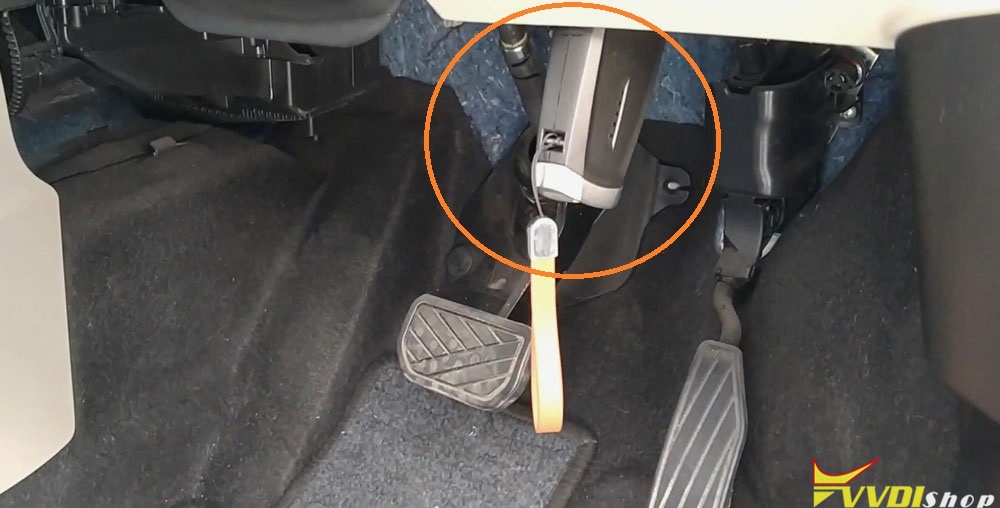
Now let’s go to Suzuki car for key programming.
Inset the VVDI MINI OBD Tool to OBD port of Suzuki, connect it with Key Tool Max via Bluetooth.
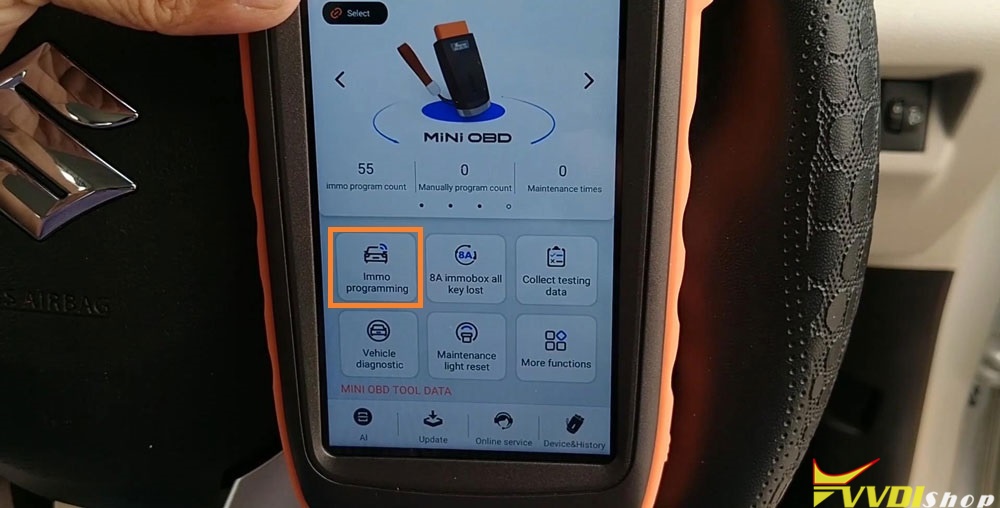
Let’s start now:
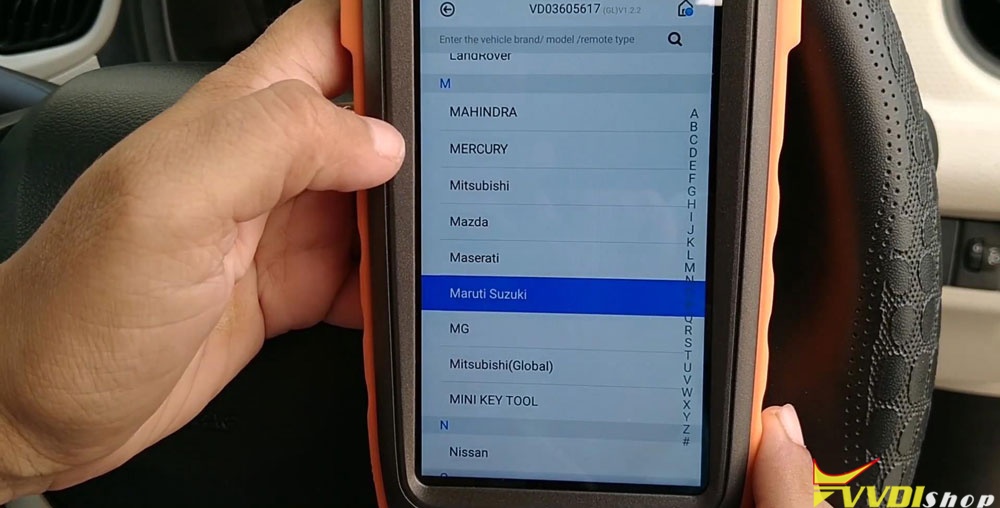
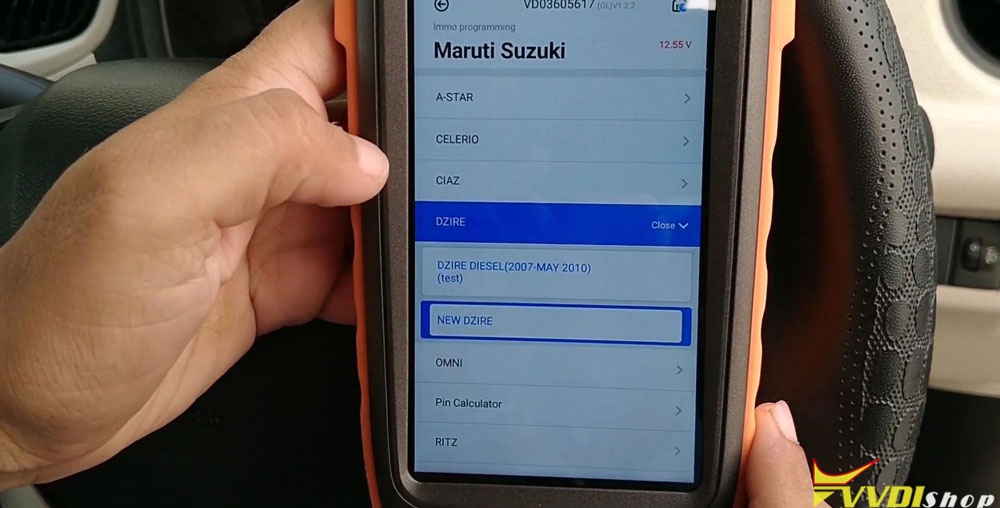
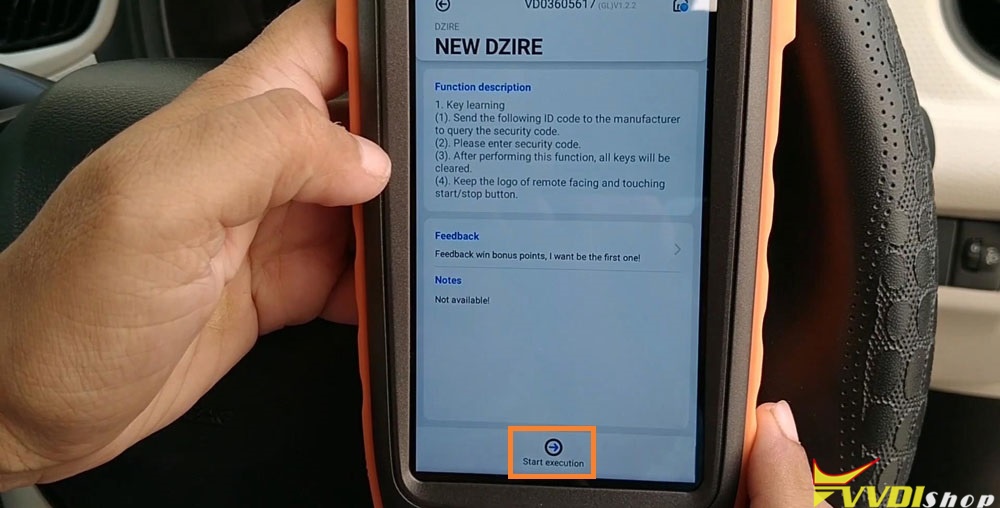
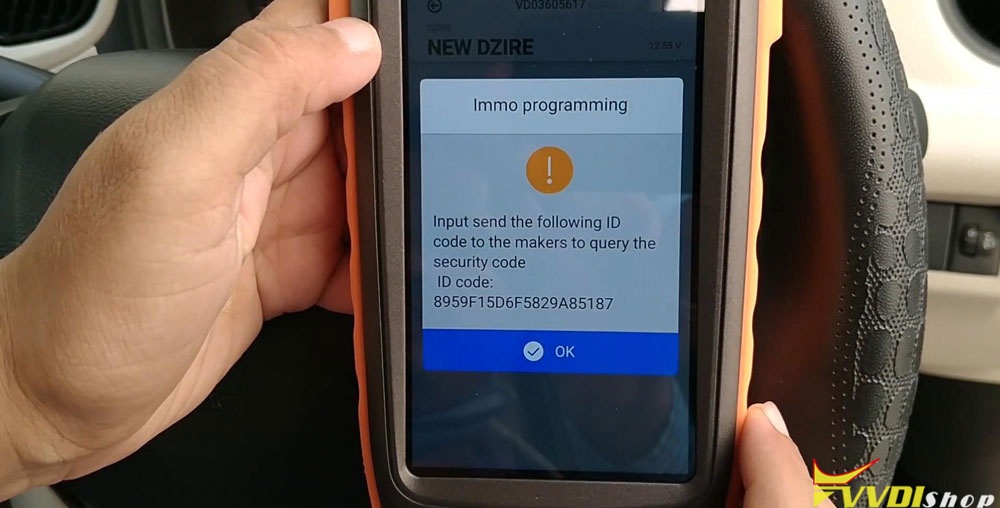
IMMO programming >> Maruti Suzuki >> DZIRE >> NEW DZIRE >> Start execution
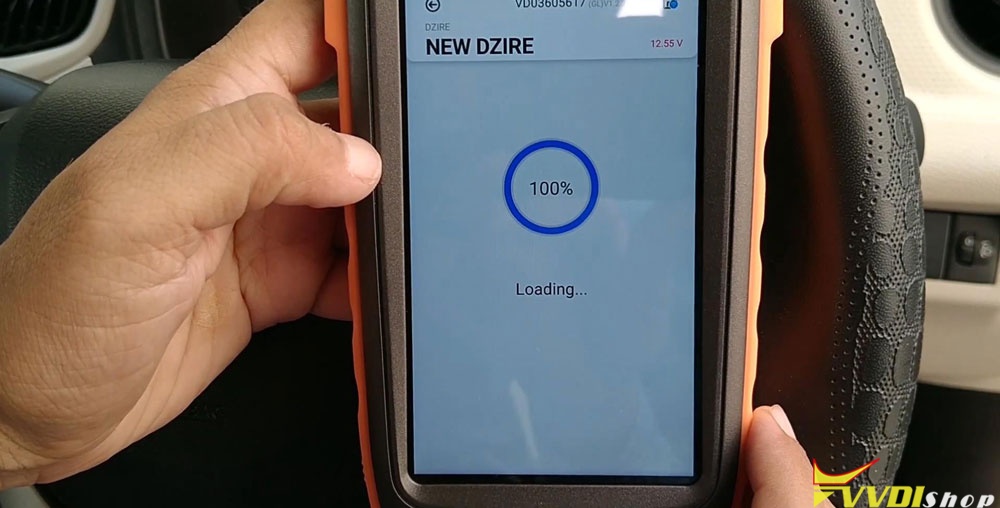
Wait until 100%…
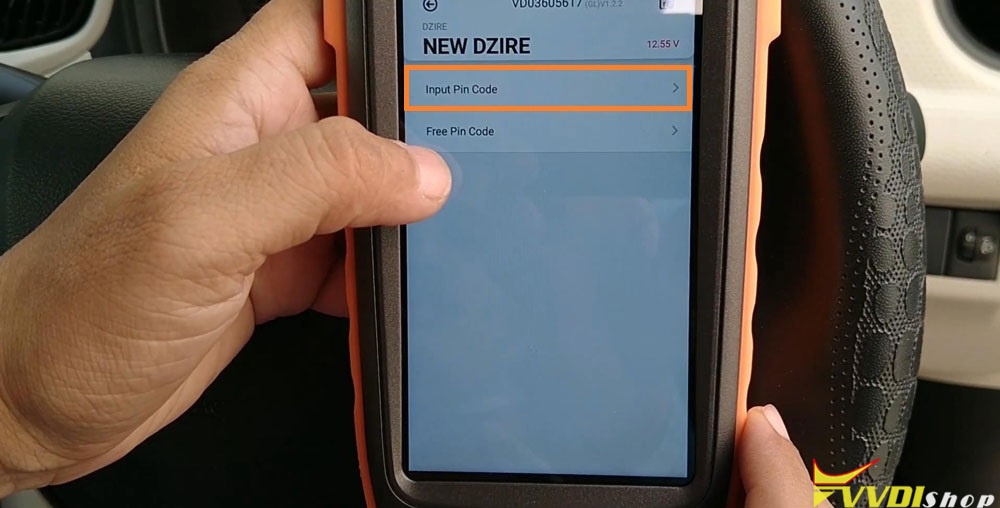
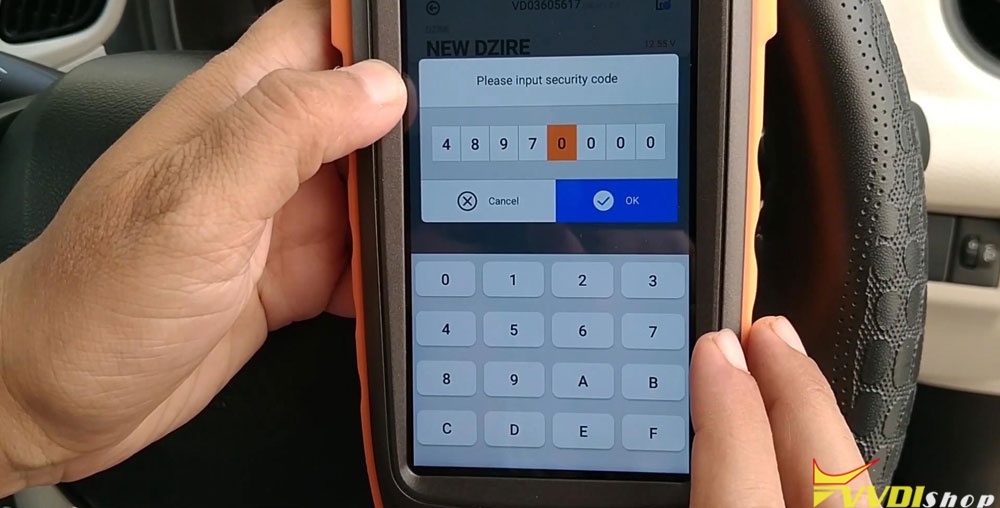
Input pin code >> OK >> Input the security code, press “OK” >> OK
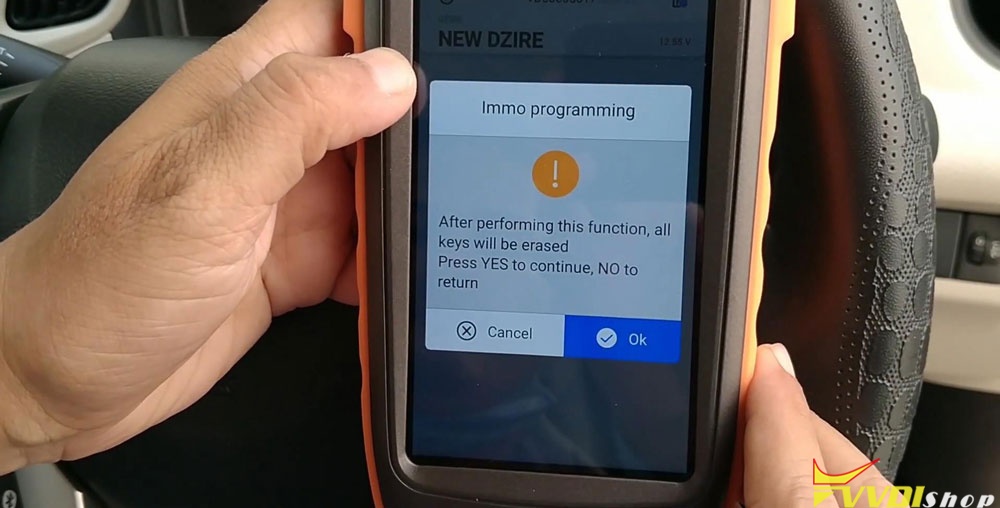
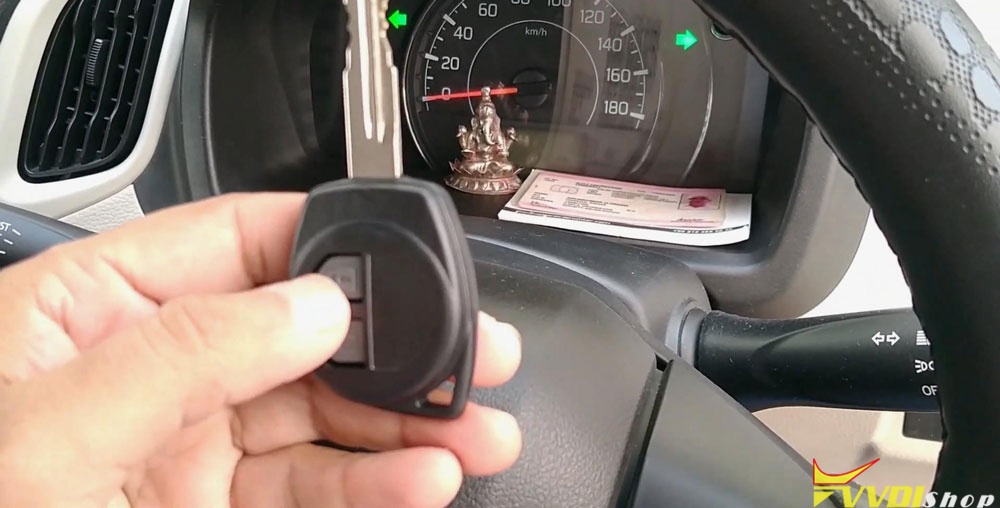
Hold the new key where the logo on the remote is facing and touching the start/stop button with the key. Press “OK”.
Program is successful, press “Yes” to continue, press “No” to return.
No >> OK
Don’t forget your MINI OBD Tool after learning key success.

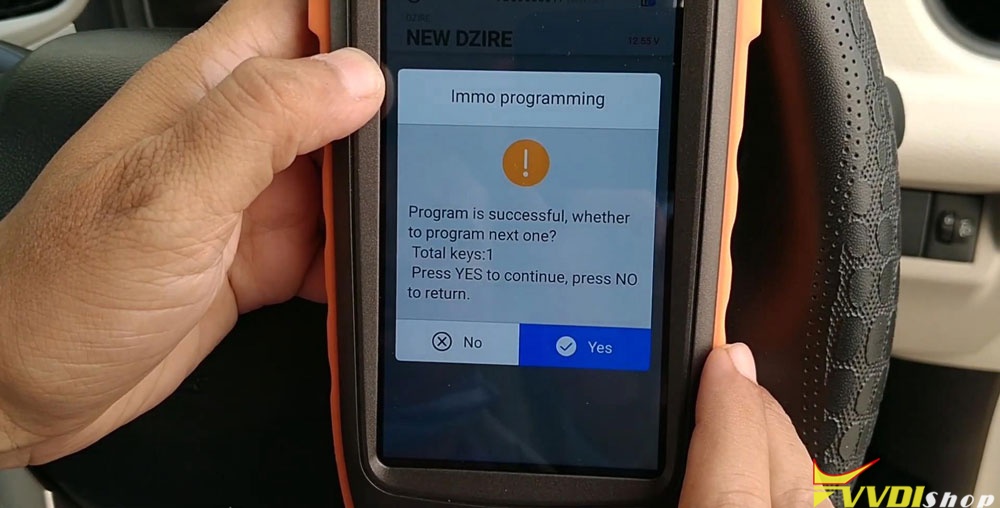
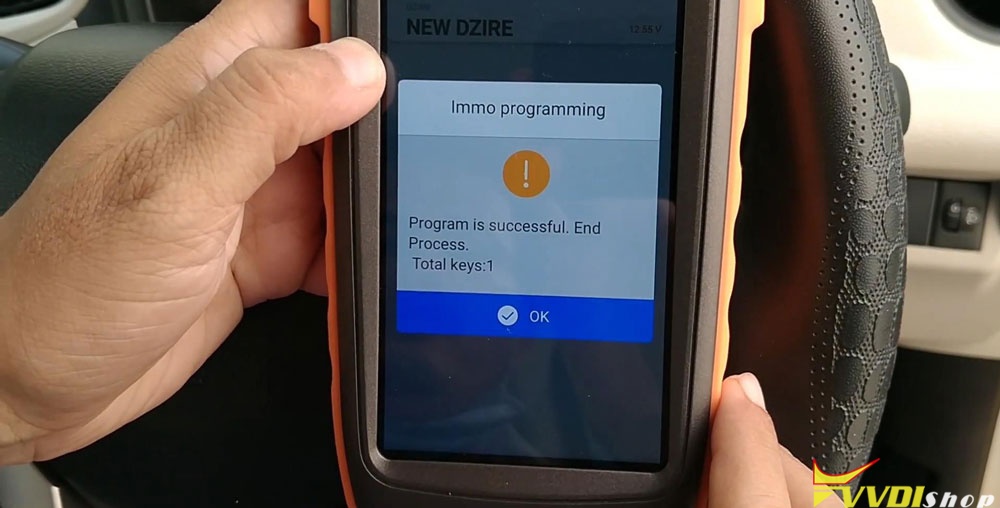
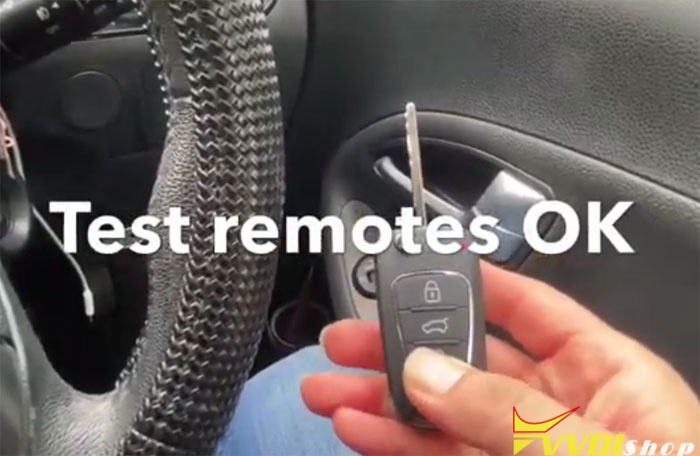
I will check the new key now, it works perfect! Key programming has done!
This is a tutorial of using VVDI Key Tool Max & MINI OBD Tool Key Programmer to add a new smart key for Suzuki Dzire, this operation may be applied to some Suzuki Swift.
VVDI Key Tool Max “Server exception” Error Solution
Question:
I was failed to connect my Xhorse VVDI Key Tool Max with VVDI MINI OBD Tool. It prompted “Server exception” error, the “Bluetooth” and “Automatic connect” button have been already turned on, but MINI OBD Tool is still disconnected.
Why? Please help me!
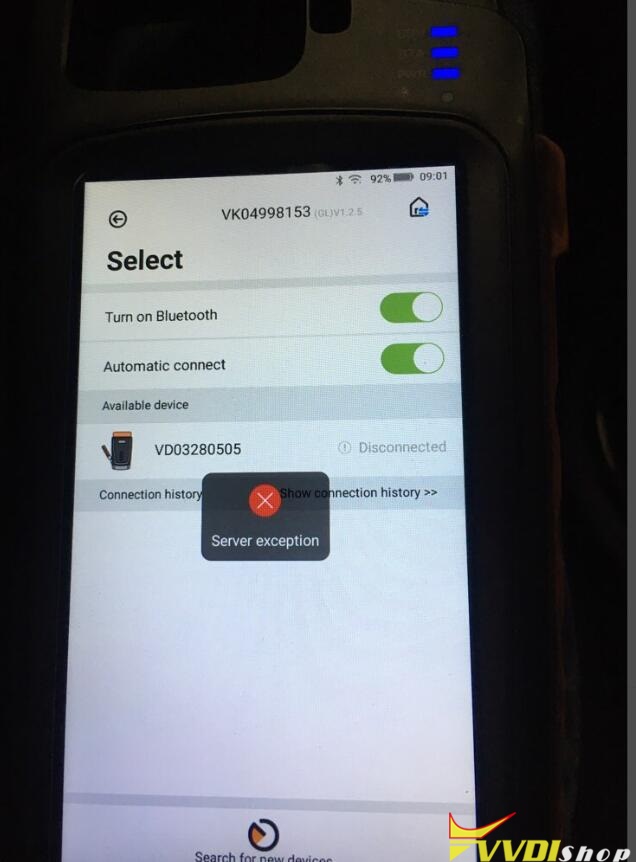
Vvdishop solution:
Please turn off the “Automatic connect” button, upgrading both firmware of Key Tool Max and MINI OBD Tool to latest version.
Connection error was fixed! It is successful to connect 2 devices now.
Thanks to Vvdishop engineer.
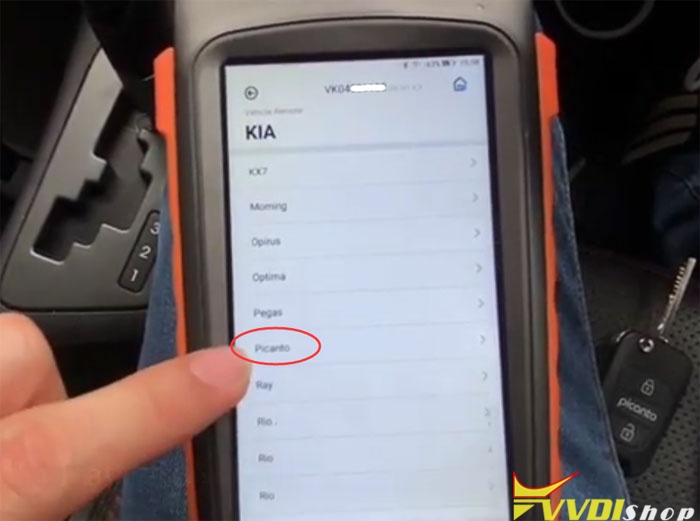
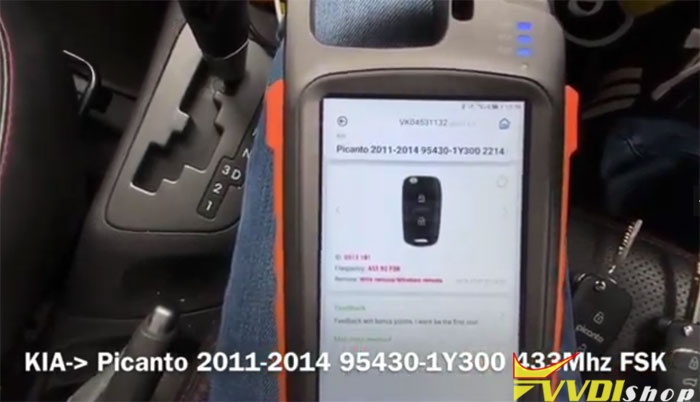
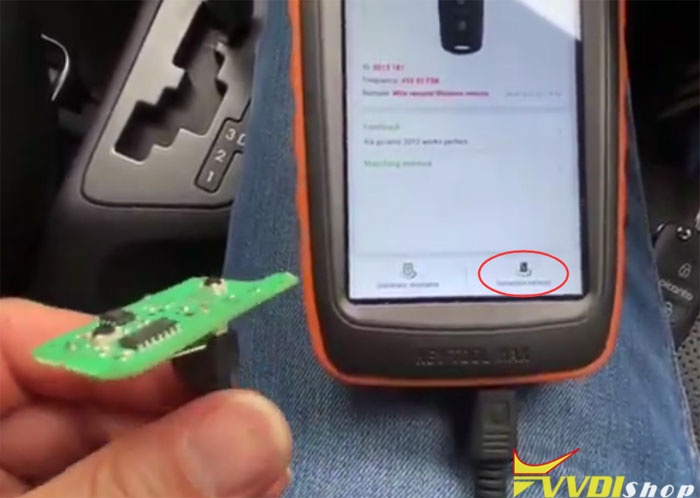
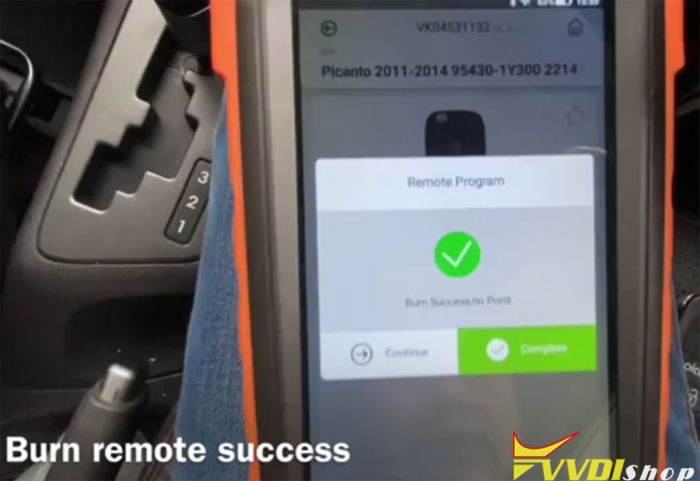
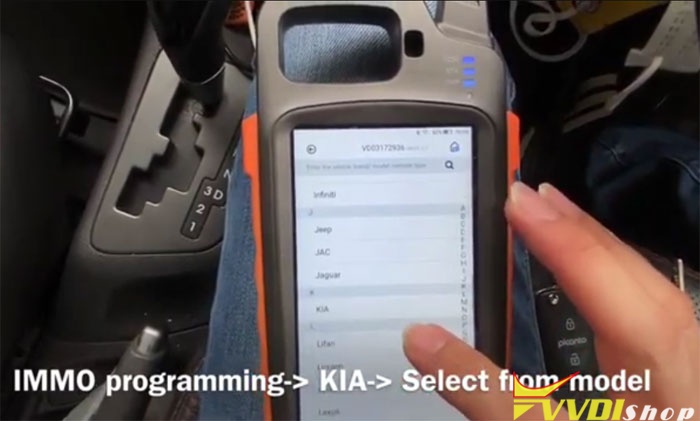
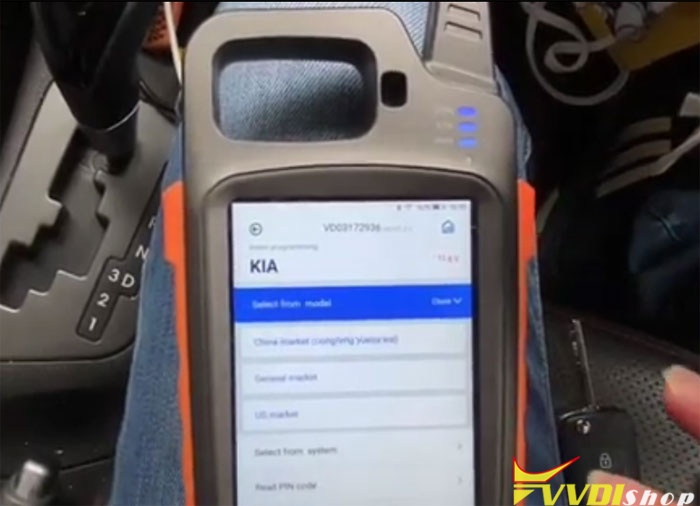
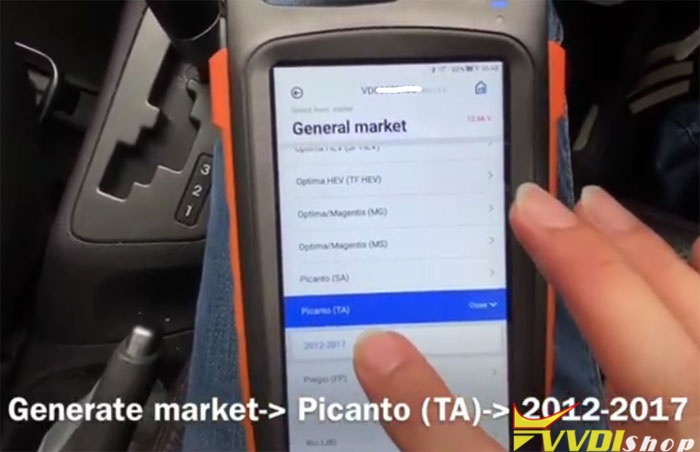
Program Kia Picanto Remote with VVDI Key Tool Max
Step 1: Generate Remote
Connect VVDI wired remote with cable, press Generate remote
Burn remote success
Install in remote shell and put battery.
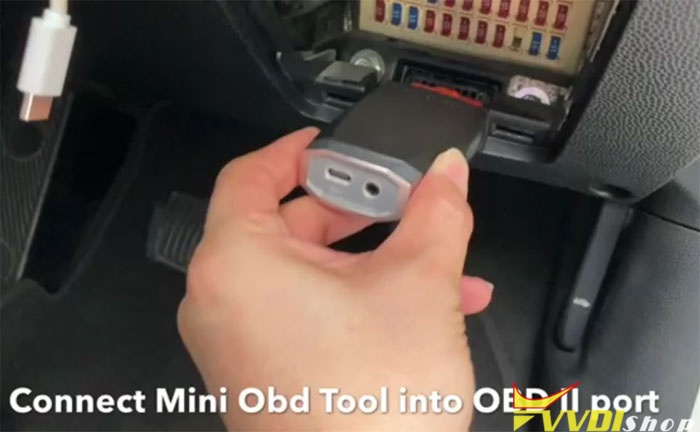
Connect with Mini OBD via Bluetooth
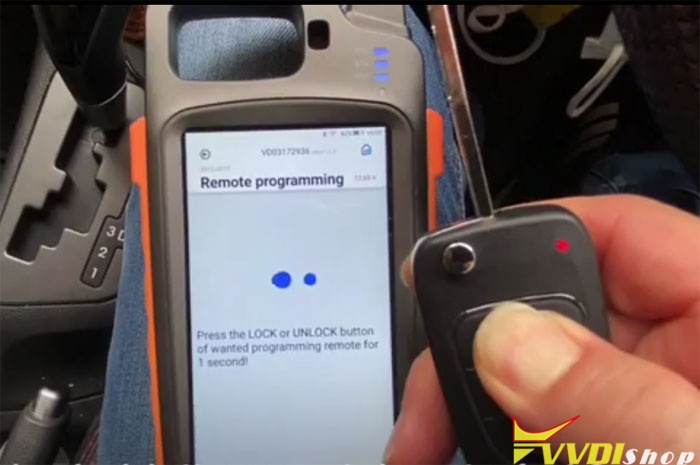
Select IMMO Programming->Kia->Select from model->Generate market->Picanto (TA)->2012-2017->Remote Programming

Read programming description
Loading
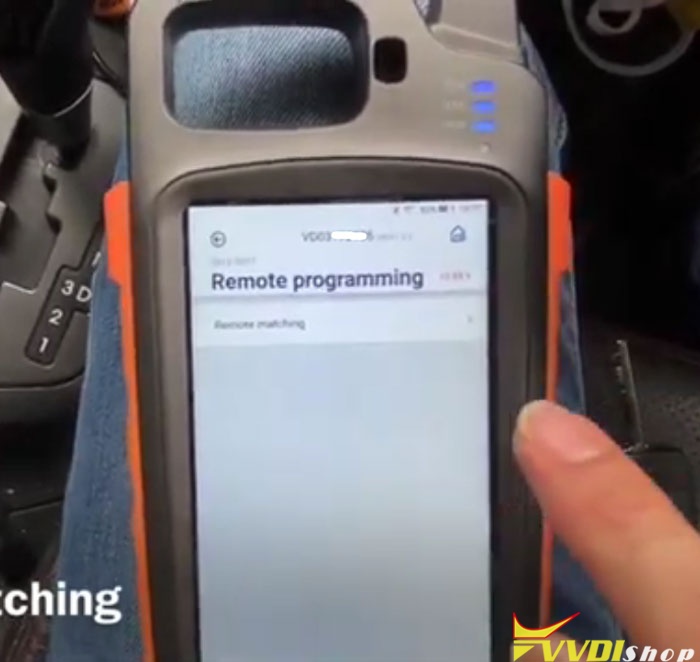
Select Remote matching
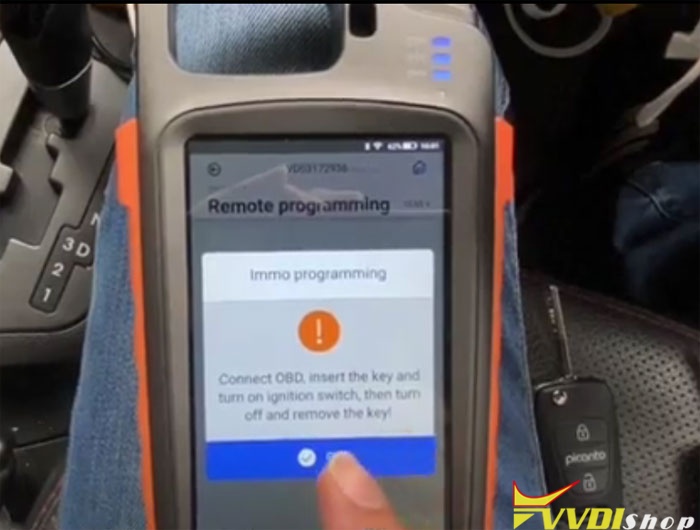
Insert key turn on and turn off then remove key
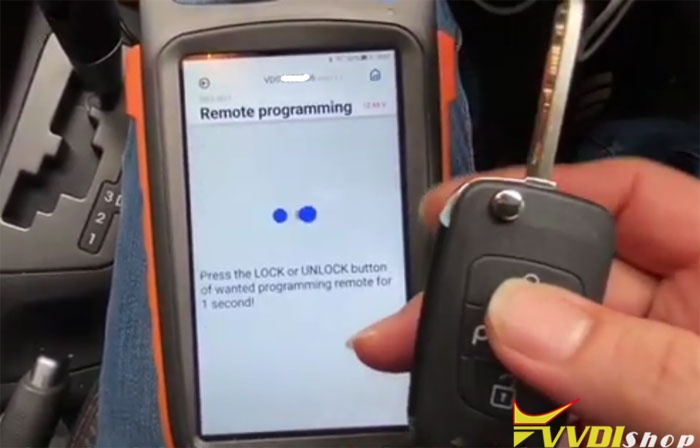
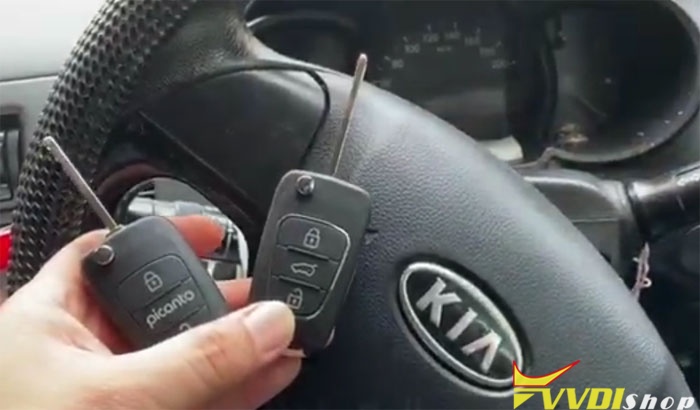
Press Unlock or Lock button on wanted remotes for 1 second
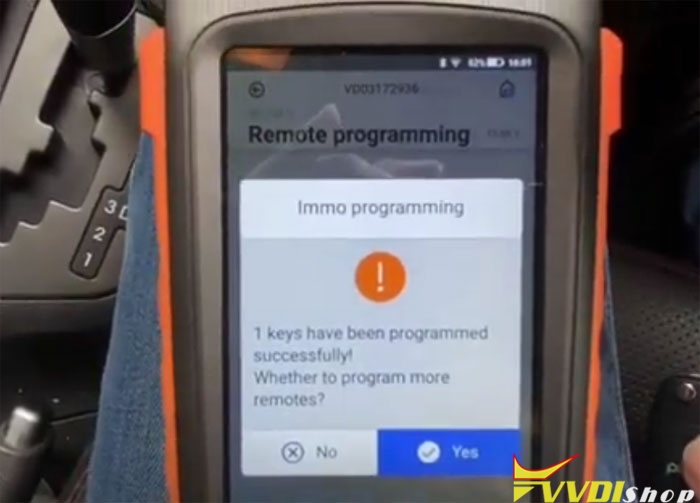
1st key have been programmed successfully. Press Yes to program 2nd remote
Press Unlock or Lock button on 2nd remotes for 1 second
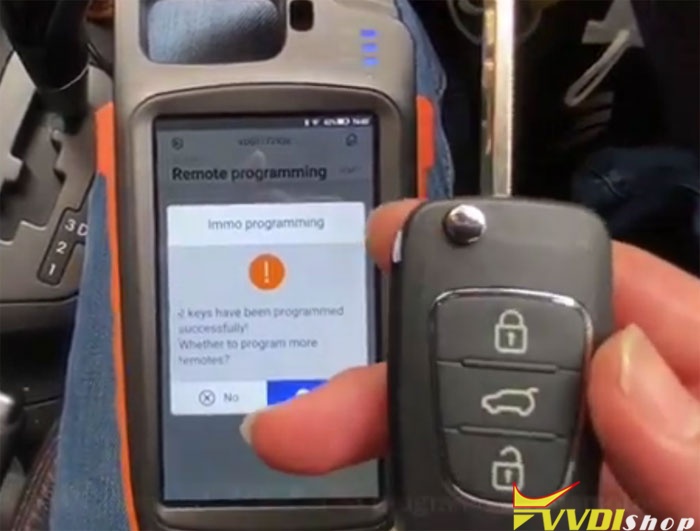
2nd key have been programmed successfully.
2 remotes have been programmed. Press No for finish.
Program Skoda Octavia Key with VVDI Prog and Key Tool Max


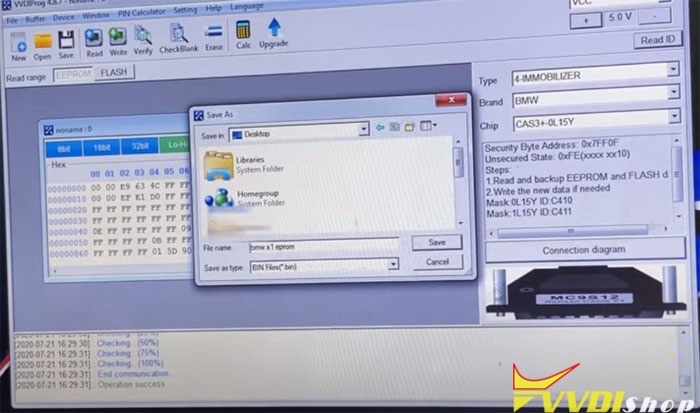
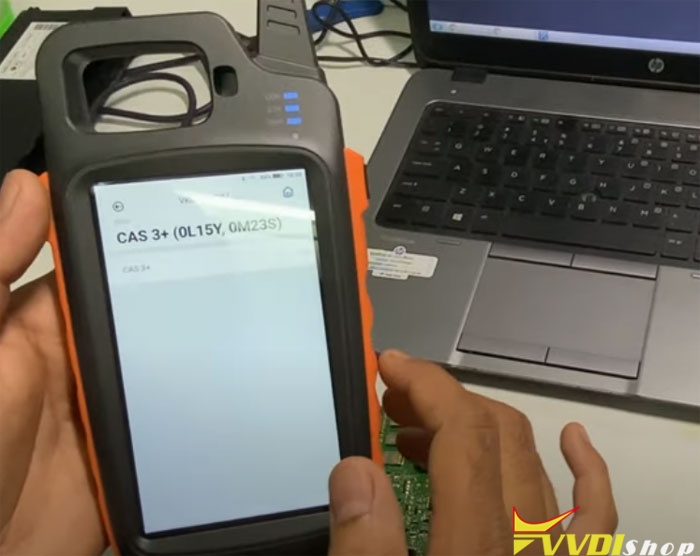
VVDI Prog and Key Tool Max Program BMW X1 Key
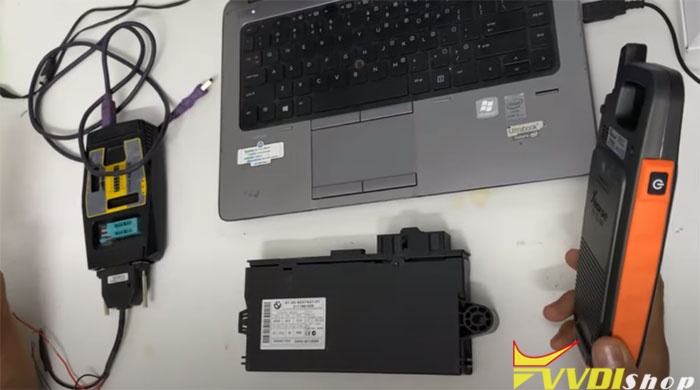
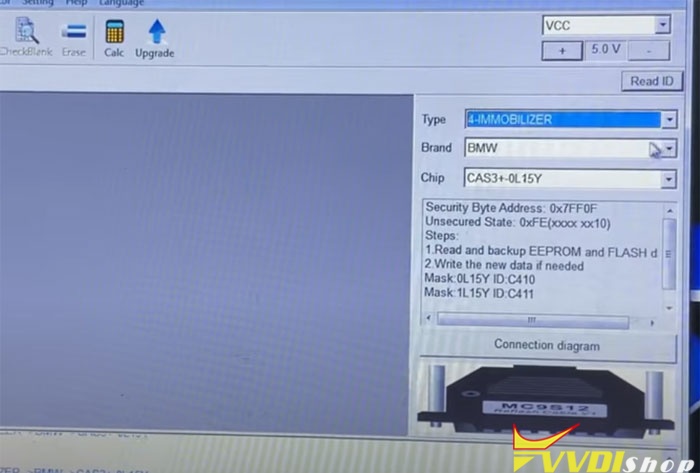
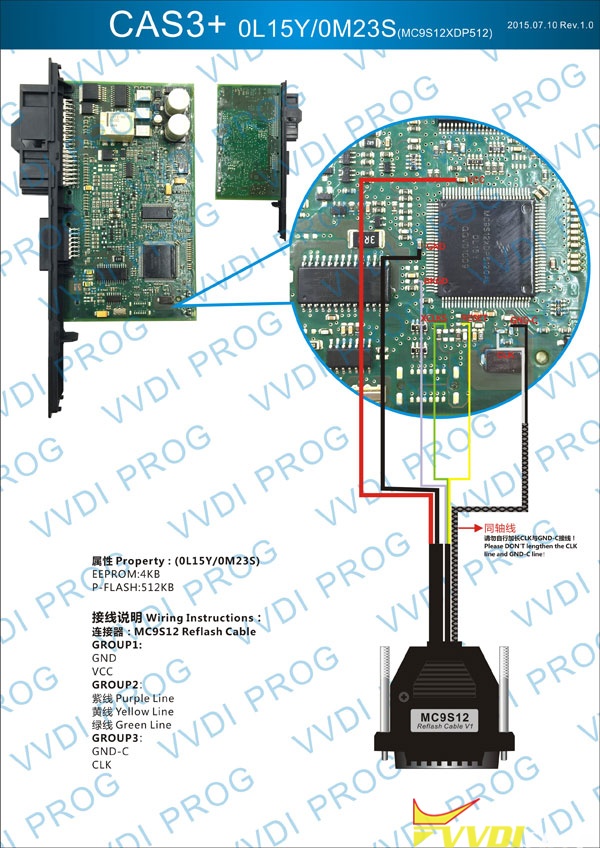
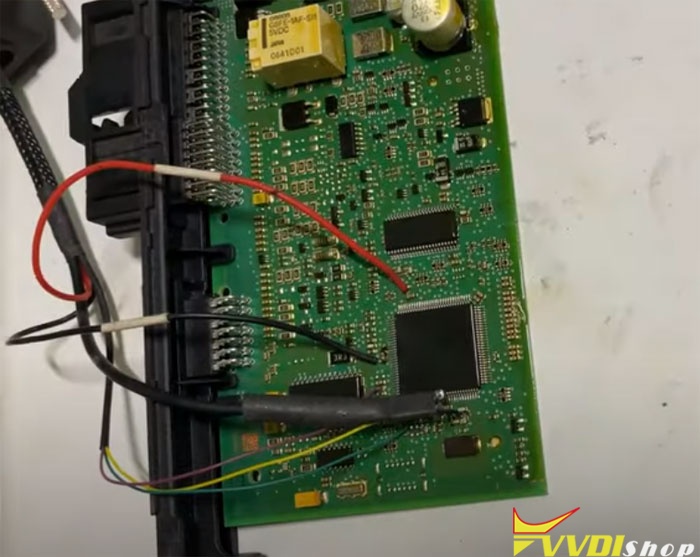
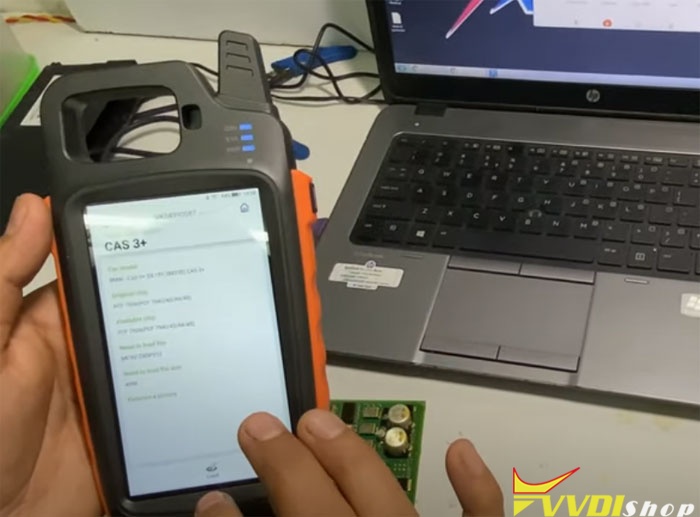
Connect CAS3+ with VVDIProg follow the diagram
Read data
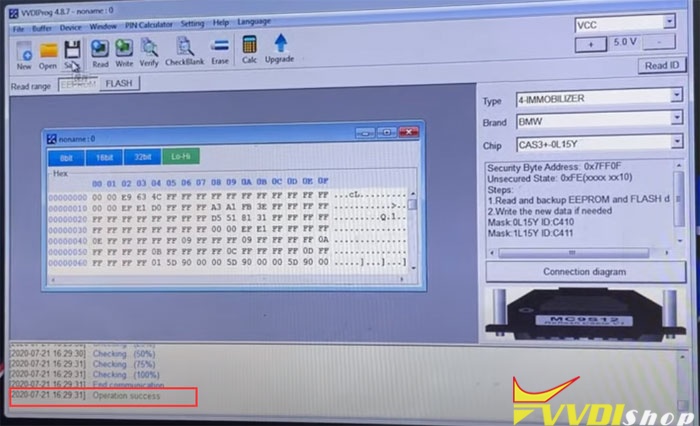
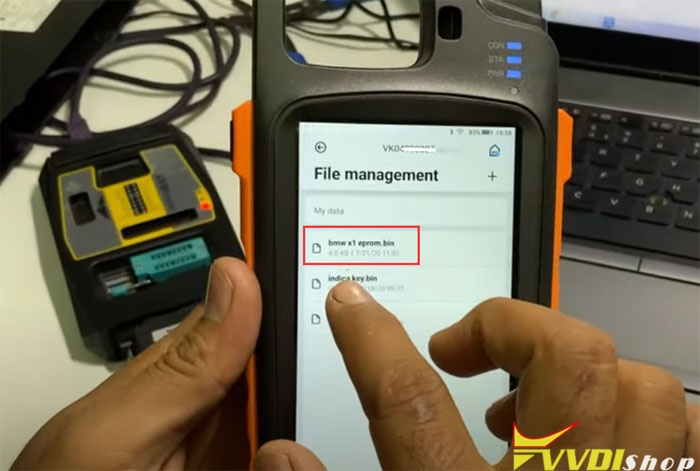
Save data, i.e bmw x1 eeprom
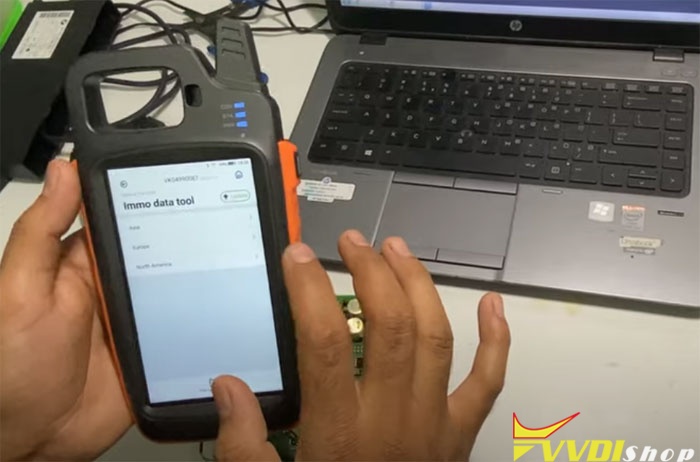
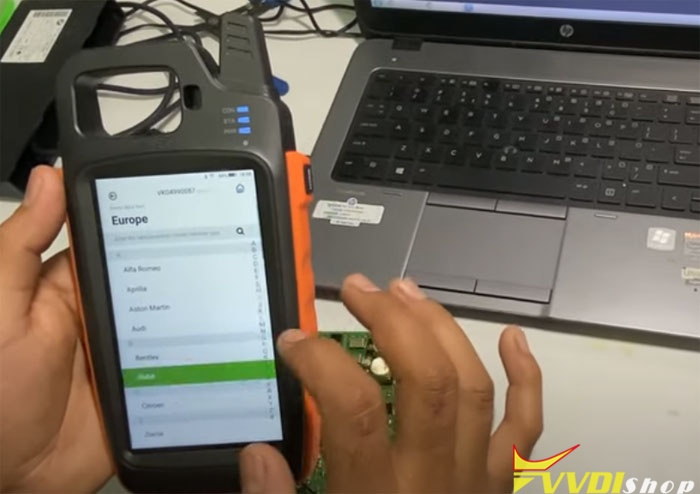
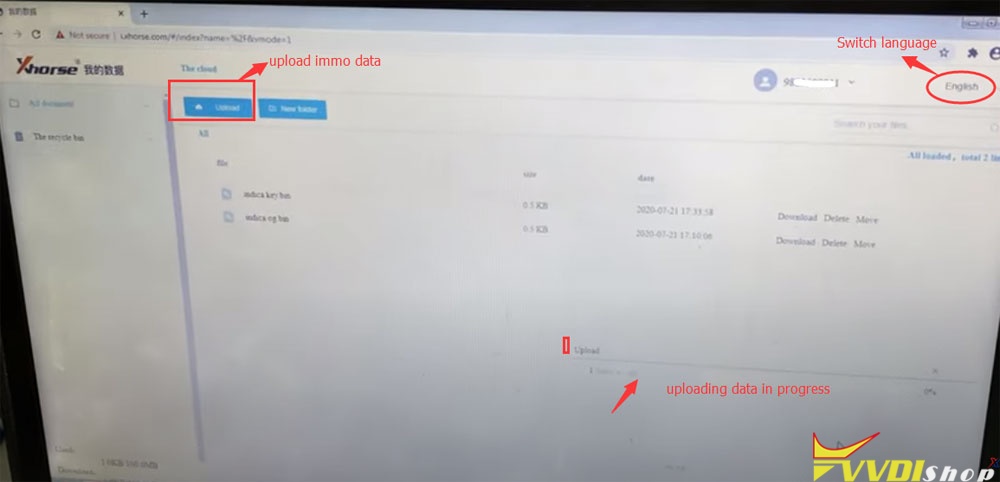
Switch website language (Chinese to English)
Upload eeprom data from laptop (bmw x1 eeprom)

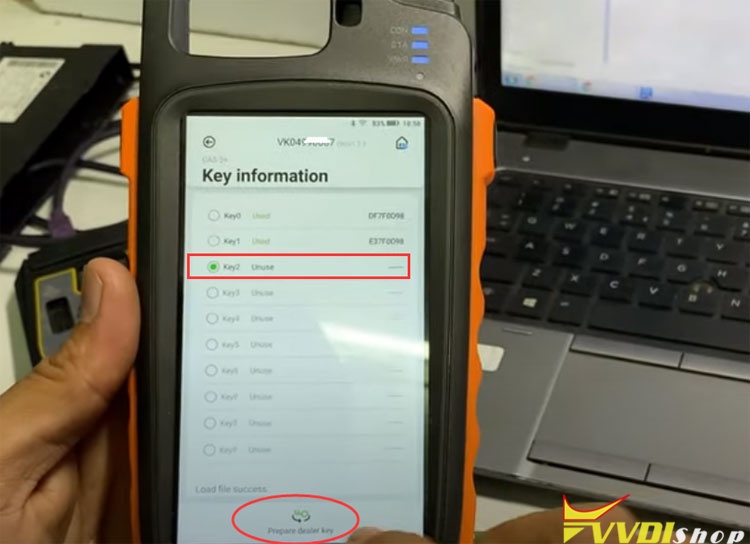
Select an unused key position
Press Prepare dealer key
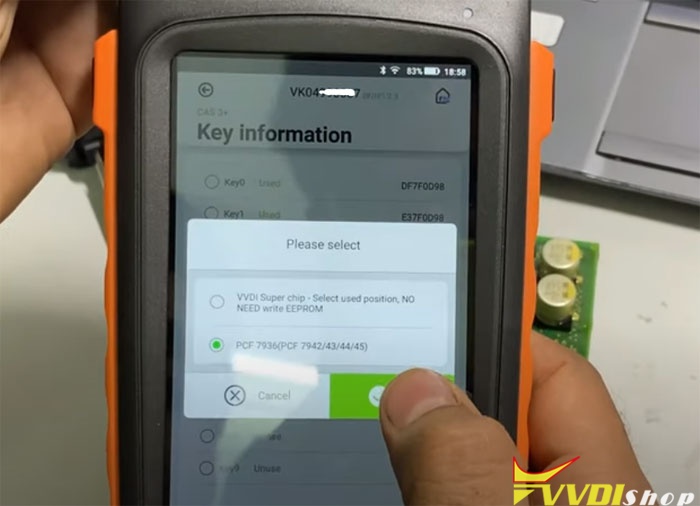
Select key type: PCF7936 (PCF7942/43/44/45)

Select Have a working key, insert working key to programmer and continue
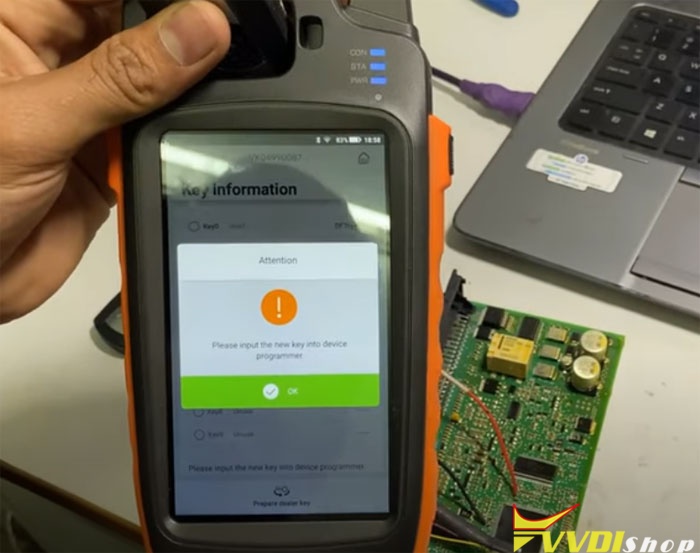
Then input new key into key tool max
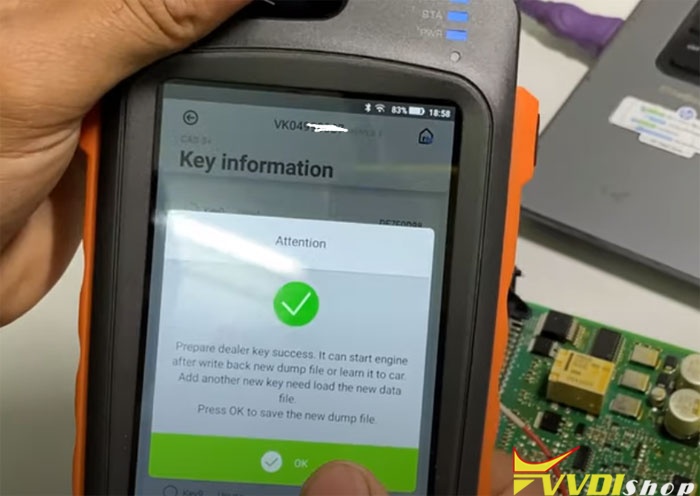
Prepare dealer key success.
It can start engine after write back ne dump file or learn it to car.
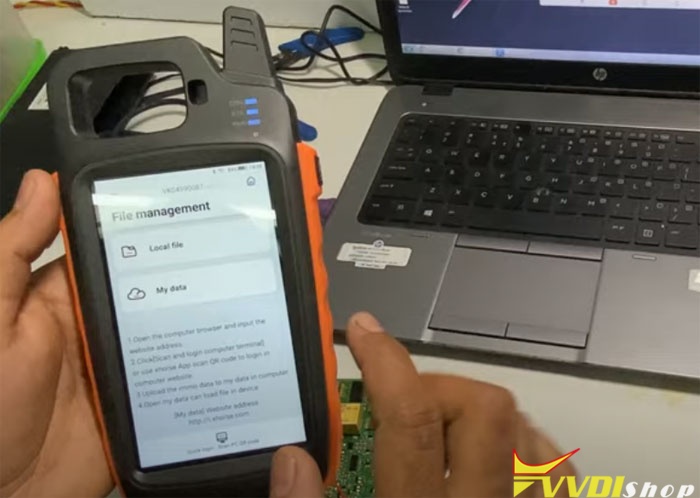
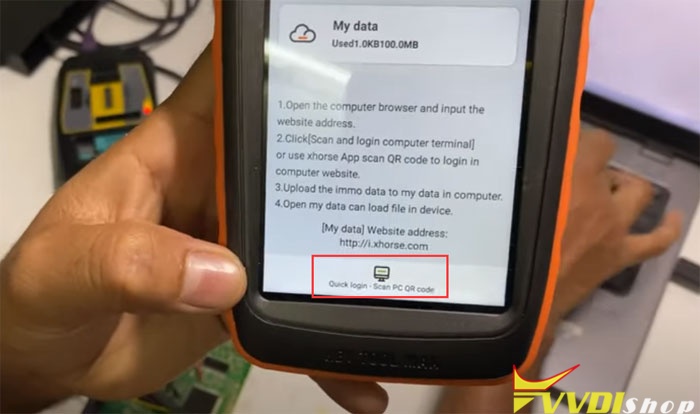
Add another new key need load the new data file.
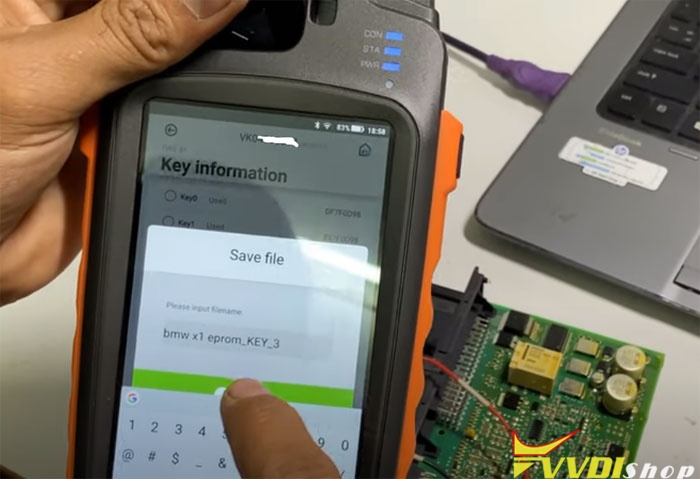
Press OK to save the new dump file, i.e bmw x1 eprom_KEY_3
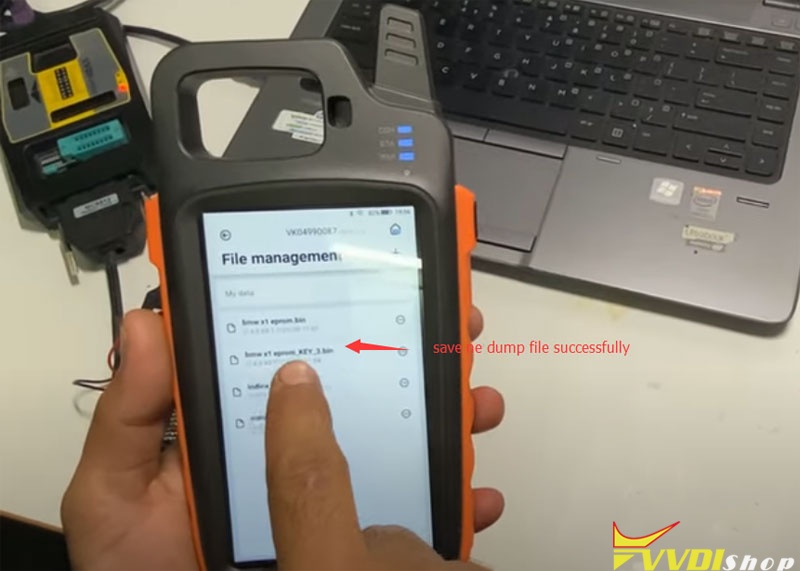
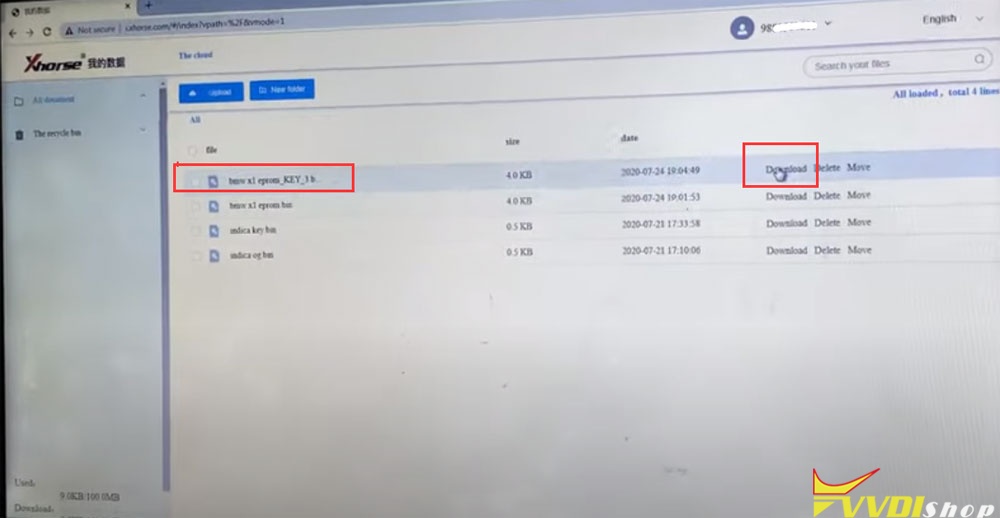
Download the new dump data (bmw x1 eprom_KEY_3) from Xhorse data center to your PC and cut to desktop
Open VVDI-Prog software
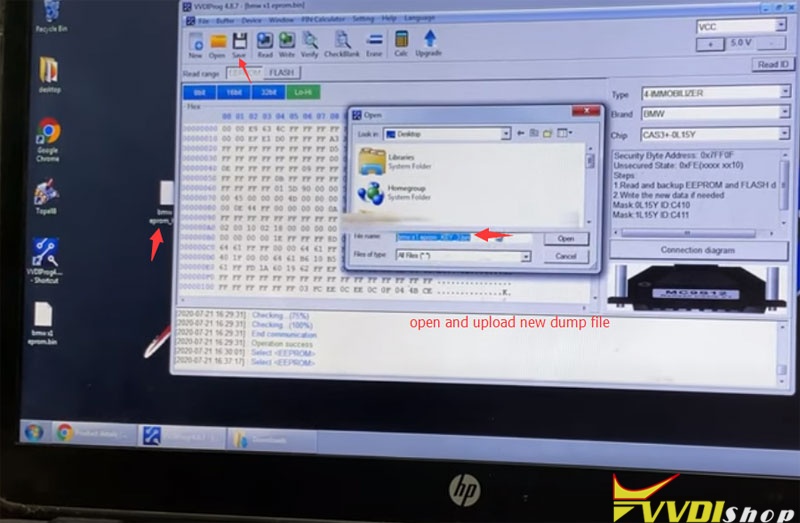
Open and upload new key dump data on desktop
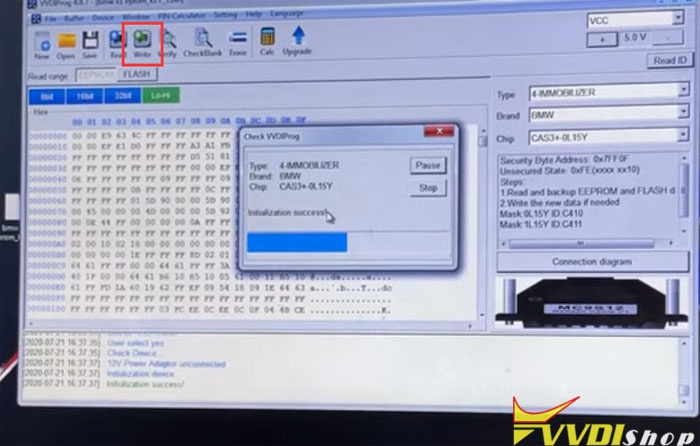
Write data
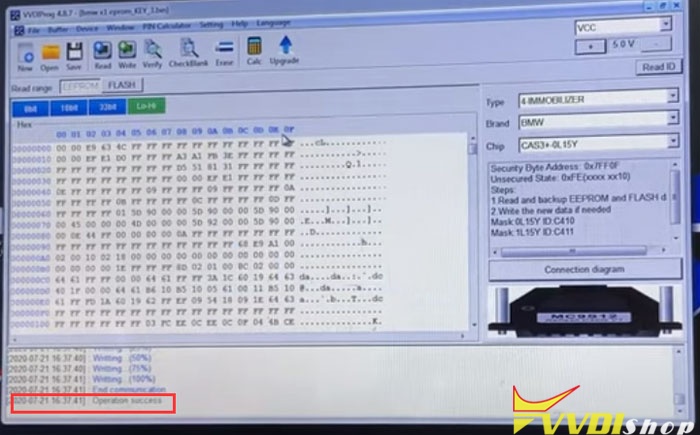
Write data success
Verify data, check success
Test the new key with BMW CAS Test platform
