ابزار Xhorse VVDI
Xhose VVDI نرم افزار برنامه نویس اصلی و سخت افزارابزار Xhorse VVDI
Xhose VVDI نرم افزار برنامه نویس اصلی و سخت افزارHow to Cut Dimple Keys with Xhorse Condor XC-002 Pro
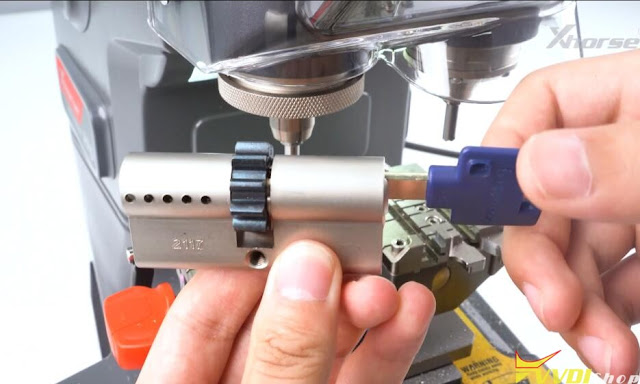
The upgraded version Xhorse Condor XC-002 Pro manual key cutting will duplicate dimple, double sided, single sided, 4 track external, 2 track external, 4 track internal, channel track keys. Here we will show how to cut a dimple key with condor xc-002 pro.
1. Insert the internal dimple probe and cutters

2. Insert the original key and the blank key using a shim

3. Rotate the knob to standard mode

4. Calibration. Follow the direction of the light until the middle light turns green
Make sure the clamp is in the corresponding position.
5. Duplicate the key
Press down the main handle to duplicate the key.
Turn off the switch after finishing one side cutting.
Clip the key and continue to cut the other side.
After finishing cutting the other side, turn off the switch and clean up.

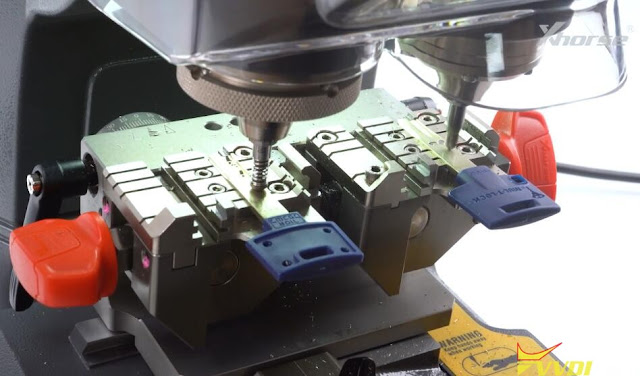
6. Insert the dimple probe and cutter (external) to Xhorse Condor XC 002 pro.
Replace the internal dimple probe and cutter with external ones.
7. Switch the konb to dimple mode
8. Insert the keys
9. Finish the calibration.
Clamp the keys and finish calibration.

10. Duplicate the key
Turn on the cutter switch to cut key.
After finishing one side, turn off the switch.
Clip the key and continue to cut the other side.
After finishing cutting the other side, turn off the switch and clean up.
Now we have a working dimple key.

Top 6 Features of Xhorse Condor XC-002 Pro
Today we’re taking about 6 new features of Xhorse Condor XC-002 Pro manual key cutting machine.
- LED Light & Speed Display
Power up the machine, and turn on the power switch. And you’ll notice the LED light in the front will turn on, the speed display will also light up.
- Easier Probe & Cutter Installation
The Condor XC-002 Pro offers an easier way to install probes and cutters. There’s no need to use an Allen wrench to install the probe and the cutter anymore.
What we need to do is simply pull the lock switch to make sure it’s unlocked. Insert the probe all the way up and pull to lock the switch.
The installation of the cutter is the same. Loosen the lock switch, insert and hold the cutter and lock the switch.
The innovative method not only makes the installation more convenient, but also ensures the automatic centering and clamping of the probe and the cutter avoiding center deviation caused by traditional method. And greatly improving the accuracy and reliability of cutting.
- Cutter Power Switch & Speed Control Knob.
After powering up the machine, when we press down the main handle, you can see the cutter actually is not spinning.
What we need to do is turn on the cutter power switch at the right side. Press down the handle, you can see the cutter is spinning immediately. We rotate the handle clockwise to lock it. And rotate this knob to adjust the speed of the cutter.
XC-002 Pro now offers seven speeds to facilitate your work.
- Mode Switch Knob
The red knob on top is the mode switch knob, which allows you to switch between dimple mode and standard mode.
We rotate the knob to switch to the dimple mode, now the probe can move up and down to detect the depth of the holes on the key. The mode is mainly used to duplicate dimple keys. When the knob directs at standard mode, we can cut double sided, single sided, 4 track external, 2 track external, 4 track internal, channel track keys.
BTW, there’s a QR code here, scan it to view the Condor XC002 Pro tutorials. If you encounter problems, you no longer have to rush online to search for videos. This is very convenient.
- New Clamp
This is a newly-designed clamp for Condor XC-002 Pro.
Slide in the clamp, and make sure the mark at the bottom of the machine points to the little triangle of C, B or A on the clamp. You can adjust the position to your needs, then tighten the knob.
Condor XC-002 Pro features 3 groove for key clamping. The left one can be used to clamp edge cut keys. This is a guiding block, used to assist us to clamp edge cut keys. Insert the guiding block. And we have an edge cut key here. Now we insert the key and make sure it is aligned using a shim. Tighten the clamp knob. Then we can hold the main handle and press down to start cutting. The silver handle beside the sub-handle in our left can be used to assist out cutting.
The middle groove can be used to cut internal cut keys. Insert the key, then tighten the clamp knob. Loosen the black locking knobs behind the clamp. Rotate the clamp to 45°and lock it. We usually use the right groove to hold thin house keys like this one. Loosen the black locking knobs, and return the clamp to its normal flat state.
Additionally, each of the three grooves has its recommended clamp mounting location. For example, when you use the left groove, it is recommended to fix the clamp at point C. The middle groove corresponds to point B. The right groove corresponds to point A. Of course, you can also adjust the position of the clamp according to your operating habits.
- Movement Of The Cutting Platform
When these 2 limitation knobs are fully released, the cutting platform can be moved freely.
And if we only tighten the right knob, the cutting platform can only move along Y-axis. However, when moving along X-axis, the platform will always go back to its original position after you release the handle.
If both knobs are tightened, the cutting platform can only move along Y-axis. And the X-axis movement is completed locked. This can help us when cutting some keys that require linear cutting.
Xhorse Condor XC-002 Pro Review What is Good
Xhorse Condor XC-002 Pro is the 2024 latest key cutting machine that I’ve got today. The machine is large and massive but simply excellent. When I took it in my hands, I realized that this was the best machine that I had. Now I’ll try to make a quick review for your guys.
The clamp is fixed by simply turning. I found there are 3 positions: A/B/C. Once I chose a well position, it’ll just be a convenient distance to the nearest vice. We generally clamp it with just one turn.
And then, what can these vices do? They can cut at any angles.
For example, to cut English-type keys or car keys. Inserted, clamped, set and cut accordingly key wave.
We take similar keys in which they are angular, the holes are made at an angle. The side clamp is suitable for this. We can set the desired angle and start cutting.
The clamp has a feat on itself and it fixes it from moving like this. This is such a convenient design.
Instead of the usual hexagonal clamp, to replace the cutter, you literally need to put the right one in a second and tighten it back. And the cutter is in.
Here shows the switching mode to the hole pattern.
There’s an adjustment, electronic adjustment, alignment of the cutter, and it even shows which way to turn. Now it shows screw it in. Here, bring it this direction. The green light is on, the cutter is set.
When you work with the keys, you don’t need to turn on and off button. The machine turns on automatically when lowered. The handle here is used to adjust the speed. Handle these quick-release cutters is just the second change. No need to click on or off the button. Just pull the handle down, then it worked and instantly adjust the positions of the vice.
In the planes, you don’t need to unscrew anything to tighten. It’s all done simply with your fingers. It’s very convenient. Everything is cool and the price will also be great.
Besides, there’s something in the side clamp. You can clamp such a key with this one. If it interferes, just insert it to the opposite direction. The clamp is very functional. In principle, most key types can be fit on.
The Condor XC-002 Pro booklet is clear. Here are what we can get from the package: a brush, 1 probe, 2 cutters, several stops and spacers for better clamping.
That’s all today’s review.
https://www.vvdishop.com/service/xhorse-condor-xc-002-pro-review.html


.jpg)
.jpg)
.jpg)
.jpg)
.jpg)
.jpg)
.jpg)
.jpg)
.jpg)
.jpg)
.jpg)
.jpg)
.jpg)
.jpg)
.jpg)
.jpg)
.jpg)
.jpg)
.jpg)
.jpg)
.jpg)
.jpg)
.jpg)
.jpg)
.jpg)
.jpg)
.jpg)